How to use the moderation tools in Sendbird’s dashboard


Sendbird’s moderation tools allow you to monitor and regulate the conversation in both open and group channels.
Moderation tools are a premium feature. To access Sendbird’s moderation tools, you must enable the premium feature on your account.
In this tutorial, we cover the following:
- Log in to your dashboard
- General Settings: Open and Group Channels
- Change Channel Information
- Manage Channel Metadata
- Admin Message
- Delete All Channel Messages
- Delete Channels
- Moderating an Open or Group Channel
- Moderating Individual Messages:
- Open Channel
- Group Channel
- Sending Messages as a Moderator
- Moderating from the User List: Open and Group Channel
- Banning a user
- Deactivating a user
- Moderating Individual Messages:
To use moderation tools, contact our sales team to upgrade your account.
Log in to your dashboard
Log in to your dashboard.
Select the application that you would like to moderate in the drop-down menu in the top left corner of the dashboard.
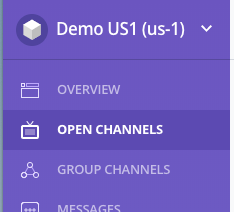
Select Open Channels.
General Settings: Open and Group Channels
All general settings apply to both Open and Group channels. To access the Settings menu, click the gear icon to the left of Open Channels or Group Channels on the channel list.
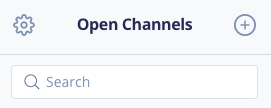
The Settings menu displays all the open and group channels, their name, channel url, the number of participants, and the date created.

The settings menu is at the top of the channel list. It includes the following options: Change Channel Information, Manage Channel Metadata, Admin Message, Delete All Channel Messages, and Delete Channels.
Change Channel Information
To change a channel’s Name, Cover Image, or to add extra information to the channel, click the box to the left of the channel name.
Select Change Channel Information from the top menu.
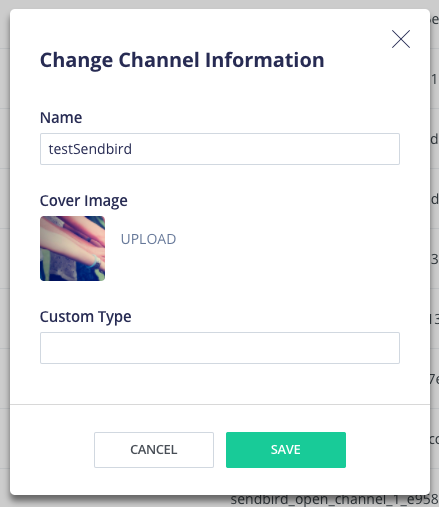
Change the Name or Cover Image in the panel.
If you would like to add extra information to identify the channel, type this information into Custom Type.
Manage Channel Metadata
Metadata gives information about a set of data (e.g. a list of messages in an open channel) and can make it easier to track or work with data sets.
To add Metadata to an open or group channel, select Manage Channel Metadata from the menu.
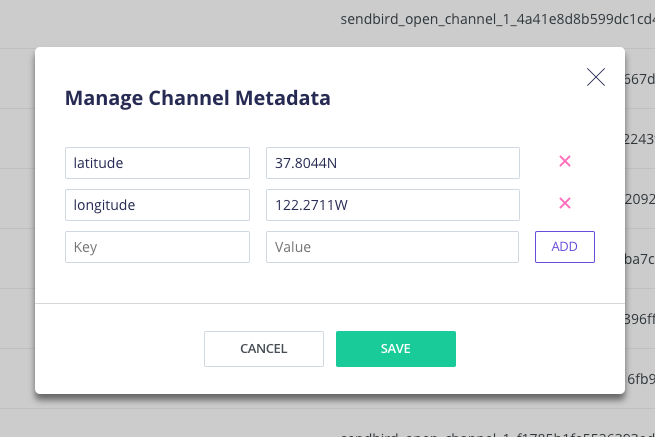
You can add a key-value pair to the channel by typing the Key directly into the first text-field and the Value in the second text-field. Click Add.
You can add as many key-value pairs as you like. Click Save.
To delete a key-value pair, click the X to the right of the Value text-field.
Admin Message
An Admin Message allows the moderator to send a message or announcement to multiple channels at once.
To send an Admin Message to multiple channels, select the channels that you want to receive the message.
Click Admin Message in the menu.
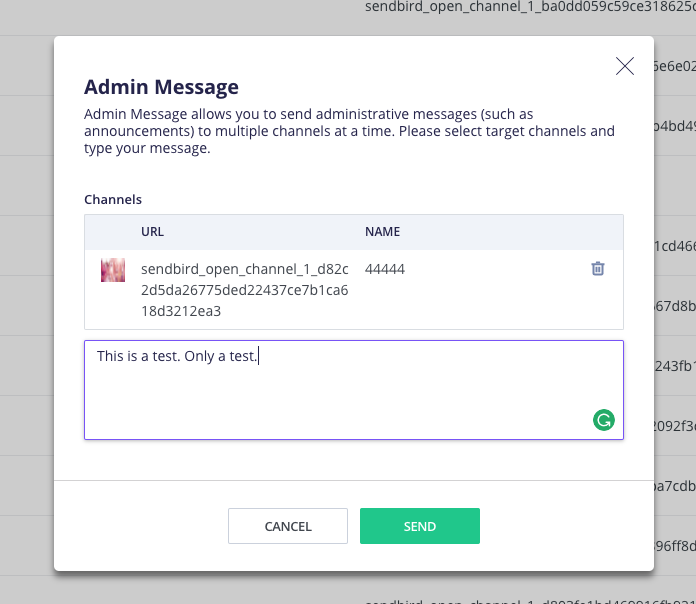
The Admin Message panel displays the channel URL and Name of each channel that you selected. If you’d like to remove a channel from the list, select the Trash icon to the right of the channel.
Type your message in the text-field (e.g. “This is a test.”). Note that an Admin Message cannot be longer than 1000 characters.
Click Send.
Delete all channel messages
To keep a channel but delete its chat contents, click on Delete All Channel Messages in the menu.
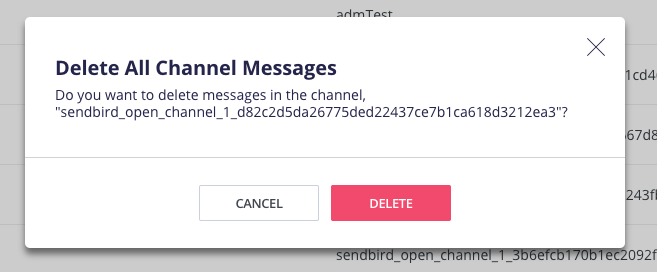
Click Delete to confirm that you wish to delete the all of the channel’s messages.
Delete Channels
To delete existing channels, select the channels in the settings menu. Click Delete Channels in the menu.
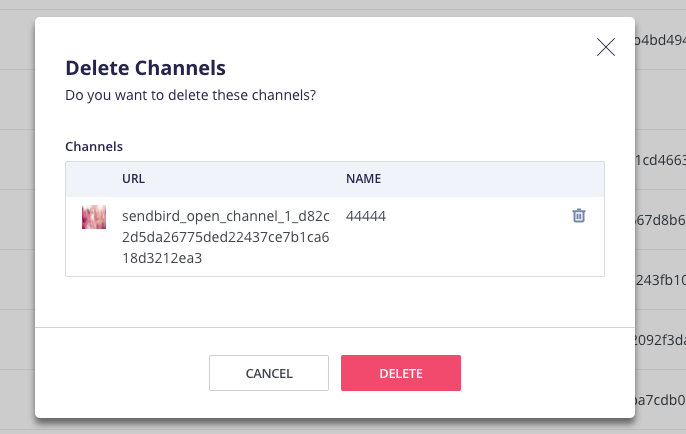
To remove a channel from the list, click the Trash icon on the right of the channel.
Click Delete to confirm that you want to delete the selected channels.
Moderating an Open or Group channel
When the moderator is in a channel, he or she may moderate individual messages and users. In general, the moderator can Ban, Edit, or Delete a single message and Ban or Deactivate a user.
Before you can moderate a channel’s messages or users, you must enter the moderator’s information.

Click on the dotted circle to add your information.
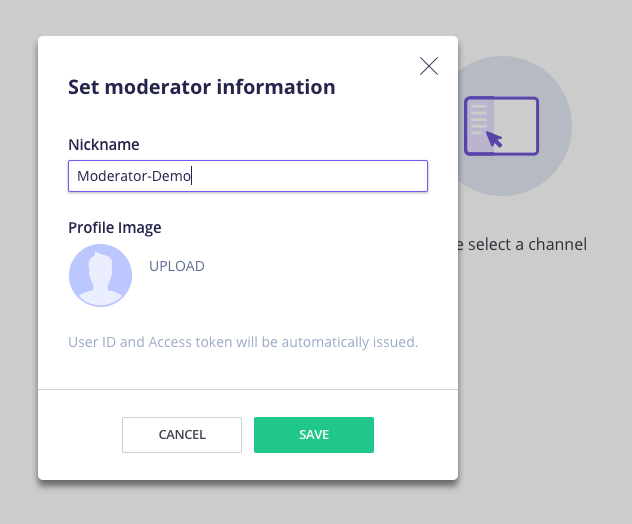
Enter the moderator’s Nickname and upload a Profile Image if you wish.
Click Save.
After saving the moderator information, you can now moderate both messages and users in an individual channel.
Moderating individual messages
Open Channels
As a moderator, you can Ban a user from the channel, Edit a user’s message, or Delete a message all within the channel’s chat panel.
To do any of these options, move your mouse over the message you’d like to effect. A More Options icon will replace the message’s timestamp. Click the More Options icon.
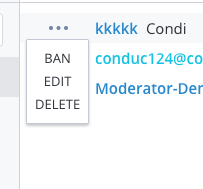
Select your option.
Ban removes the user from the channel and prevents them from returning to the channel.
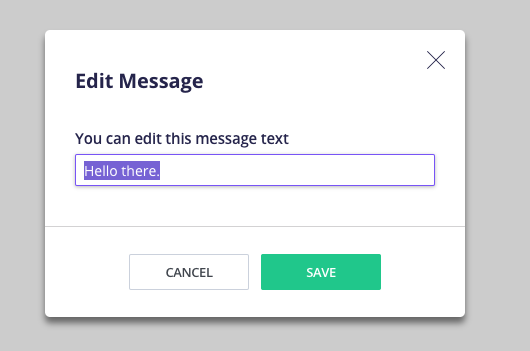
Edit allows the moderator to edit the user’s message. To edit a message, click Edit from the menu. In the Edit Message panel, change the text of the message. Click Save.
Delete removes the message from the channel without affecting the user.
Group Channels
Moderation works the same for Group Channel as it does for Open Channel with one difference.
In a Group Channel, the moderator cannot Ban a user by clicking into the message options.
Sending messages as a moderator: Open and Group Channels
Open Channels
The moderator can send a User Message and Admin Message in Open Channels.
The moderator also has the option to write a User Message and Admin Message from within the chat channel.
By sending a User Message, the moderator sends a message to the chat channel on behalf of the Dashboard Moderator and uses the Moderator’s Nickname.

By sending an Admin Message, the moderator sends a message without attributing an author to the message. An Admin Message cannot be longer than 1,000 characters.

To send a message, select User Message or Admin Message above the text-field at the bottom of the chat channel. Type your message and press Return.
Group Channels
The moderator can only send an Admin Message in Group Channels because the discussions are private.
Moderating from the User List: Open and Group Channels
The moderator also has the option to Ban or Deactivate User from the member list.
Ban a user to remove them from the channel
Deactivate User to deactivate the user’s account and prevent him or her from being able to sign in again.
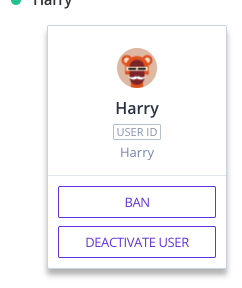
To Ban or Deactivate User, select the user from the member list.
Banning a user
The moderator can only Ban a user in Open Channels.
To Ban a user, select Ban in the user’s profile.
The moderator has the option to issue a user a Temporary or Permanent ban in the Ban User panel. The default ban is a Temporary ban for 60 seconds.
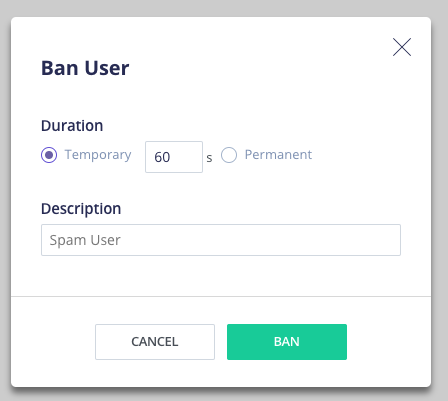
Toggle between a Temporary and Permanent ban by selecting the appropriate radio button.
To change the time of the Temporary ban, enter a number in the text-field under Duration. Seconds are the units of the Duration.
The moderator has the option of logging a Description in the associated text-field. The Description is for internal use only. It is not displayed to the user
Click Ban. The user will be removed from the channel according to the options selected by the moderator.
The banned user will be listed in the Banned list in the Channel information.
Deactivating a user
The moderator can Deactivate User in both Open Channels and Group Channels.
To Deactivate User, select the user in the member list.
Select Deactivate User.
Confirm that the user displayed in the Deactivate User panel is correct.
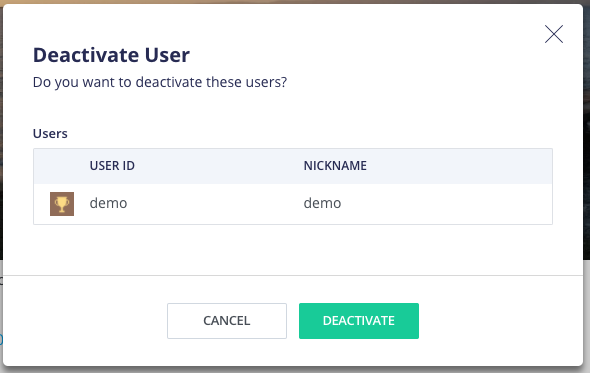
Select Deactivate.