
How to build an iOS messaging app with Swift: Part 1 – User Login View

Introduction
In this tutorial, you will learn how to implement a user interface for an iOS messaging app and develop the features to support messaging with the Sendbird Chat SDK. After completing it, you will have created your very own login view and have connected your user to Sendbird. This is part 1 of creating your own chat application with Swift and Storyboards.
Future samples will be listed in this repository under the main branch or part-specific branch.
This tutorial was built using:
- Xcode Version 12.5
- iOS Version 14.5
- Sendbird Core iOS SDK Version 3.0.224
Note that this tutorial assumes a basic knowledge of Swift. That said, let’s get started!
Step 1. Create a new Xcode app and import the Sendbird Chat SDK
1. Create a new App in Xcode:
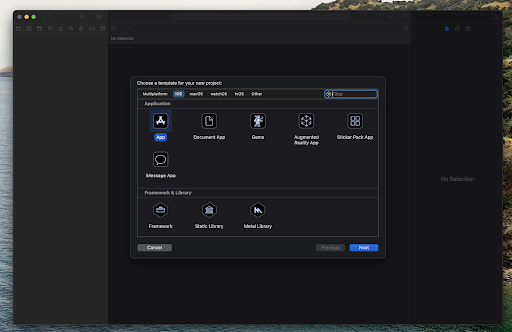
To start a new project, run Xcode and select File > New > Project and select App. Click Next.
Name your app Messenger, set the Interface to Storyboard, and select Swift as the Language. Click Next.

Select the folder in which you’d like to create the project and click Create.
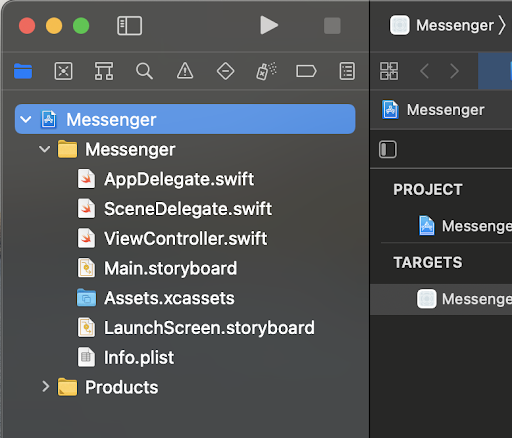
Xcode will automatically create your application with the AppDelegate.swift, ViewController.swift, and Main.storyboard files that we will be editing in this tutorial.
2. Follow Step 2: Install SDK via CocoaPods or Carthage and Step 3: Use the Chat SDK in Objective-C of the Sendbird Chat iOS SDK Readme.md page on GitHub. This will walk you through the SDK installation.
For this tutorial, I chose CocoaPods for my installation via the Terminal app:
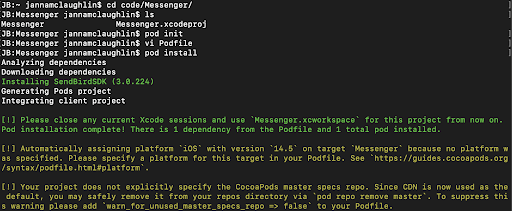
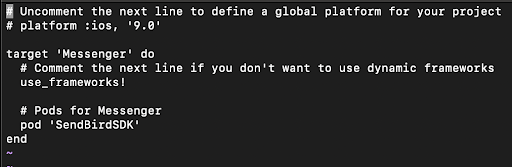
My Podfile looks like this:
After installation and SDK configuration, be sure to close any current Xcode sessions and use the `Messenger.xcworkspace` file for this project from now on. This will make it possible to build and run the app later.
For the import line in Step 3, you can add `import SendBirdSDK` into the AppDelegate.swift file at the top like this:
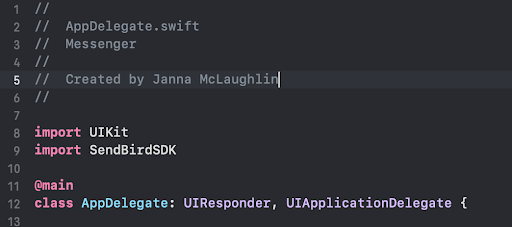
Note: If you see any issues with this import line that the module cannot be found, from the left column select the Pods project > Build Settings > Build Active Architecture Only (you can also use the search to find it) and set it to “NO”.

At the top, select Product > Build. The import error should resolve itself at this point, and you can run the app now to see an empty screen. If not, you may find other helpful alternative solutions in this StackOverflow post.
Step 2. Create a Sendbird application on the dashboard
First, you need to create an application on the Sendbird dashboard. To do so, visit the Sendbird dashboard.
Sign up to create an account for the dashboard.
After signing up, follow the initial setup process. Once you finish it, you can view your new application in the Dashboard Overview.
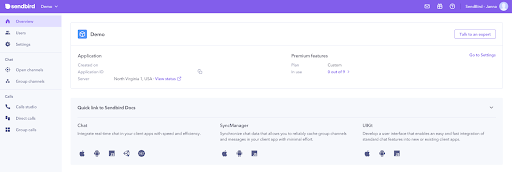
The client uses the Application ID to identify your application.
Step 3. Implement the login view
Understanding the recommended login procedure
A user who wants to chat with someone must get permission to access the Sendbird server. If you want to release a production version with a more secure authentication, a user authentication server must be implemented. The authentication server has a user database and communicates with the Sendbird Server via the Sendbird Platform API.
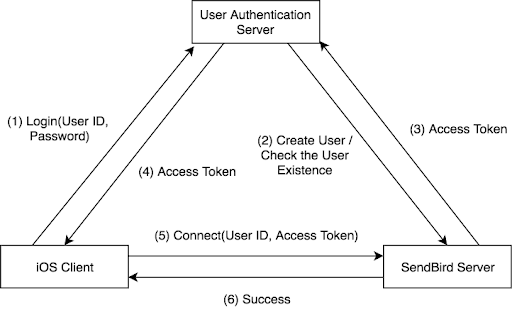
The above diagram explains the procedure to get permission from the user authentication server.
- The iOS Client logs into the User Authentication Server with the user ID and the password.
- The User Authentication Server (via Platform API) creates a user or checks if the user already exists in Sendbird.
- The Sendbird Server returns an access token or session token to the User Authentication Server.
- The User Authentication Server returns the access token to the iOS client.
- The iOS Client connects to the Sendbird Server with the user ID and the access token via Sendbird’s SDK.
- The SendBird Server returns success to the SDK and connects the user.
Simplifying the login procedure
However, this tutorial doesn’t cover the User Authentication Server. In order to imitate the login procedure and implement it easily, this tutorial omits the User Authentication Server.

Sendbird allows users to connect without an access token according to the application setting on Sendbird dashboard.
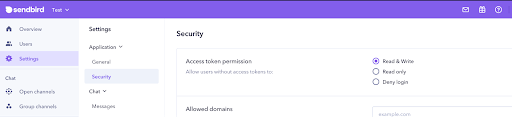
We will use the Read & Write policy in this tutorial.
Build the login view
The login user interface has two essential elements: (1) a text field to get the user ID and (2) a button to start connecting. There’s also a text field that accepts the user’s nickname so other users can identify that user. The user ID must be unique on the Sendbird application, but the nickname can be anything.
The login view will have the following elements:
- UIImageView for an app logo image
- UILabel for the User Id label
- UITextField for entering the user ID
- UILabel for the Nickname label
- UITextField for entering the nickname
- UIButton for connection
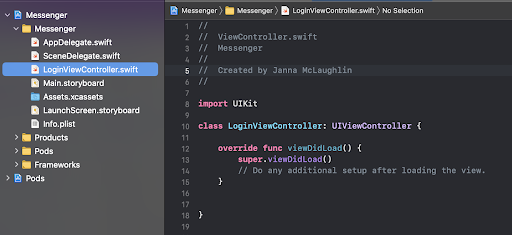
1. The current Xcode project is named ViewController.swift. Double click on the filename in the project navigator in the left pane to change the name to LoginViewController.swift.
2. Click on LoginViewController.swift and change the class name to LoginViewController. Save the file (keyboard shortcut: Command–S).
3. Open the Main.storyboard file and rename View Controller to Login View Controller.
4. Select Login View Controller and click the identity inspector on the right pane. Change the Class field to LoginViewController in the Custom Class section.

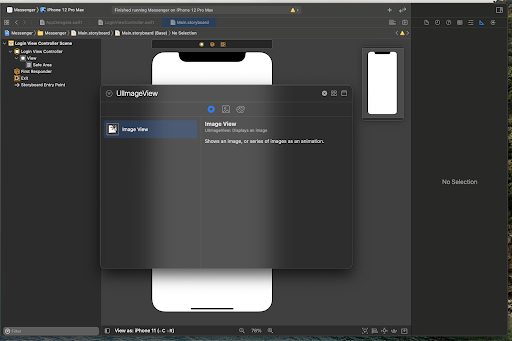
5. Select the + icon in the top right and search for a UIImageView and drag it into the top center half of the view.
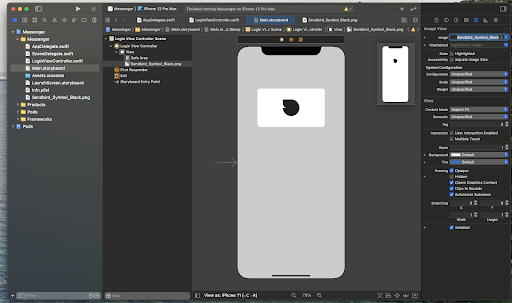
I added a custom image, the Sendbird logo, to my project. You can drag and drop your own image from your computer into the project navigator in the left pane. In the attributes inspector in the right pane, click the arrow next to the image and you should see your new image as an option to select.
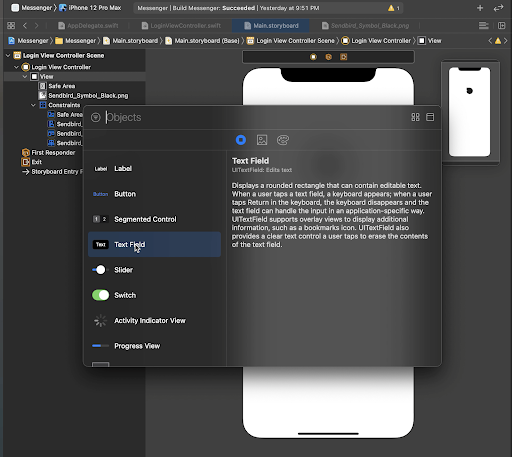
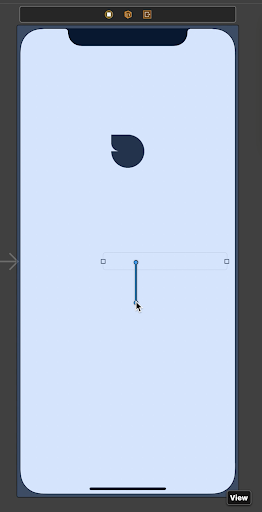
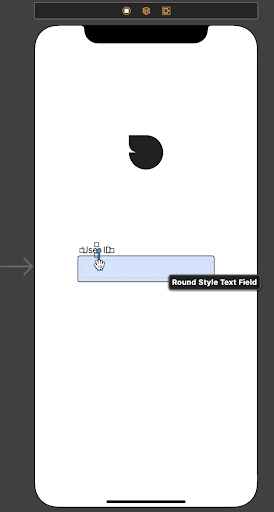
6. Select the + icon in the top right again, find a Text Field, and drag it into the center of the view.
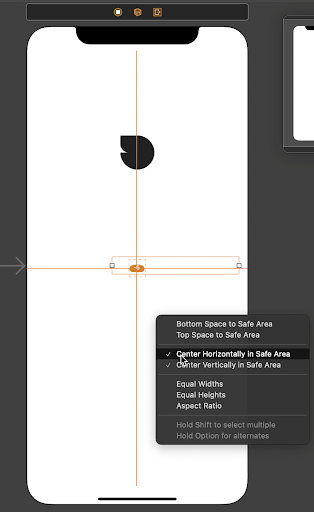
Now let’s add constraints to your Text Field. Control-click on the Text Field and drag your mouse over the main View.
Hold Shift and select the Center Horizontally in Safe Area and Center Vertically in Safe Area constraints. This will keep the text field pinned to the center of the view.
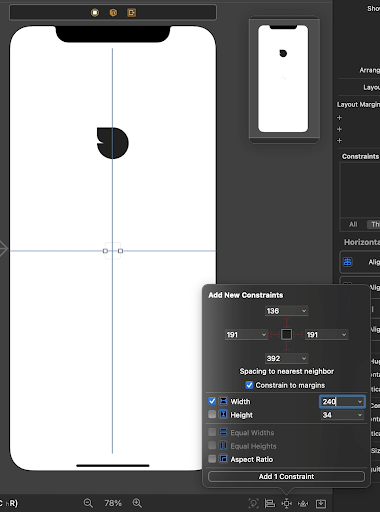
Select the Add New Constraints icon at the bottom of Xcode and set the Width to 240.
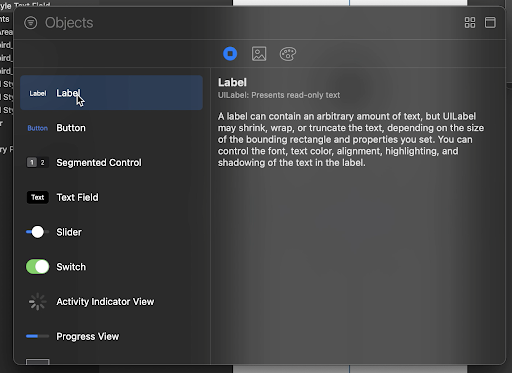
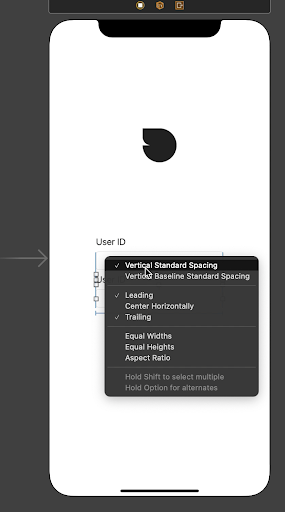
7. Click the + icon at the top again and add a Label. Double-click on the Label to rename it to User Id.
This time, we’ll add a constraint between the User Id Label and the Text Field we just created. Control-click on the User Id Label and drag your cursor over the Text Field.
Hold Shift and select the Vertical Standard Spacing, Leading, and Trailing constraints. Rename the Text Field to User Id Text Field.
8. Next, we’ll add a label and text field for the user’s nickname. Select the User Id Text Field in the left column. Hold Shift and select the User Id Label. Copy and paste (command-c and command-v) them to create a second label and second text field. Rename the second label to Nickname Label. Rename the second text field to Nickname Text Field. Move them down in the iPhone view so they’re not overlapping the first fields. Move the Nickname Label upward so it’s not overlapping the Nickname Text Field.
Now, let’s fix the constraints. With both the Nickname Label and Nickname Text Field selected, control-click and drag your mouse to the first User Id Text Field. Hold Shift and select the Vertical Standard Spacing, Leading, and Trailing constraints.
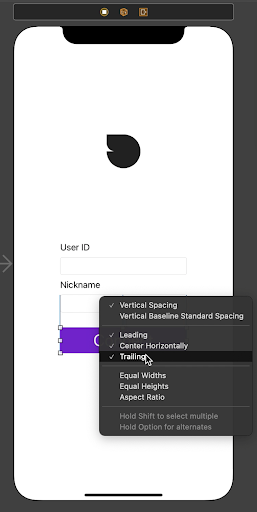
9. Next, click the + at the top right, create a Button, and drag it to the center of the view below the Nickname Text Field. Double-click the Button and rename it to Connect.
If you like, resize the width of your button to match the text fields, add a background, and change the font to make it larger in the attributes inspector.
Control-click and drag your mouse to the Nickname Text Field and add the Vertical Spacing, Leading, Center Horizontally, and Trailing constraints.
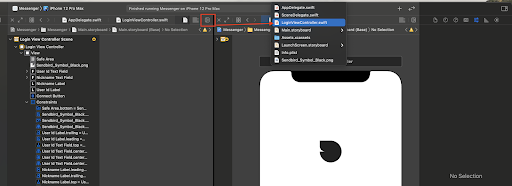
Connect the login view to the login view controller
1. With the Main.storyboard file still open, select the Add Editor on Right icon. Select the Main.storyboard folder next to the Messages folder, and select LoginViewController.swift.
2. Next, we will add variables for the text field.
@IBOutlet weak var userIdTextField: UITextField!
@IBOutlet weak var nicknameTextField: UITextField!
In the Main.storyboard on the left, control-click on the User Id Text Field and drag your mouse to the LoginViewController.swift class to insert the IBOutlet variable. Name the text field userIdTextField and click Connect.
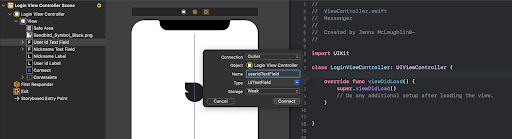
Repeat this step to create the IBOutlet for nicknameTextField.
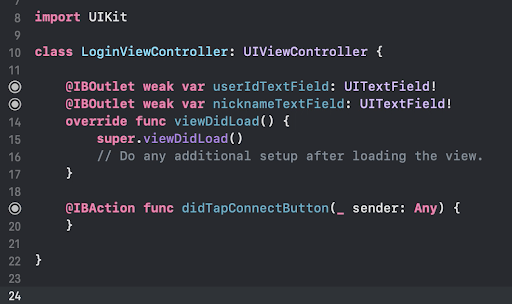
3. Now we’ll add a function for the button.
@IBAction func didTapConnectButton(_ sender: Any) { }
Control-click the Connect button and drag your mouse to the LoginViewController.swift class to insert the IBAction variable. Set the name to didTapConnectButton and click Connect.
Your code should now look like this:
4. Before we run the app, we need to add in some code to handle what happens when the user edits the text with the keyboard to let the app know the user is finished typing.
In the viewDidLoad() function, set the userIdTextField.delegate = self and the nicknameTextField.delegate = self. At the top of the class, add the UITextFieldDelegate and override the touchesBagan function. Add the textFieldShouldReturn method to tell the app when user has stopped typing and clicks outside the text area, or when the user has selected the keyboard’s return button.
5. Now we’re ready to run the app to see the view. Tap on the User Id and Nickname text boxes, and click away from the keyboard or select the return button to hide the view. In the next section, we’ll work with the Connect button to connect the user to Sendbird.
Connect the user to Sendbird
In the last section, we added an IBAction function didTapConnectButton that’s connected to our Connect button. Let’s fill in this method so that when Connect is pressed, the user is signed in to your Sendbird application.
1. First, let’s initialize Sendbird with your app. In AppDelegate.swift, update the didFinishLaunchingWithOptions method to include the following:
SBDMain.initWithApplicationId(“YOUR-APP-ID-HERE”)
This app id can be found on your Sendbird dashboard.
2. In the LoginViewController.swift class in the didTapConnectButton method, extract the userId and nickname from the user’s input from those text fields:
let userId = userIdTextField.text
let nickname = nicknameTextField.text
3. Connect to Sendbird with the userId. Add the following:
SBDMain.connect(withUserId: userId ?? “”, completionHandler: { (user, error) in
guard error == nil else { return // Handle connection errors in this block }
4. (Optional) Add a helper method for an alert to show if the user was able to connect successfully.
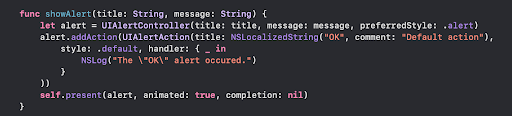
Call this method when:
a) The user connected successfully
b) The user did not connect successfully
c) The user did not enter a user Id and nickname before selecting the connect button
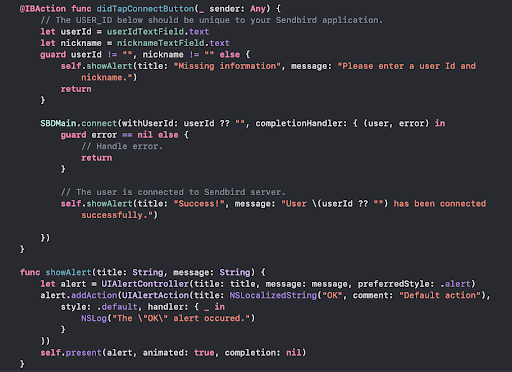
See the connection code here on GitHub.:
Your user should now be connected successfully to Sendbird!
In your Sendbird Dashboard, you should be able to find the user by the User Id in the “Users” section. Select the user and check the Chat > Status to see if that user is “Online”.
Conclusion
This concludes part 1 of this tutorial, and you are on your way to creating your own chat application with Sendbird in Swift! In this tutorial, you:
- Imported dependencies
- Initialized your app with Sendbird
- Created a LoginViewController and a Login View for the UI
- Connected your user to Sendbird
Look out for part 2 of the Swift guide, where you will complete your own chat application by adding a channel list and chat UI for users to send and receive messages.
Happy chat building! ✌
