This tutorial teaches you to integrate Sendbird UIKit for iOS in your application.
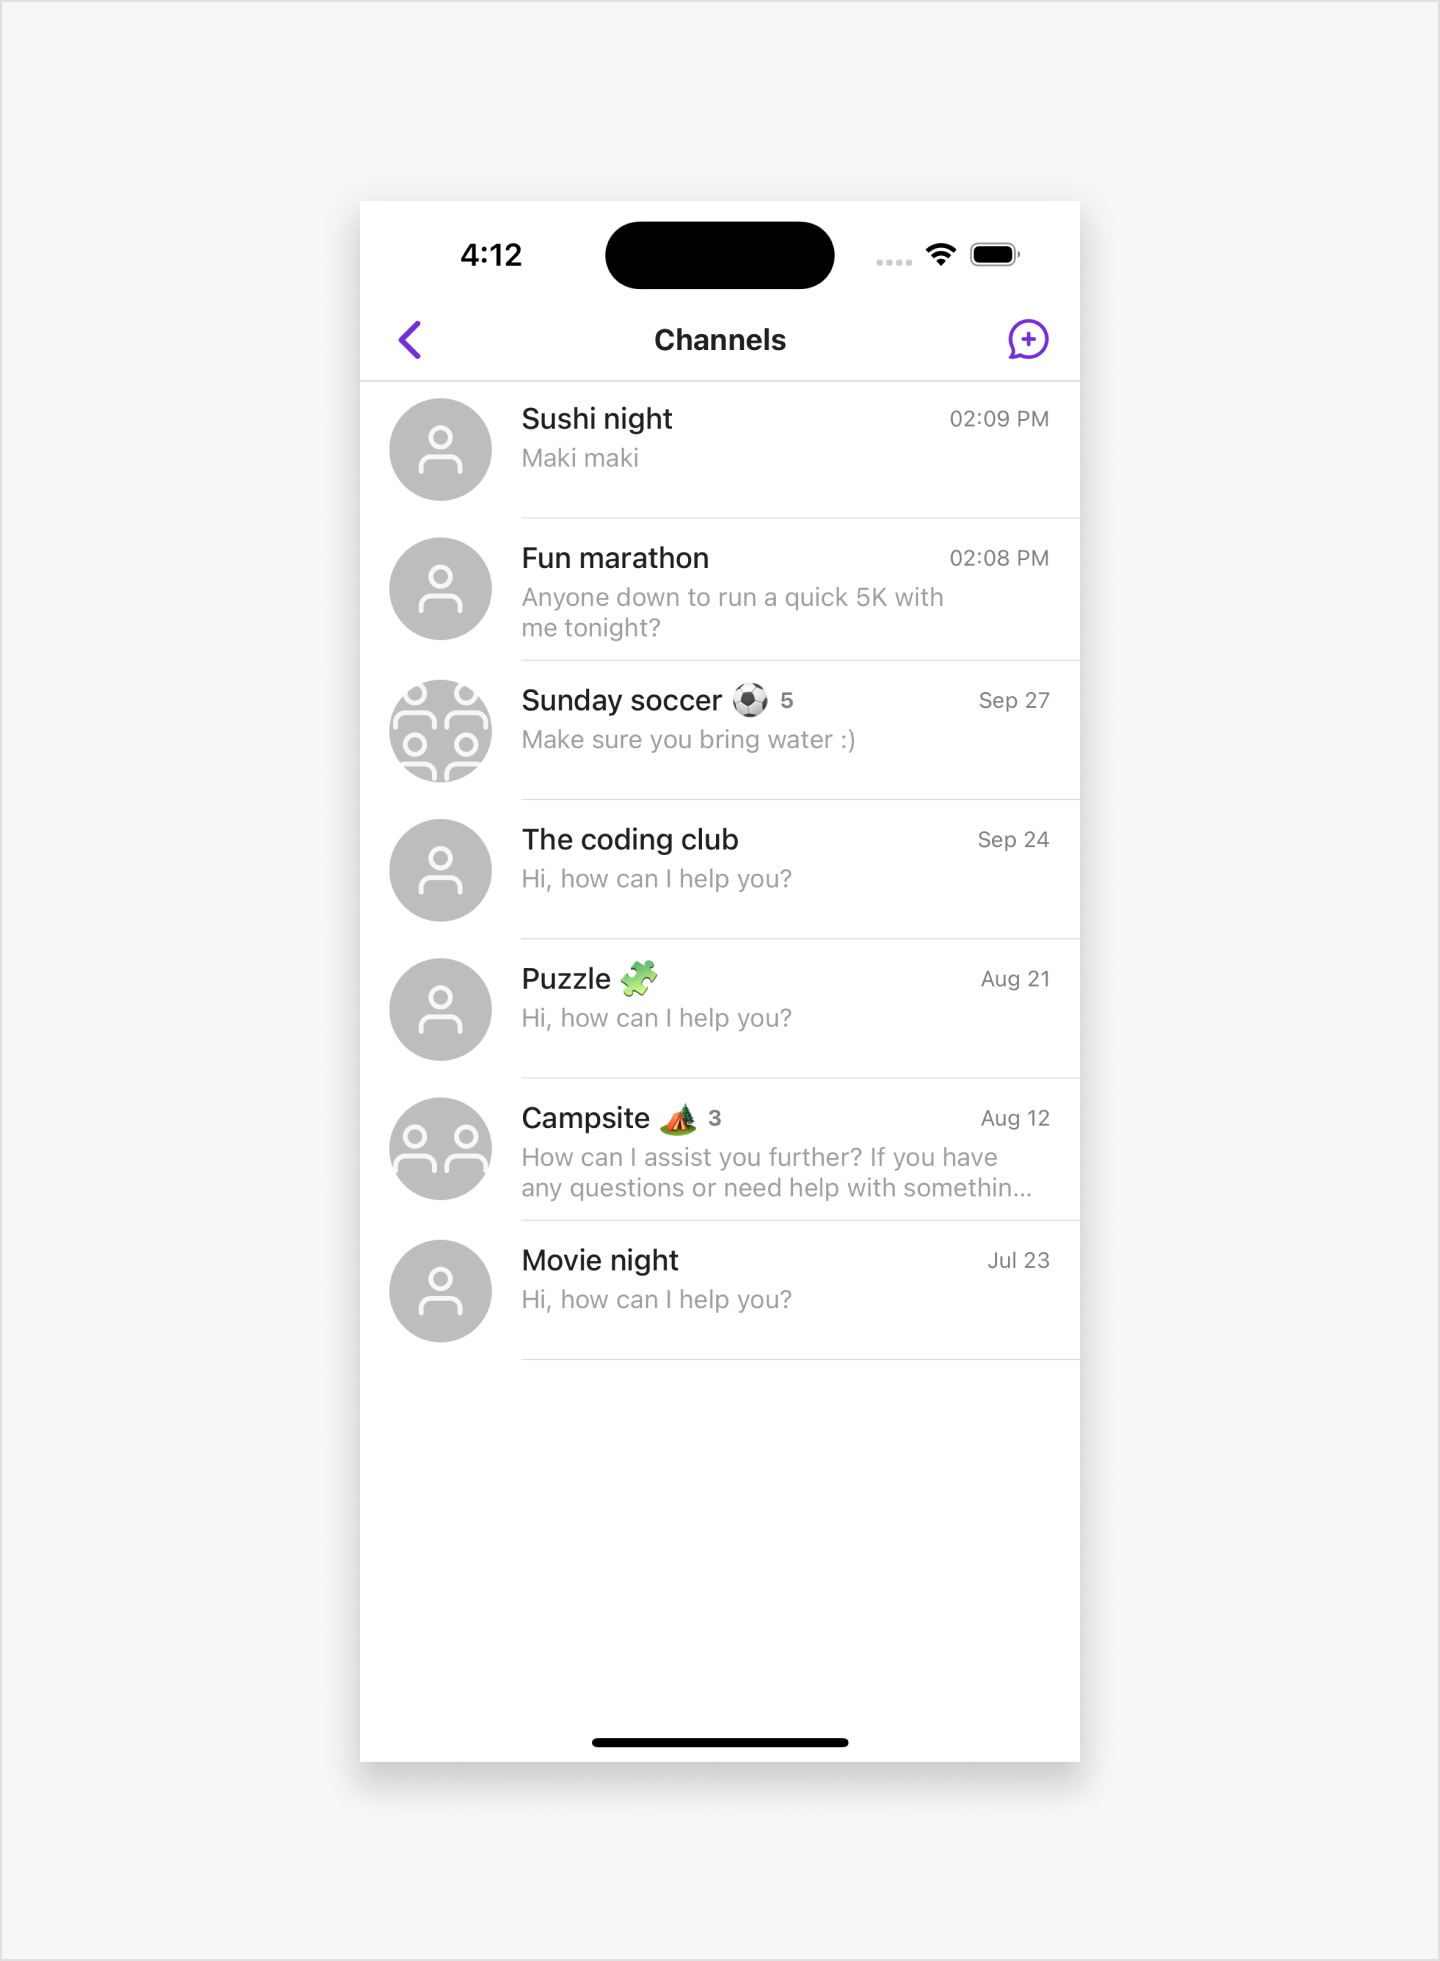
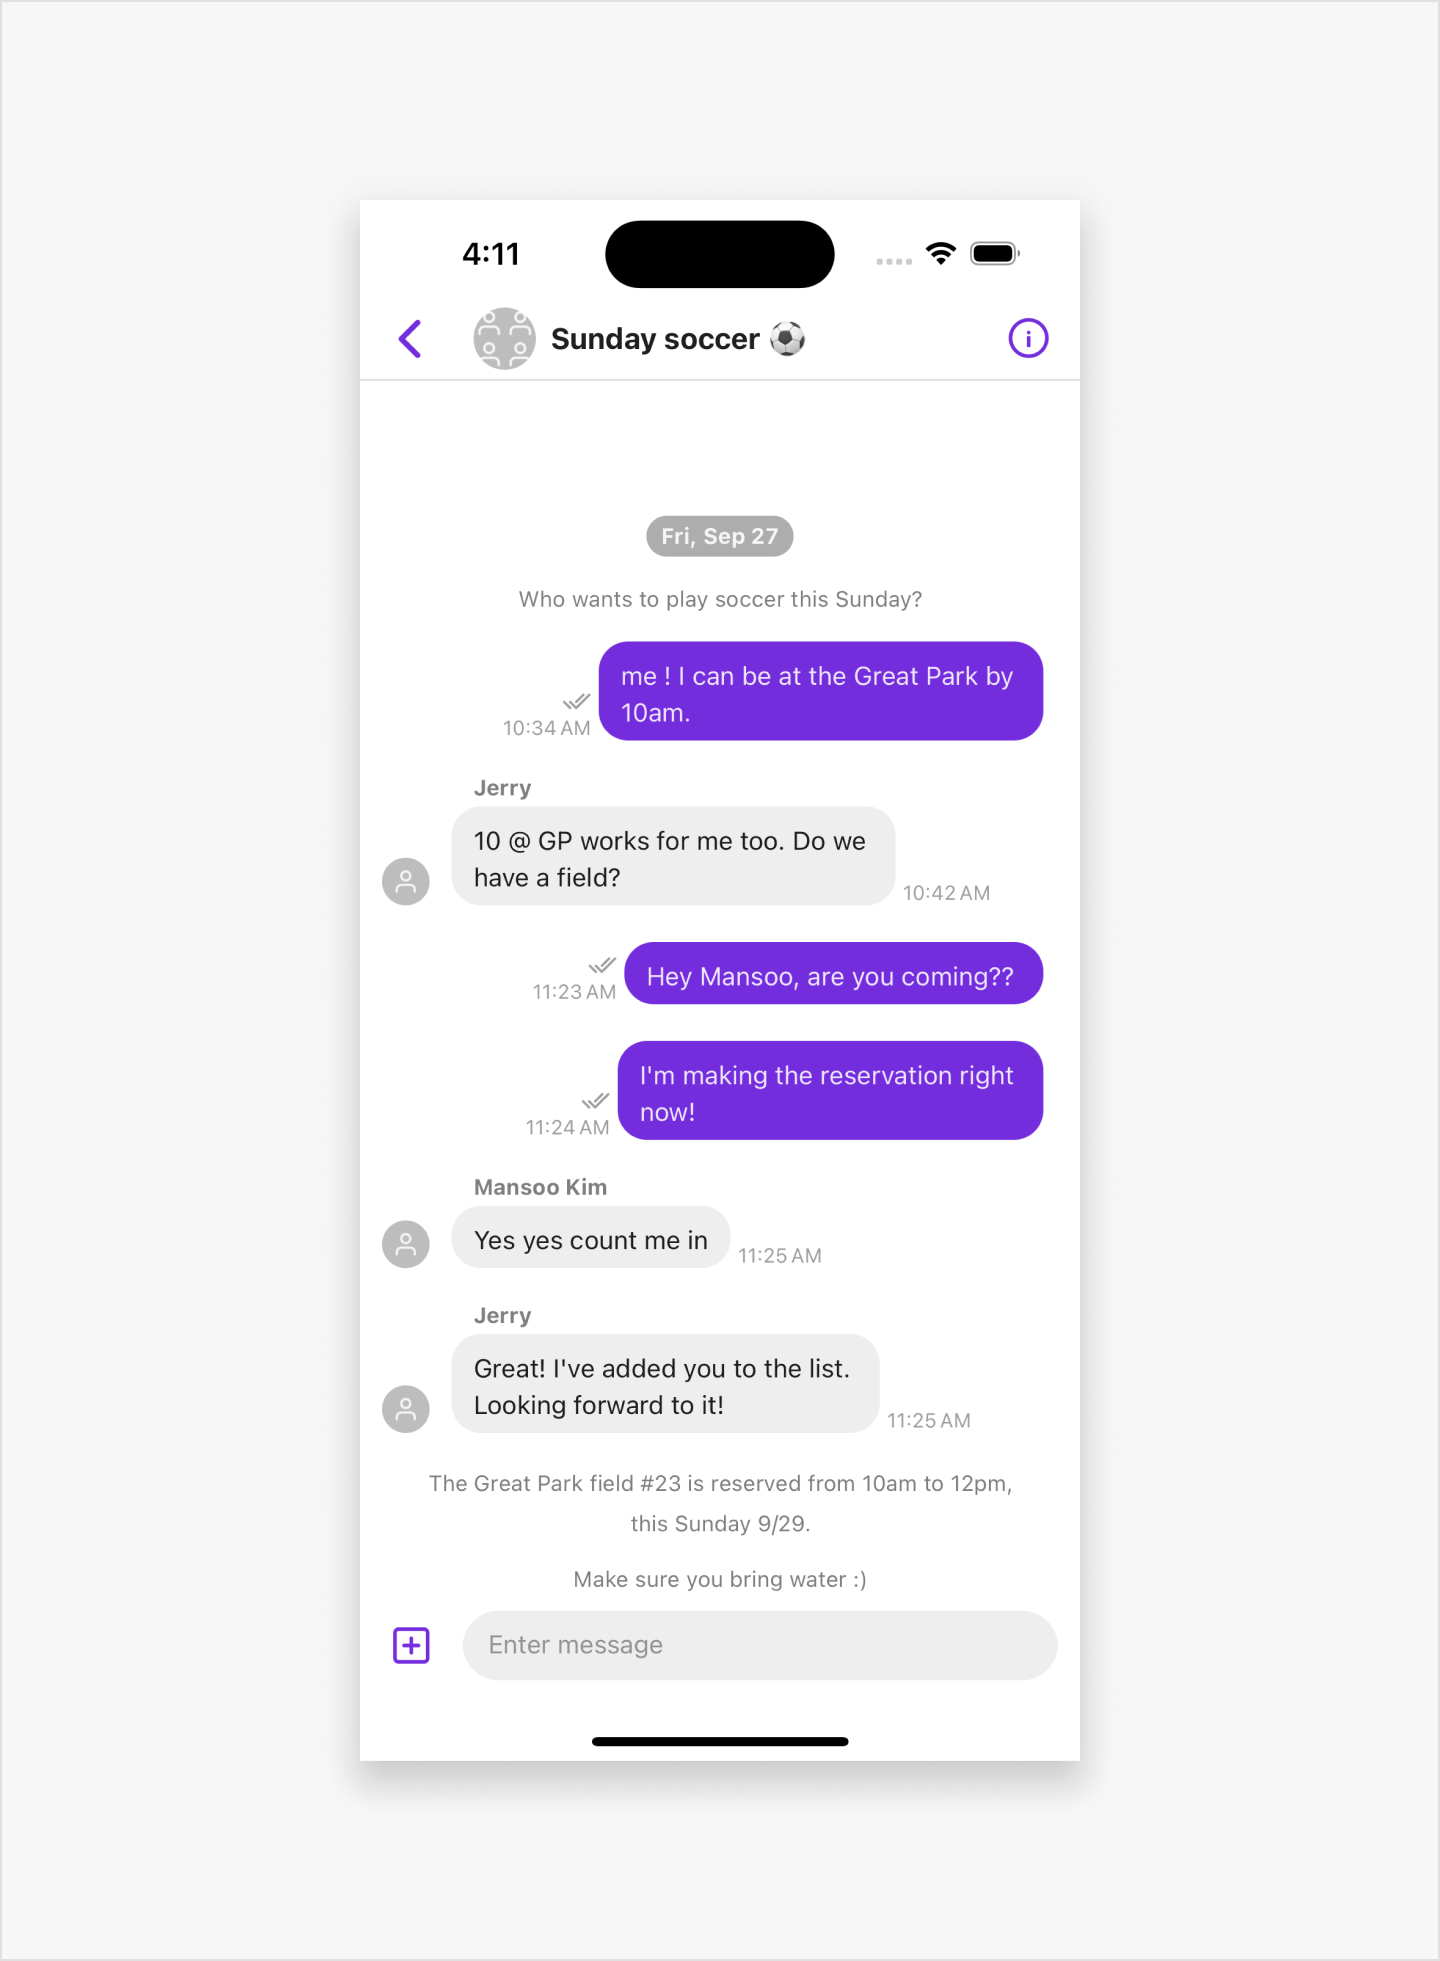
This is what your app will look like when you've finished this tutorial:

Left: channel list view. Right: channel view.
What you'll learn
- How to create a project and install Sendbird UIKit
- How to initialize UIKit in your application
- How to display channel list
- How to display channel
What you need
- Xcode 15.0 or later
- iOS 13.0 or later
- Swift 5.0+
Notes
- Swift 6.0 and later
- OS
If you are building your app in Swift 6.0 and later, use a `@preconcurrency` annotation before import statements to avoid compilation errors. For example, `@preconcurrency import SendbirdChat`.
Currently, Sendbird UIKit for iOS supports iPhone OSs only, not iPad OSs.
Before you start, you need the following:
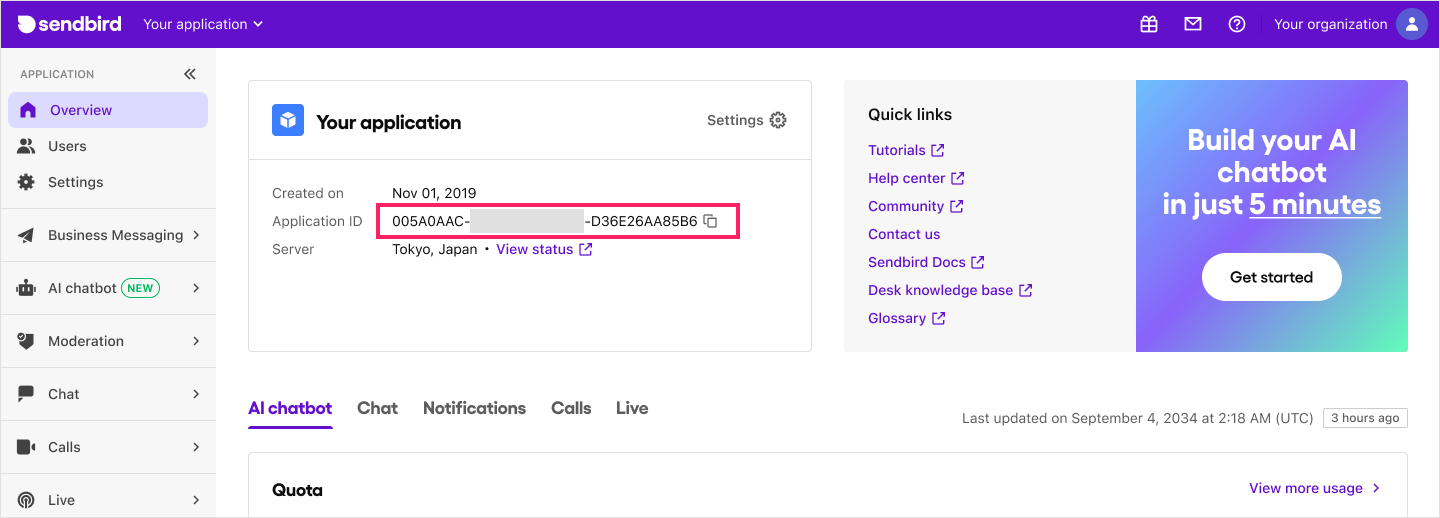
Application ID
- Go to Sendbird Dashboard and create an account or sign in.
- Click Create + to create a new application.
- Enter a name, choose a Product Type and Region, then click Confirm.
- Note down the Application ID - you'll need this later.
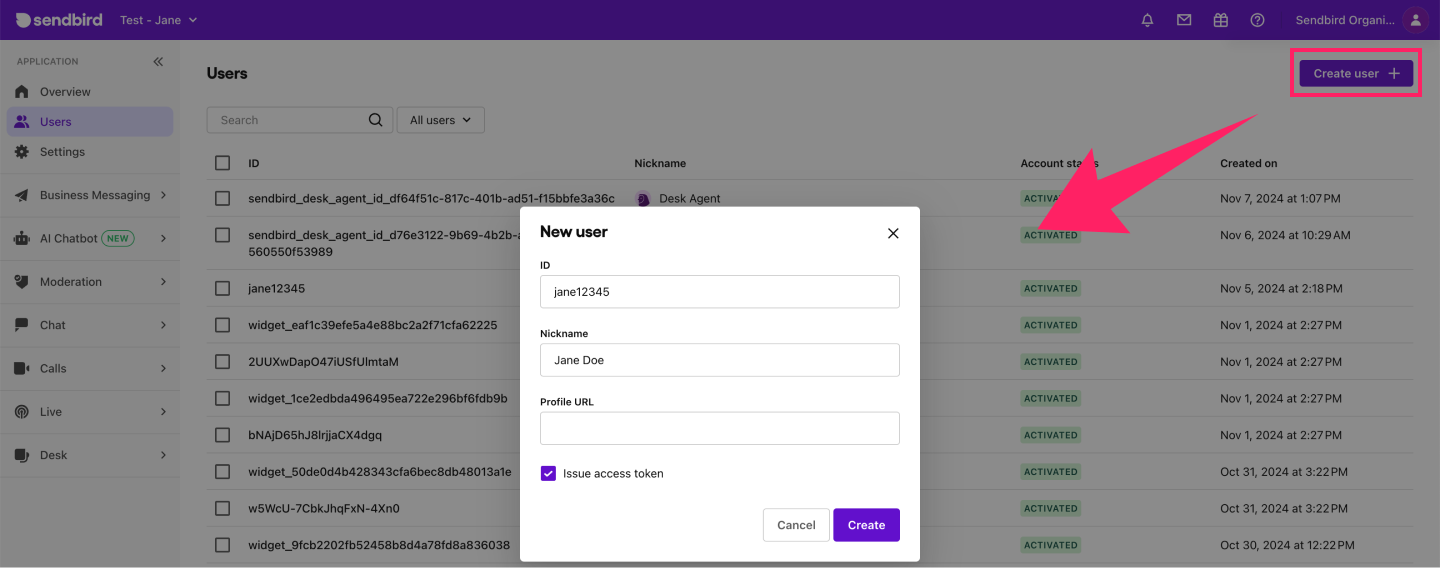
User ID
Next, create a user in your Sendbird application:
- Go to the Users menu and click Create user+.
- Enter a User ID and Nickname. Check Issue access token for authentication.
- Click Create and copy the user ID for later use.
Let's start by creating a new Xcode project:
- Open Xcode.
- Choose File > New > Project.
- Select iOS as the platform and App as the platform.
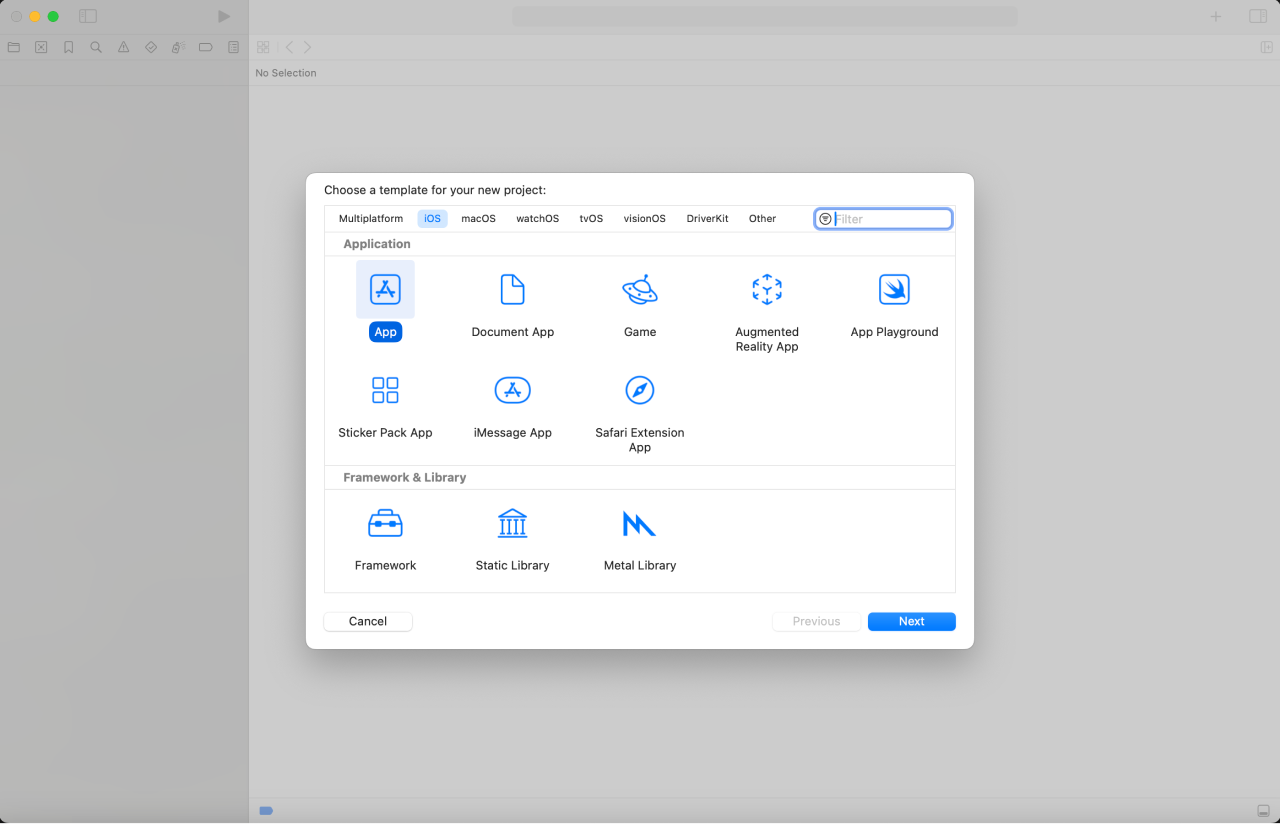
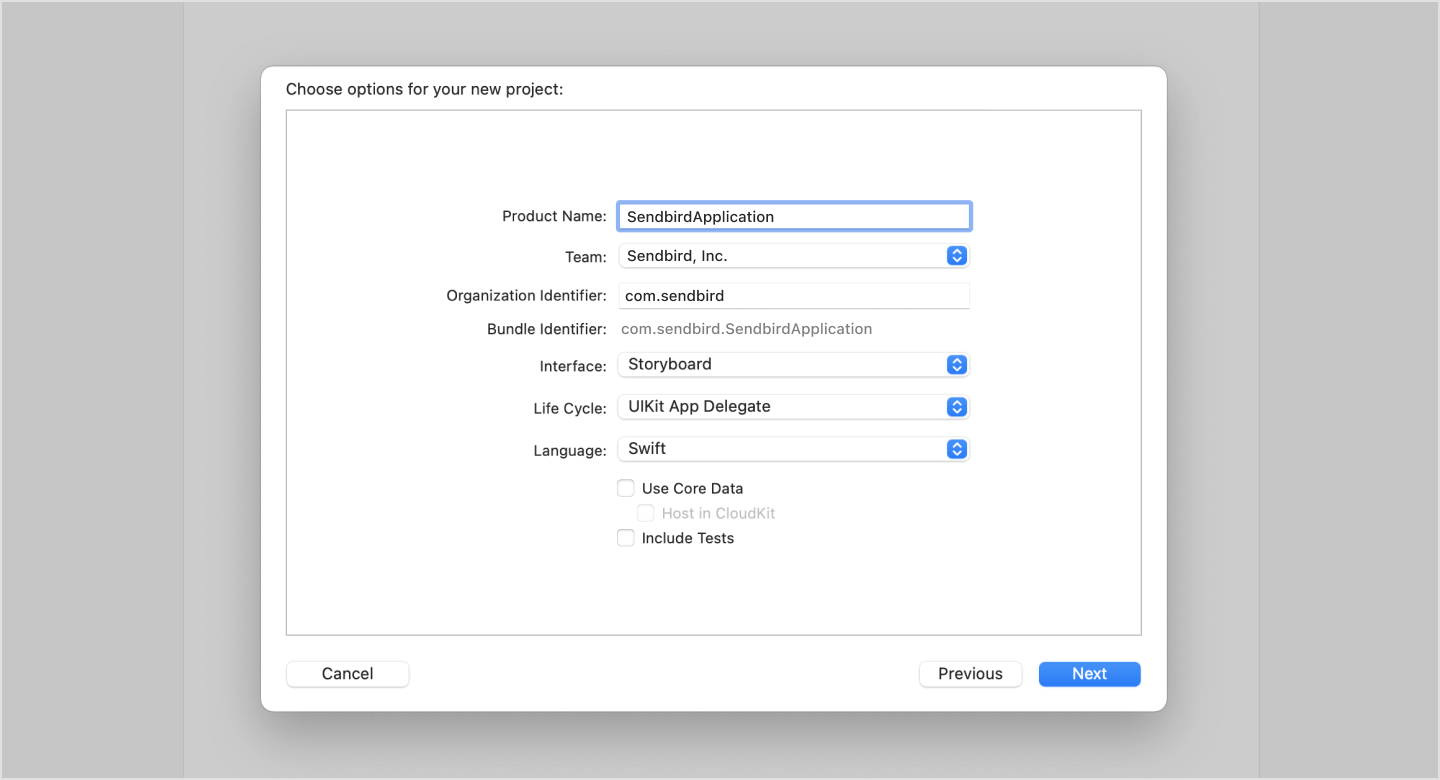
- Name your project and choose
Storyboardas the Interface.
You can install UIKit for iOS through Swift Package Manager, CocoaPods, or Carthage. We'll use Swift Package Manager in this codelab.
Swift Package Manager
- In Xcode, select File > Add Packages Dependencies.
- Enter the following URL in the search bar:
https://github.com/sendbird/sendbird-uikit-ios-spm.git
- Click Add Package.
- Select your project name under Add to Target and finish adding package.
Now, let's initialize Sendbird UIKit in your app:
Add the following code to your AppDelegate.swift file. Make sure you replace the
APP_ID, USER_ID, and the user's ACCESS_TOKEN.
// AppDelegate.swift

import UIKit
import SendbirdUIKit

@main
class AppDelegate: UIResponder, UIApplicationDelegate {

    func application(_ application: UIApplication, didFinishLaunchingWithOptions launchOptions: [UIApplication.LaunchOptionsKey: Any]?) -> Bool {
        let APP_ID = "YOUR_APPLICATION_ID"    // Specify your Sendbird application ID.

        SendbirdUI.initialize(
            applicationId: APP_ID
        ) { params in
            // This is the builder block where you can modify the initParameter.
            //
            // [example]
            // params.needsSynchronous = false
        } startHandler: {
            // This is the origin.
            // Initialization of SendbirdUIKit has started.
            // We recommend showing a loading indicator once started.
        } migrationHandler: {
            // DB migration has started.
        } completionHandler: { error in
            // If DB migration is successful, proceed to the next step.
            // If DB migration fails, an error exists.
            // We recommend hiding the loading indicator once done.
        }

        SBUGlobals.currentUser = SBUUser(userId: "USER_ID")
        SBUGlobals.accessToken = "ACCESS_TOKEN"
        SendbirdUI.connect { user, error in
            guard let user = user, error == nil else {
                print("Failed to connect with error: \(error!)")
                return
            }

            print("Successfully connected \(user.userId).")
        }
        return true
    }
}
Note: You can find the user's Access token in the Sendbird Dashboard under your Application > Users > your user > Access token. For this tutorial, you are using the user access token as a way of authentication. For actual implementation, it is highly recommended to refer to this authentication guide to implement a more secure way of authentication.
Now, let's display the channel list.
Note: If your app doesn't require a Channel List view, you can skip this step and go on to step 7: Display Channel.
// SceneDelegate.swift

import UIKit
import SendbirdUIKit

class SceneDelegate: UIResponder, UIWindowSceneDelegate {
var window: UIWindow?

    func scene(_ scene: UIScene, willConnectTo session: UISceneSession, options connectionOptions: UIScene.ConnectionOptions) {
        guard let windowScene = (scene as? UIWindowScene) else { return }
        window = UIWindow(windowScene: windowScene)

        let channelListVC = SBUViewControllerSet.GroupChannelListViewController()
        let navigationController = UINavigationController(rootViewController: channelListVC)
        window?.rootViewController = navigationController
        window?.makeKeyAndVisible()
    }
}
Press the build button to launch the app on the simulator. The list of channels associated with the indicated user will be displayed as the starting screen, as shown below.
To directly display the channel view without a channel list:
Add the following code to your ViewController.swift file:
import UIKit
import SendbirdUIKit
import SendbirdChatSDK

class ViewController: UIViewController {

    override func viewDidLoad() {
        super.viewDidLoad()
        // Do any additional setup after loading the view.
        let params = MessageListParams()
        let channelVC = SBUGroupChannelViewController(
            channelURL: "CHANNEL_URL",
            messageListParams: params
        )
        let navigationController = UINavigationController(rootViewController: channelVC)
        present(navigationController, animated: true)
    }
}
Replace the SceneDelegate.swift file with this code:
import UIKit
import SendbirdUIKit

class SceneDelegate: UIResponder, UIWindowSceneDelegate {

    var window: UIWindow?


    func scene(_ scene: UIScene, willConnectTo session: UISceneSession, options connectionOptions: UIScene.ConnectionOptions) {

        guard let windowScene = (scene as? UIWindowScene) else { return }
        window = UIWindow(windowScene: windowScene)

        // `SBUViewControllerSet.GroupChannelListViewController` is `SBUGroupChannelListViewController` by default.
        let channelListVC = SBUViewControllerSet.GroupChannelListViewController.init()
        let navigationController = UINavigationController(rootViewController: ViewController())

        window?.rootViewController = navigationController
        window?.makeKeyAndVisible()
    }

    // ...
}
Press the build button to launch the app on the simulator. The specified channel will be displayed as the starting screen, as shown below.
You've now successfully integrated Sendbird UIKit for iOS in your application. You've learned how to:
- Set up a project and install Sendbird UIKit for iOS
- Initialize Sendbird UIKit in your application
- Display group channel list view and group channel view
- Check out the list of group channel and open channel views provided by the Sendbird UIKit for iOS. You can customize these views to meet your needs as well.
- Group channels are usually for 1-on-1 or 1-to-N for small groups, invitation only.
- Open channels are more suitable for live events such as streaming or concerts.
- For a variety of additional code samples, check out our sample app.