AI agent
Discover how to go beyond basic conversation AI to create intelligent assistants that achieve impressive resolution rates while freeing your human agents to focus on high-value interactions.
AI agent: Deploy intelligent agents for customer conversations
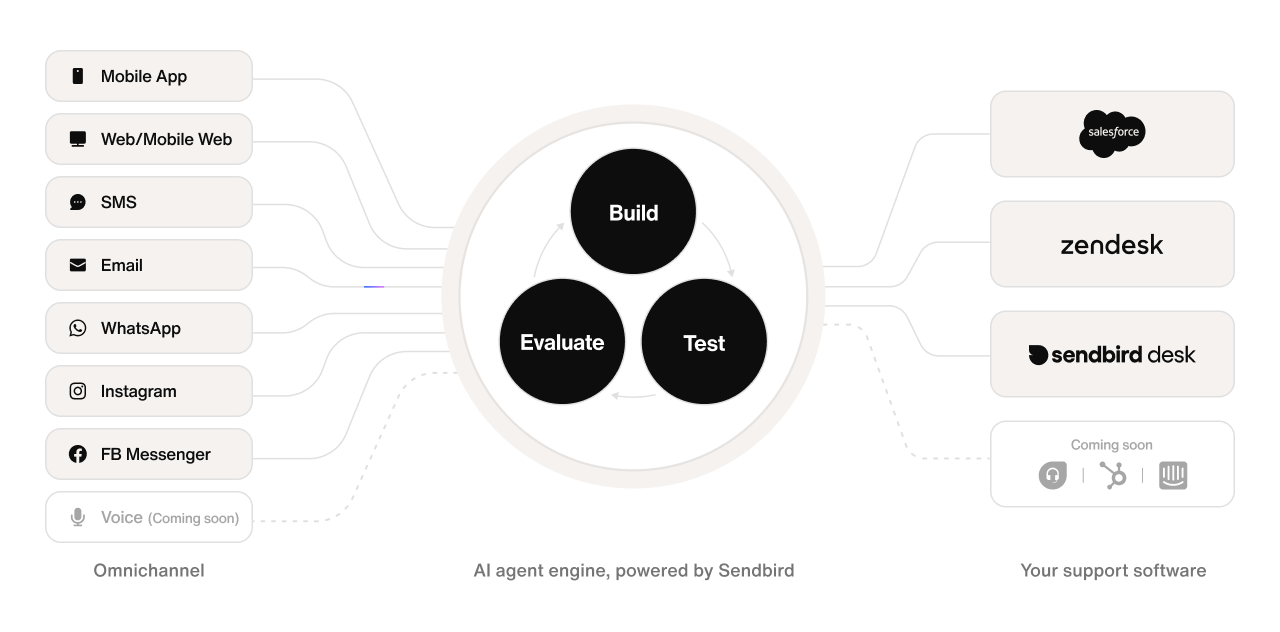
Sendbird's AI agent is a modern, flexible solution for automating conversations and delivering intelligent customer support across any messaging channel. Built for modern AI customer service, the AI agent platform enables businesses to deploy intelligent assistants that handle complex interactions, reduce resolution time, and scale efficiently.
The AI agent platform supports customizable workflows, workspace-level management, and detailed performance monitoring. It enables teams to provide seamless, intelligent support across all channels, from in-app chat to external messaging platforms.
If you're looking to engage users across channels, the AI agent supports SMS AI agent capabilities as well as omnipresent AI for unified, omnichannel AI customer support — including proactive outreach powered by intelligent workflows.
You can also connect the AI agent to your existing tools through powerful AI agent integrations, including CRM systems and ticketing platforms.
Looking for AI agent documentation?
Documentation for the AI agent is available in a private site. To request access, please contact our team.
The AI chatbot product has been discontinued and is no longer supported. All related documentation has been removed from this site.