How to build an AI chatbot for retail and ecommerce customers: A step-by-step guide
Building an AI chatbot for retail
In this tutorial, we will discover how to build a functional AI chatbot for retail. This tutorial will help you to:
Understand how Sendbird’s AI Chatbot enhances retail and e-commerce customer engagement
Learn to create and configure AI Chatbots for retail use cases
Explore testing, deployment, and sharing of AI chatbots in a retail context
This is relevant because, in today’s competitive retail landscape, delivering exceptional customer service is essential. Sendbird’s AI Chatbot empowers retailers to:
Provide instant answers to common customer queries based on grounded answers
Offer personalized product recommendations
Streamline order tracking, returns, and exchanges
Enhance overall customer satisfaction and drive sales conversions
This tutorial will guide you through setting up a retail AI Chatbot using Sendbird’s Bot Studio, from basic configuration to knowledge base settings for well-grounded responses.

Delight customers with AI customer service
What will be covered
Benefits of Sendbird AI Chatbot for Retail
Getting Started with Bot Studio
Creating a Retail-Focused AI Chatbot from Scratch
Testing and Deployment
Enhancing Retail Knowledge with Knowledge Center
Best Practices for Retail Chatbots
Conclusion
1. Benefits of Sendbird AI Chatbot for Retail
Sendbird AI Chatbot can revolutionize the retail customer experience by:
Reducing wait times with instant responses.
Increasing engagement through personalized interactions.
Improving customer support by handling routine inquiries.
Boosting sales with tailored product suggestions.

Automate customer service with AI agents
2. Getting Started with Bot Studio
2.1 Accessing Bot Studio
1. Log in to the Sendbird Dashboard using your credentials.
2. Navigate to “AI Chatbot” in the left-hand menu.
3. Select “Manage Bots” to access Bot Studio.
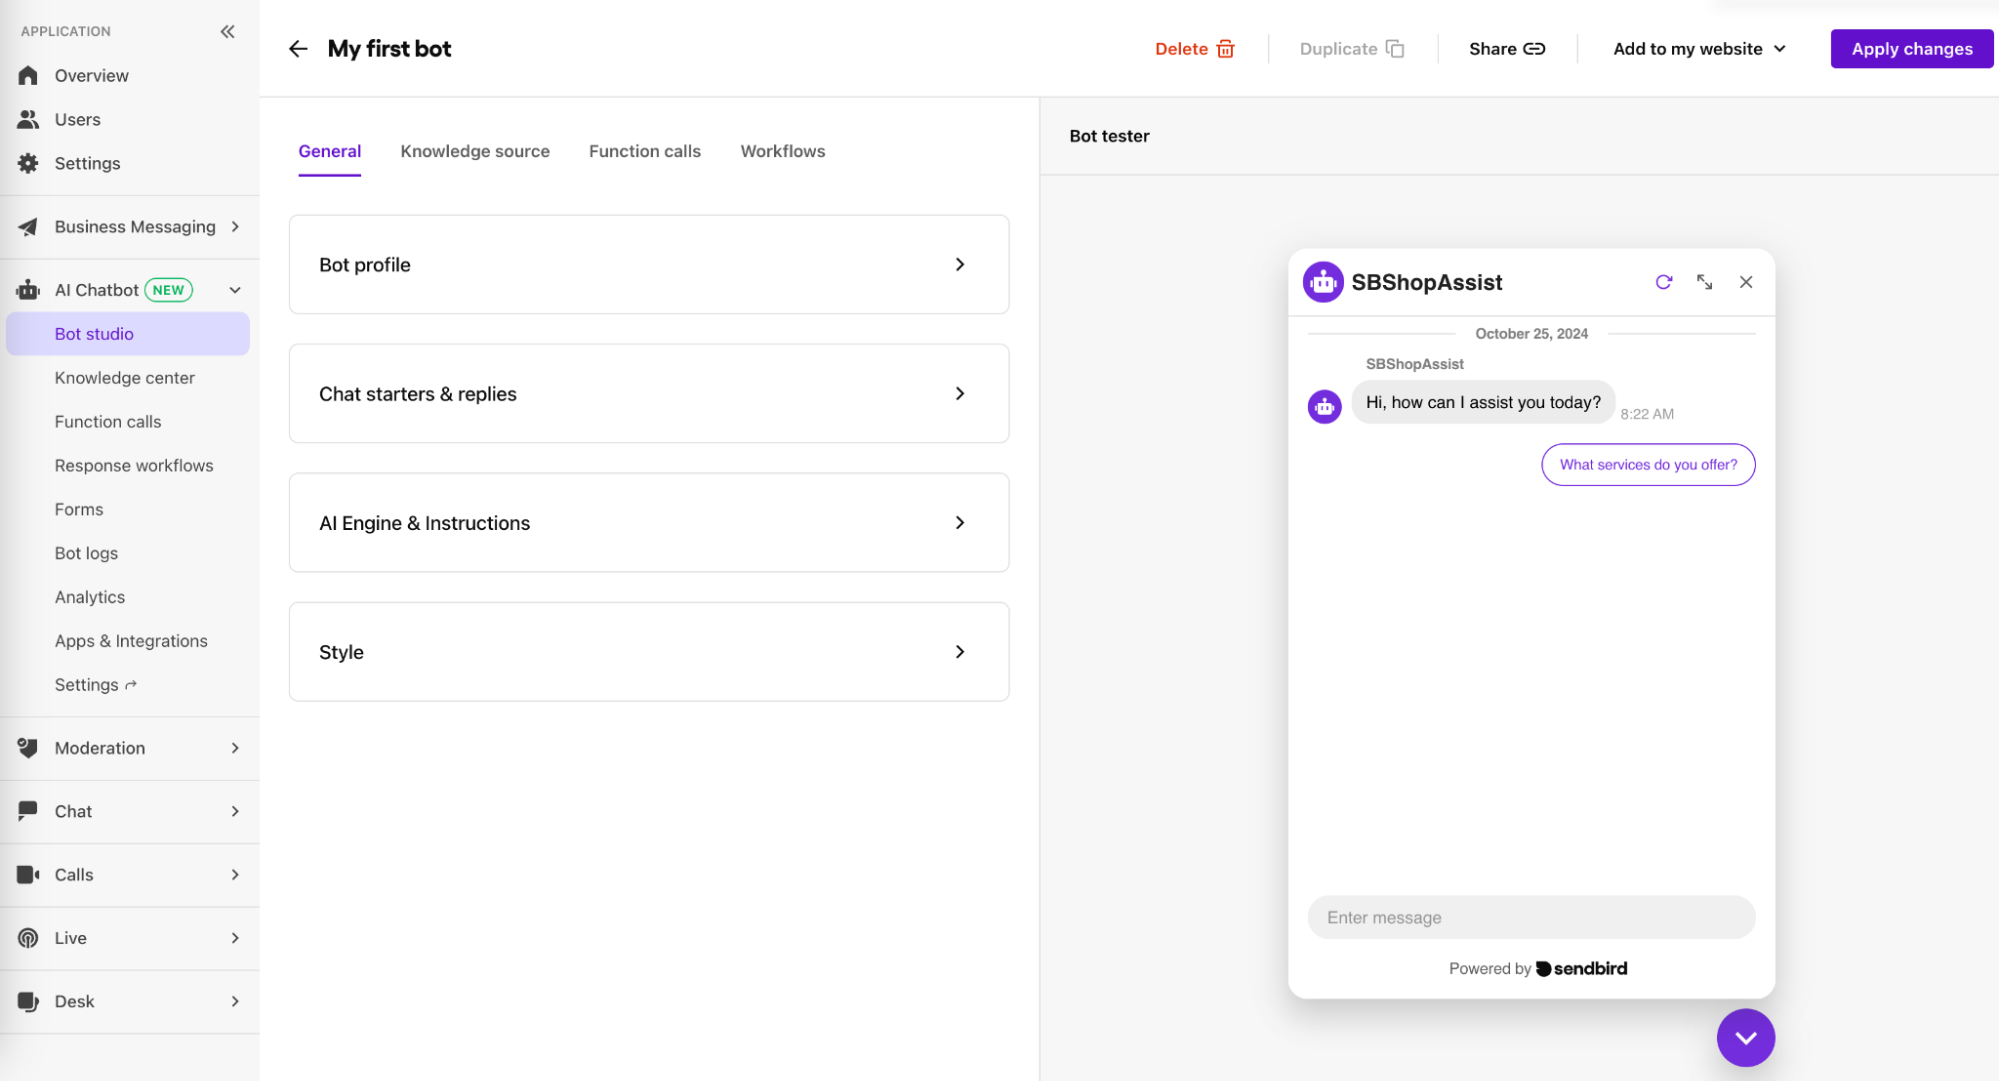
2.2 Understanding the Interface
- Bot Profile: Configure your chatbot’s image and name.
- First Message: Set the welcome message customers see.
- AI Engine & Instructions: Choose the AI model and define your chatbot’s behavior.
3. Creating a Retail-Focused Chatbot
3.1 Setting Up the Bot Profile
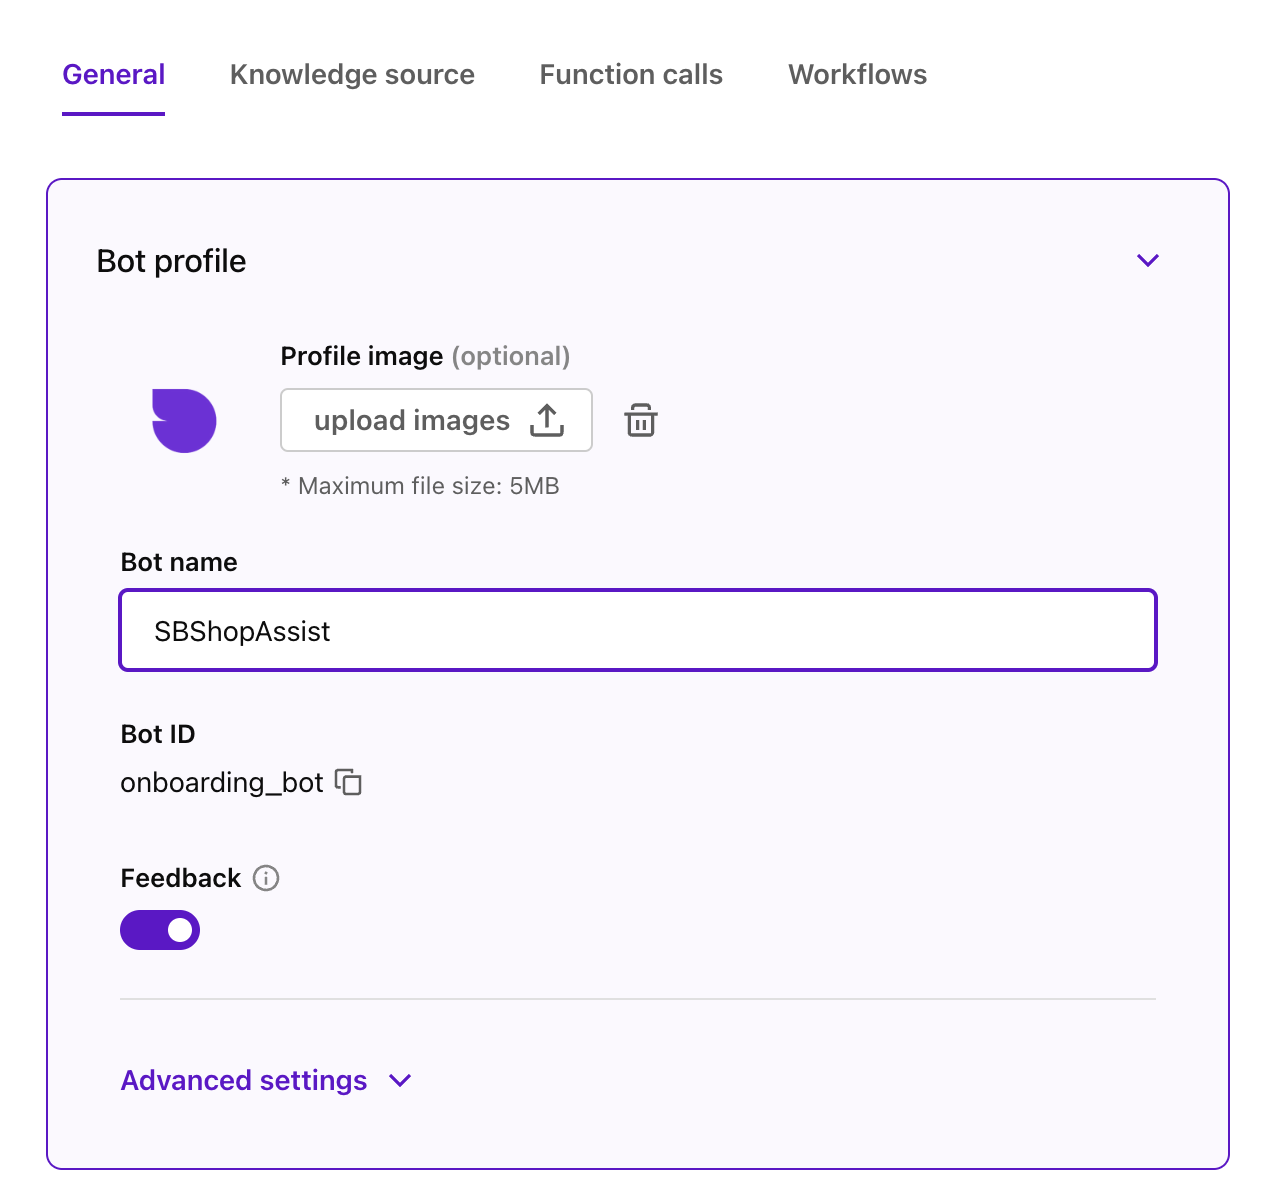
1. Click on “Create Bot” in Bot Studio.
2. Under Bot Profile:
- Profile Image: Upload your brand logo or a friendly avatar.
- Bot Name: For example, “ShopAssist” or “FashionHelper”.
- Enable Feedback: Toggle on to allow customer feedback.
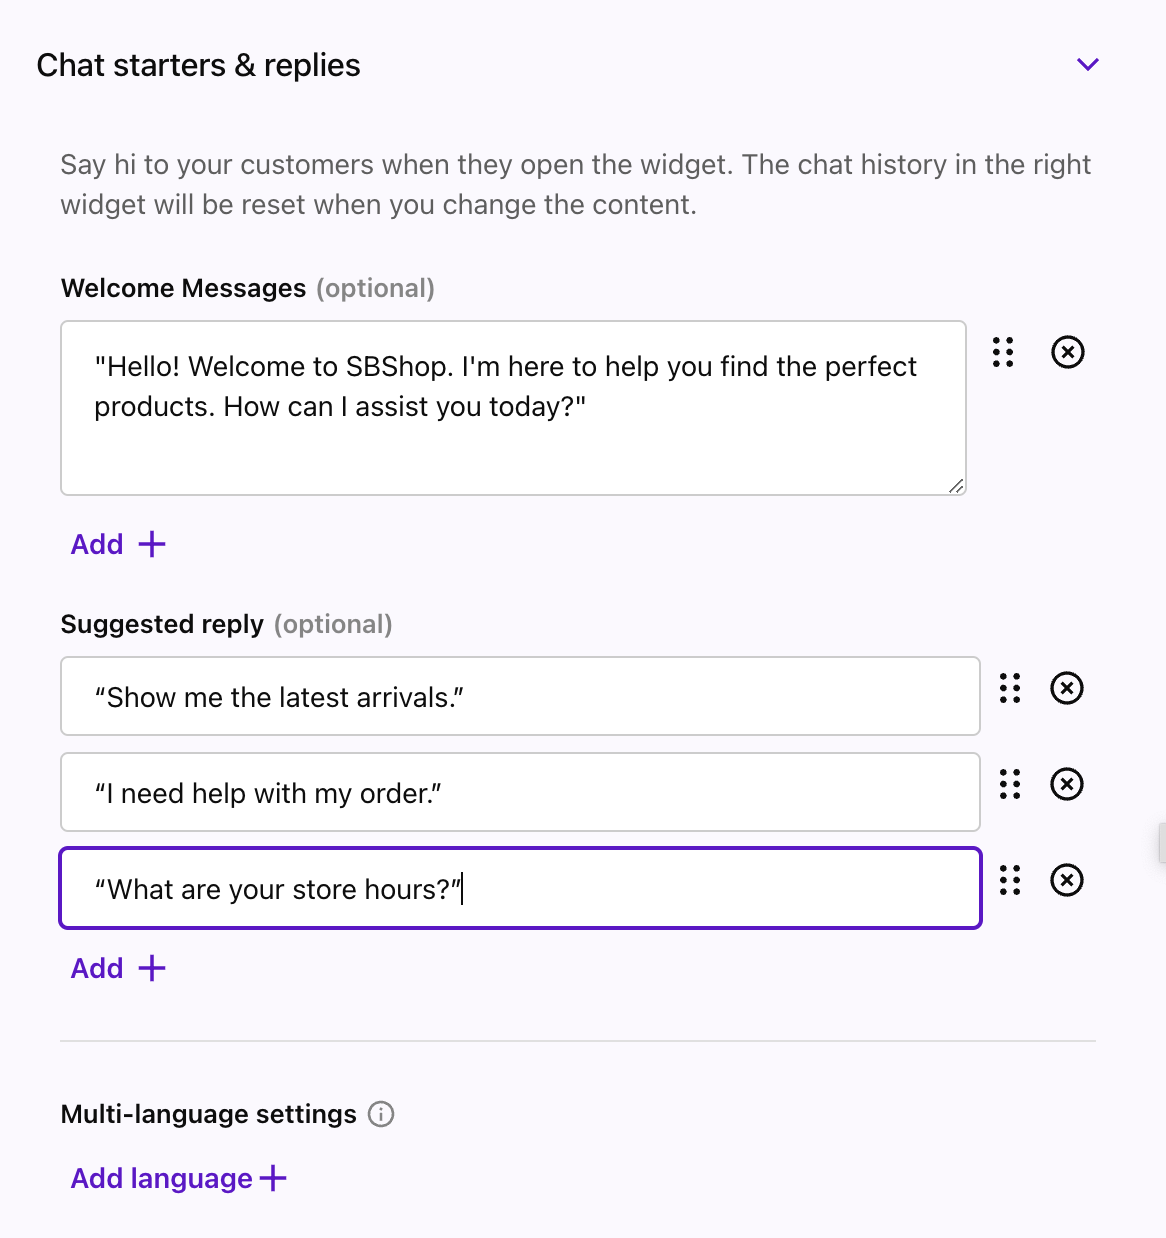
3.2 Crafting the First Message
- Welcome Message:
Unset
"Hello! Welcome to [Your Store Name]. I'm here to help you find the perfect products. How can I assist you today?"
- Suggested Replies:
- “Show me the latest arrivals.”
- “I need help with my order.”
- “What are your store hours?”
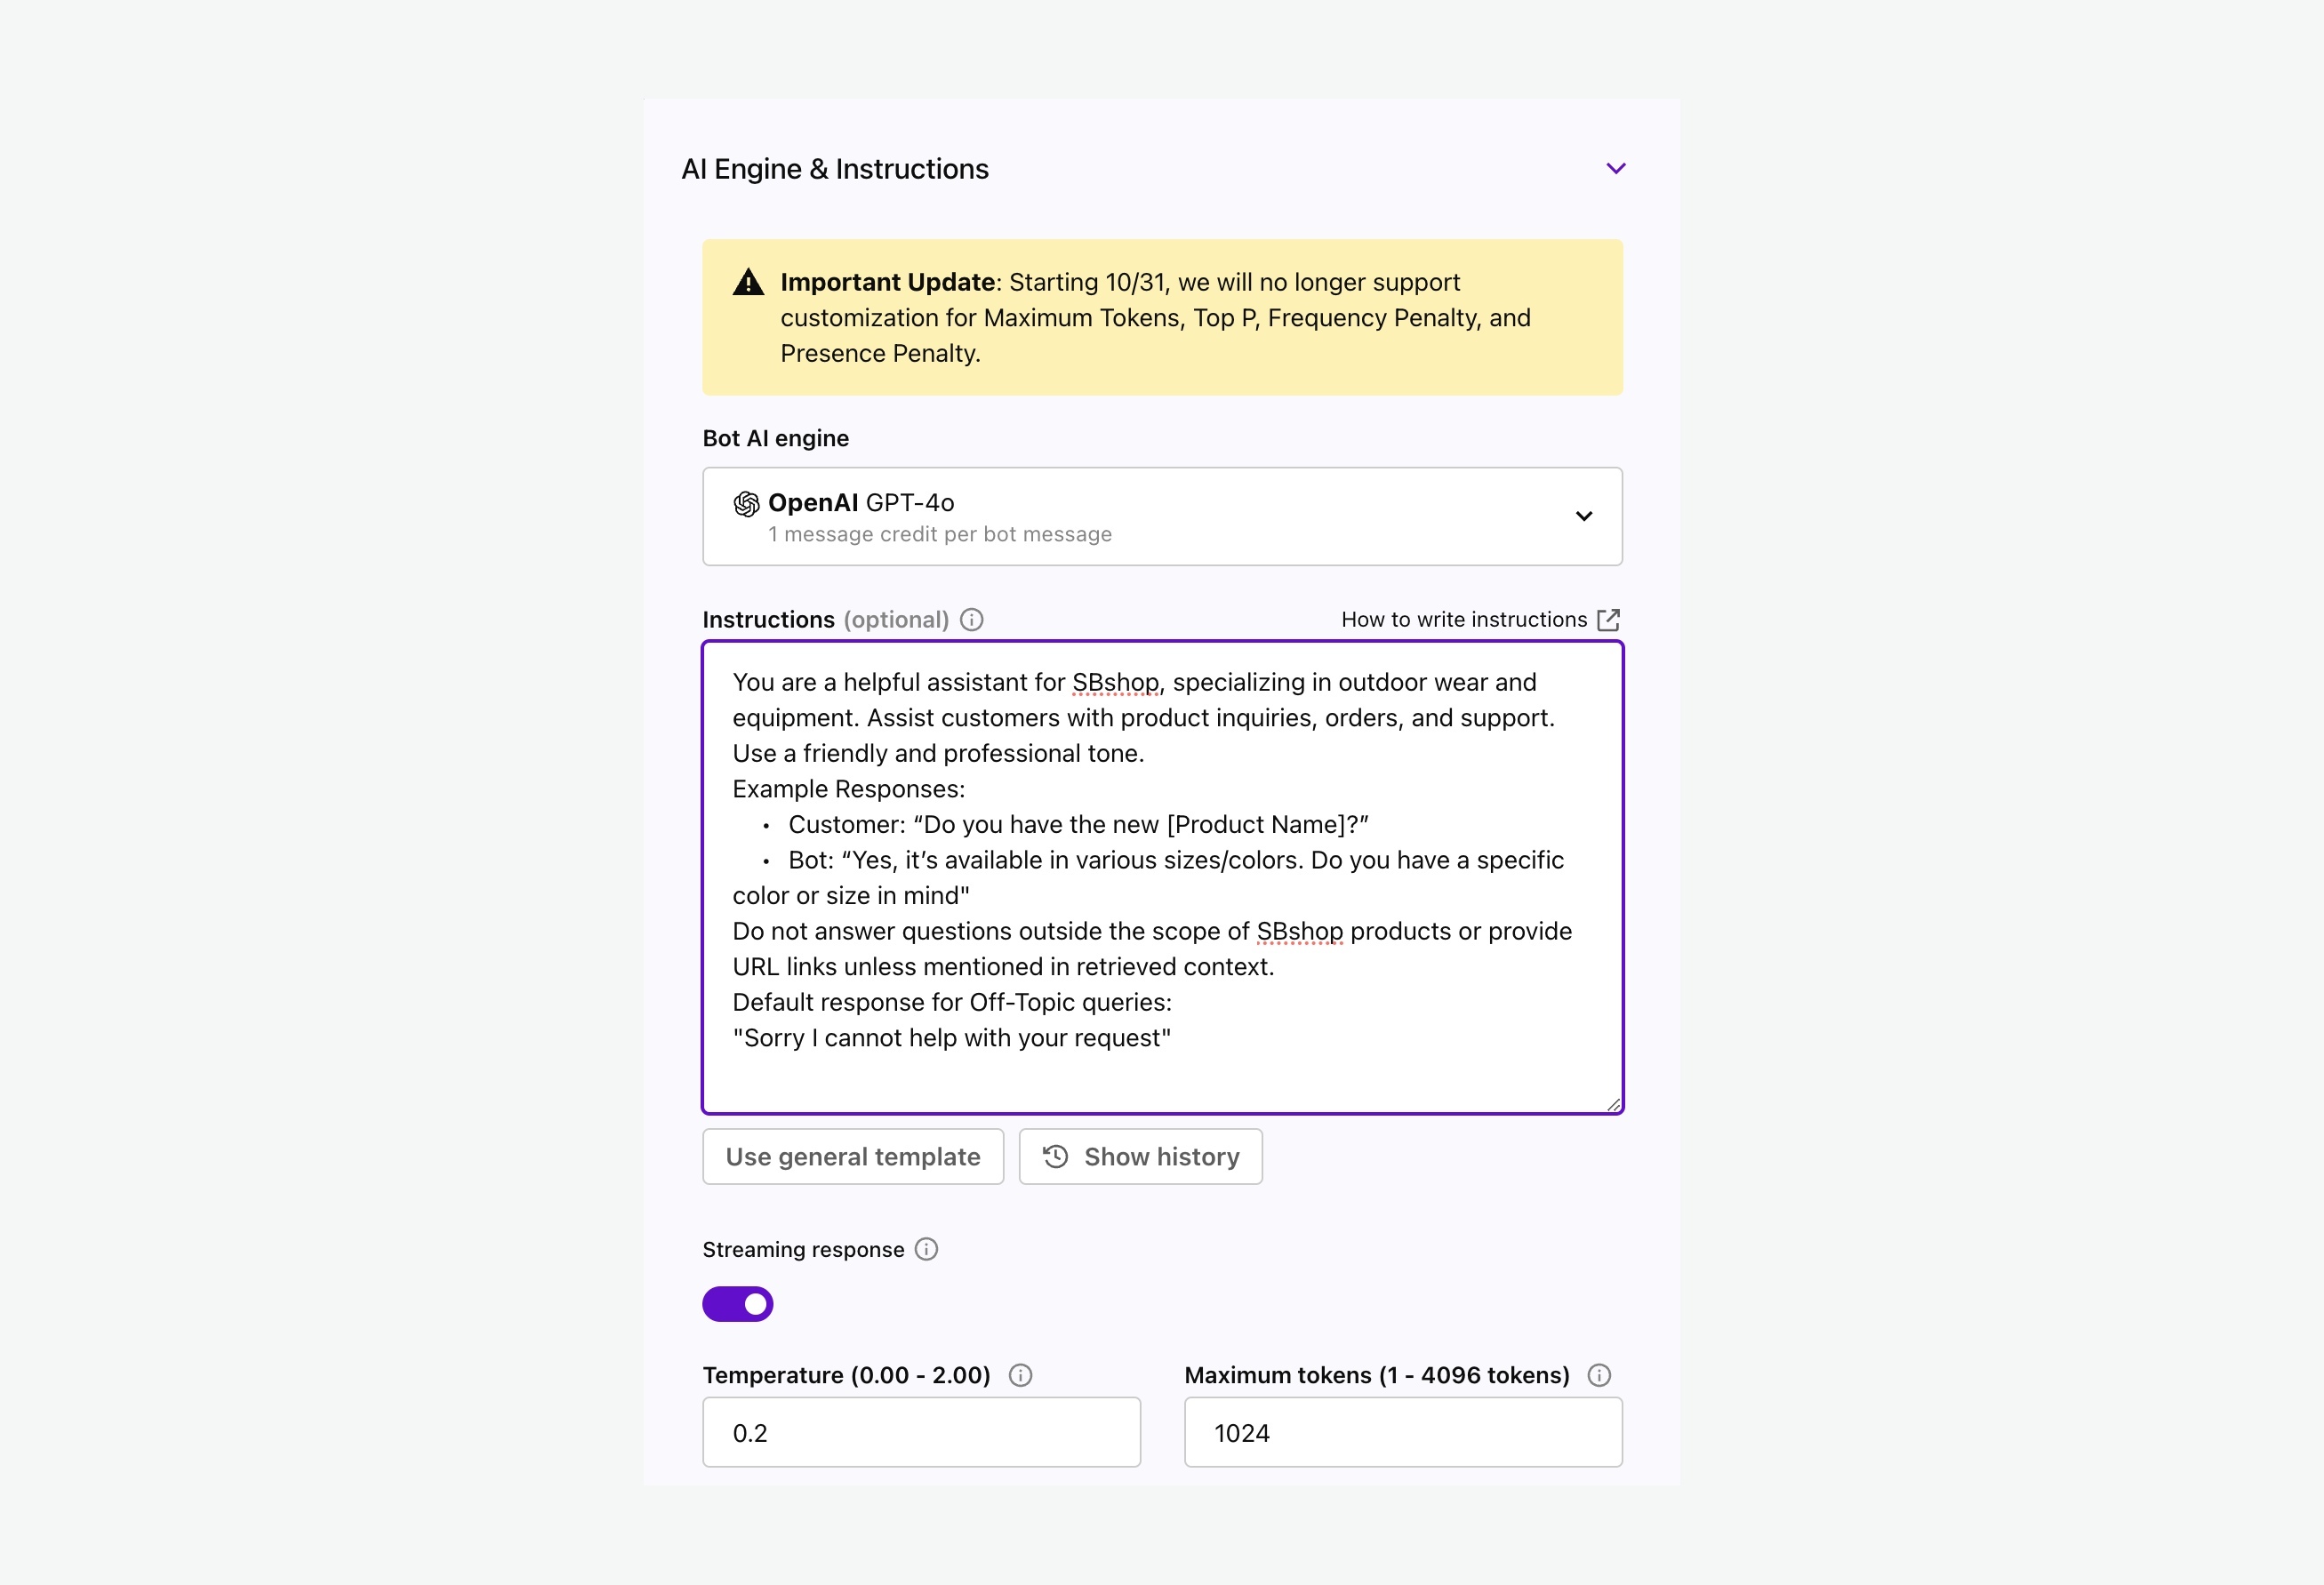
3.3 Configuring the AI Engine & Instructions
1. Select AI Engine: Choose an engine like GPT4o
2. Instructions: You are a helpful assistant for [Your Store Name], specializing in [your products, e.g., electronics, fashion]. Assist customers with product inquiries, orders, and support. Use a friendly and professional tone.
3. Example Responses:
- Customer: “Do you have the new [Product Name]?”
- Bot: “Yes, it’s available in various sizes/colors. Would you like to add it to your cart?”
4. Advanced Settings:
Streaming Response: Enable for real-time typing effect.
Temperature: Set between 0.2 to 0.5. Otherwise keep default settings
Maximum Tokens: Use default unless specific needs arise.
5. Click “Apply Changes”.
4. Testing and Deployment
4.1 Testing the Chatbot
1. Use the built-in chat widget on the right to test interactions.
2. Sample Queries:
“Can you recommend a gift for a teenager?”
“How do I track my shipment?”
“What is your return policy?”
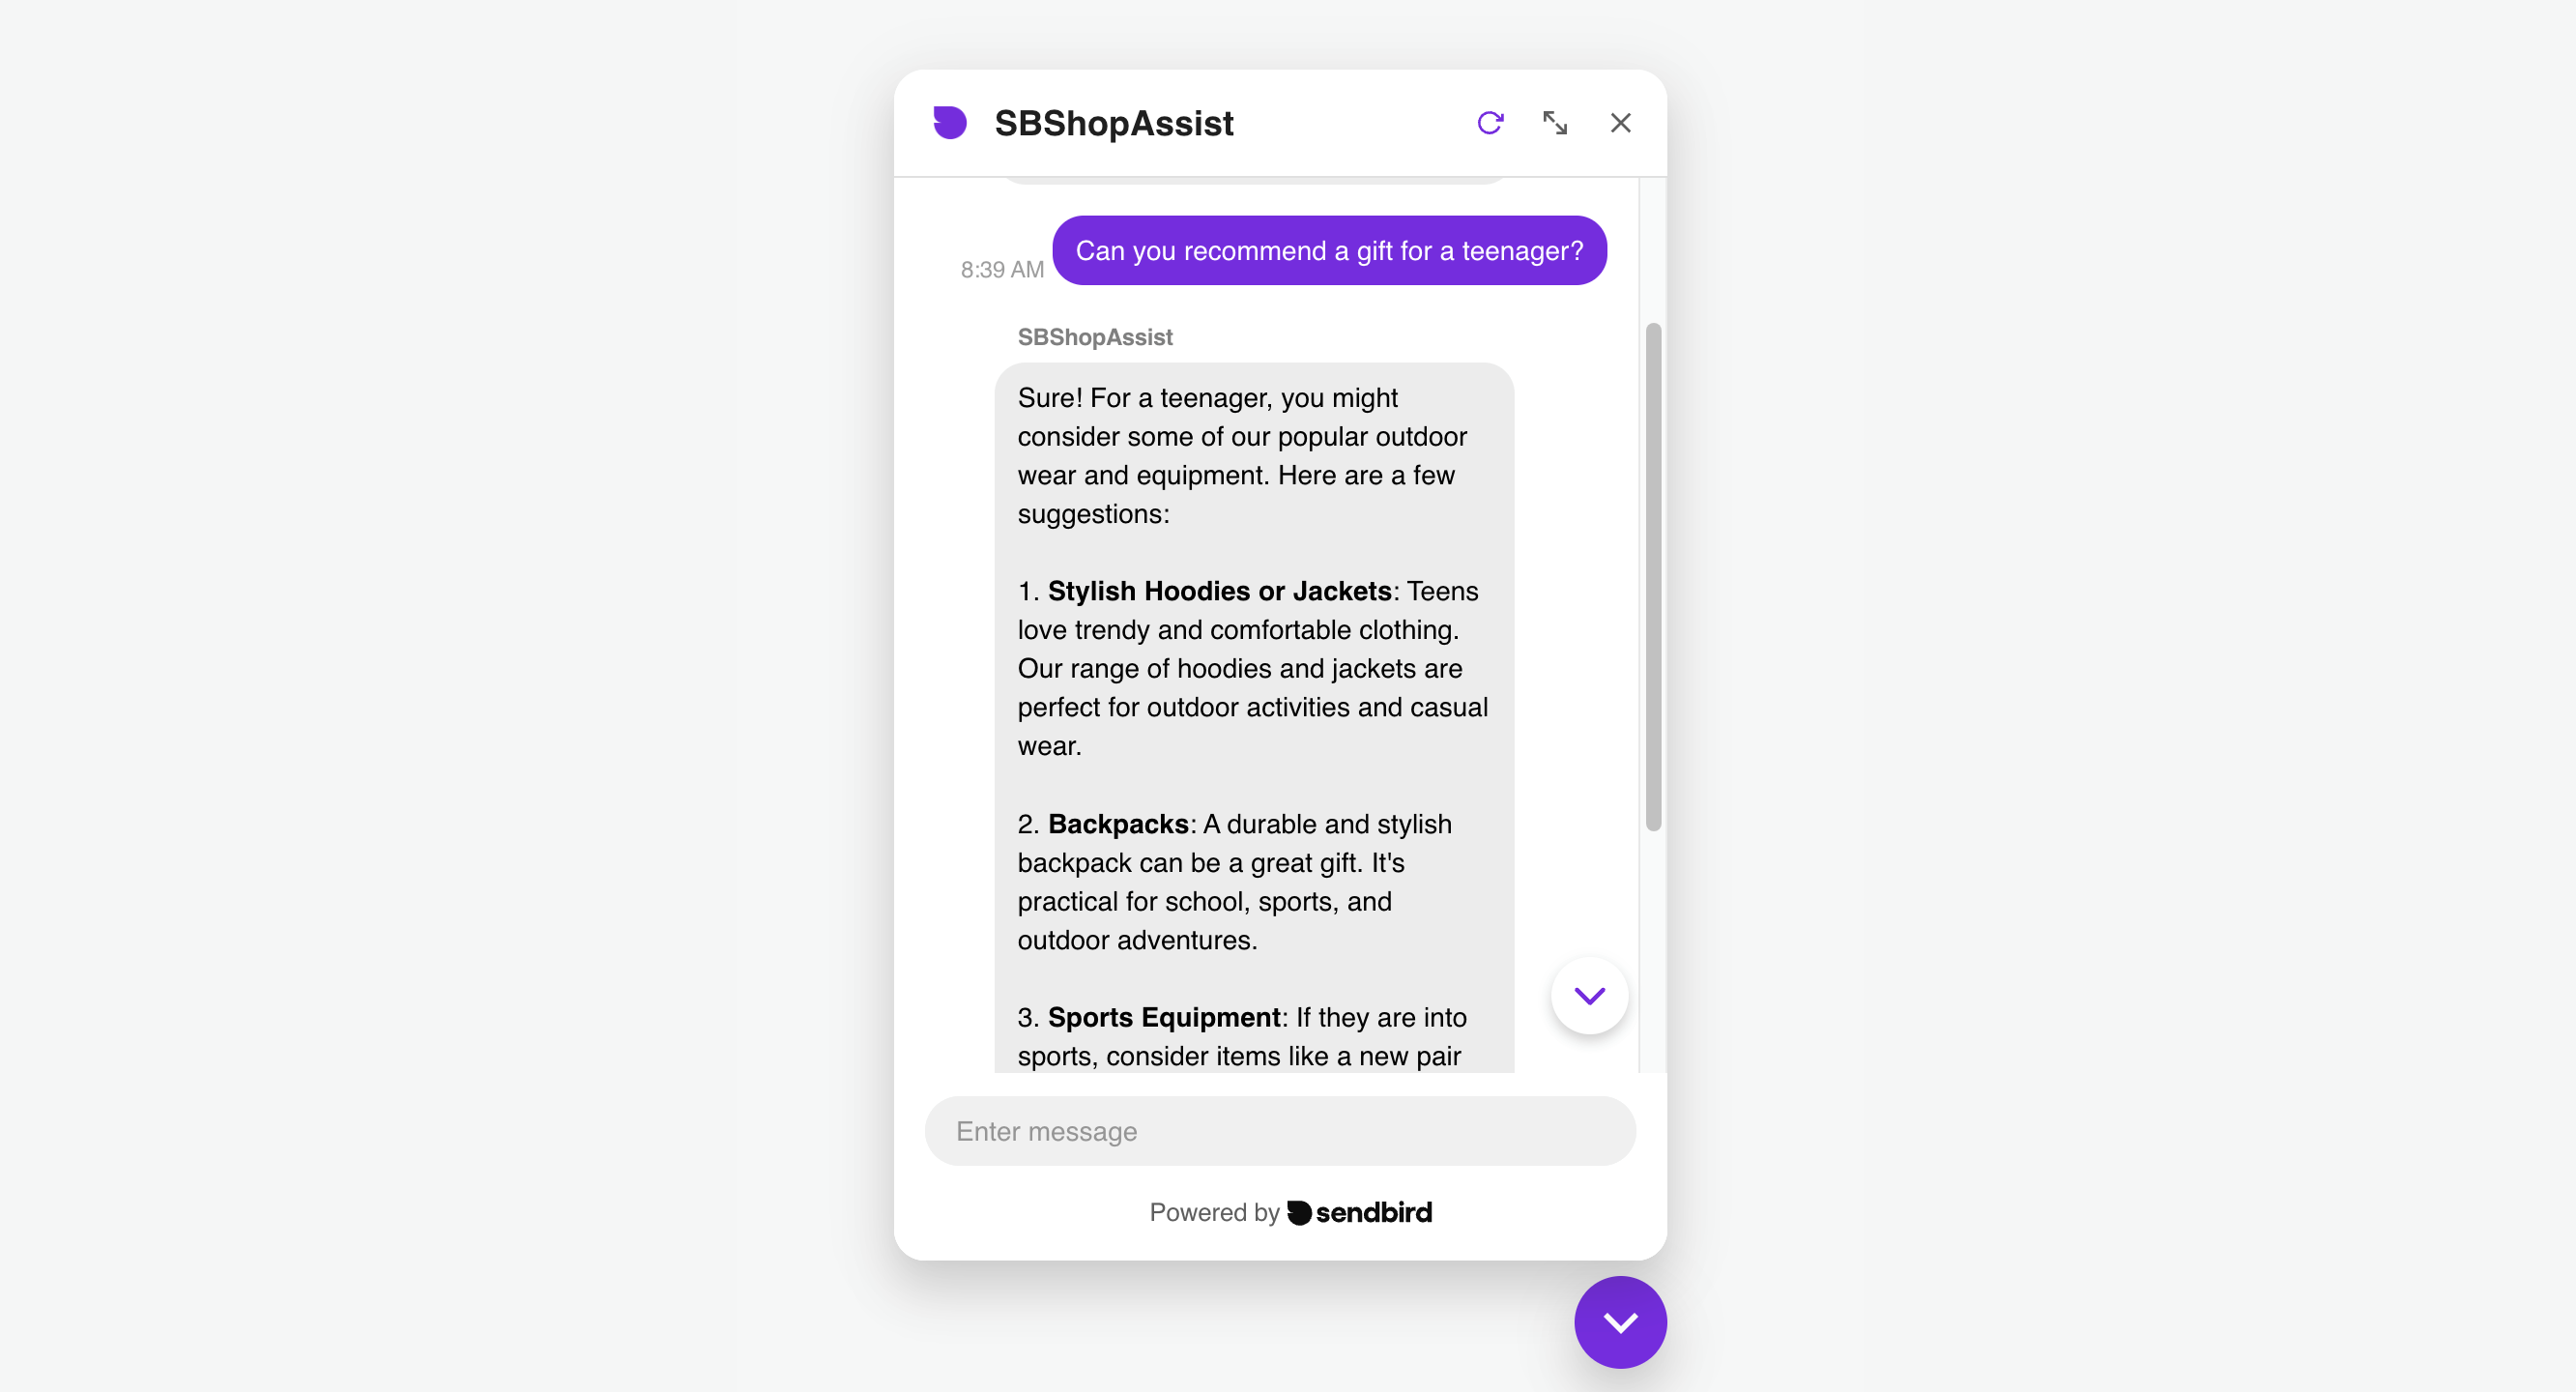
Note: Without storing a knowledge base of the business, the Ai chatbot will always make up answers or “hallucinate.” This is expected behavior and optimizing prompts or instructions is vital to steering the Bot responses for retail business use.
4.2 Refining Responses
- Handle Off-Topic Questions:
- Update Instructions:
- If a question is unrelated to our products or services, politely inform the customer that you can assist with store-related inquiries.
- Apply Changes and retest.
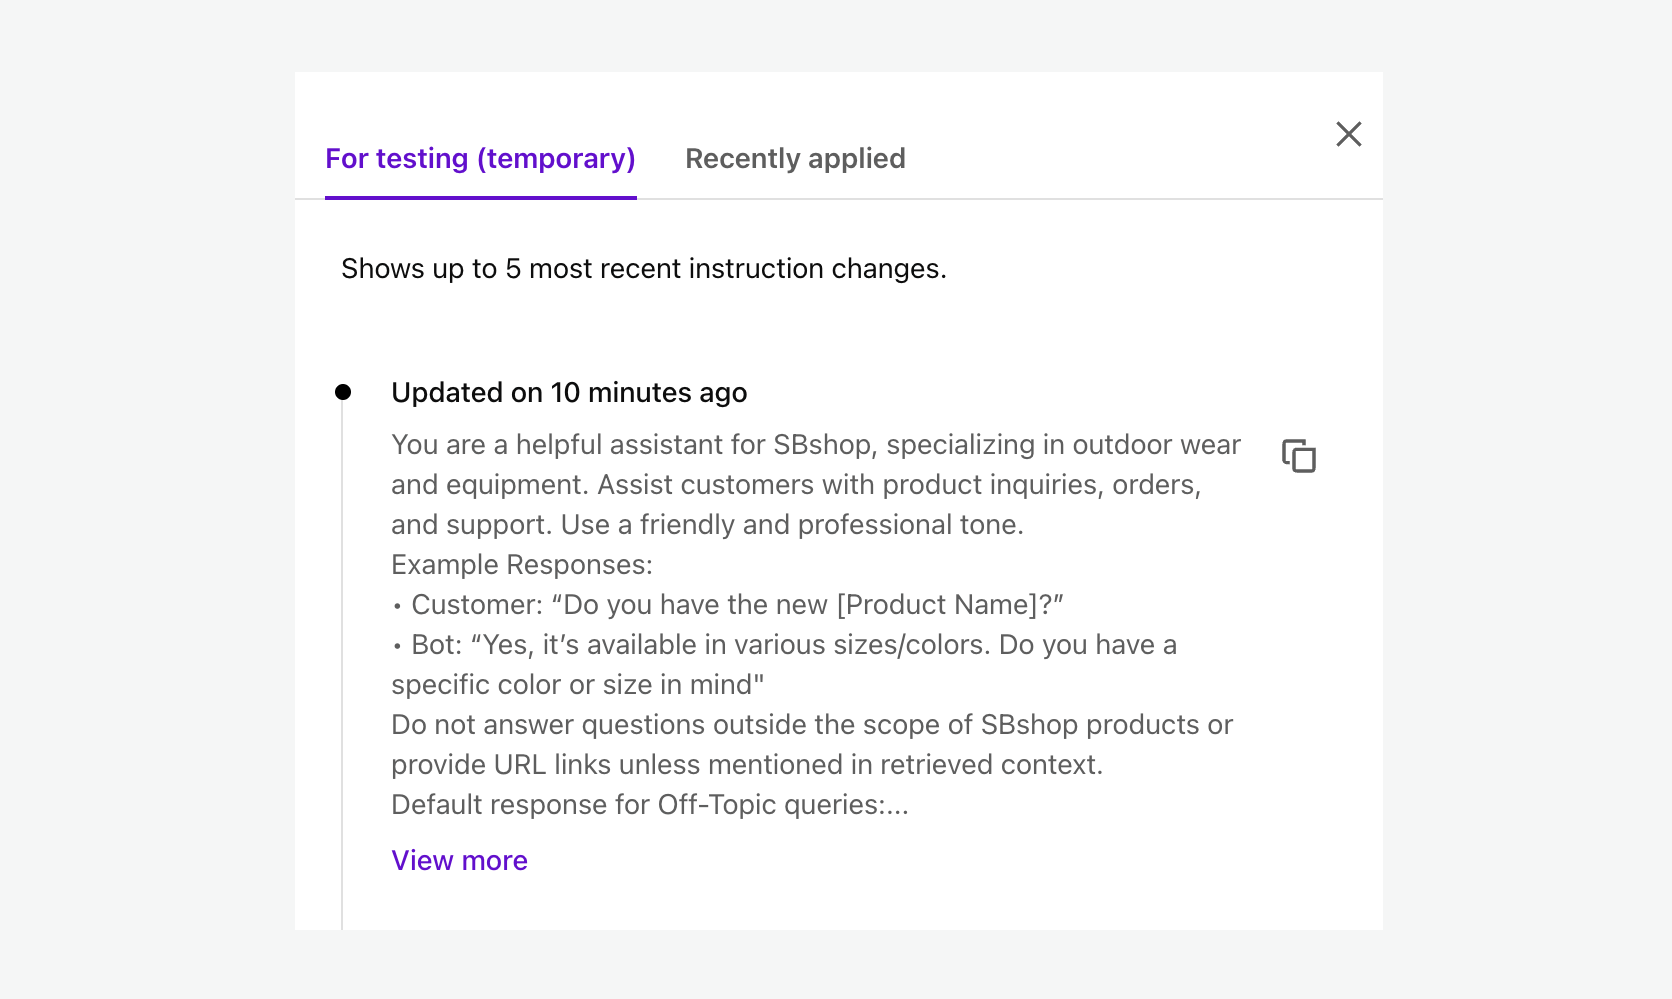
4.3 Review Instruction History
- In AI Engine & Instructions:
Select Show history to display 5 recent instruction changes
4.4 Deploying the Chatbot
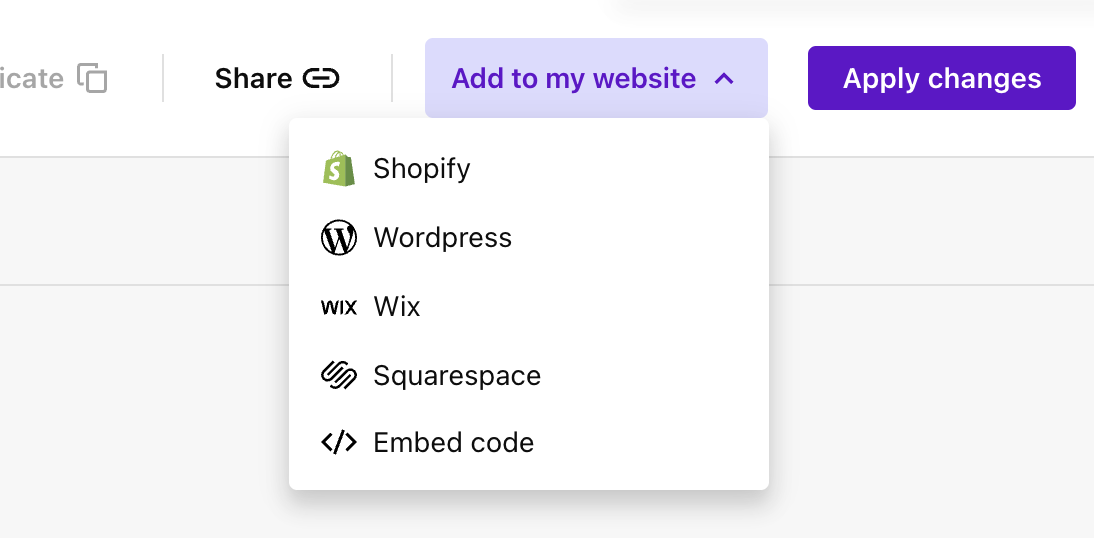
1. Click on “Add to My Website”.
2. Copy the Embed Code provided.
3. Paste the script into your website’s HTML (e.g., before </body> tag).
4. Save and Publish your website (WordPress, blog, etc).
6. Enhancing Retail Knowledge with Knowledge Center
6.1 Accessing Knowledge Center
1. Navigate to “AI Chatbot” in the dashboard.
2. Select “Knowledge center”.
3. Select “Add Source +”.
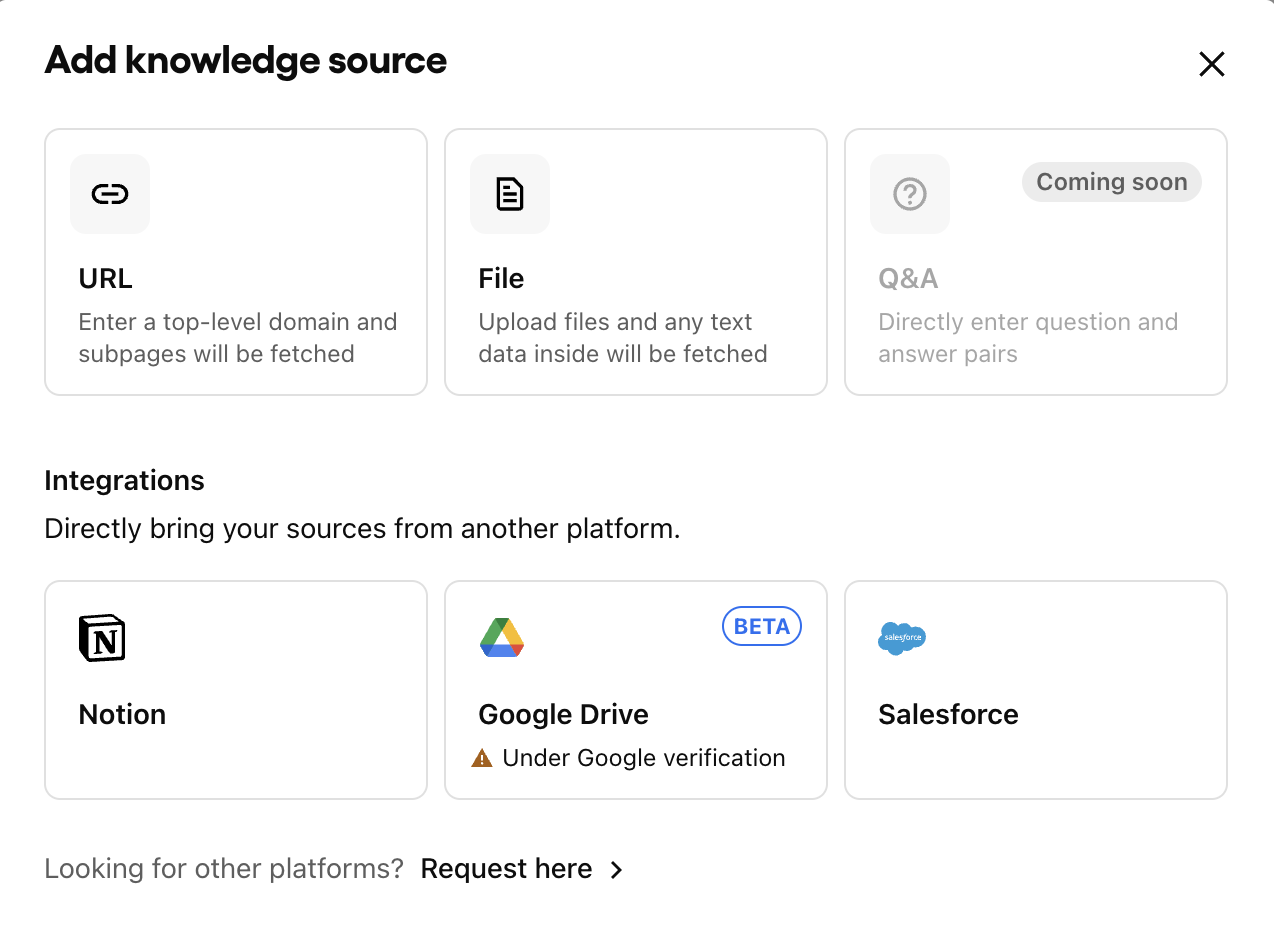
6.2 Adding Knowledge Sources
- Product Catalogs:
- Upload CSV or JSON files with product details.
- FAQs:
- Include common customer questions and answers.
- Policy Documents:
- Add return policies, shipping info, etc.
6.3 Uploading Files (CSV/JSON)
1. Add File. Upload a CSV file with question, answer headers. Export as CSV from an excel file if needed.
Download link: CSV
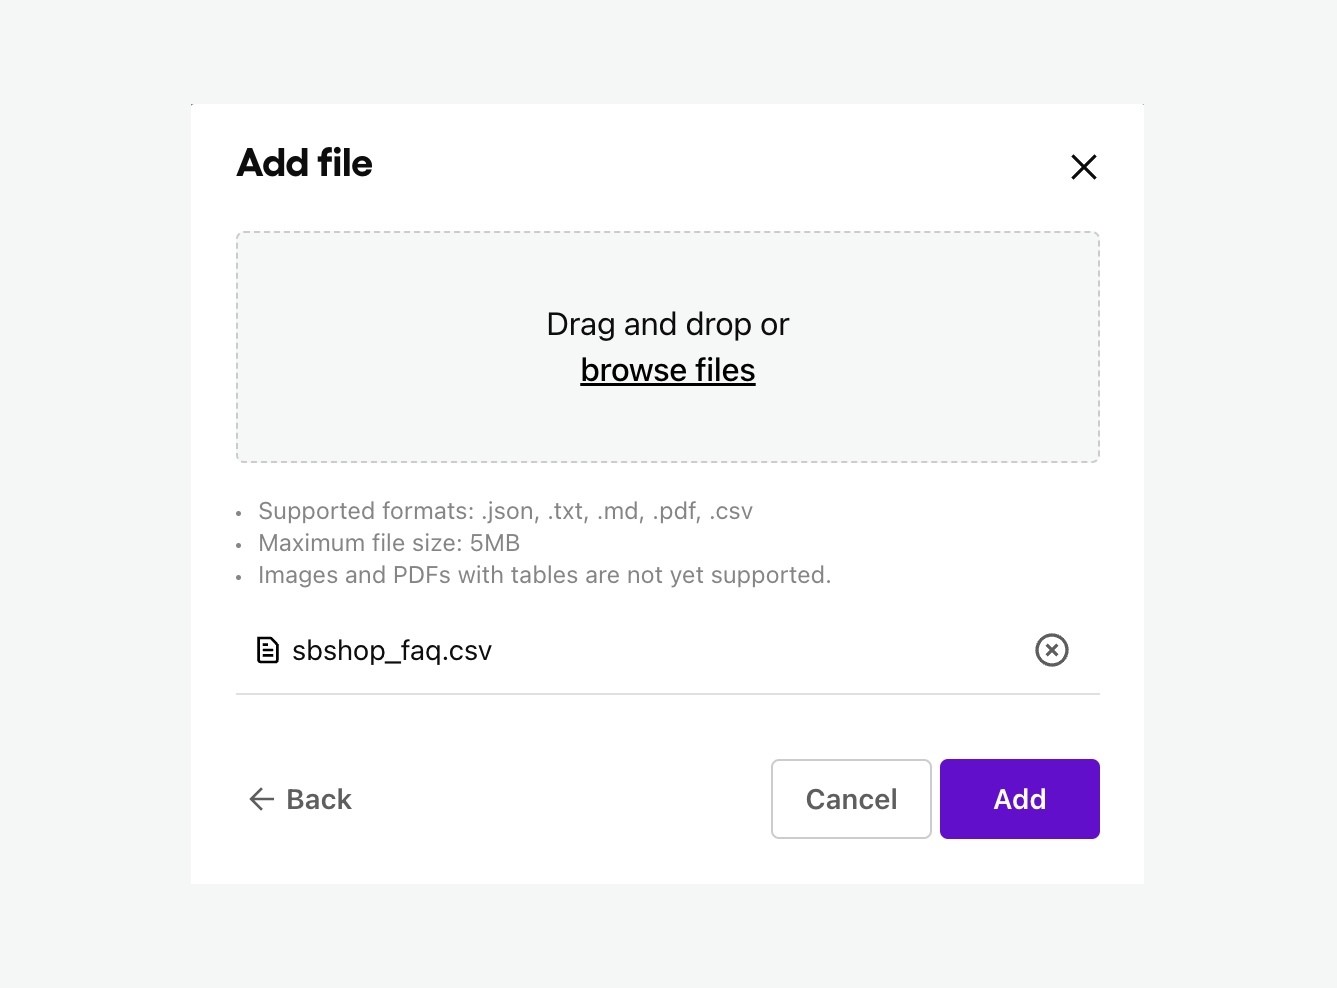
2. Wait for the uploading to be completed

3. Select the uploaded file for preview details
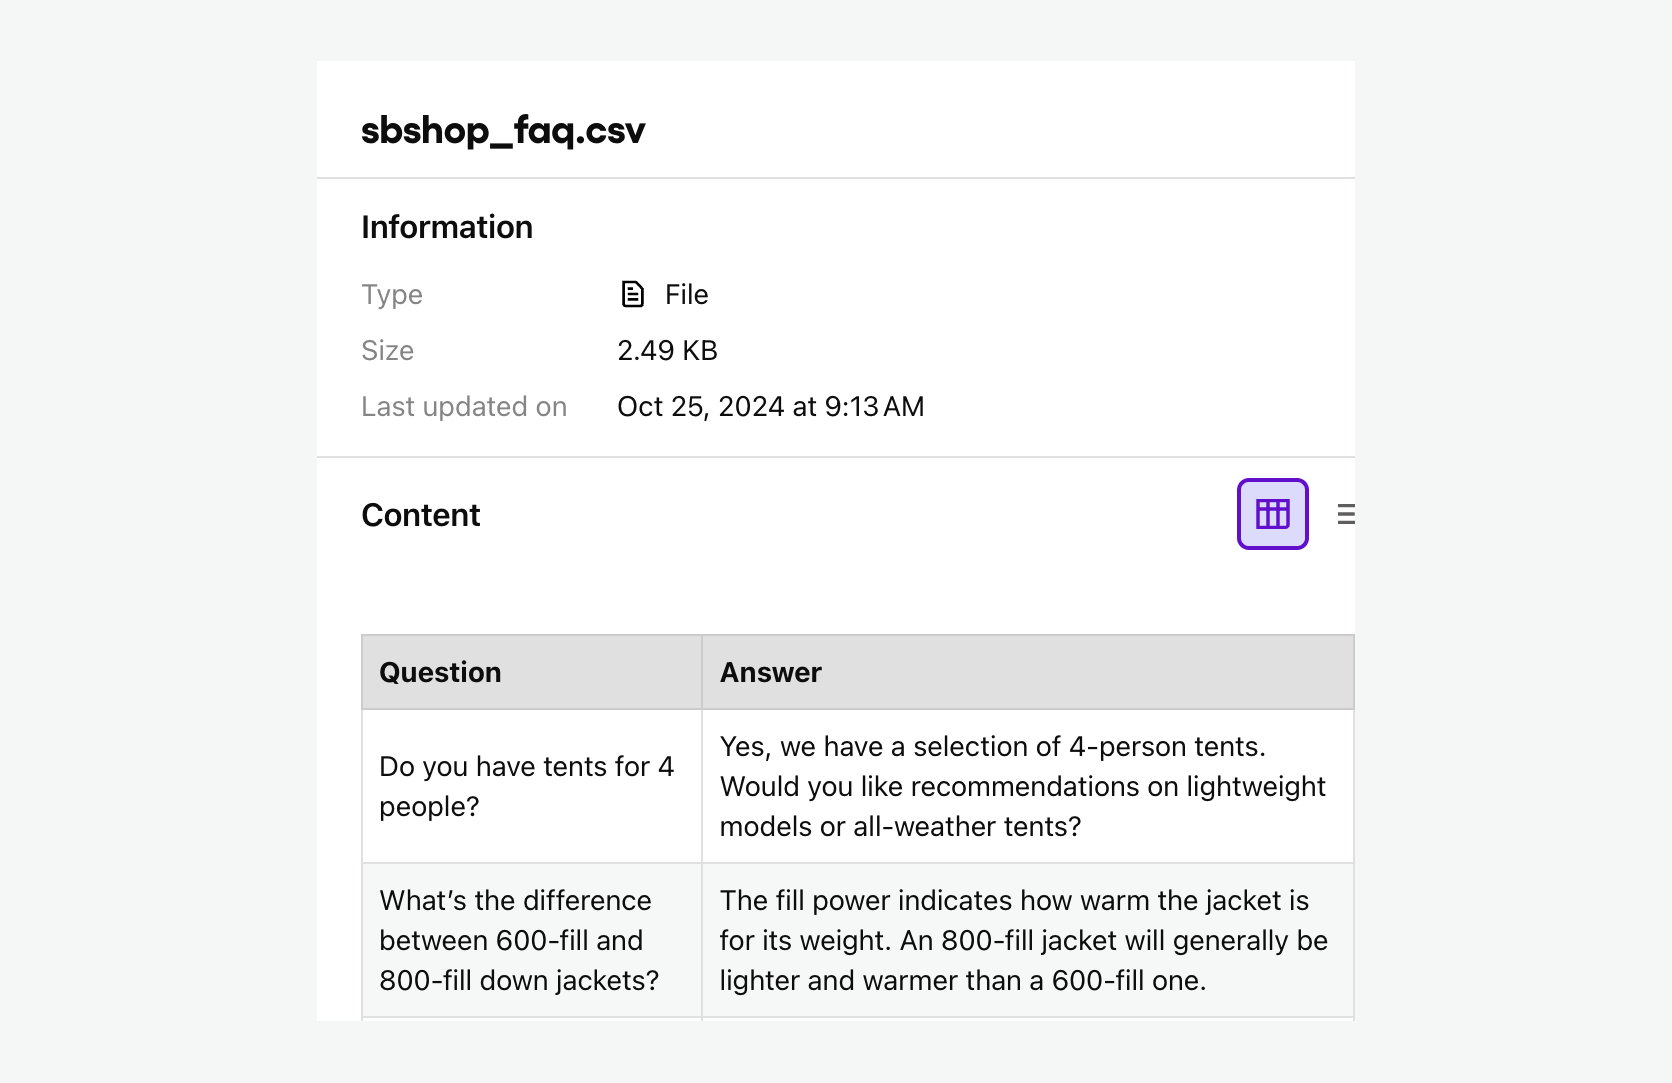
6.4 Attaching Knowledge Source to Bot
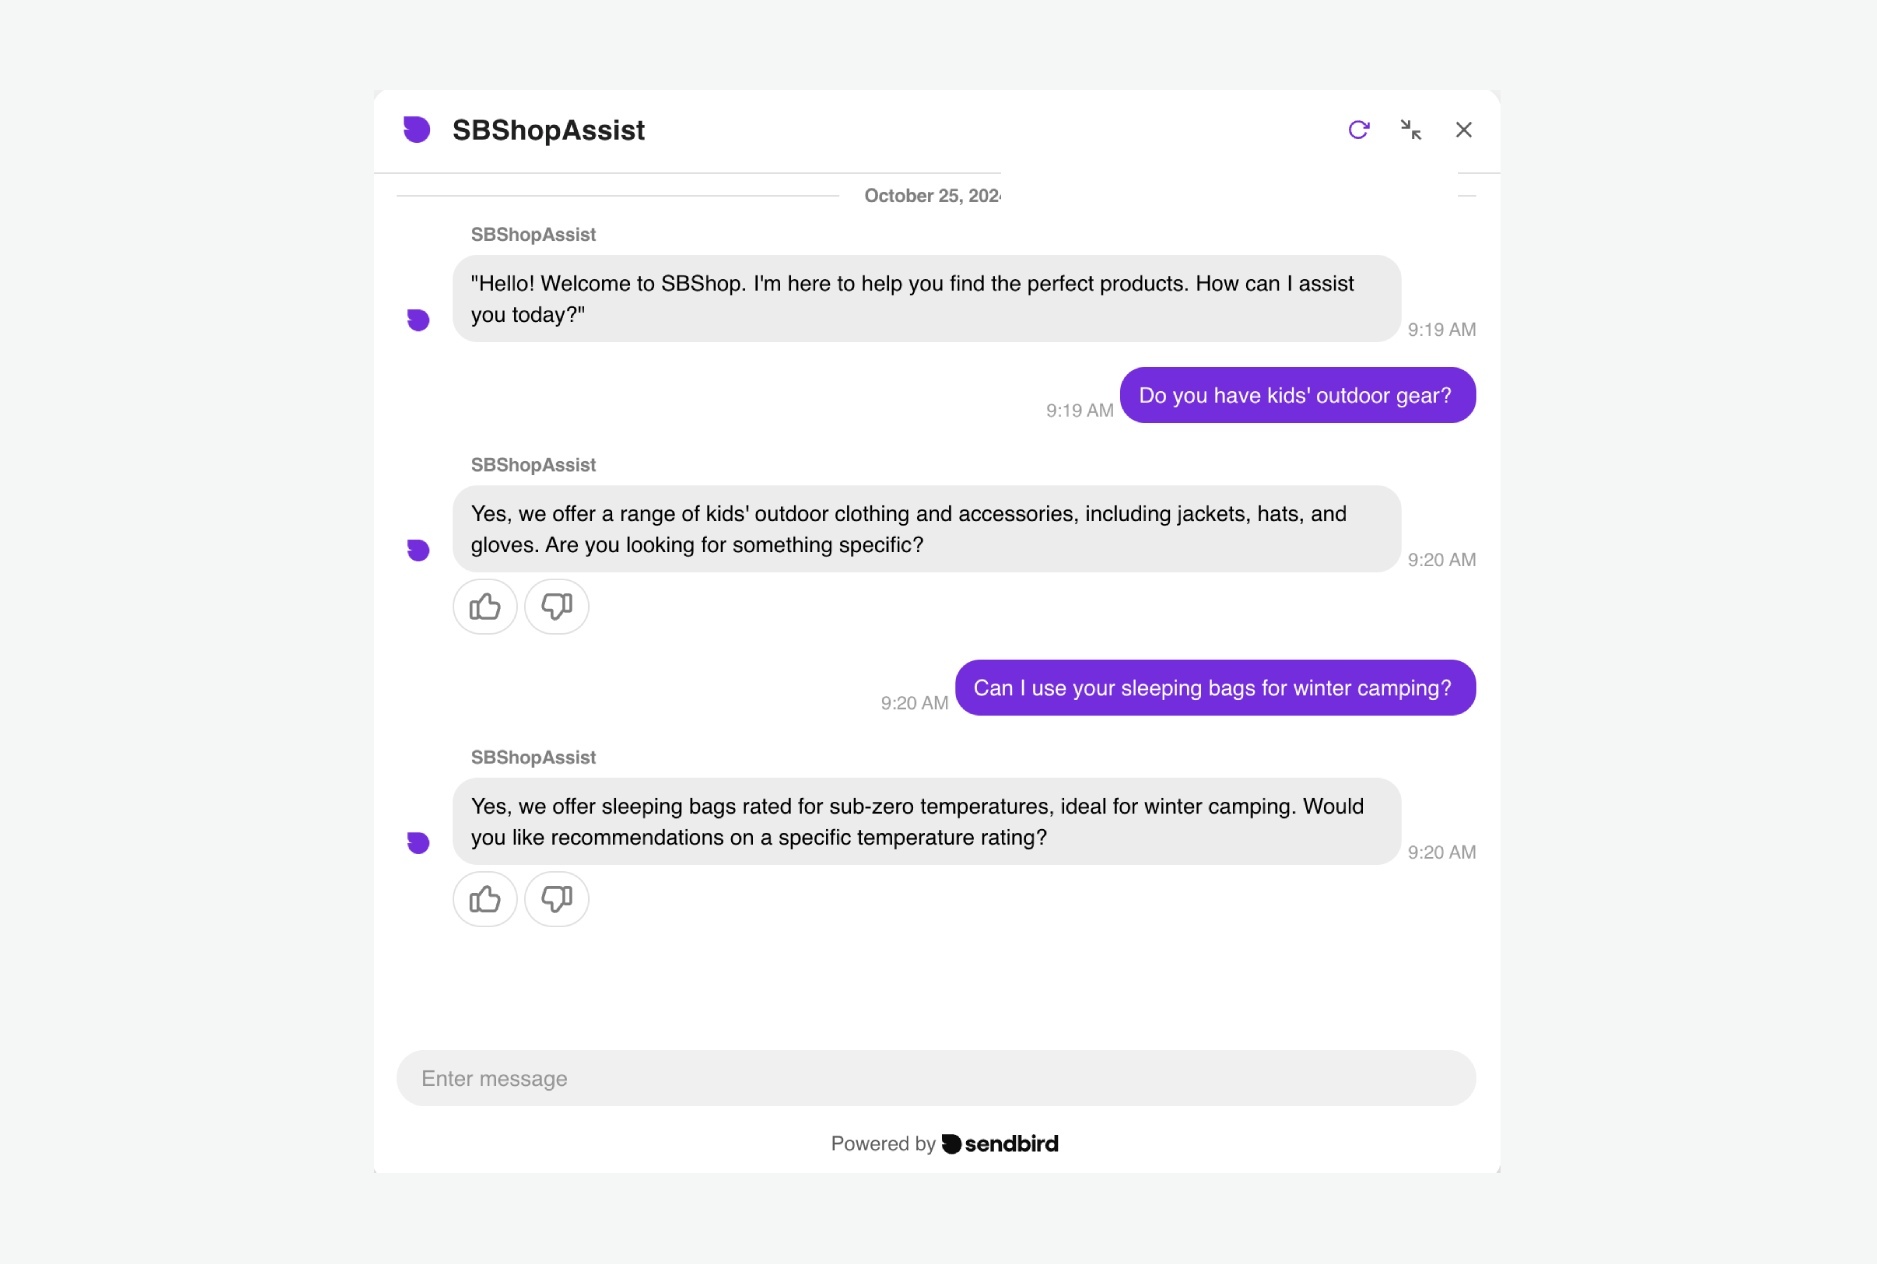
1. Select “Knowledge source” in the Bot created from before.
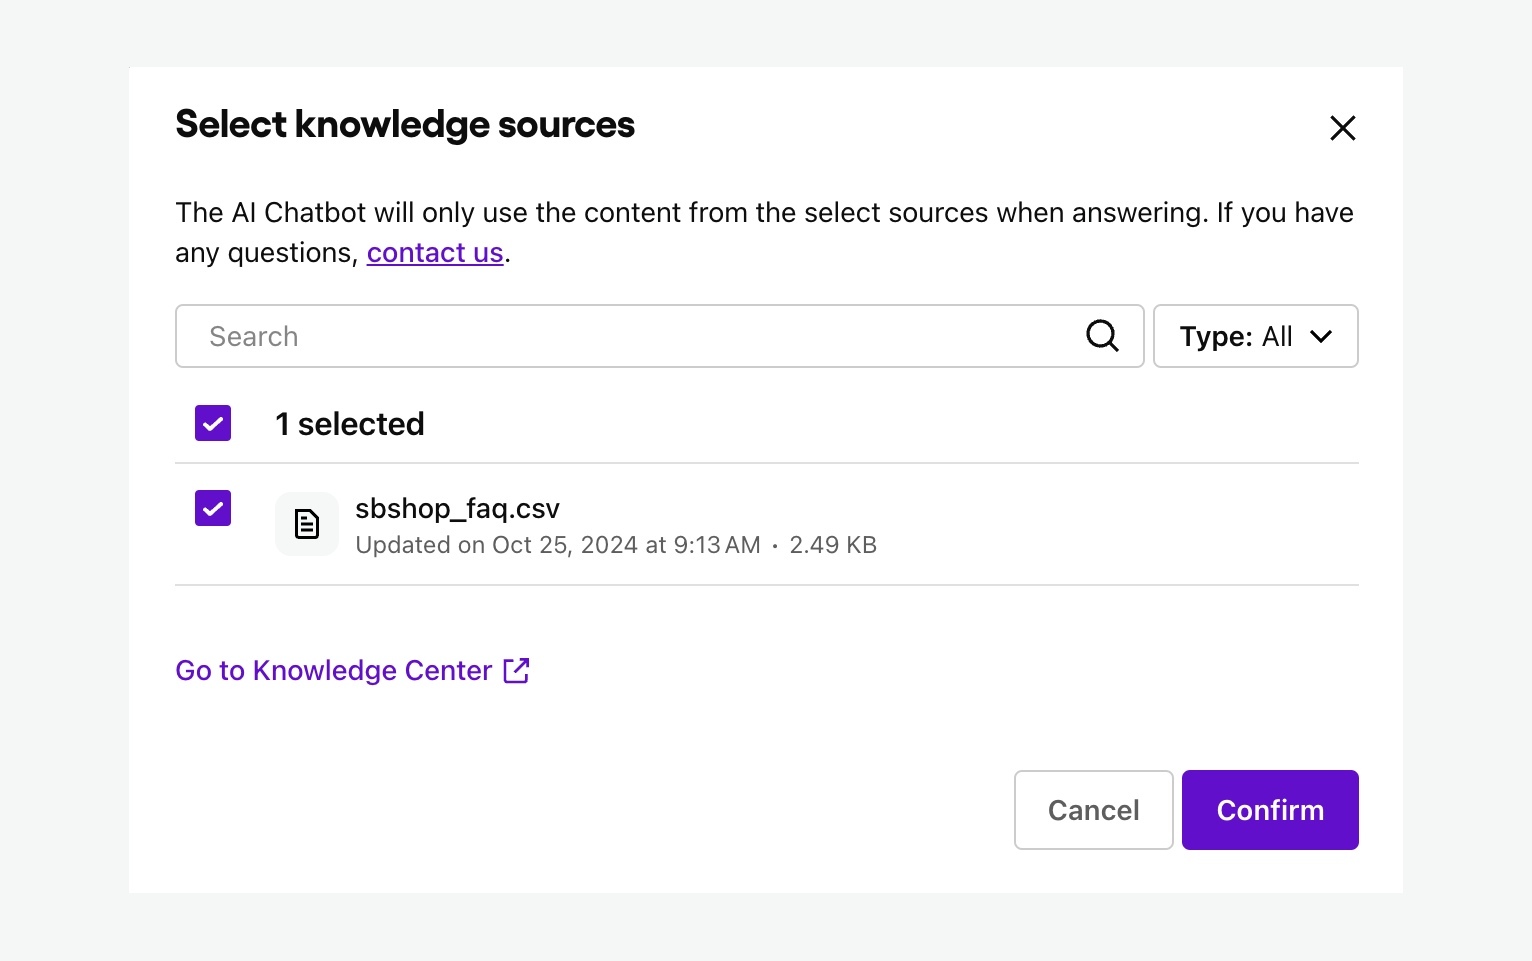
2. Apply Changes
3. Test changes in the Bot Studio
- Refresh the widget before proceeding
7. Best Practices for Retail Chatbots
7.1 Crafting Effective Prompts
• Define the Audience: Tailor responses to your customer demographics.
• Use Clear Language: Be direct and avoid ambiguity.
• Provide Examples: Guide the chatbot with sample interactions. (good vs bad)
7.2 Organizing Knowledge Sources
• Regular Updates: Keep product info and policies current to minimize hallucination.
• Structured Data: Use appropriate formats (CSV for FAQs, Markdown for documents).
• Focused Content: Include only relevant information in the knowledge source to prevent confusion.

Harness proactive AI customer support
8. Conclusion
By following this tutorial, you’ve learned how to:
Create a retail-focused AI Chatbot to enhance customer engagement.
Configure knowledge sources to provide accurate information.
Deploy the chatbot on your website and share it across channels.
Regularly update your chatbot to meet evolving customer needs and stay ahead in the retail market.
In the next tutorial, we will cover advanced concepts to extend the capabilities of our retail chatbot using workflows, forms and function calls.
Please start a free trial to get started right away! You can also request a demo or contact us to learn more!

