How to customize your iOS app chat UI using Xcode debug
Customizing a chat UI with Xcode debug
Customizing UI components can present a unique challenge when integrating third-party UI frameworks into your iOS projects. How do you identify which chat UI components are being used, and how can you customize them to fit the needs of your application?
In this post, we will learn how to leverage Xcode's Debug View Hierarchy and open-source code when customizing Sendbird UIKit SDK in your iOS app.
Customizing Sendbird UIKit for iOS: A step-by-step guide
1. Prepare your environment
- Your app: Ensure your iOS app integrates Sendbird UIKit and can display a Group Channel view. (To learn how to integrate Sendbird UIKit into your app, see the Send Your First Message tutorial.)
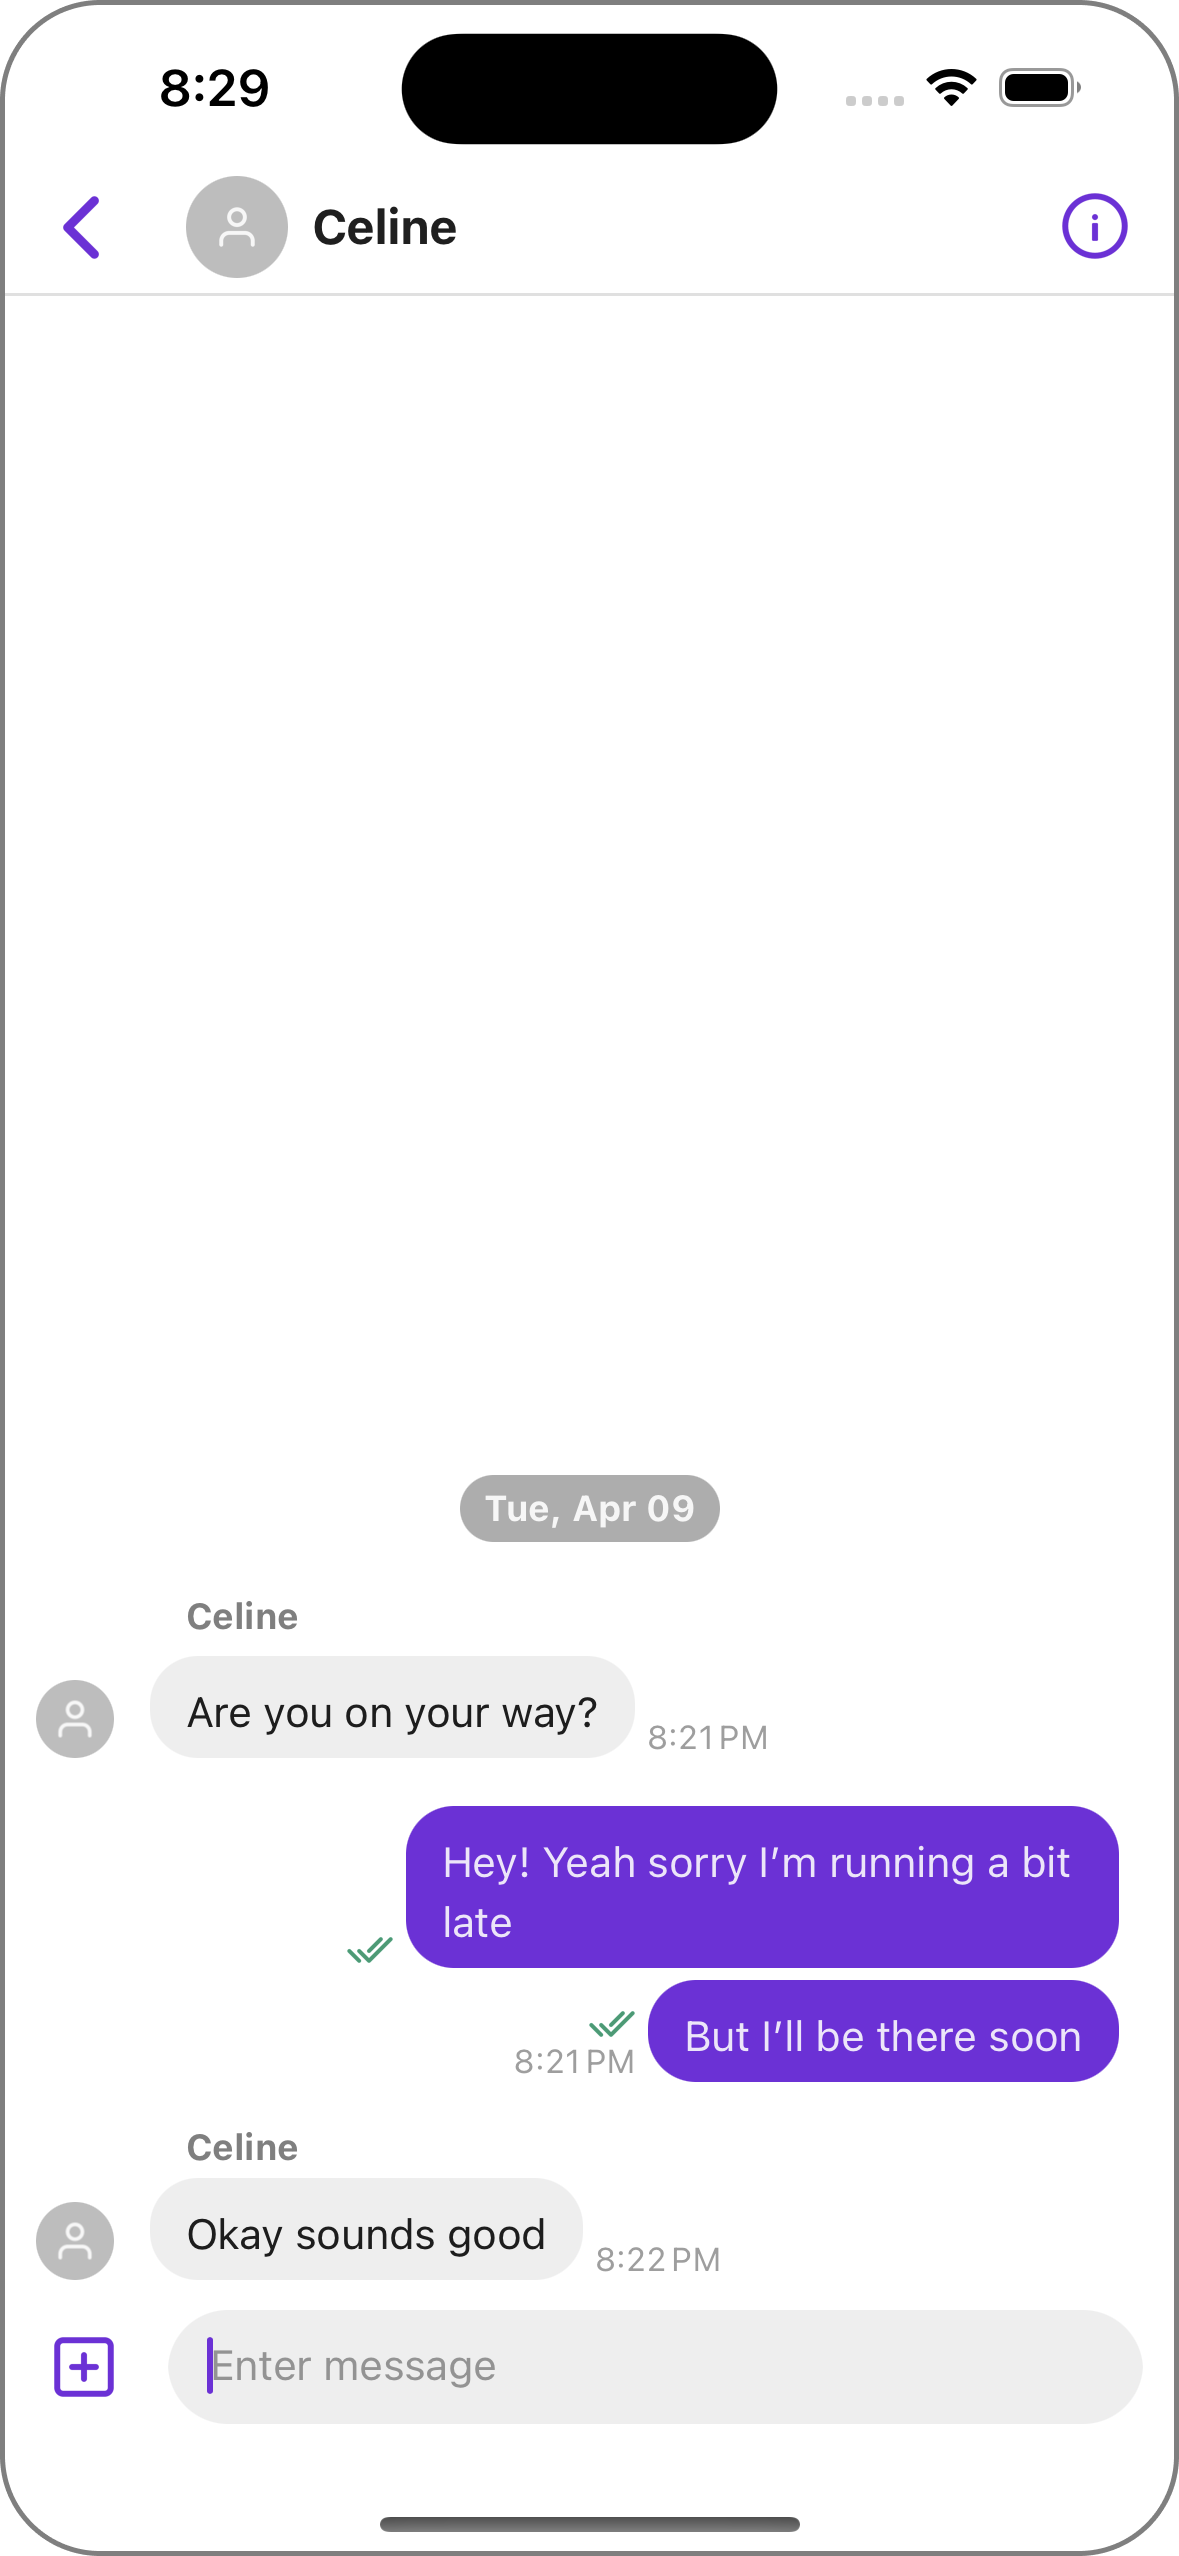
The default GroupChannelViewController
- Open-source code: Clone the Sendbird UIKit repository to access its source code.
- Customization goal: At the end of this post, you will have a customized Group Channel view with a mint border around the channel title text.

2. Open the Xcode debug view hierarchy and navigate
- Run your app (cmd + R). On your simulator or device, navigate to the screen you wish to inspect, the Group Channel view.
- On Xcode, click the Debug View Hierarchy button in the debug area’s top bar.
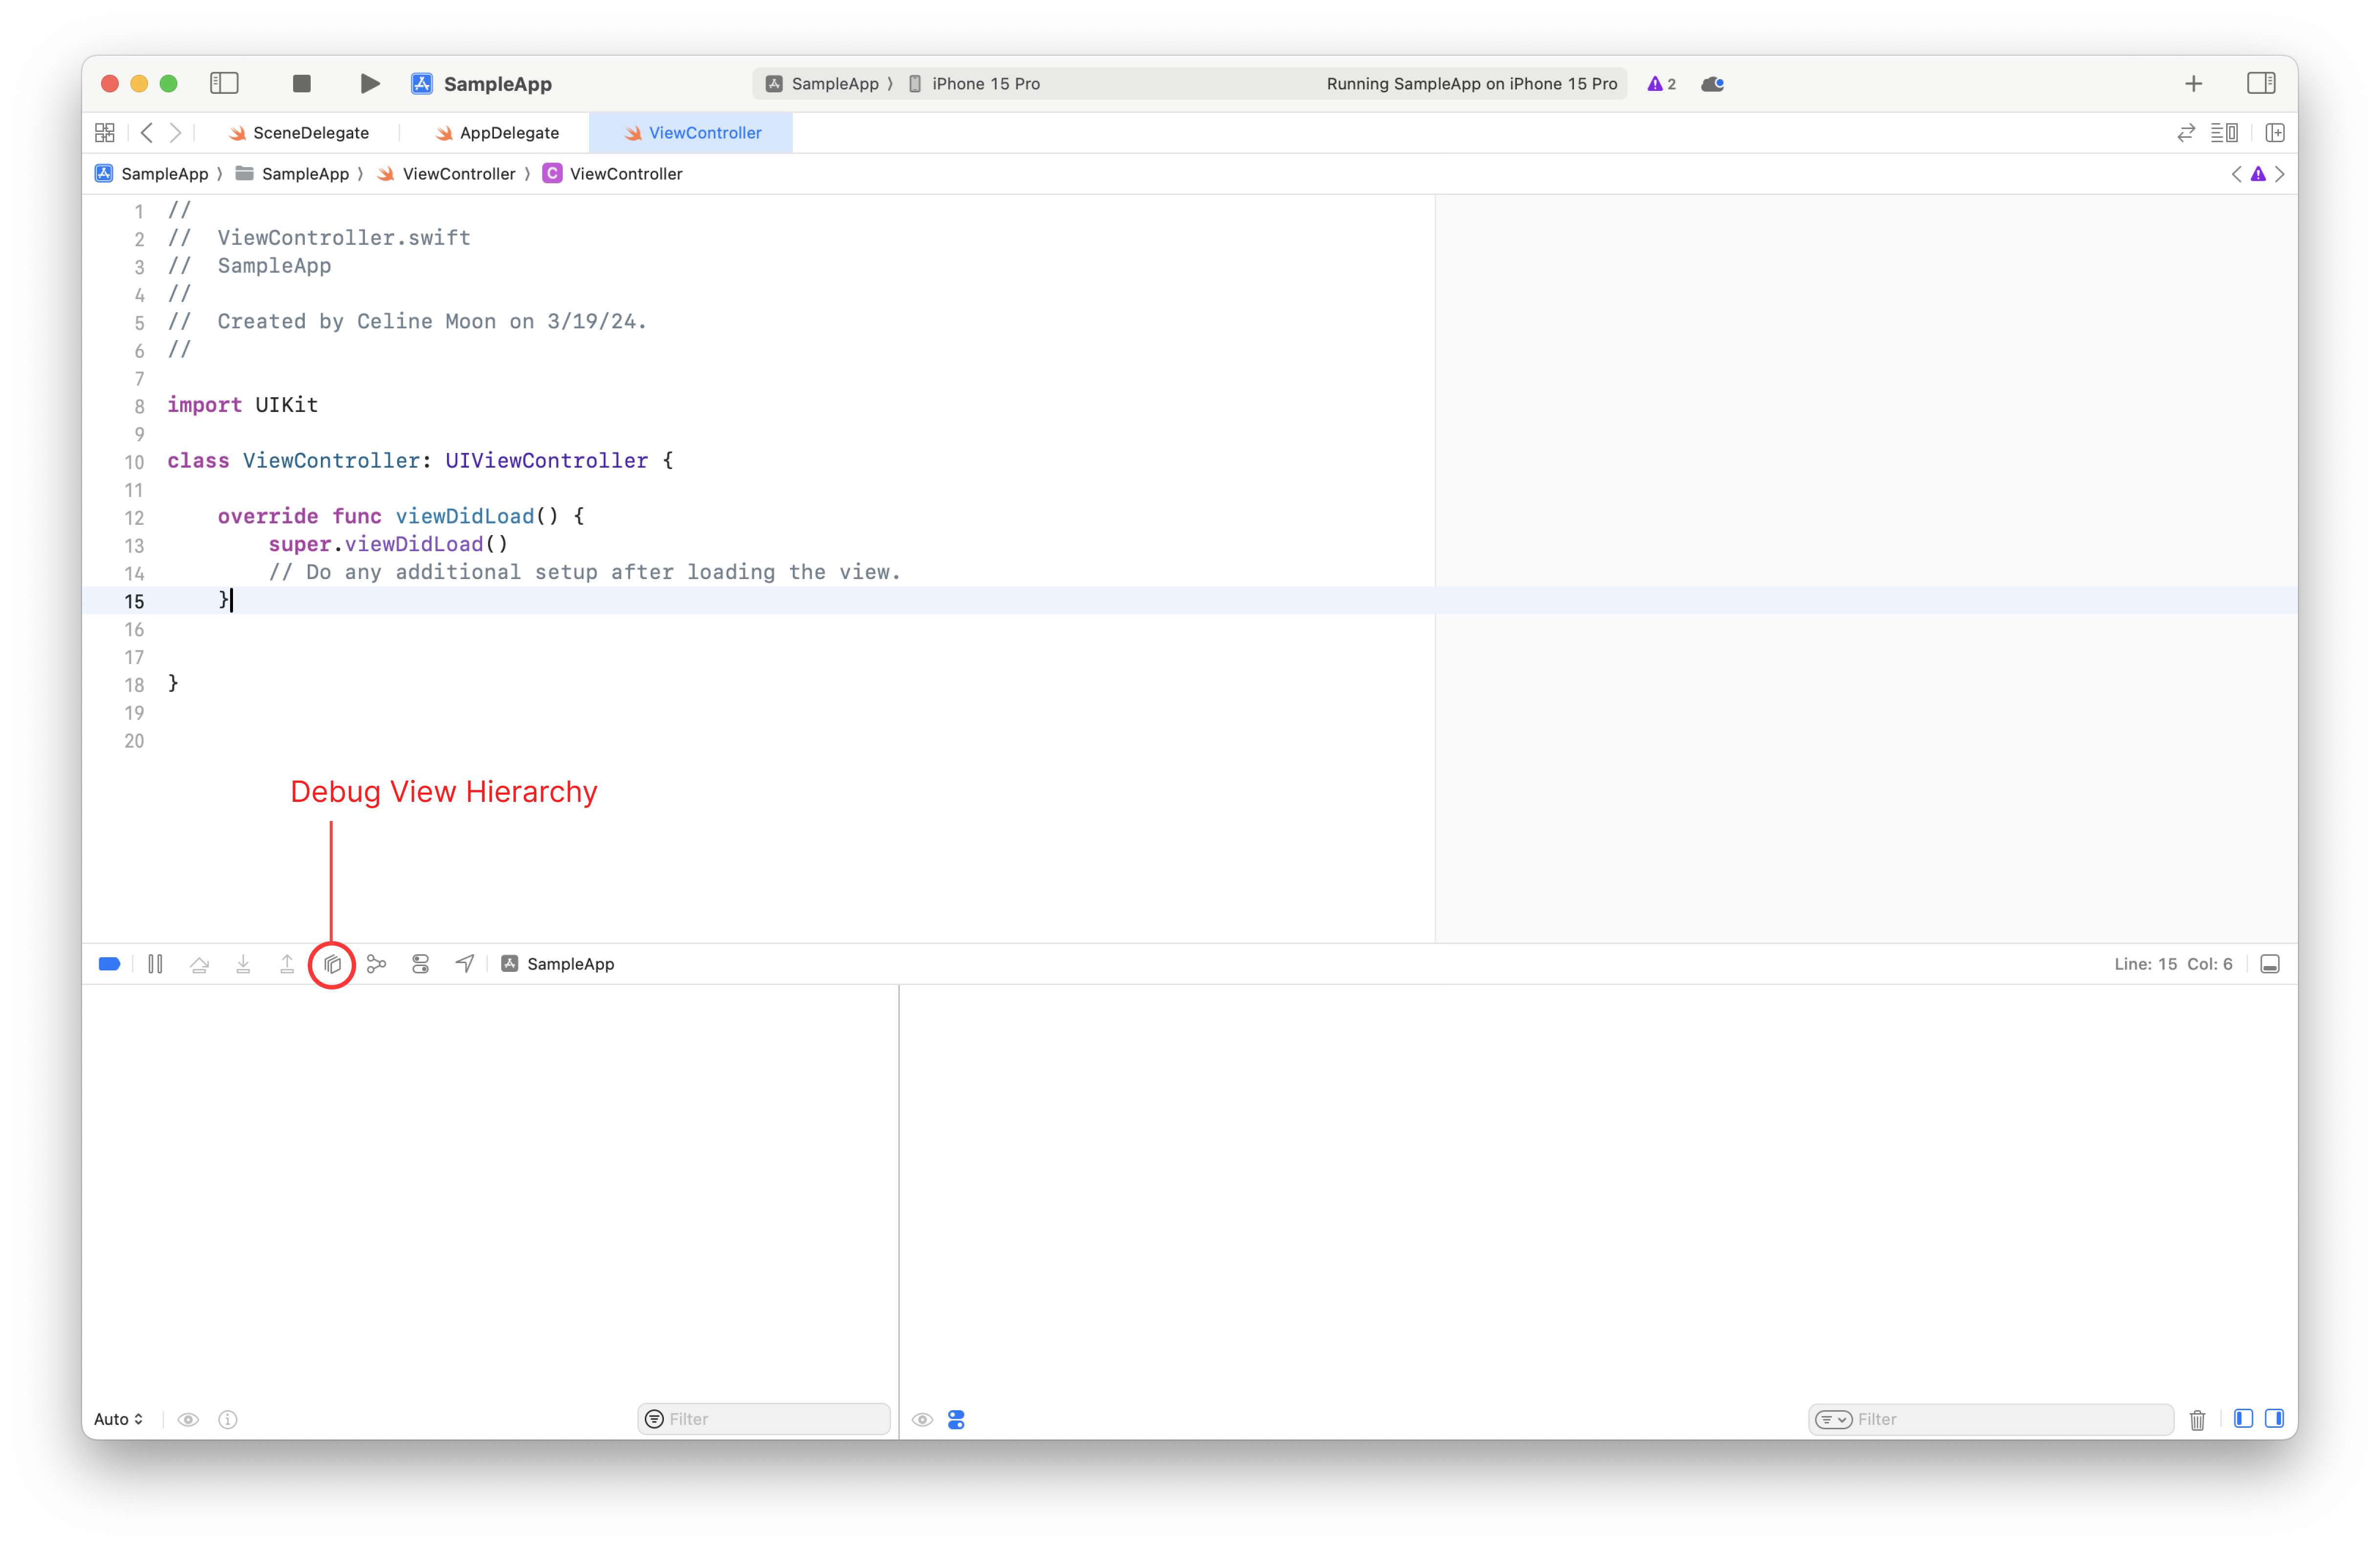
How to use Debug View Hierarchy - To precisely identify the class of the channel title view,
- Right-click on your target component,
- Then click on “Reveal in Debug Navigator.”
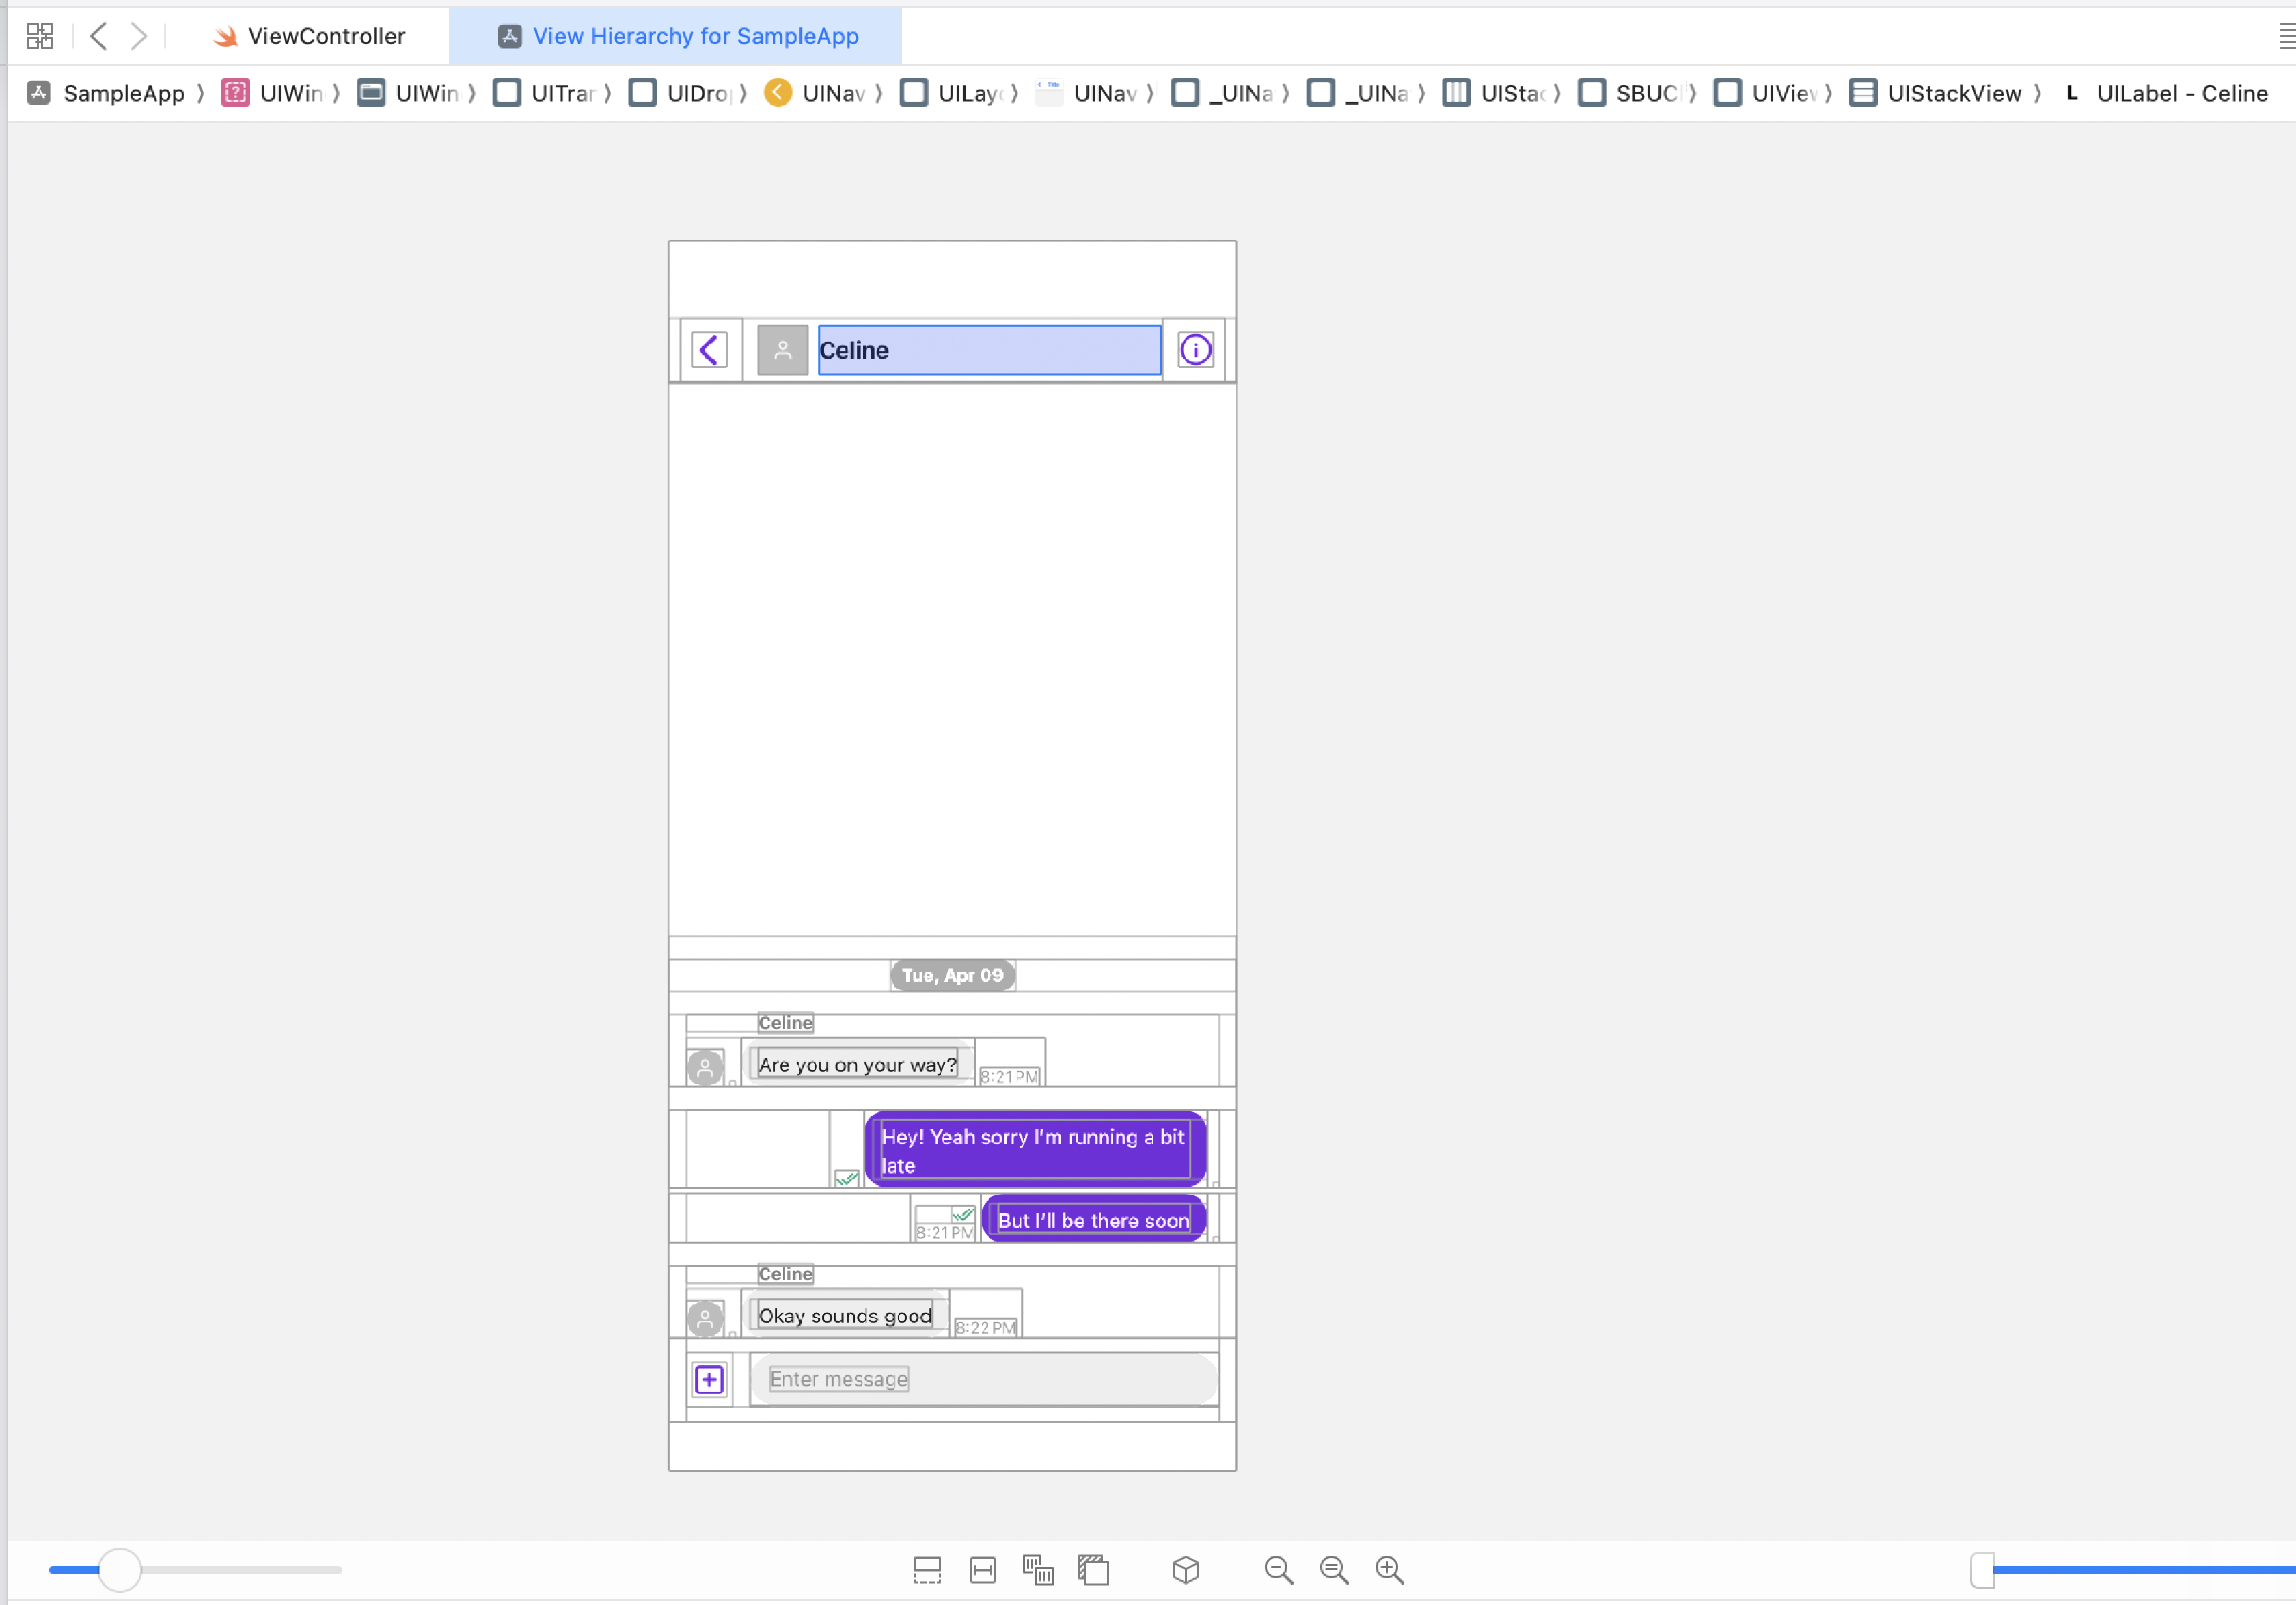
- This reveals the view’s class name on View Hierarchy (the left plane of Xcode).
- The channel title view is a
UILabelinsideSBUChannelTitleView SBUChannelTitleViewis inside theUINavigationBarofSBUGroupChannelViewController
- The channel title view is a
3. Identify UI chat components
- As you explore the View Hierarchy, you'll start to notice SendBird UIKit's components, distinguishable by their class names prefixed with
SBU.SBUChannelTitleViewis one of them. - Finding Sendbird UIKit components related to your target UI view gives you a starting point for exploring the Sendbird UIKit source code or documentation to find customization hooks or subclassing options.
4. Access source code & find customization points
- Open the cloned Sendbird UIKit source code. Search in the Xcode project (cmd + shift + O) to find the
SBUChannelTitleViewclass. - In
SBUChannelTitleViewclass, you will find theUILabelproperty astitleLabel. This is the view you will need to modify.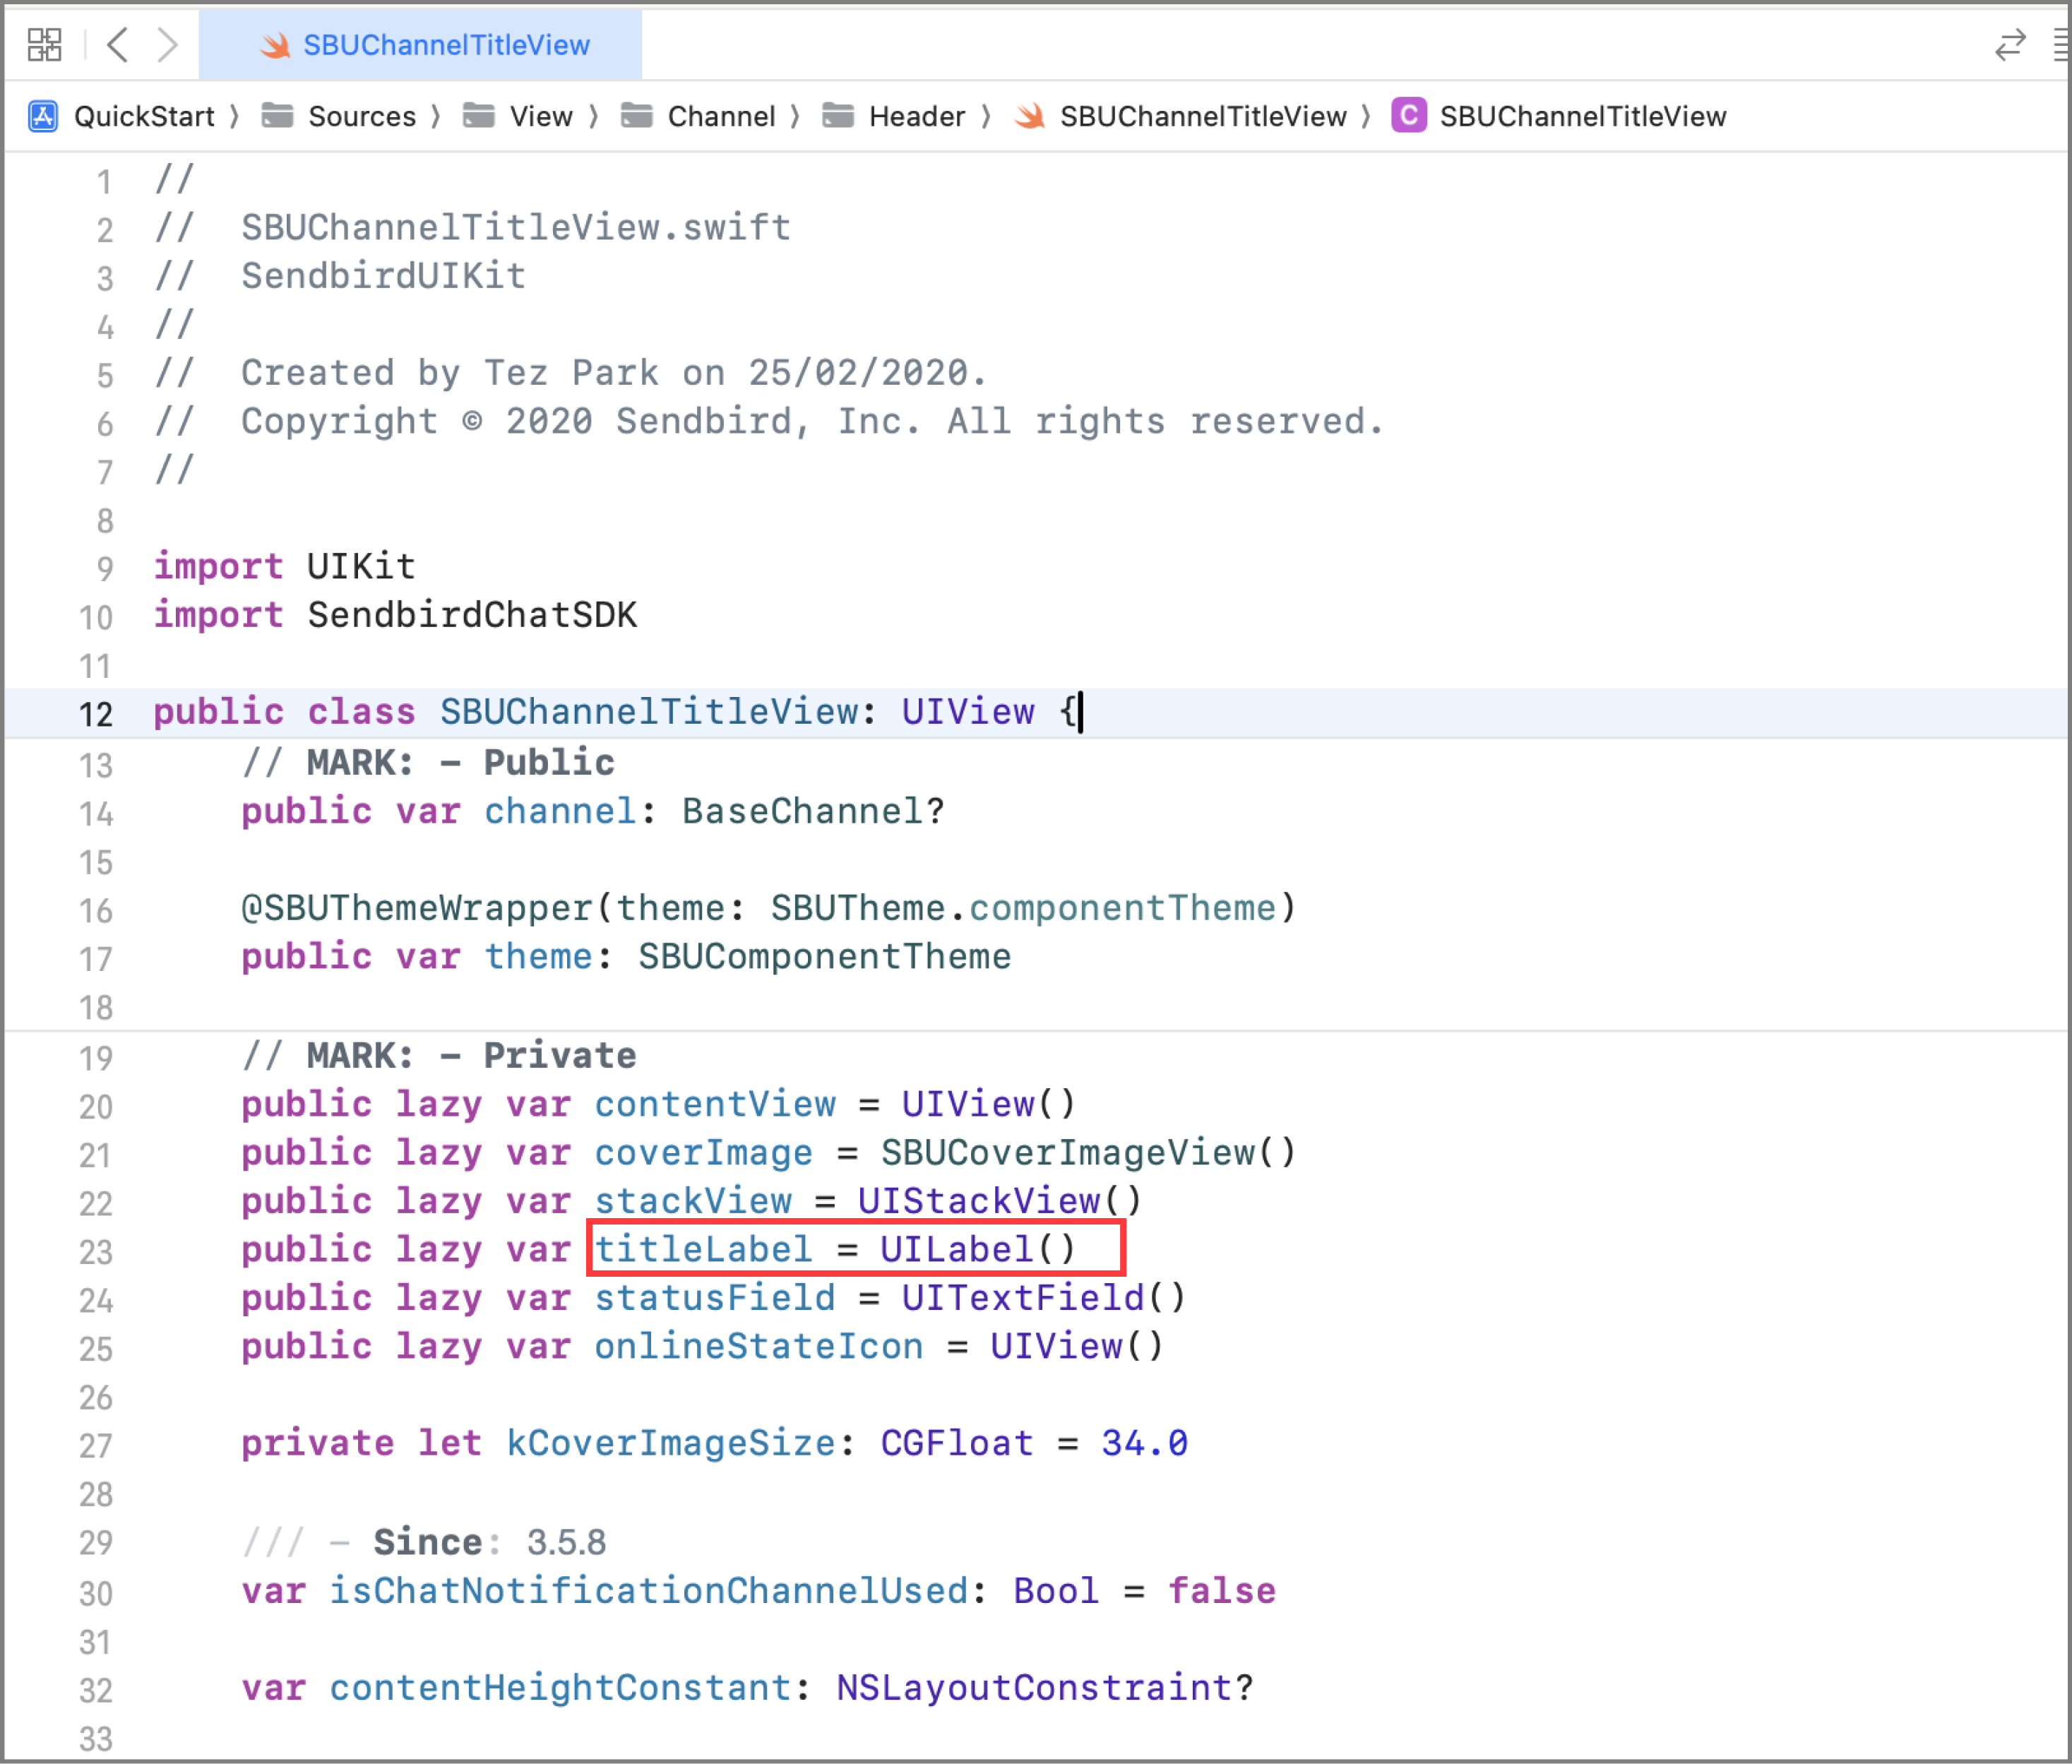
- Where is the
SBUChannelTitleViewused? SearchSBUChannelTitleViewin the project (cmd + shft + F). You will find it being used asvar defaultTitleView, which is one of the view properties ofSBUBaseChannelModule.Header. OpenSBUBaseChannelModule.Header.swiftfile.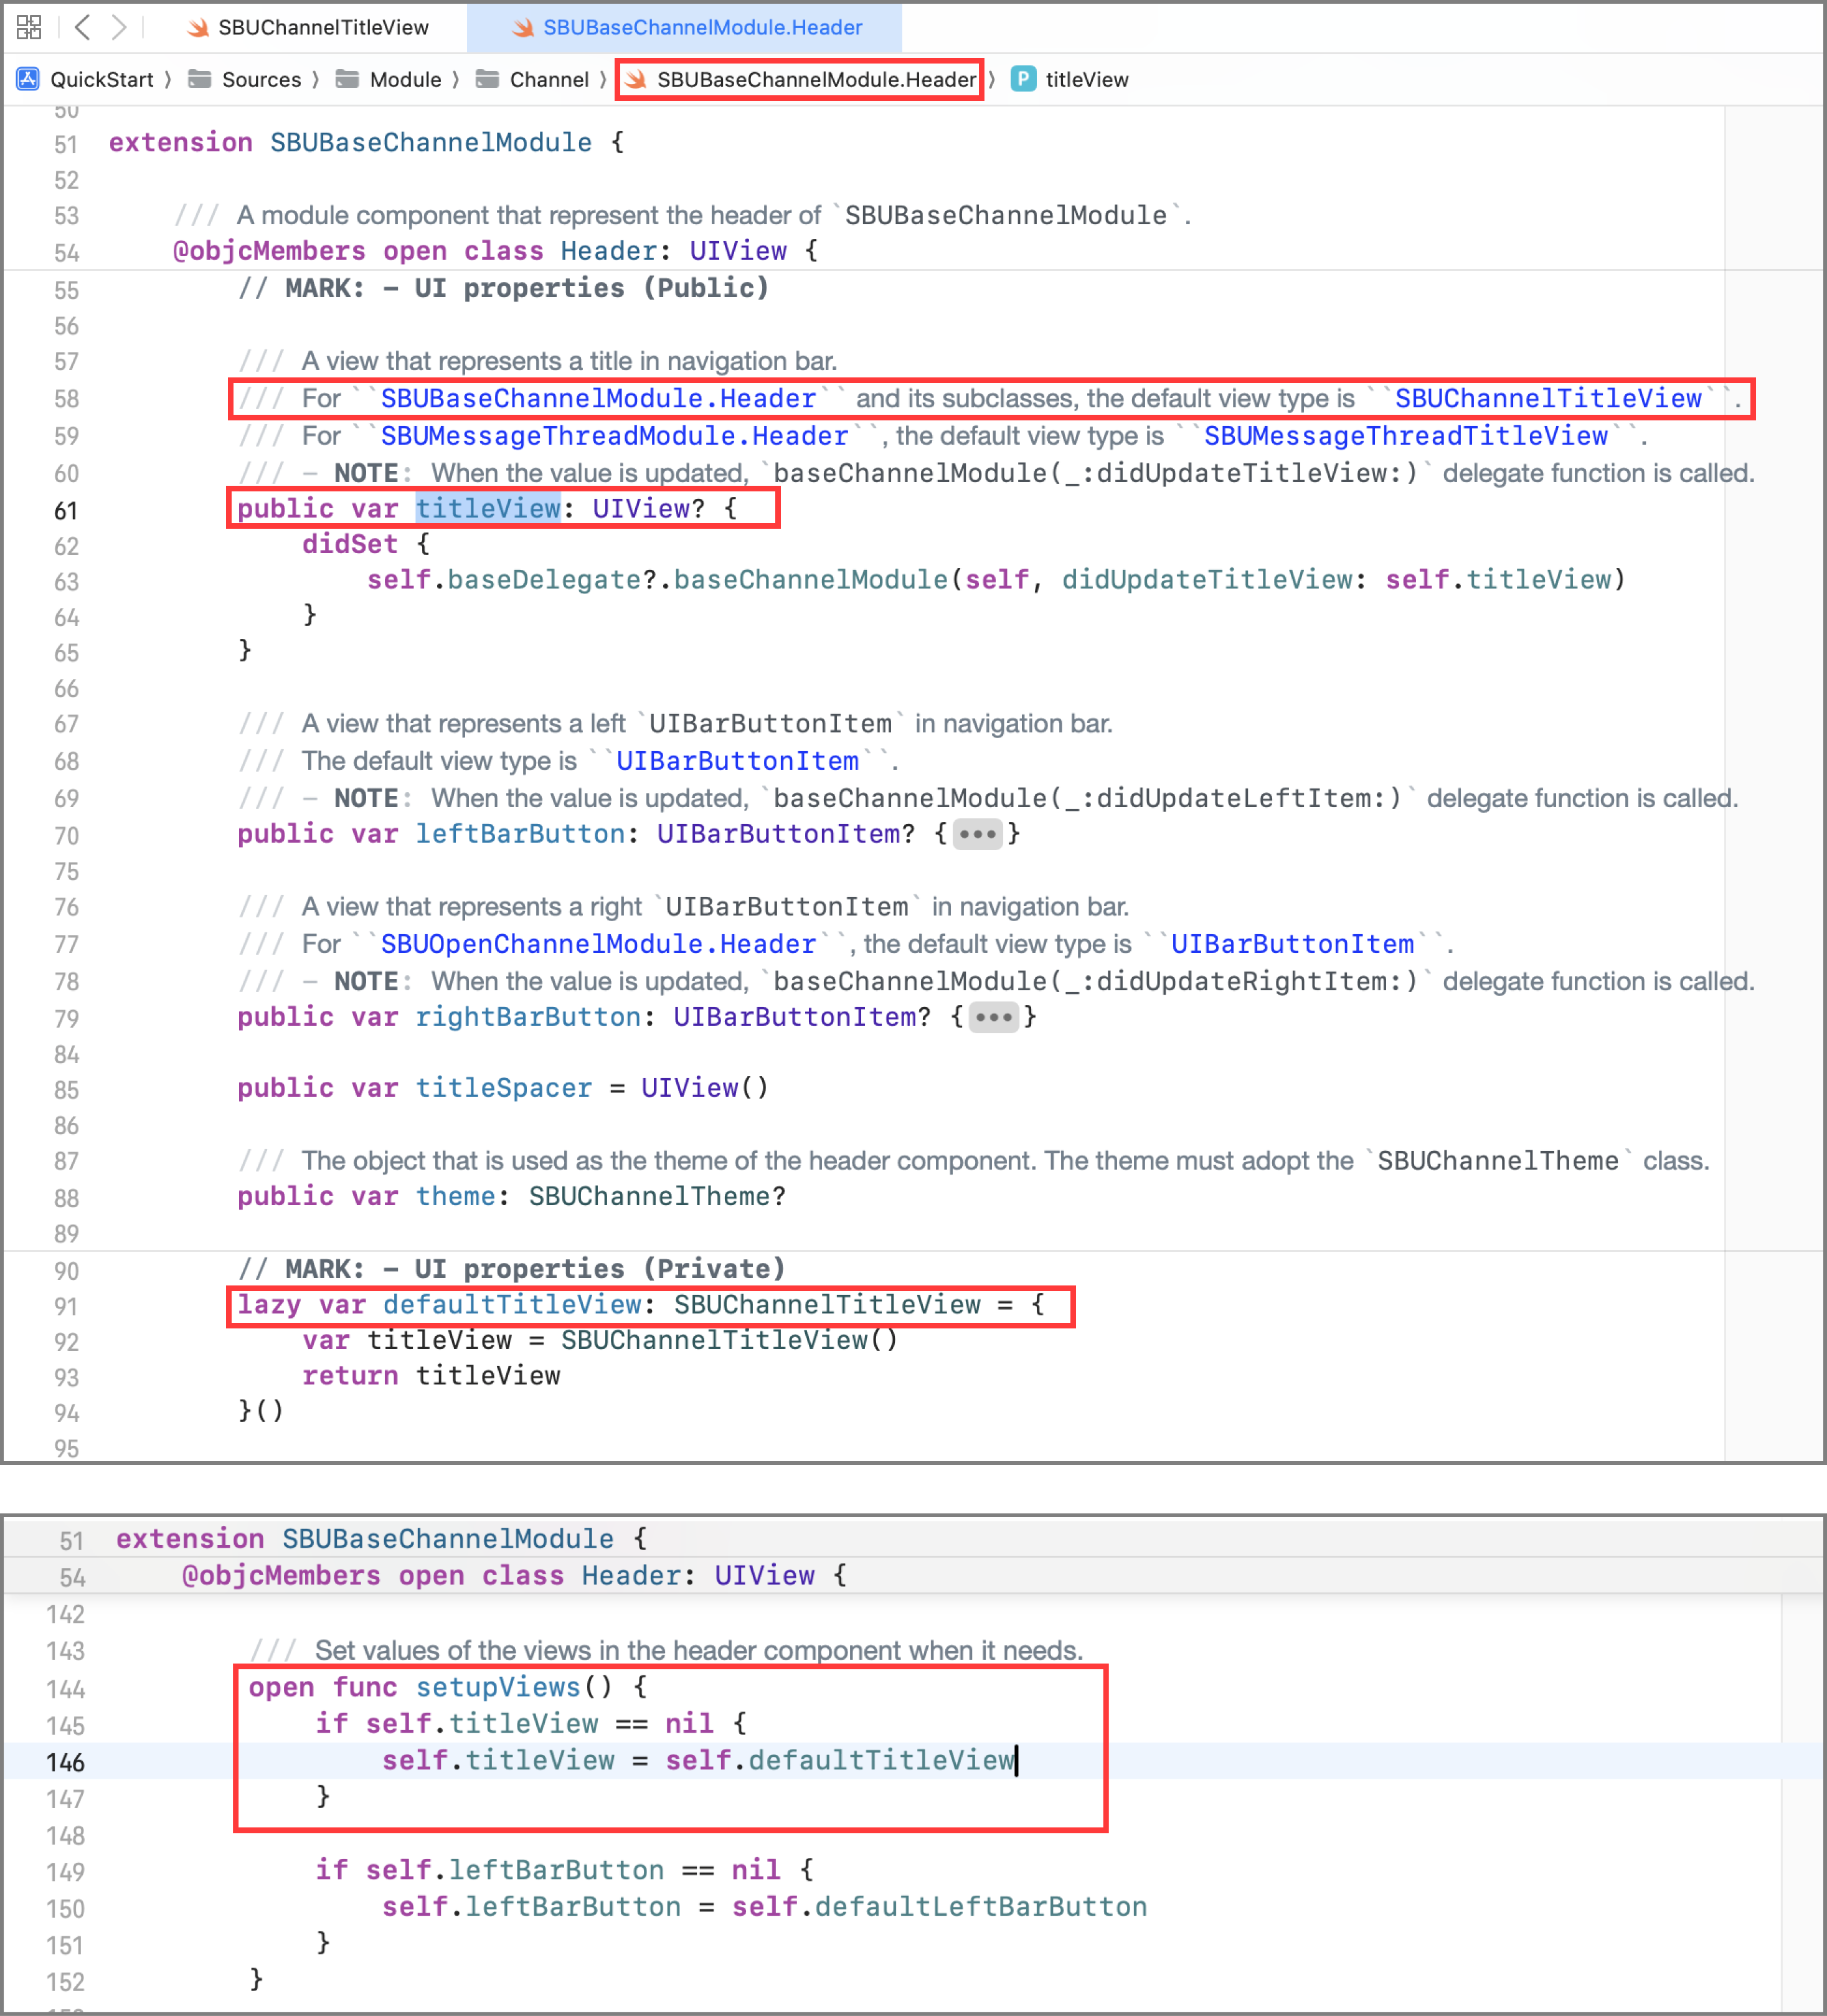
- In
SBUBaseChannelModule.Header, you can finddefaultTitleViewbeing assigned totitleViewinsetupViews(). This means that thetitleViewof aSBUBaseChannelModule.Headerinstance is typeSBUChannelTitleViewby default. (This can also be confirmed in thetitleView’s documentation, which reads “forSBUBaseChannelModule.Headerand its subclasses, the default view type isSBUChannelTitleView") - Since
titleViewofSBUChannelTitleViewis public, which means you can accesstitleViewfromSBUBaseChannelModule.Header.
5. Customizing identified components
Now that you have identified which part of the Sendbird UIKit you want to modify, create a custom class to customize the UI component to your needs.
- Create your custom channel module header component by subclassing
SBUBaseChannelModule.Headerto access thetitleViewinside it. - Based on the module component's lifecycle, override the
setupStyles(theme:)method. - Set your custom component into Sendbird UIKit module anywhere before presenting the Group Channel View. (Note: to learn more about customizing modules, see this guide.)
6. Result
And that’s it! Now you have a customized channel title view.
You can use the above method to easily customize other parts of Sendbird UIKit.
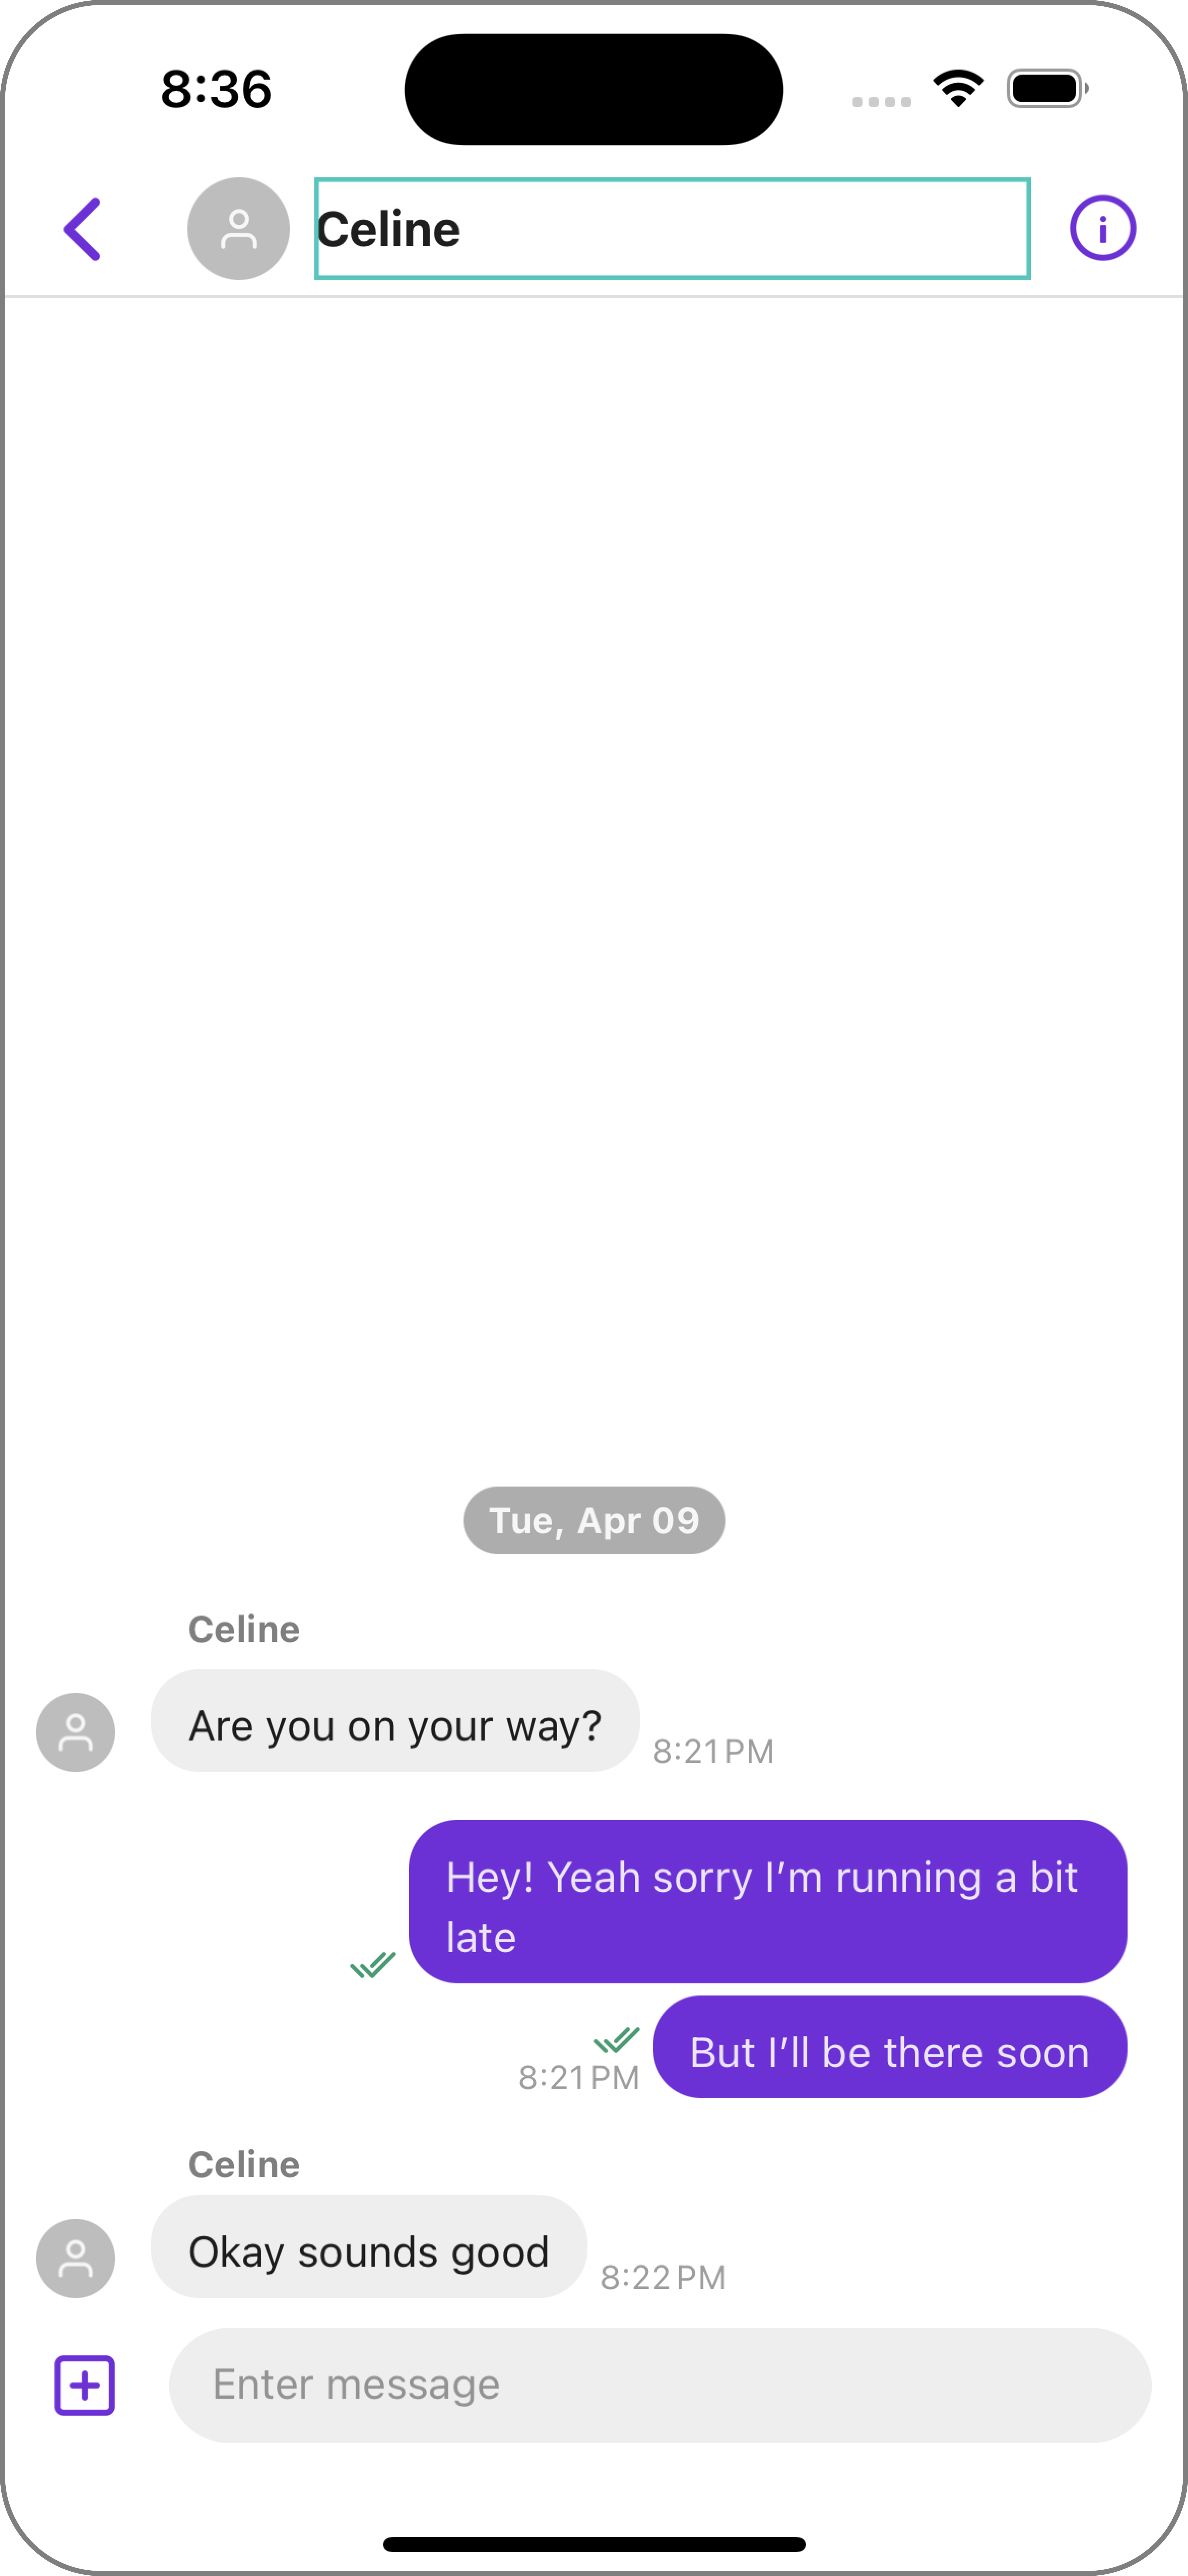
GroupChannelViewController with a customized channel title viewStart building and customizing your iOS chat UI today
Building a chat app into your offerings or operations might be a huge game-changer for your business, but the undertaking doesn’t need to be intimidating. By leveraging the Sendbird chat API, SDKs, and UIKits, you can jumpstart your development and get to market quickly while keeping your costs low.
This tutorial taught us how to customize a chat UI using Xcode’s debug view hierarchy and open-source code. The developer portal offers more hands-on tutorials and guides tailored to specific platforms, frameworks, and languages.
When your business decides the right time to build chat capabilities, Sendbird is ready to provide communications solutions you can build on. You can send your first chat message today by creating a Sendbird account to get access to valuable (free) resources with the Developer plan. Become a part of the Sendbird developer community to tap into more resources and learn from others' expertise. Try our chat demo and sandbox to see Sendbird Chat in action. If you have any questions, please contact us. Our experts are always happy to help!
Happy UI chat building! 💬


