
How to add Sendbird Group Calls to your Discord clone

Enhancing your Discord clone
Group calls, a staple of modern applications, facilitate vital interactions and build a sense of community. In this tutorial, we’ll discuss how to add group calls to your chat application.
In a previous post about creating a Discord clone using Sendbird UIKit, we have seen how to implement Group Channels and Open Channels. In this tutorial, we’ll see how to incorporate group calls in the Discord clone we created earlier. If you haven’t yet built this Discord clone, we encourage you to go back to this blog to learn how to build it, and then come back here to continue to enhance your Discord clone. Before you begin, make sure you have logged in to the Sendbird Dashboard!
Let’s dive in! 💻
Getting started
First, you’ll need to install Sendbird Calls into your dependency to the package.json file within your app. This can be done through npm with ‘npm install sendbird-calls’ or yarn with ‘yarn add sendbird-calls.’
After installing Sendbird Calls, import the Calls SDK with ‘import SendBirdCall from ‘sendbird-calls.’ Then, initialize the SendBirdCall instance with the SendbirdCall.init() function and pass in the application’s ID.
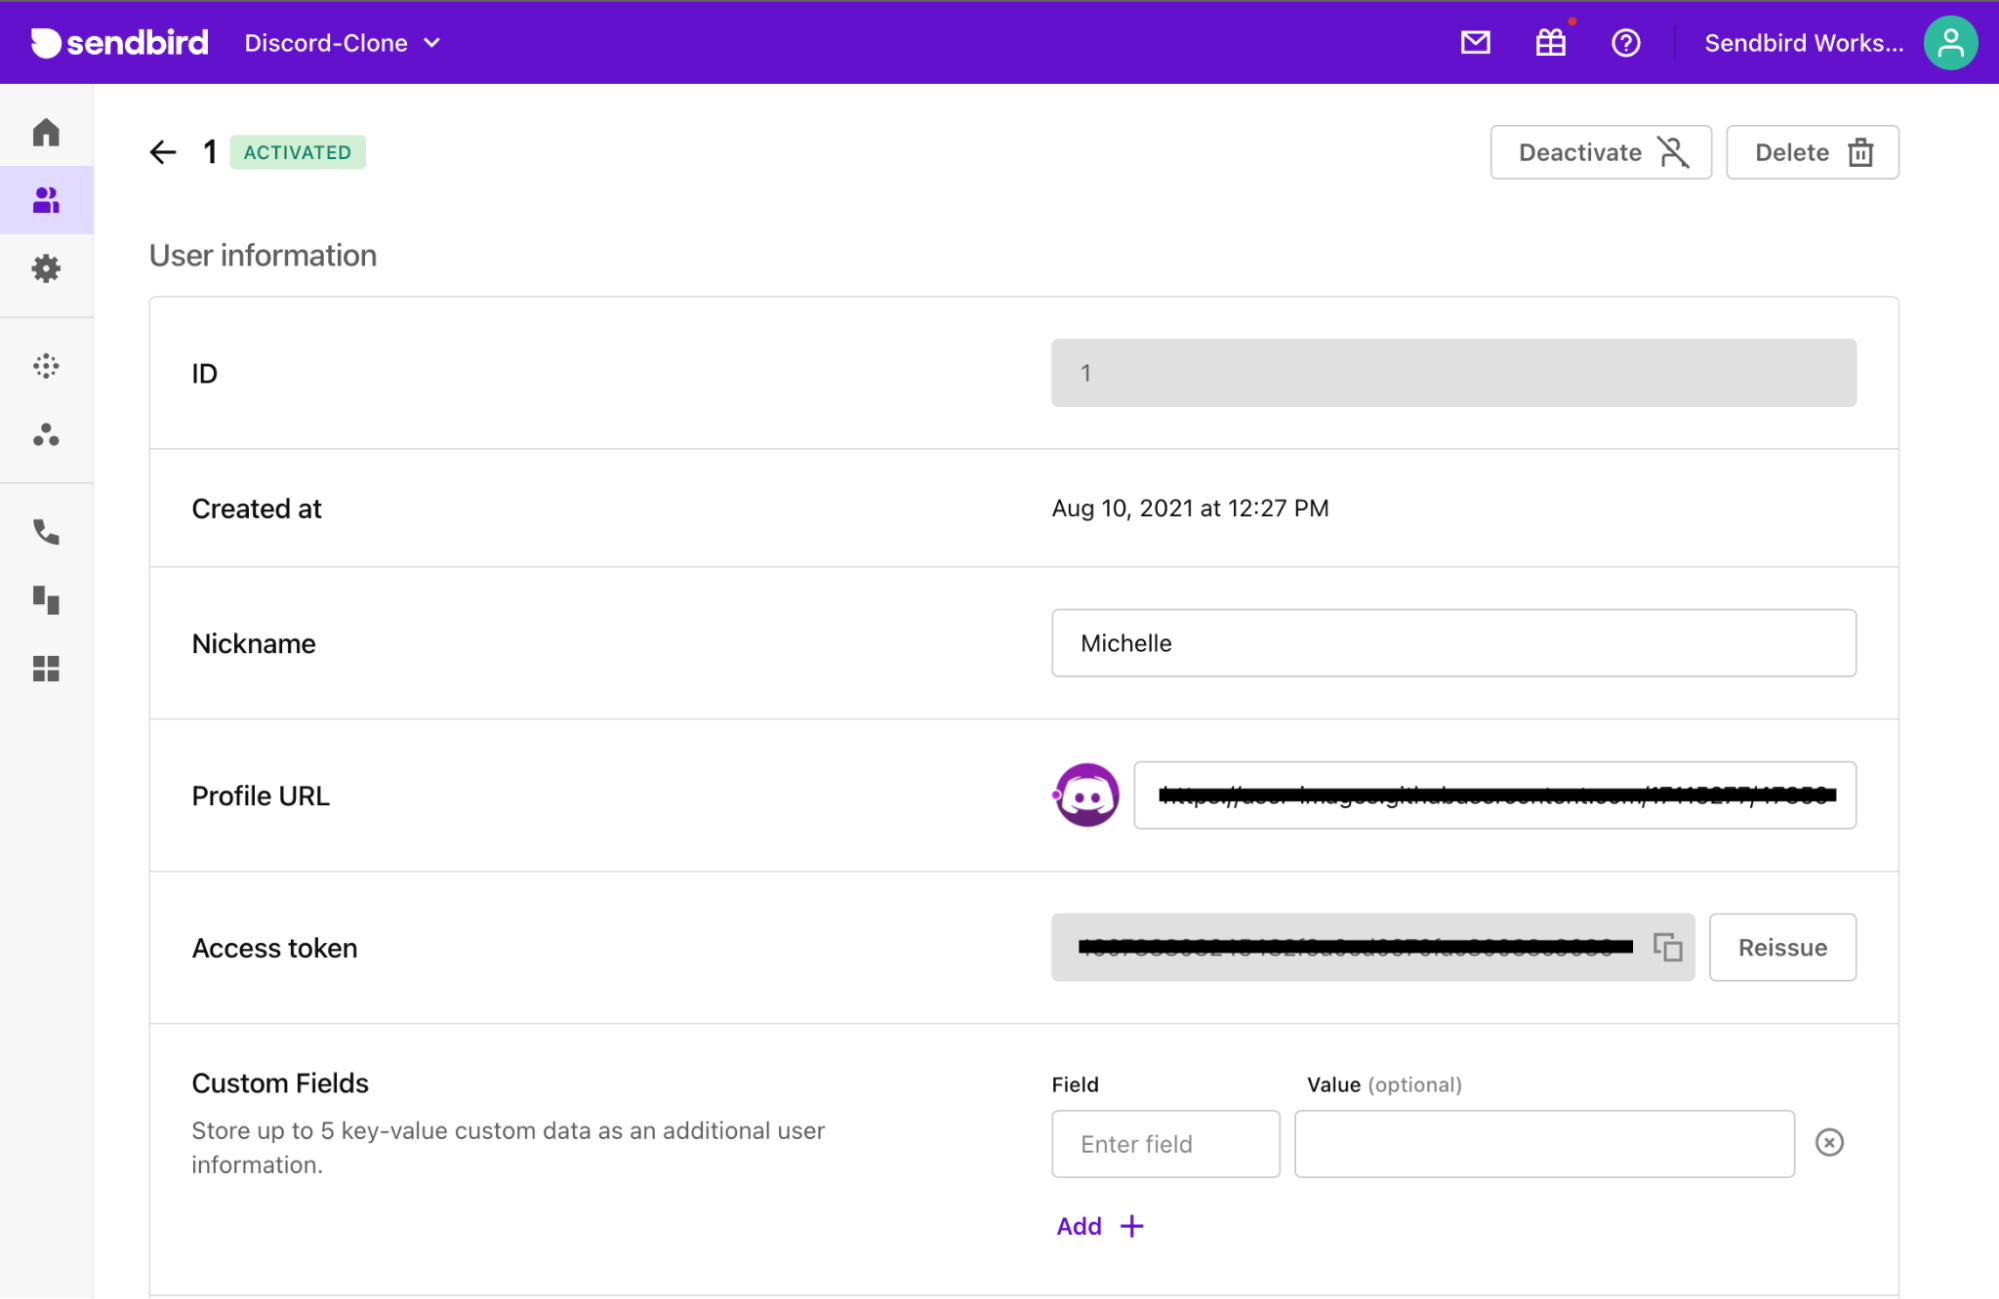
To authenticate a user to the Sendbird server, use SendBirdCall.authenticate(). This method accepts an ‘authOption’ and a callback function that returns a result and an error. The authOption object holds the userId and access token. Both can be found on your Sendbird Dashboard.
After the user is successfully authenticated and connected to the Sendbird server, establish the WebSocket connection with SendbirdCall.connectWebSocket(). For the Discord clone, this initialization, authentication, and websocket connection will be contained within the App.js file.
Sendbird supports both Direct Calls and Group Calls. Direct Calls are a 1-on-1 call while Group Calls are designed for multiple people to be in a room. The Discord clone will be utilizing Group Calls in the following steps.
Step 1: Updating the channel list
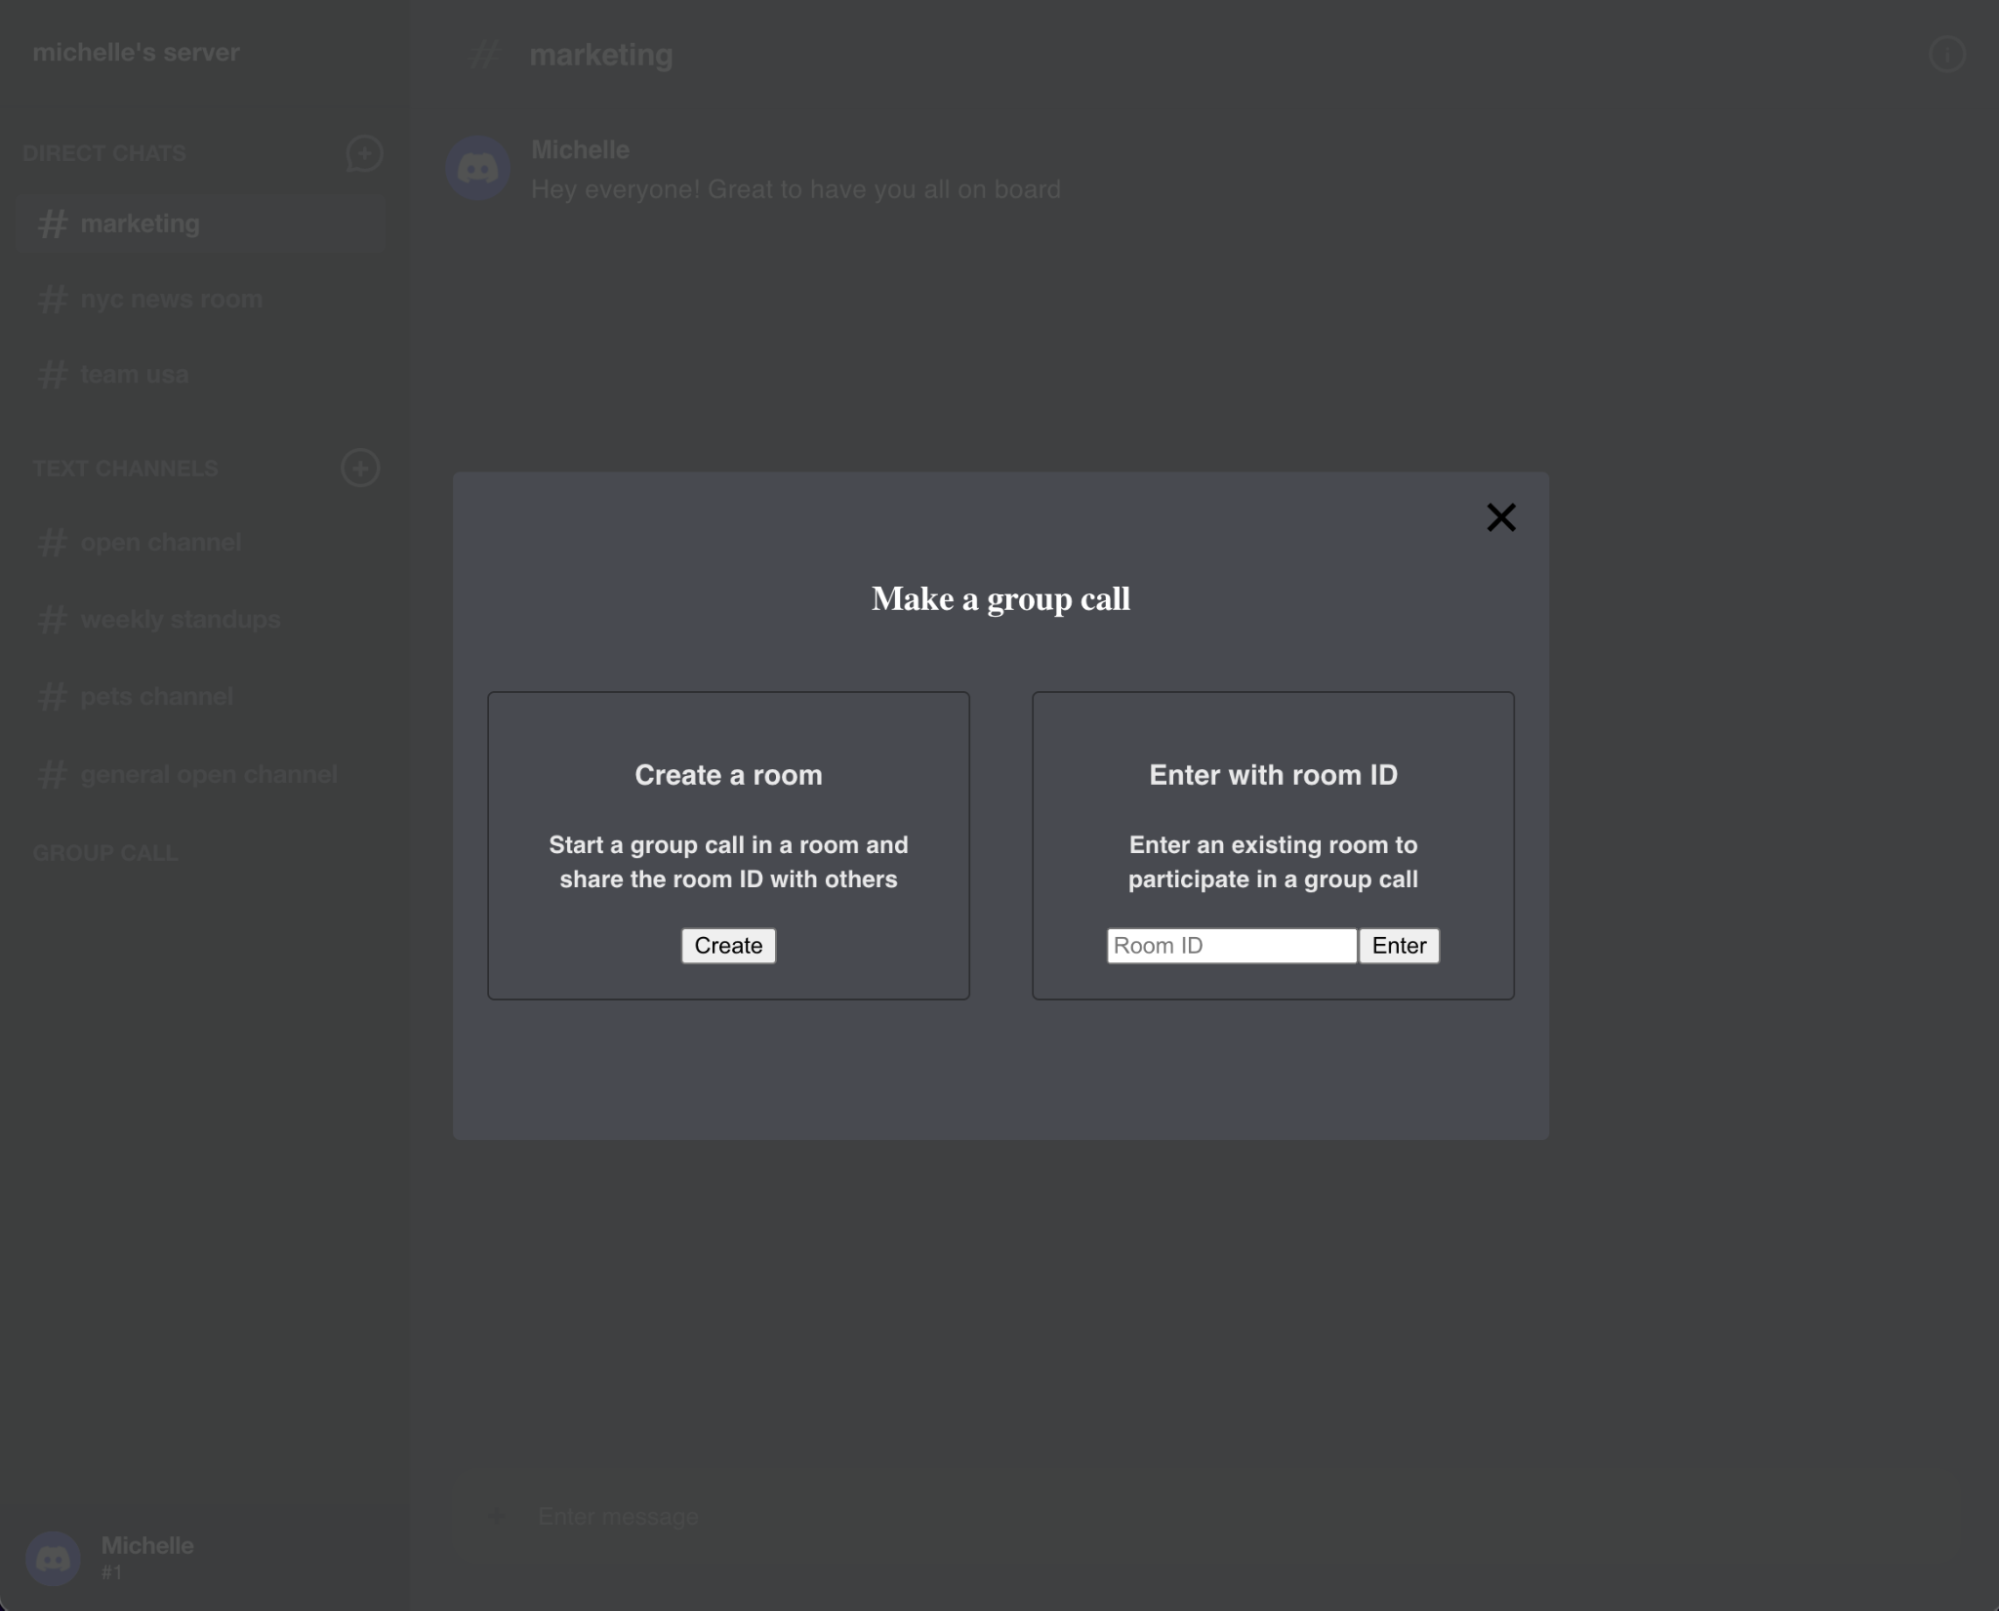
The channel list sidebar currently contains the Group Channels and Open Channels, so we’ll set the Group Calls button there. Once a user clicks on ‘Group Calls’ from the channel list sidebar, a form called GroupCallForm will render to the screen and allow the user to create a new Group Call room or enter a room with an existing roomID.

Step 2: Creating a room
When a user clicks on create a room, createGroupCallRoom will be called. Within createGroupCallRoom, use the SendBirdCall.createRoom() method and pass in the roomParams, which in this case is an object that sets the roomType. In this gist below, this can be seen on line 7. This can be seen in the gist below on line 7.
For this application, the roomType is set to SendBirdCall.RoomType.SMALL_ROOM_FOR_VIDEO (line 4). The SMALL_ROOM_FOR_VIDEO is a type of room that supports both audio and video and can have up to 6 participants. The other type of roomType is ‘LARGE_ROOM_FOR_AUDIO_ONLY’ which is a type of room that only supports audio and can have up to 100 participants.
Once the room is created with createRoom, it returns ‘room’ which holds information such as the room’s ID (line 8).
Step 3: Entering a room
After creating the room, the next step is to enter the room. While this is the following step after utilizing the createRoom method above, referring to the GroupCallForm, this will also be the step at which ‘Enter room by ID’ would begin. In this app, it’s referred to the function ‘EnterGroupCallRoom’.
To enter a room, use the SendBirdCall.fetchRoomById() method. Pass in the provided room ID that was generated from creating the room or from pasting it into the input to ‘Enter a room by ID’.
Once the roomID is provided, it’s fetched from the Sendbird server to continue with room.enter() to enter the room. This method expects to be passed in enterParams, which is an object that holds information such as videoEnabled and audioEnabled.
Step 4: Receiving a media stream
After entering the room, participants will need to display the video view and be able to send or receive media streams in a room.
Once a user enters a room, they’re connected to the Sendbird server and can send a media stream. To receive a media steam, the user has to be connected to the media server. To do so, locate the element with the ID of ‘local_video_element_id’ (line 24 in the gist below). With that local media view element, set the room’s media view to be that local media view element. Then, pass in ‘room’ to setPassedRoom() (line 28).
The room.on() is an alias for ‘addEventListener’ to add a listener. Using room.on() and passing it ‘remoteParticipantStreamStarted’, this event listener will be called when a remote participant is connected to the media stream and starts sending the media stream. This can be seen on line 29 in the gist below.
The callback function passes through a ‘remoteParticipant’ where we use remoteParticipant.setMediaView() and pass in a remoteMediaView, which is a new video element (line 32). Once the remoteMediaView element is created, it’s recommended to set the remoteMediaView.autoplay to true (line 31).
Following this, the props in this GroupCallForm ‘setOnCall’ and ‘setShowRoomCreated’ will be set to true. This will activate the ‘GroupCall’ and ‘RoomCreated’ components located in App.js to appear across the screen, while ‘setSetGroupCallForm’ will be set to false and it will remove the GroupCallForm view from the screen.
Step 5: Displaying the group call
RoomCreated
When the RoomCreated function is called from App.js, it’s passed in the variables ‘isOpen’, ‘room’ and ‘close’ which will set the variable ‘setShowRoomCreated’ to false. Once ‘setShowRoomCreated’ is false, the RoomCreated component will no longer be rendered on the screen.
RoomCreated returns the form that appears on top of the video display and includes information such as the room ID and the ID of the user that created the room. Within RoomCreated.js, RoomInfo is also being exported here to be used in the GroupCall.js file.
Once a user no longer needs that initial information, they’re able to continue and close out of RoomCreated to have just the group call on the screen.
GroupCall
When GroupCall is called, it’s passed ‘room’ and ‘setOnCall’. ‘setOnCall’ updates to recognize if a user is currently in a call. GroupCall returns how the video display will be formatted and designed. This file was based on how Sendbird’s quickstart-calls had its standard video display arranged.
GroupCall contains customized components using CSS styling directly in this file to alter as you’d like. Additionally, this file holds the layout for the header, media content, and footer. The footer contains the settings, utility buttons, and participant information. The utility buttons include the option to mute, stop the user’s video view, or to end the call. The participant button opens a sidebar that shows the participants in the room with each of their IDs and the room’s ID to copy for other users to join.
You can view the full GroupCall.js file. CSS customizations were implemented directly within this file for the specific components used within GroupCall as well.
Device settings
When the settings button is clicked, it renders the DeviceSettings component. This holds dropdown options for the camera, microphone and speaker.
Conclusion
And that’s a wrap! You now know how to add group calls to your Discord clone.
While the Discord clone app was initially created by utilizing only Sendbird UIKit’s Group Channels and Open Channels, Group Calls can be placed seamlessly into any existing application and is highly customizable to fit any theme for unique applications.
Please refer to this Github repo for the entire code base.
We can’t wait to see what you build! Happy calls building!👨💻


