
Seamless Integration of Slack with Sendbird's Chatbot API: A Step-by-Step Tutorial

Seamless Integration of Slack with Sendbird's Chatbot API: A Step-by-Step Tutorial
Discover the seamless integration of Slack with an AI chatbot powered by Sendbird, where the chatbot API, Slack chatbot, and chat widget come together to revolutionize communication within Slack. This step-by-step tutorial guides developers through the process, showcasing how to leverage the chatbot API to create a Slack chatbot that enhances team interactions and streamlines workflows.
The heart of this integration lies in the chatbot API, which serves as the backbone for developing the Slack chatbot. The chatbot API provides the necessary tools and protocols to bring intelligent, AI-powered interactions to Slack, enabling the Slack chatbot to understand and respond to user queries effectively. By tapping into the chatbot API, developers can equip the Slack chatbot with advanced functionalities, from handling customer support inquiries to managing internal tasks.

Automate customer service with AI agents
Moreover, the integration highlights the importance of the chat widget as a pivotal element in this ecosystem. The chat widget, designed to facilitate easy interactions within Slack, is customizable through the chatbot API, ensuring that the Slack chatbot delivers a user-friendly experience. It's the chat widget that allows for a seamless blend of AI capabilities and Slack's collaborative environment, making the Slack chatbot not just a tool, but an integral part of the team's daily operations.
Incorporating a chat widget into the Slack chatbot experience elevates the functionality of Slack channels. Whether it's for customer service, team collaboration, or task automation, the chat widget ensures that interactions are intuitive and efficient. The chatbot API's versatility enables developers to tailor the chat widget and the Slack chatbot to meet specific business needs, demonstrating the power of integrating these technologies.
This tutorial is not just about connecting a chatbot API with Slack; it's about reimagining what's possible in communication and task management with a Slack chatbot. Through the detailed guidance provided, developers will learn how to integrate a chat widget within Slack, powered by the chatbot API, to create a Slack chatbot that stands out for its intelligence and usability.
This step-by-step guide is an invitation to developers to explore the synergy between the chatbot API, Slack chatbot, and chat widget, encouraging them to leverage these technologies to build solutions that make Slack an even more powerful tool for teams and businesses.
Prerequisites
Before we get started, you'll need the following prerequisites:
- A Slack account with administrative access to create and configure apps.
- A Sendbird account. If you don't have one, you can sign up for free at Sendbird's website.
- Basic knowledge of JavaScript and web development.
- Access to a web server or hosting environment for deploying your chat widget.
What will be covered
Introduction to Speaking with a Sendbird AI chatbot from Slack
Setting Up a Slash Command Bot in Slack
Setting Up a Chat Bot in Sendbird
Setting Up a Proxy Server
Deep Dive into Proxy Server Configuration

Reinvent CX with AI agents
Implementation
Step 1 - Introduction to Speaking with a Sendbird AI Chat Bot from Slack
This project has the target of being able to send a message and get a single reply from a Sendbird AI driven SmartAssistant ChatBot. As seen below the service uses slash commands to ask a question to the Sendbird ChatBot. The Sendbird Chatbot can be set up any knowledge base from which to answer questions.
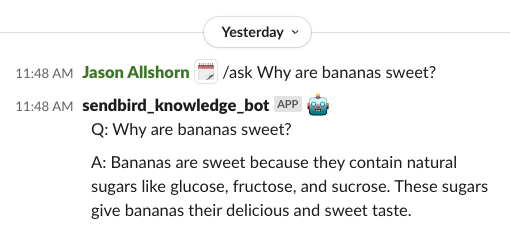
As seen below a user enters a /ask + question in Slack and then the service sends a message to a proxy server which then calls Sendbird and then the response is passed back down to Slack.
Step 2 - Setting Up a Slash Command Bot in Slack:
Navigate to your Slack App settings and create a new Slash Command.
Configure the command request URL to point to your proxy server.
Link to Slack Slash Command setup guide, and video for this project.
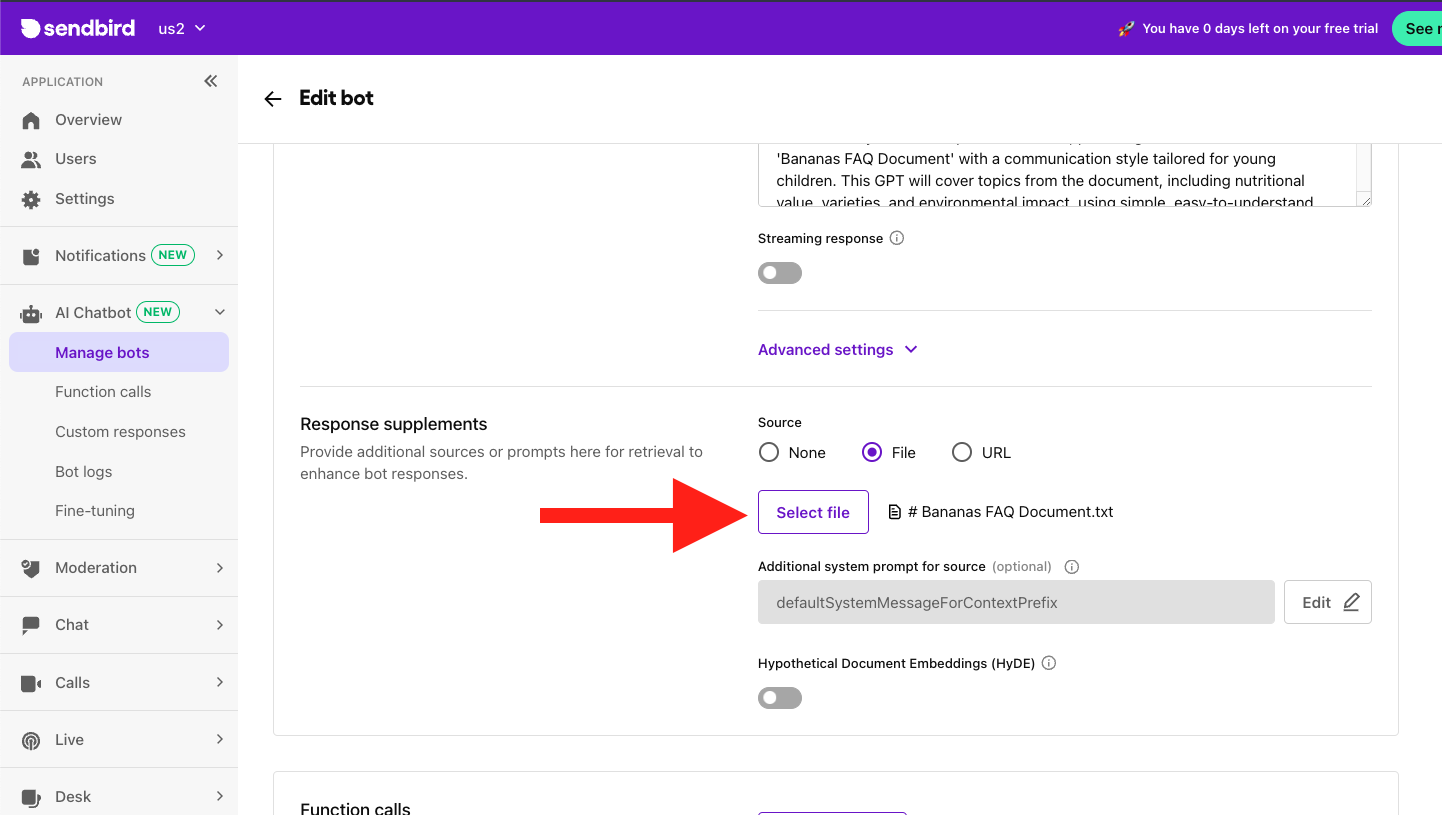
Step 3 - Setting Up a Chat Bot in Sendbird:
- Create a new bot in the Sendbird dashboard, with a video guide here.
We gave the bot an id of banana_savvy for this project.
Add a knowledge base of your choosing (see image below).
Step 4 - Setting Up a Proxy Server:
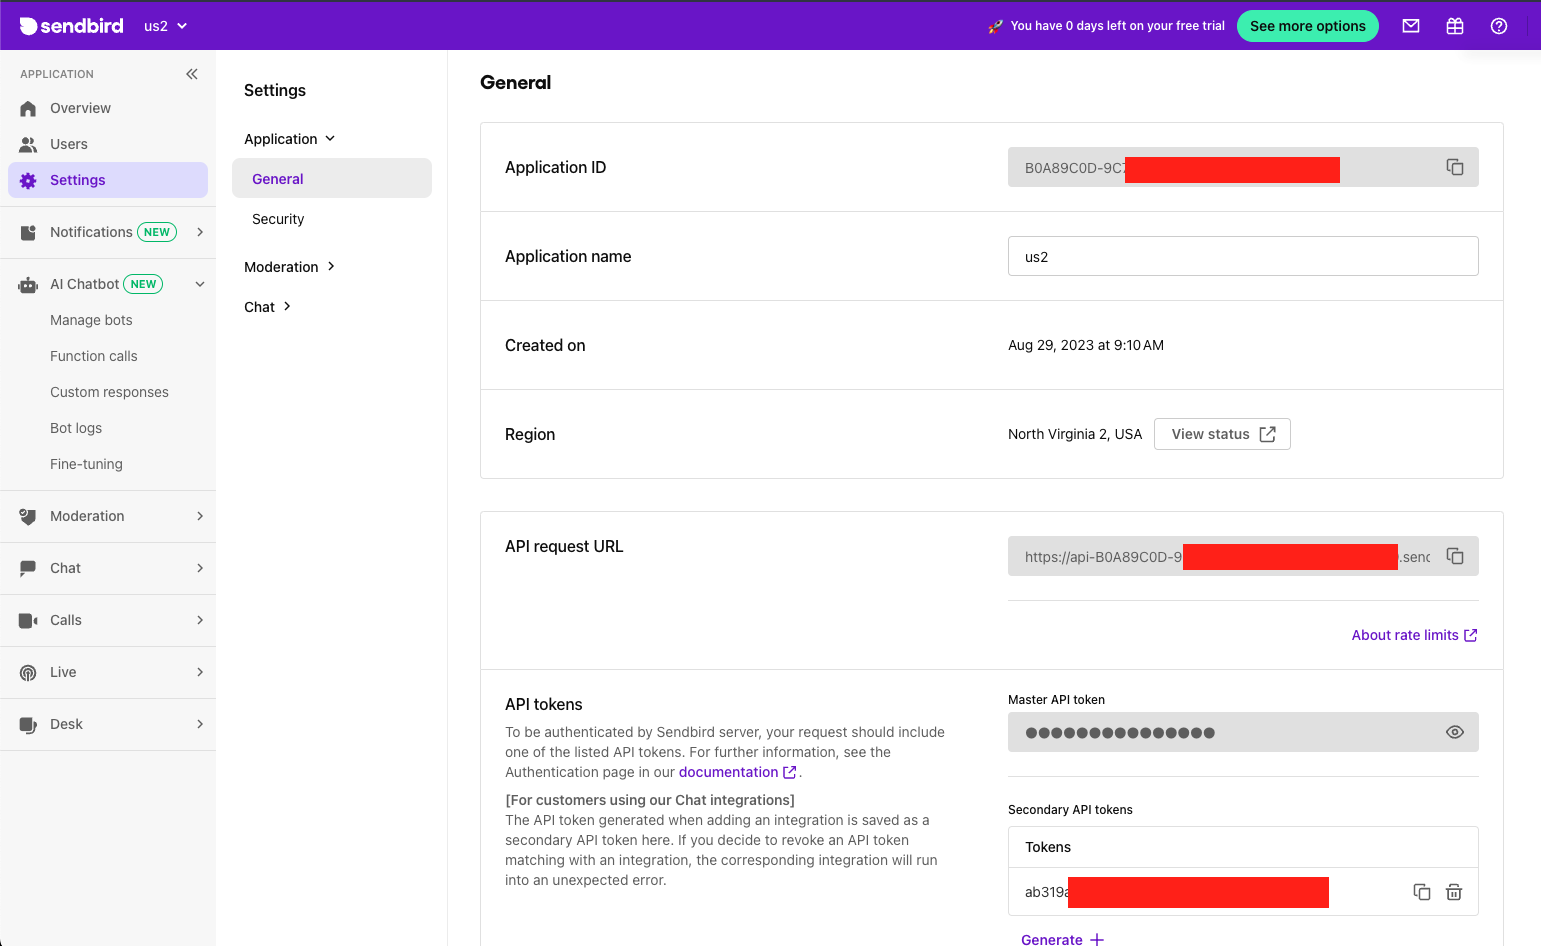
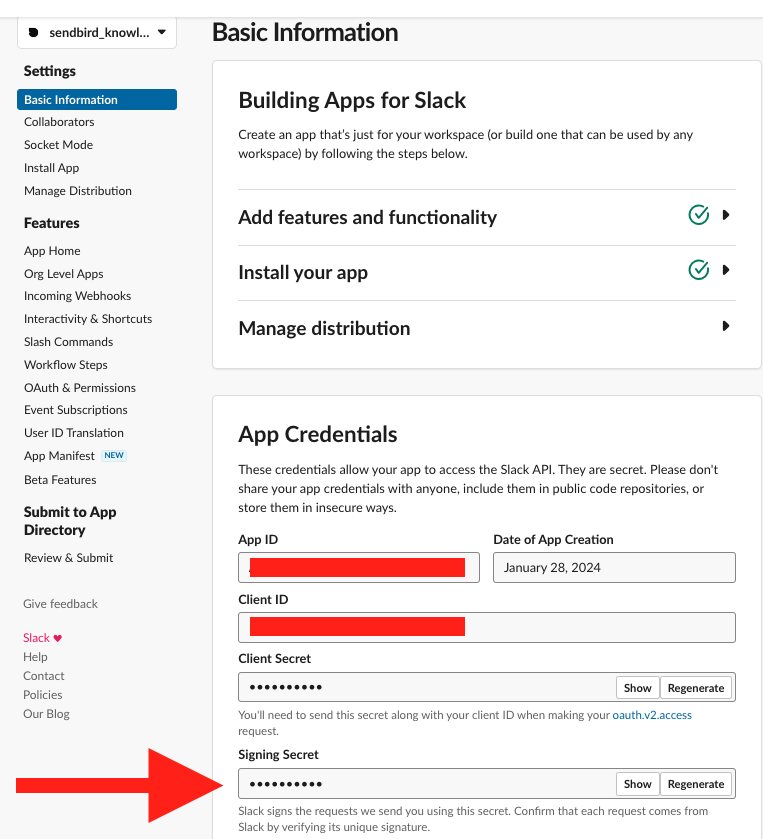
This project implements a basic server using Node.js to handle requests from Slack and forward them to Sendbird. You are welcome to remix and use this example in Glitch. There is a set up video guide here. You will need App Id, Api Token and your Sendbird bot ID from the Sendbird Dashboard and your signing secret from your Slack App dashboard.
Sendbird Dashboard
Slack App Dashboard
Proxy Server Deep Dive:
The full code for the server can be found in the Glitch Example’s server.js file and there is a video walkthrough of the code here. Below are details of what the code is doing.
The server carries an endpoint /message_to_bot.
The call is intercepted by a middleware to authenticate the call from Slack.
Once past the middleware a response is sent right away to Slack, so the user knows the service is working and to keep within Slack’s timeout restrictions.
Next the message from the user is passed to a function to forward the user’s question to your Sendbird Chatbot.
Below we can see that from the payload provided by Slack we gather the text and append it to an array of messages which can be read by the Sendbird Bot.
The message is sent off to your Sendbird Chatbot and the response contains an array of reply_messages from which we gather the first.
Slack’s slash command request payload also included a reponse_url which is now used to pass the Sendbird’s ChatBot reply down to Slack.

Delight customers with AI customer service
Conclusion
This guide covered the essentials of integrating Sendbird's AI chat functionalities within Slack, from setting up a Slash Command Bot to implementing a proxy server for seamless communication. This integration not only enhances user experience but also streamlines internal and external communication processes.


