
Understanding users in Sendbird Chat

Introduction
This guide explains the core Sendbird developer concept of users in Sendbird Chat. It will discuss how to work with the Sendbird SDK and user objects to create, update, and delete users. These activities are fundamental to Sendbird integration and a good stepping stone to comprehensive Sendbird development mastery.
Let’s get started!
What are users in Sendbird Chat?
At the center of the Sendbird experience are users — entities that connect to Sendbird Chat or Calls via Sendbird’s client-side SDK.
Here are a few important things to know about creating users:
- You can manually create Sendbird application users when you first begin development.
- Before production, we recommend creating users via the Platform API. Consider adding a majority of your users to Sendbird before going live. It is wise to start early on this project because user creation can take a few hours to a few weeks, depending on the size of your user base. There is no additional cost, and adding a user does not contribute to MAU unless the user connects to Sendbird.
- Via the Platform API, you can programmatically perform user dashboard operations.
- You can only add user metadata to the user object via the Platform API.
- Users connect to the Sendbird application using a Sendbird SDK.
With this in mind, let’s understand a bit more about the Sendbird SDK and user objects before creating users.
SDK and user objects
When starting Sendbird development, users can be logged in without authentication. However, in production, the best practice is to use authentication (access or session tokens). We recommend reasonably short-lived session tokens for the most secure setup.
You can control user access permissions by going to the Sendbird Dashboard > Settings > Security.
Note that from the SDK, by default, a user can update:
- nickname (often used for the user’s display name)
- profile _url (image URL)
- metadata (often used to categorize users into groups)
- preferred_languages
Sendbird also offers the ability to restrict the above preferences to only allow updates to come from the Platform API.
Ready to create users? Keep reading!
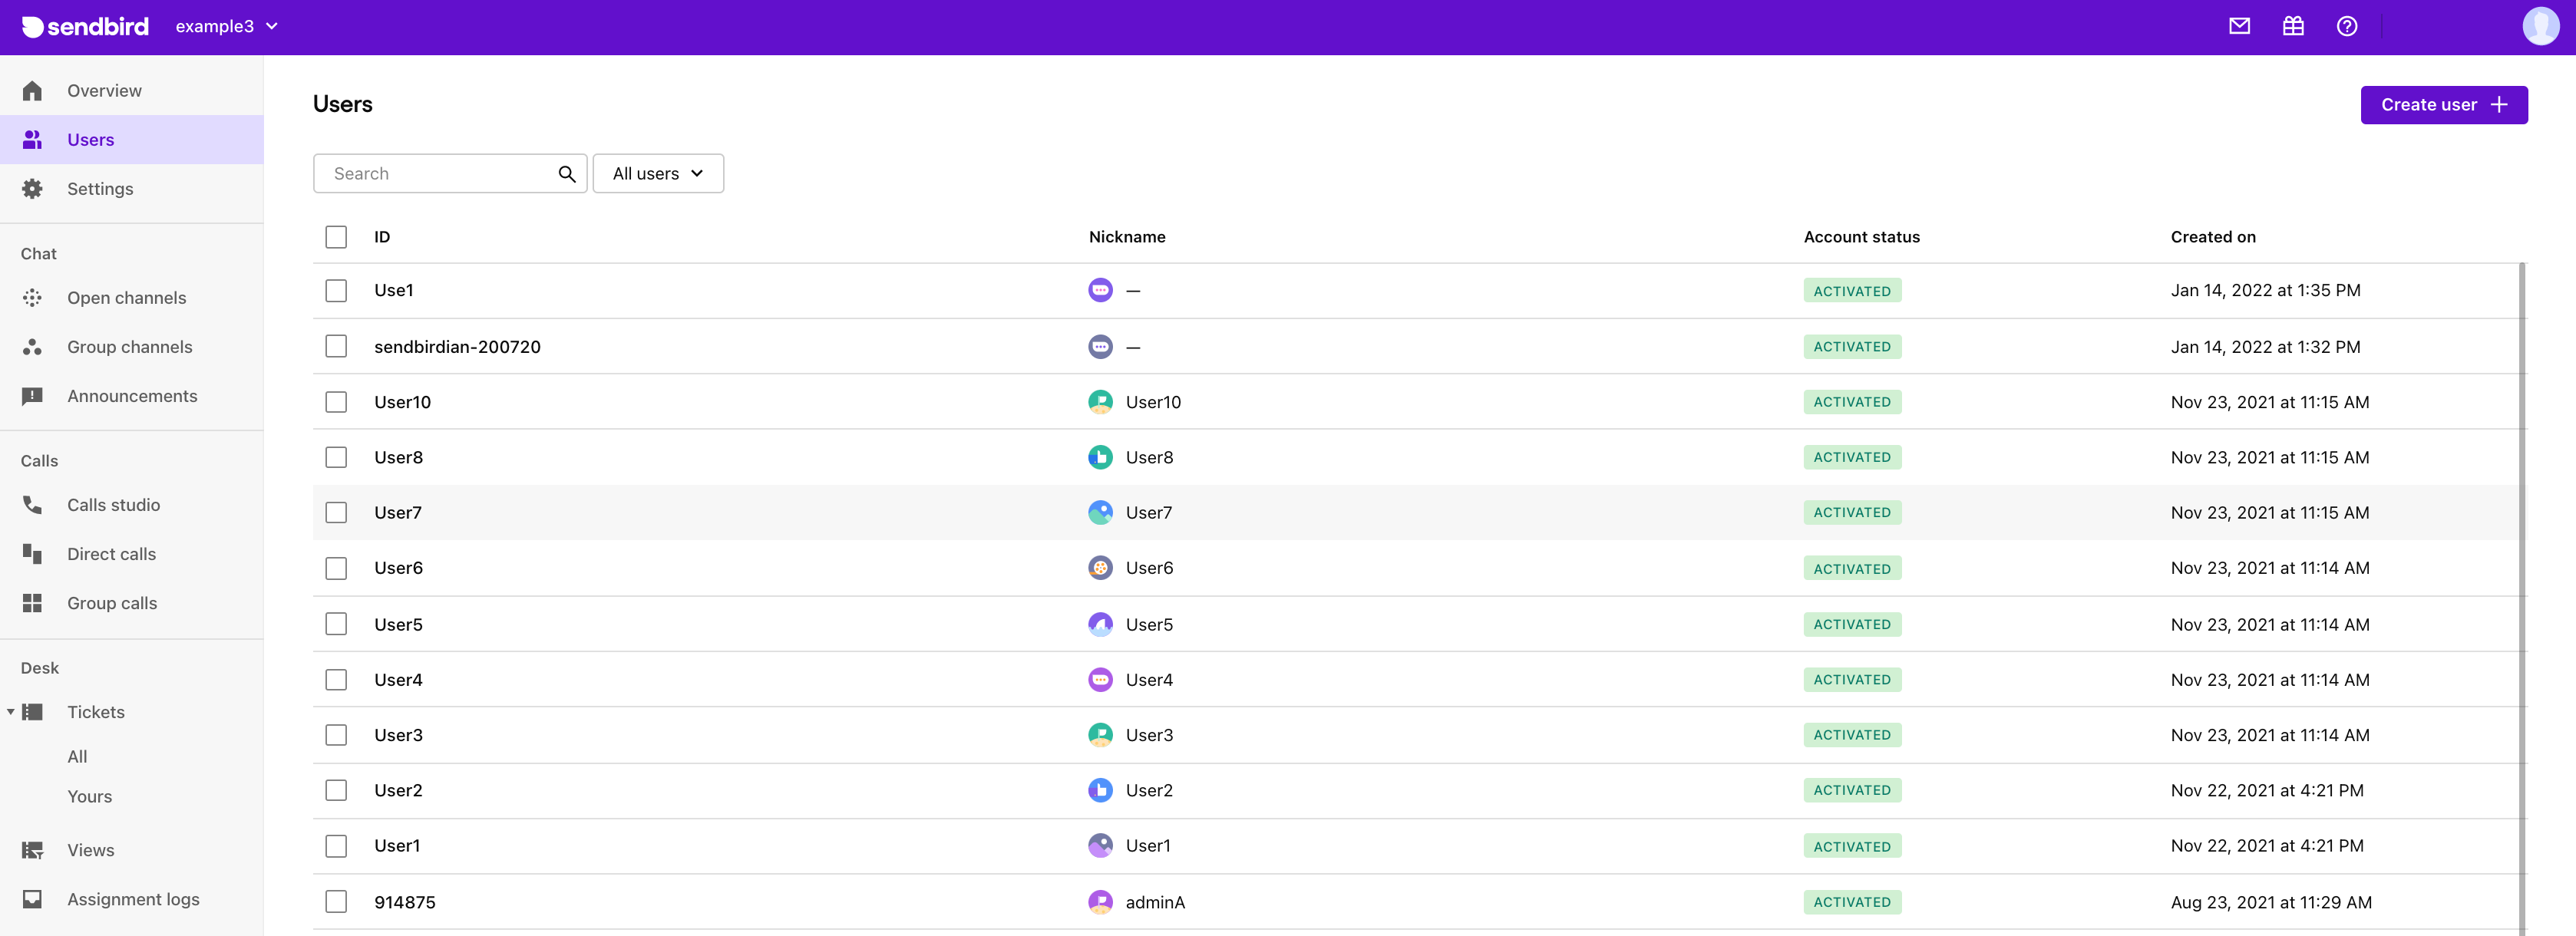
How to create users
Dashboard
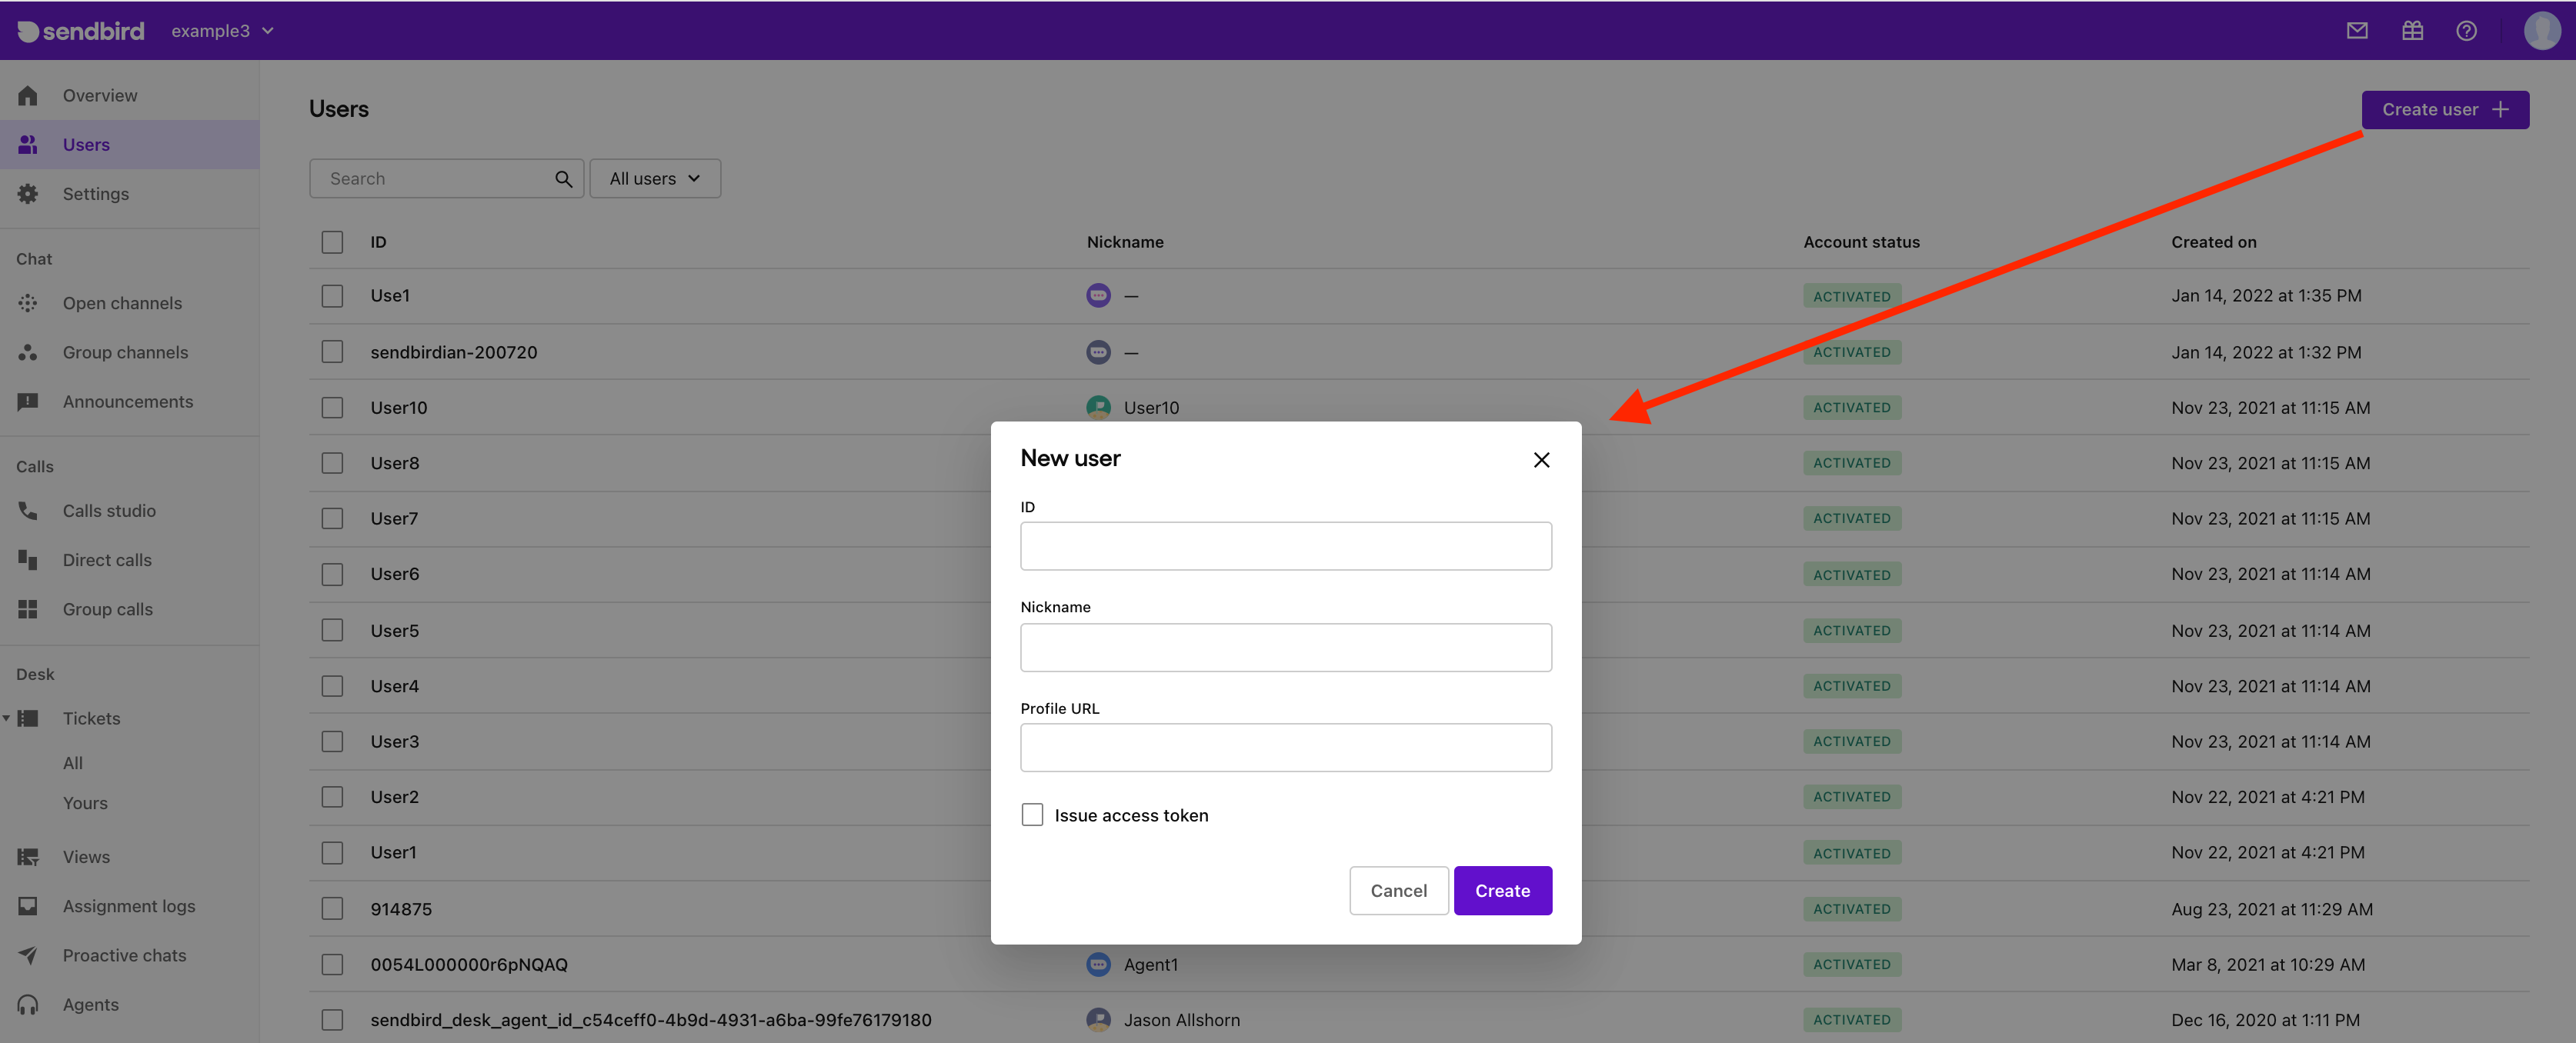
- Click “Create user +”.
- The ID requires a unique identifier. It is common for it to be the same user ID used by the client-side application that runs the Sendbird SDK.
- The nickname is required, but it is editable via the dashboard, Platform API, and by the user in the SDK (SDK editing can be turned off on request)
- The Profile URL is optional, and by default, is an empty string. (Profile URLs The Sendbird’s domain filtering protects the Profile URLs, but not via image moderation)
- Issuing the access token is optional, but strongly recommended for production use. The session tokens are JWT tokens and are not stored anywhere in Sendbird.
Platform API
See this guide to understand how to create users via a Platform API call.
SDK
- If the application’s security settings are set to “read and write,” a user can be created via the SDK. (This is not recommended for production)
- To create a user, connect to Sendbird and pass in any user_id and nickname. A new user will automatically be created, or an existing user will be returned.
| Pro Tip!
When starting out, manually create 10 users, with sequential IDs, in the dashboard. User nicknames should be identical to user IDs. |
How to review users
Users table
Users are listed in order of newest to oldest created. Click on any user ID to drill down for more details.
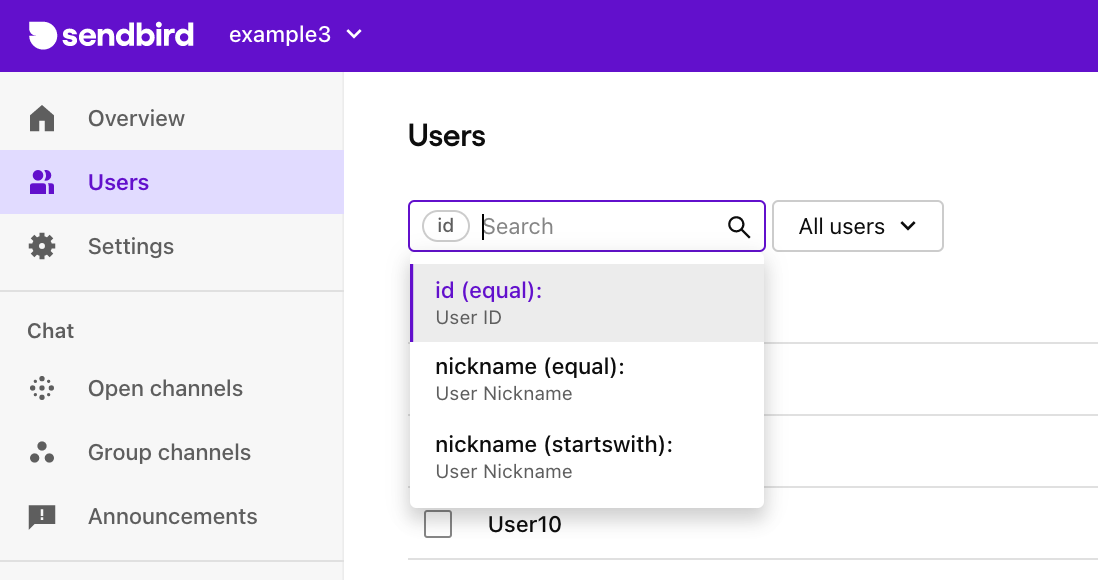
User search
You can also search for users using the ID, the Nickname, or Nickname startswith.
| Pro Tip!
By default, you can fetch 100 application users at a time via the SDK. It’s also possible to categorize the users via their metadata, then fetch categorized users with a metadata filter. This default action can be turned off if your security policy prohibits users from fetching all other users. |
How to update users

Dashboard
Select a user’s ID to view and update the user’s profile.
SDK
A user can only update their profile image and nickname via Sendbird’s SDKs.
Platform API
All aspects of a user object (profile) can be updated via Platform API, including:
- Nickname
- Profile URL
- Metadata
- Access token
- Session token
How to delete users

Dashboard
It’s possible to delete users one by one or many at a time via the dashboard. Once a user is deleted, the same user ID can be used to create another user.
SDK
Sendbird’s SDKs do not provide a “delete user” option.
Platform API
Deleting users one by one via Platform API is also possible.
Conclusion
This guide discussed how to create and work with users via the Sendbird SDK. These basics should create a great foundation for your development efforts. Thanks for using Sendbird to create great chat applications and helping to connect people better! Happy chat building! 👩💻


