
Build a JavaScript video chat app with Sendbird Calls

Introduction
This guide is a two-part guide. Part 1 shows how to set up calls within Sendbird, and the second part shows how you can implement a screen-sharing functionality with minimal changes to your implementation.
Step 1: Create a Sendbird Account
1. Sign up for a free Sendbird account
2. Create an account using your email id or `Continue with Google`
3. Setup your Organization by entering `Organization name` and `Phone number`
4. Create a new “Chat + Calls” Application in the region closest to your locale.
On the left side of the screen, you should see a “Calls” menu, go into the “Studio” and create a new “phonebooth” user.
Define a USER ID to call to. The ID of the moderator will be 789298.

Step 2. Create a new Project
Let’s start by creating an empty folder and adding the following files:
- Index.html
- index.js
Index.html
This file contains two sections:
The Login section: This is where you will enter your Sendbird application ID and user information.
The Video section: Once connected, two video elements will appear, along with other buttons such as Make Call, End Call, Call user, and Stop sharing.
Import library
The only library used for this project is sendbird-calls. I will import it using NPM.
I will create a default package.json file by running the following command: npm init -y
This will create a new file in your folder. Next, download Sendbird Calls and run
npm install sendbird-calls
Wait for the download. Then, you should see something like this below for your package.json file.
Please note that this version for your Sendbird library (1.5.4) may be higher.
Open your index.html file and include this library:
Optionally, I will include Bootstrap for some styling. This is not required.
Part 3: Creating the UI
Connection
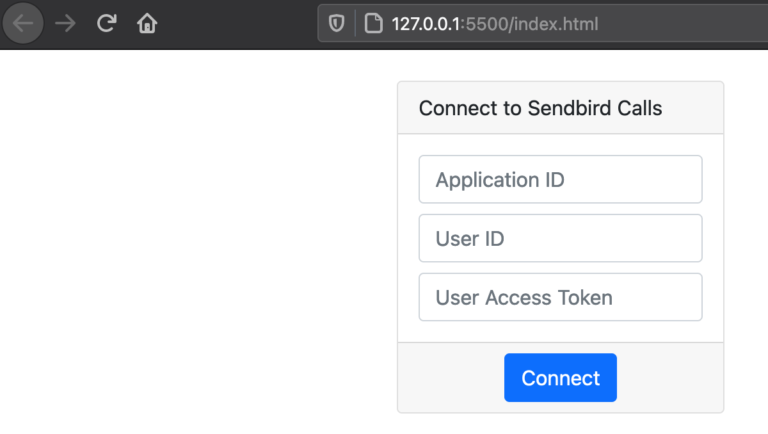
Inside the tag of your index.html file, add the elements for entering your Sendbird application ID, user id (and access token if necessary). Add a Connect button for calling our function in Javascript.
You can quickly run this in your browser in several ways. The Live Server plugin is one way that makes this easy if you are using VSCode. If you open this in a browser, you should be able to see the following results:
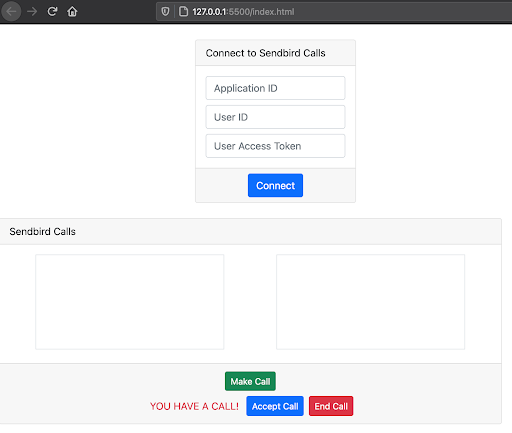
Next, I will add the section showing two video elements (local and remote). The local video displays your image and transmits your audio. Whereas. the remote video casts the other user’s media. To avoid confusion, mute yourself.
If you run this in a browser, you should see something like this:
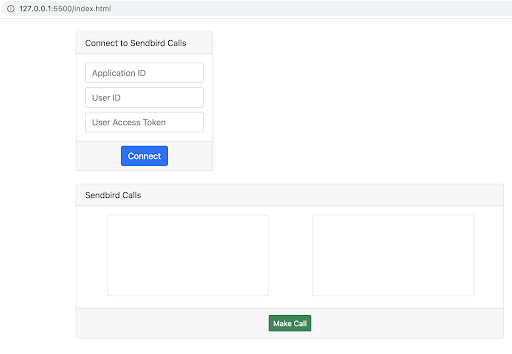
The buttons are not visible, as you can see. I will apply the login inside the index.js file to show them at the right moment. Let’s hide all of them except Make Call. Check the extra style=”display:none” applied.
Replace the code from above with this new one:
If you refresh your browser, you should see something like this:
That’s all you need for the view part. Let’s jump now to the Javascript code. Create an index.js file in the same folder.
Inside your index.html file, right before the closing tag, add the following line:
Part 4: Implementation
Index.js
This file contains all the Javascript logic for connecting to Sendbird, making, receiving, and ending a call. It also contains the logic for screen sharing.
Global variable
We will have one global variable called currentCall. It will hold the current call once established.
Connect to Sendbird
Next, create the function for connecting to Sendbird.
- Init Sendbird Calls and validate your application ID.
- Ask for browser permission (for transmitting audio and video) A popup will show to the users. They must approve it.
- Authorize the user on the Sendbird platform.
Ask for browser permission is a straightforward call:
Authorizing a user with Sendbird is critical to validate them in our database:
Last step. Connect to the Sendbird WebSocket. If this is not done, you can’t make or receive calls.
Now you are ok to send and receive calls.
Making a Call
Before screen sharing, you need to have a connected call. To do this, let’s add the following function:
- We use the prompt function for asking the user which is the user_id we want to call to. It is native to Javascript, and you can use your own implementation.
- Once we have a destination user_id, we can set the dialing parameters. (please notice that you must define which video elements you’ll use for your call.
- Next, we make the call (SendbirdCall.dial) and send these parameters to the server.
- Some listener functions are created:
a) onEstablished: it runs your logic when the call is established with the remote user.
b) onConnected: it runs your logic when the call is connected (not yet established) with the remote user.
c) onEnded: it runs your logic when the call ends.
d) onRemoteAudioSettingChanged: it runs your logic when the remote user changes his audio settings.
e) onRemoteVideoSettingChanged: it runs your logic when the remote user changes his video settings.
To get more information, please check out our official documentation.
Test a call
To be able to test a call, you can use your Sendbird Dashboard. From your Calls Studio, you have the chance to open your Phonebooth and call a moderator user. The User ID for moderators is usually a number. Here, my moderator user ID is 789298

Receiving a Call
If you want to test this using another client application instead of using our Sendbird Dashboard, you need to implement the functionality for receiving a call.
Update your waitForCalls() { … } function:
You only need to add a listener we provide. This listener contains several functions called automatically by the SDK:
- onRinging: it is invoked when receiving a call that is not yet accepted.
- onConnected: it is invoked when a call is accepted.
- onEstablished: it is invoked once a call is accepted by both parties.
- onEnded: it is invoked when a call ends for any reason.
Conclusion
That is it. That is all it takes! Congratulations on making your first call! This guide has covered how to create a new application on the dashboard, create users, and create a sample app capable of making and receiving video calls. As mentioned at the start, this is a two-part guide.
Check out our next section showing how you can implement screen sharing!


