
How to implement map previews and location sharing on Android

Introduction
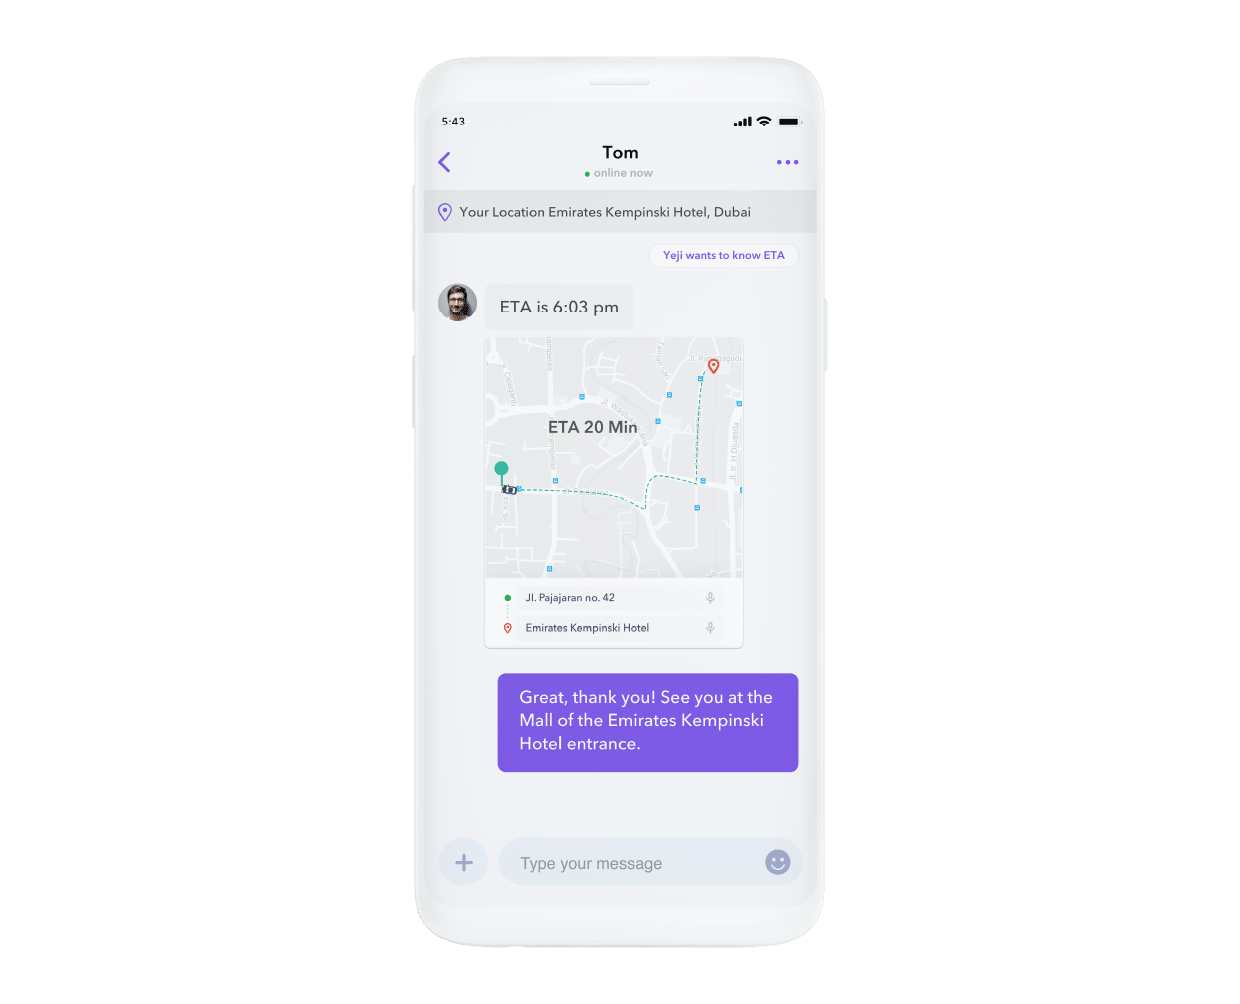
In-app location sharing and map previews offer an efficient way to communicate geolocation with friends and service providers. They remove any ambiguity about the directions to reach a location and provide peace of mind while allowing users to monitor the progress of a trip. For example, location sharing simplifies the life of delivery service personnel and improves their customer’s satisfaction when sending their location upon inquiry.
Mapping and messaging are fantastic ways to coordinate live interactions. Rory Sutherland, Vice Chairman of Ogilvy & Mather Group and author of Alchemy: The Dark Art and Curious Science of Creating Magic in Brands, Business, and Life, reminds us why the Uber map was magic. He called it:
“…a psychological moonshot, because it does not reduce the waiting time for a taxi but simply makes waiting 90% less frustrating.” – Rory Sutherland
As you can guess, this feature is specifically relevant for apps in the industries of:
- Transportation and ridesharing
- Delivery and logistics
- Food or grocery delivery
- Other consumer product delivery
- Online to offline services
This simple tutorial will walk you through the implementation of location sharing with easily digestible within-message map previews.
Please note that this guide assumes you have already implemented chat using the Sendbird SDK. If you have not, check out the docs or this tutorial to learn how to do this.
Let’s begin! 💻
Implementing location sharing and map previews in Sendbird
When a user presses the “Share Location” button, Android’s LocationManager class provides the user’s geographic coordinates. Sendbird sends their location in a UserMessage with the CustomType set to location. After sending the message, it is inserted into the RecyclerView through its adapter. Based on the MessageType(UserMessage) and the CustomType(location), the layoutInflater inflates a custom view containing the MapView. Finally, you add geographic coordinates to the MapView.
Please note that using the Google Play Service Maps SDK, users can share their location from within the in-app chat and the recipient can open this location in Google Maps. Sendbird displays the map in an easily digestible preview for quick consumption.
To implement location sharing and map previews, follow these steps:
- Understand the prerequisites (outlined below) for location sharing and map previews on Android
- Obtain permission to use the user’s location
- Declare your API access token and a dependency for maps
- Create the layout for sender and recipient
- Retrieve the user’s location
- Send the user’s location in a UserMessage
- Handle the received message by checking the custom type and bind it to a view
Prerequisites for location sharing and map preview
To reiterate, this guide assumes that you have already implemented chat using the Sendbird SDK. Check out the docs or this tutorial for more information.
Note that the code in this guide uses Sendbird’s SyncManager SDK to send and receive messages.
You will need:
- Sendbird Android SDK
- Google Play Service Maps SDK
- A Google API access Token
Note:
- If you are using Android’s built-in emulator, note that it will likely not show your location.
Other resources:
- Google’s Official Guide on Maps
- Google’s official sample apps using maps
Step 1: Obtain permission to use the user’s location
For location sharing to work, you need to obtain permission to use the user’s location.
Request this at runtime. For the sake of brevity, this guide omits the runtime code.
Instead, it shows permission as it is shown in the AndroidManifest.xml.
Step 2: Declare your API access token and add a dependency for maps
Declare your API access token in the AndroidManifest.xml.
Add a dependency for maps in the app level build.gradle file.
Step 3: Create the layout for the sender and recipient
Create a layout for both sides of the chat, i.e. both sender and recipient. This guide differentiates between them as “me” and “other,” where “me” represents the sender and “other” represents the recipient. Both should contain a MapView.
See the full gist for each layout.
Me (sender):
Other (recipient):
Note: This guide skips over the implementation for setting up the recyclerview, setting button listeners, etc. You can view the sample code in this gist.
Step 4: Retrieve the user’s location
Retrieve the geographic coordinates from the LocationManager. This happens when the user decides to share their location.
Step 5: Send the user’s location in a UserMessage
Once you obtain the longitude and latitude, send it as a UserMessage. To indicate that it is a location, set the CustomType on the individual message to “location.”
Next, insert the message into the RecyclerView by adding it to the adapter.
See below for the full implementation.
Step 6: Bind the view to your customer viewHolders
After adding the messages to the adapter, check the message type before binding the view. Do this by overriding getItemViewType.
Based on what getItemViewType returns, inflate the layout according to whether the message belongs to “me” (sender) or “other” (recipient).
Next, bind the views to your custom viewHolder.
In your custom viewHolder, implement OnMapReadyCallback, and override the onMapReady function.
You may find it useful to check out the full Adapter code.
Conclusion
And that’s a wrap! With Sendbird’s map preview and location sharing implementation, your users will now be able to send a map showing their location, thereby improving communication with others and making their app experience a bit more magical.
Happy coding! 👩💻


