
Building iOS push notifications: How to implement push notifications on iOS with Sendbird Chat

Getting started with iOS push notifications: What are push notifications, and why are they important?
A push notification is a short pop-up message or alert sent directly to the app users’ mobile devices, regardless of whether the app is running or not. A push notification usually contains text, action buttons, and rich media content like GIFs, images, and videos. App developers use this technology to deliver messages and alerts regarding app or product updates, offers, events, reminders, and other relevant information.
Timely and relevant push notifications offer countless business opportunities. For example, fintechs can send transaction notifications, digital healthcare organizations can send appointment reminders, and retail services can announce sales. Push notifications are significant when the business wants to retain customers, drive conversion, and increase user engagement.
In this tutorial, we will learn how to set up iOS push notifications on Sendbird Chat using the iOS Chat SDK.
Prerequisites
To get the most out of this tutorial, you will need:
A free Sendbird account
Apple developer account enrolled with the Apple developer program
Push notifications resources
We have many valuable resources available to help you with building iOS push notifications, as well as guidance about mobile push notifications in general:
Building iOS push notifications
Follow the steps below to understand how to implement push notifications for iOS.
Understanding the Apple Push Notifications service (APNs) for iOS push notifications
By default, you can generate push notifications locally from your app or remotely from a server you manage. For local notifications, the app creates the notification content and specifies a condition, like a time or location, that triggers the delivery of the notification. For remote notifications, your company’s server generates push notifications, and Apple Push Notification service (APNs) handles the delivery of those notifications to the users’ devices.
When a message is sent to the Sendbird server through our iOS chat SDK, the server communicates with APNs, who delivers a push notification to an iOS device where the client app is installed.
Follow the below steps to set up iOS push notifications while integrating the Sendbird iOS SDK into your application.
1. Generate a CSR certificate
A signing certificate is the first requirement for signing apps for installation on iOS devices. Specifically, you need a development certificate, which you can install and run on an app. To obtain a signing certificate, you should first create a Certificate Signing Request (CSR) file through Keychain Access on your Mac.
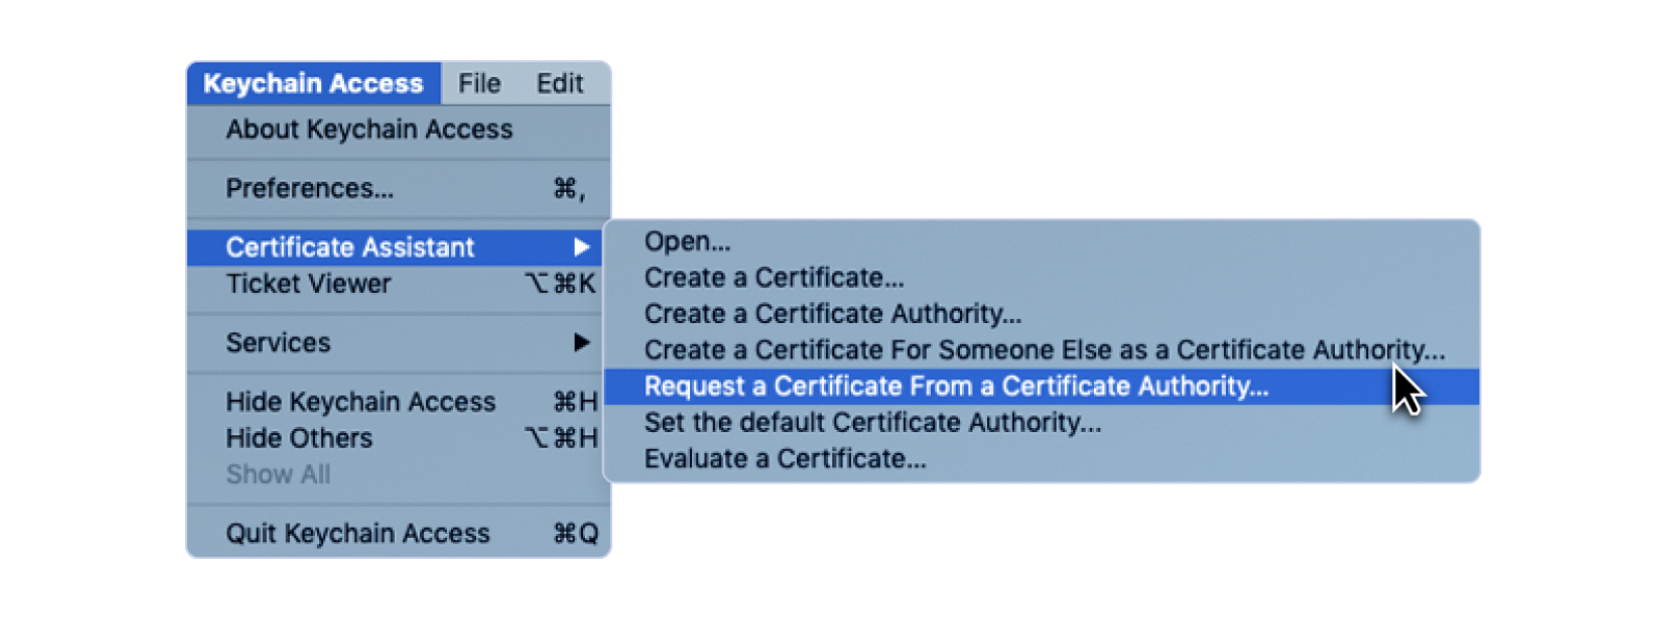
1.1 Open Keychain Access from the Utilities folder, go to Keychain Access > Certificate Assistant, and then click Request a Certificate From a Certificate Authority.
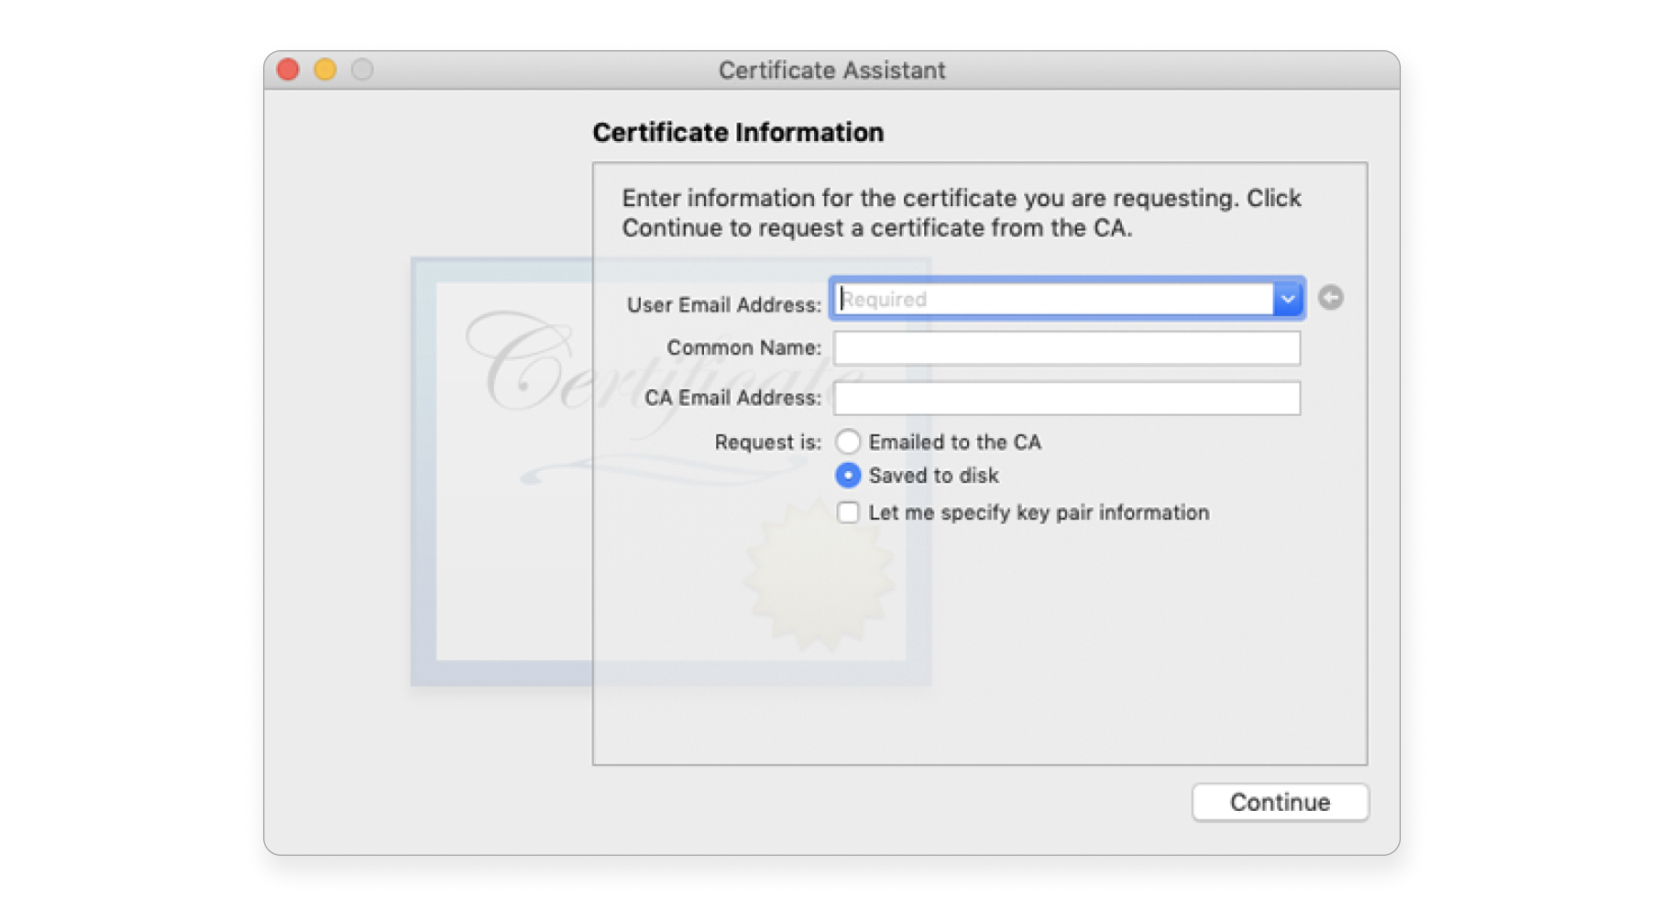
1.2 When the Certificate Information dialog box appears, enter the email address that you use for your Apple Developer account, and enter a common name for your private key. Don't enter the CA email address, choose Saved to disk, and then click Continue.
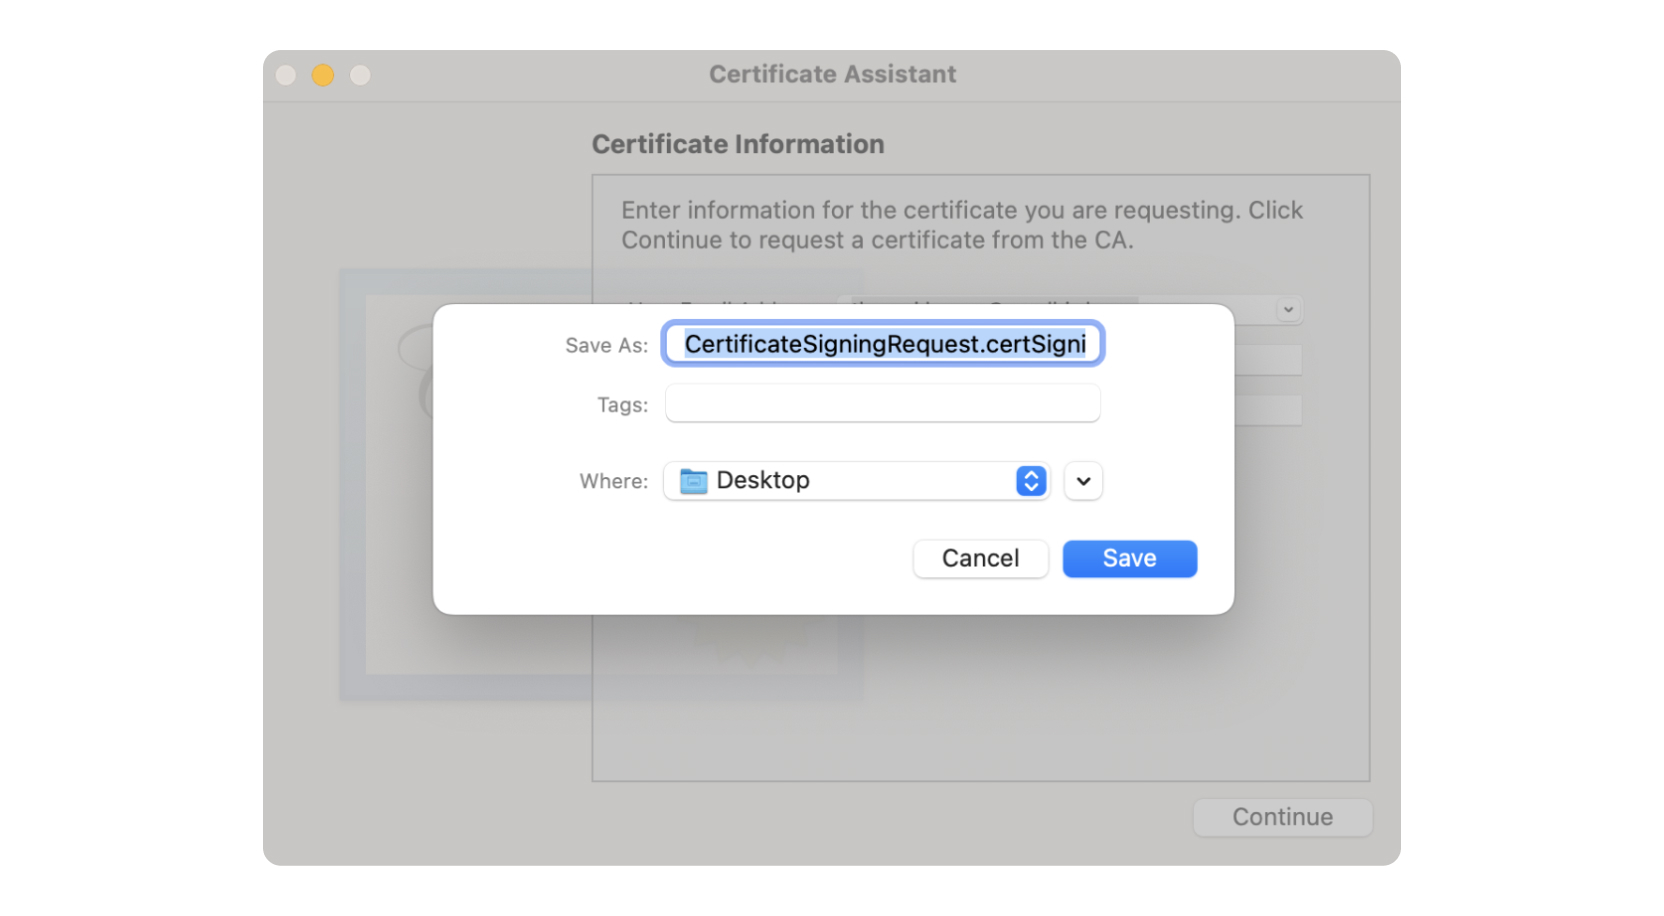
1.3 Specify the name of your CSR. Choose the location to save the file on your local disk. Then your CSR file is created. Note that the CSR file contains a public/private key pair.
2. Create a push notification SSL certificate
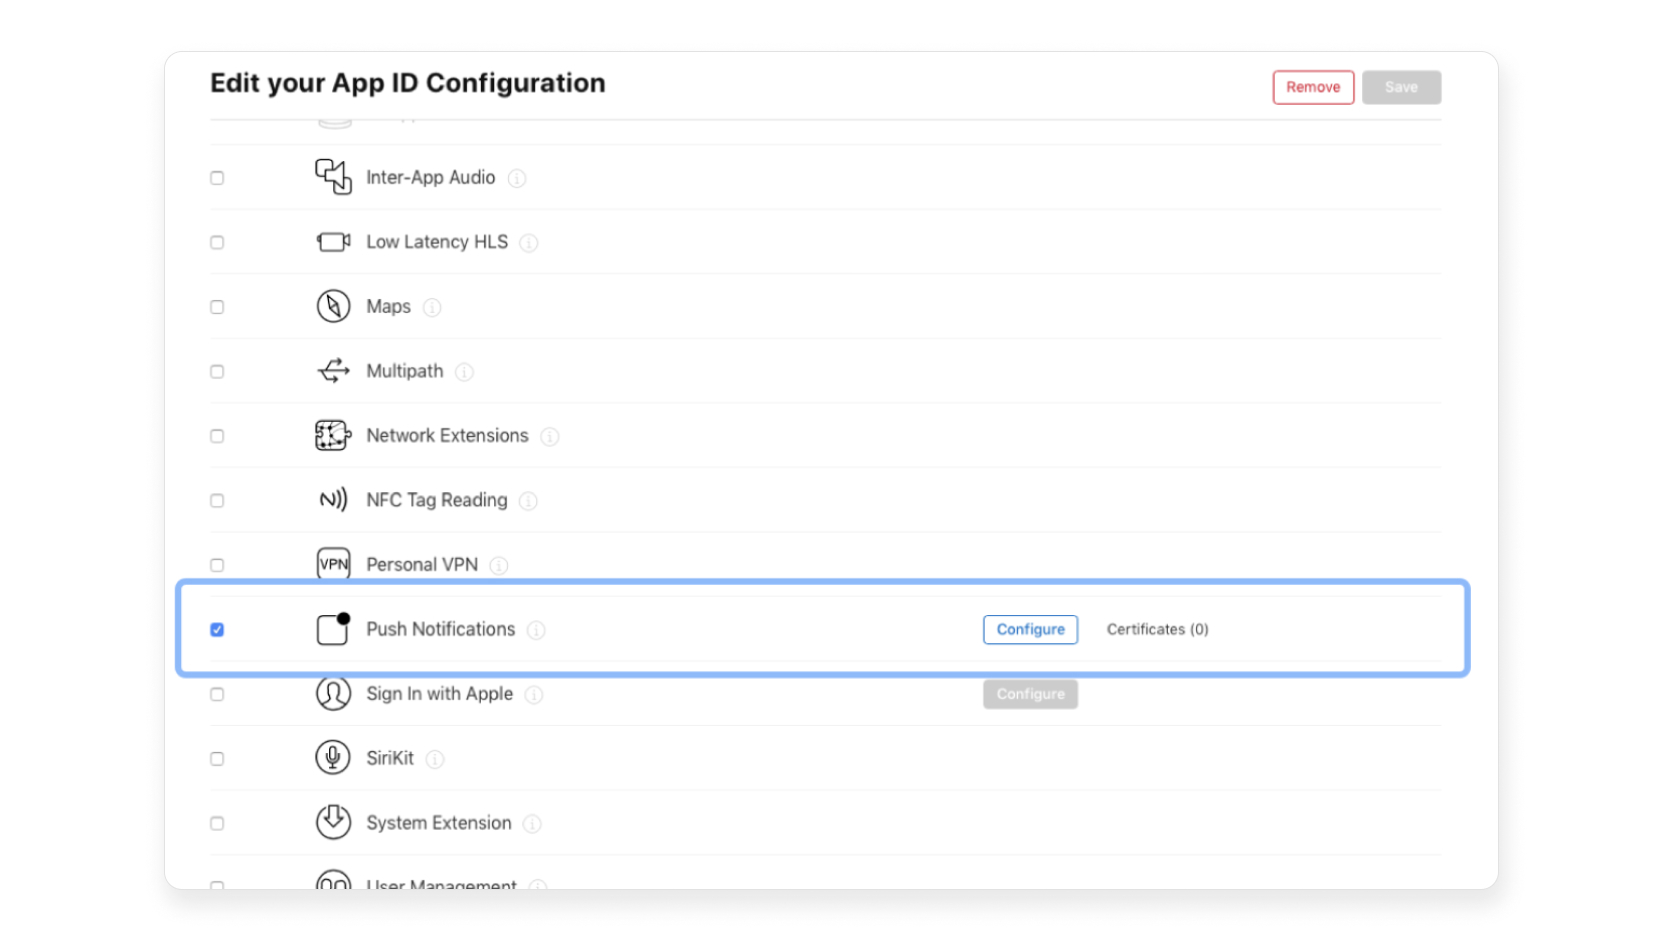
2.1 Sign in to your Apple Developer account and choose Certificates, Identifiers & Profiles.
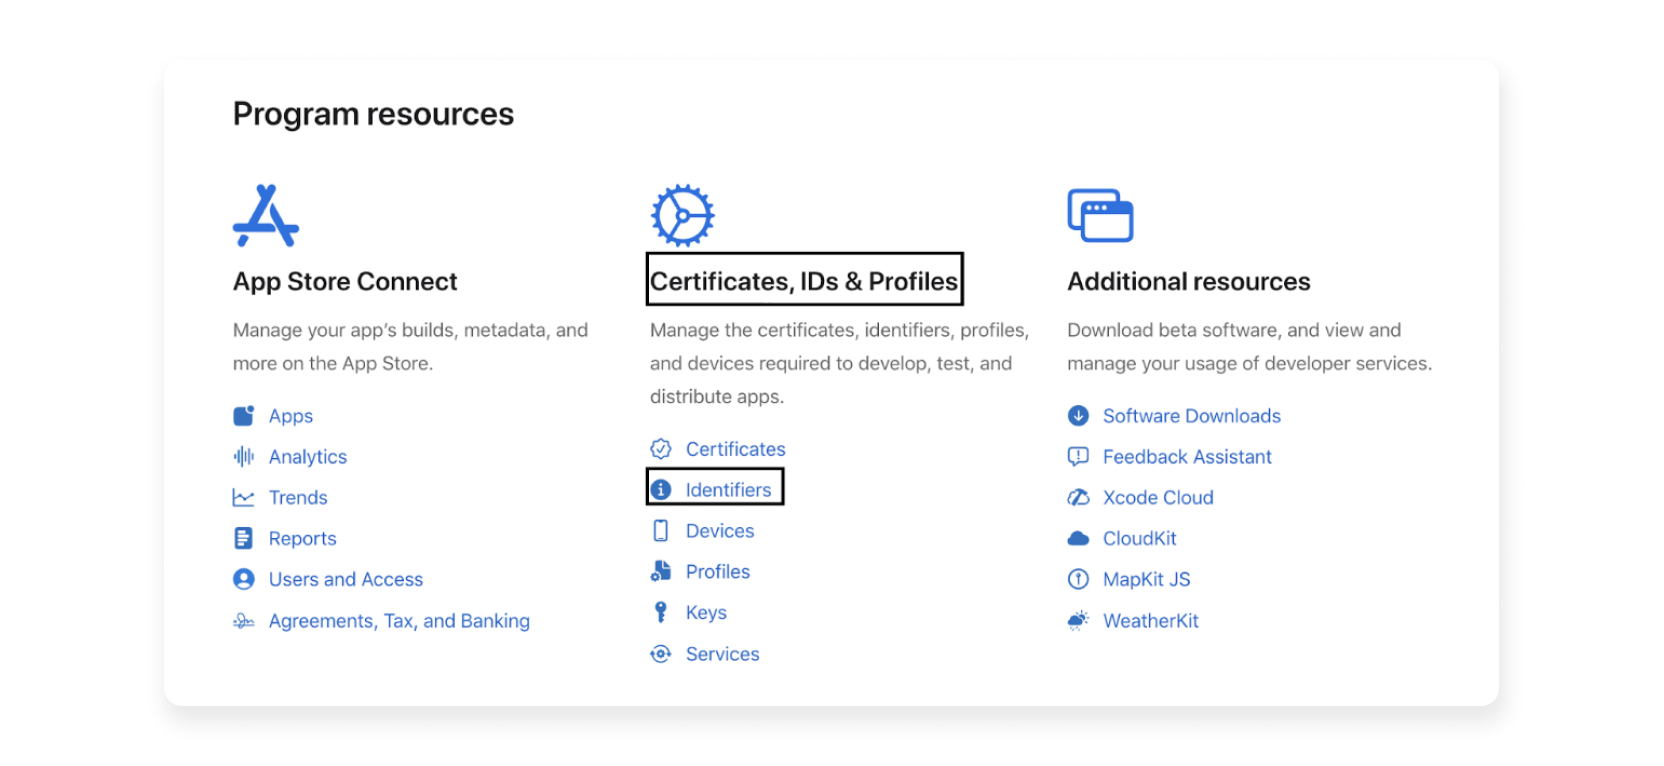
Select the Push Notifications service in the Identifiers > App IDs, then click Configure.
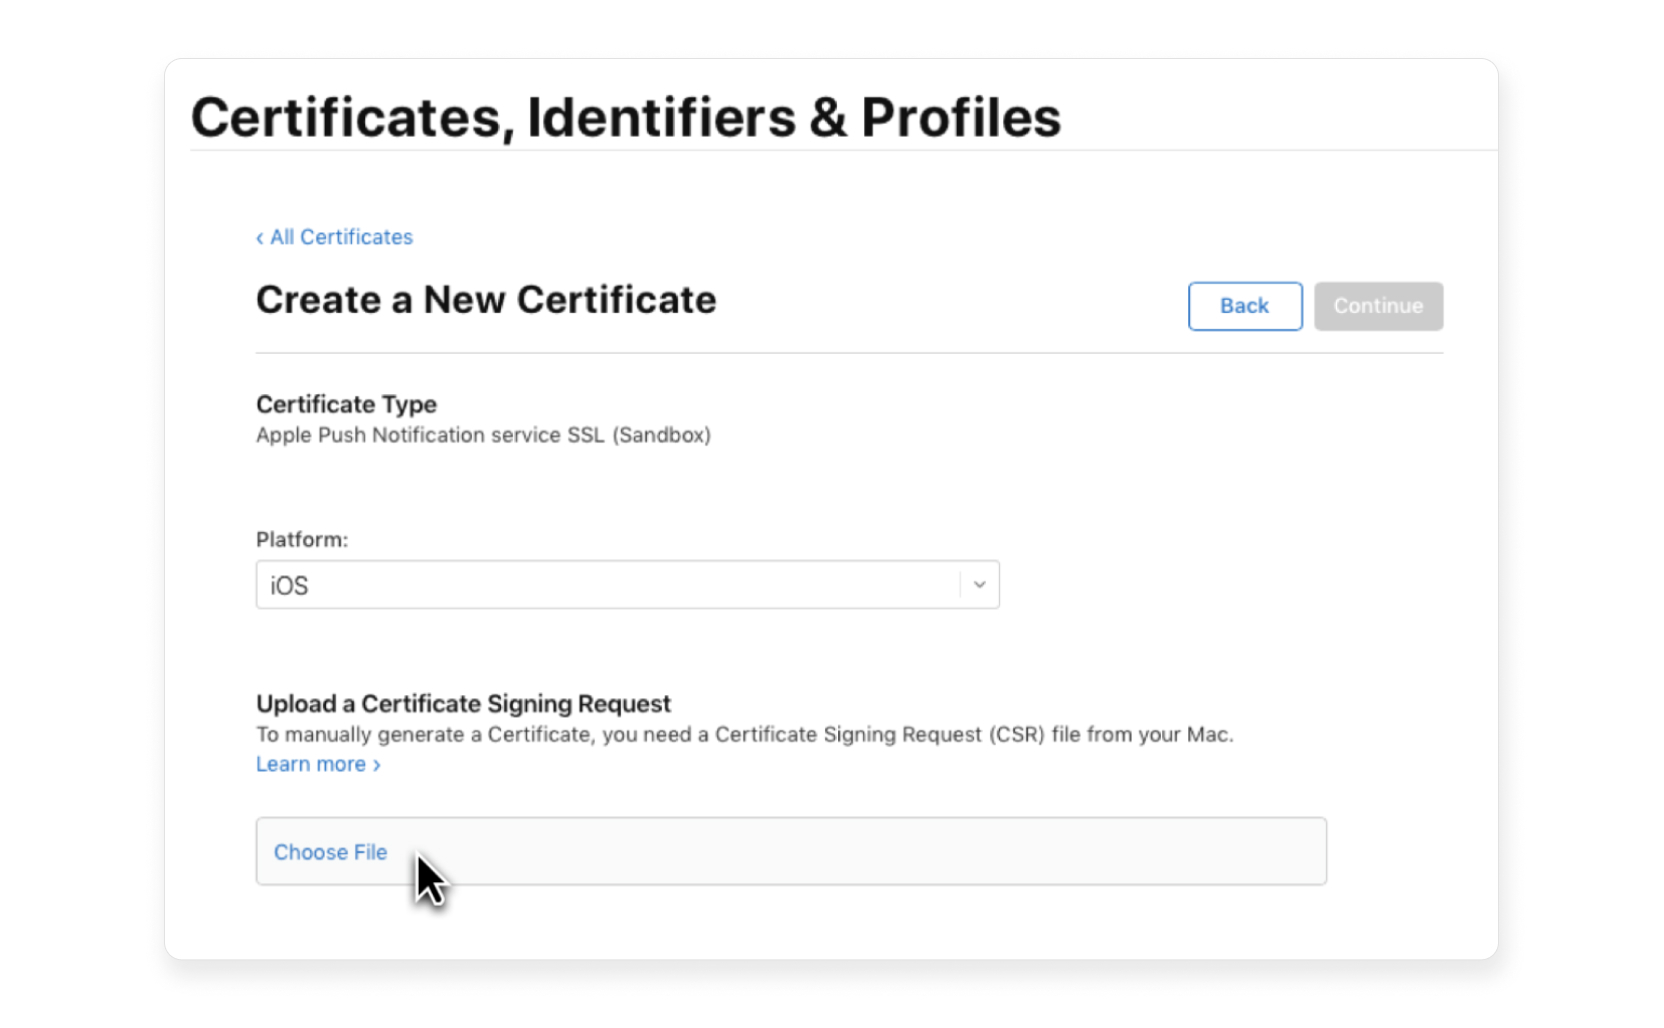
2.2 When prompted by a pop-up window, choose whether you want to create a Development or Production SSL certificate.

2.3 In the Certificates, Identifiers & Profiles pane that appears after the selection, under Upload a Certificate Signing Request, upload the CSR file you created from Step 1 (Generate a CSR certificate). To complete the process, click the Continue button above. When the certificate is ready, choose Download to save it to your Mac.
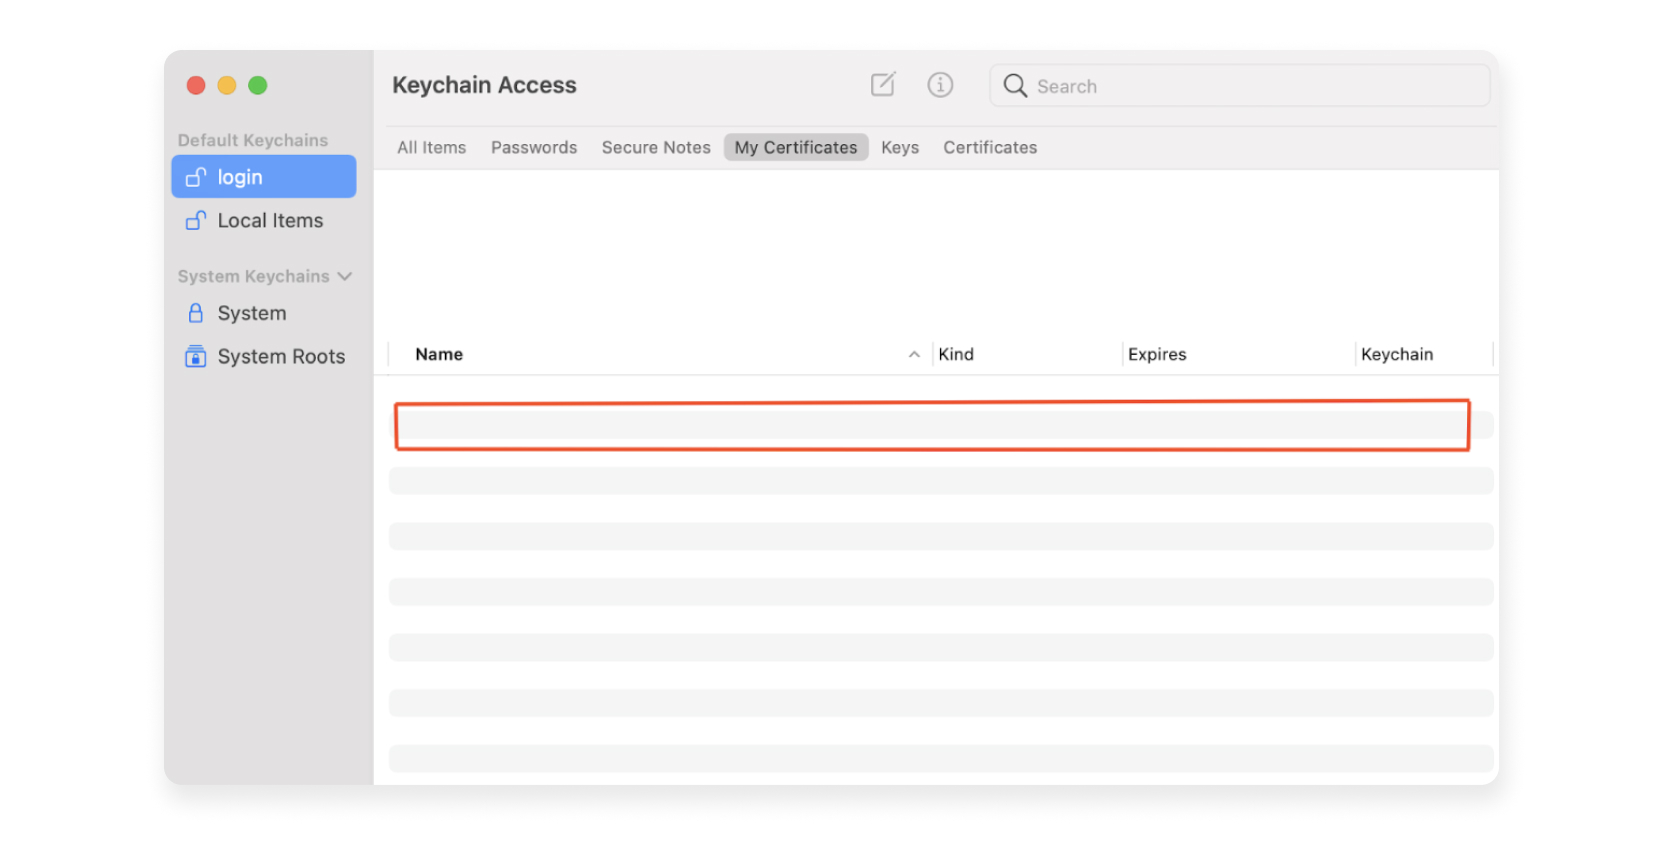
2.4 Finally, to install the downloaded certificate to the Keychain Access on your Mac, double-click it. On your own device, you can find the certificate in the Keychain Access > login > Certificates. You should see the certificate in the area denoted below.
3. Export a .p12 file and upload it to the Sendbird Dashboard
A .p12 file is a set of certificates that you generated when building a client app for iOS. The Sendbird server needs to use some of your confidential information in your .p12 file to communicate with and send notification requests to APNs on behalf of your server.
You can register your .p12 file to the Sendbird server through your dashboard or by using the platform API's add an APNs push configuration action. The following steps show how to register a .p12 file in the Dashboard.
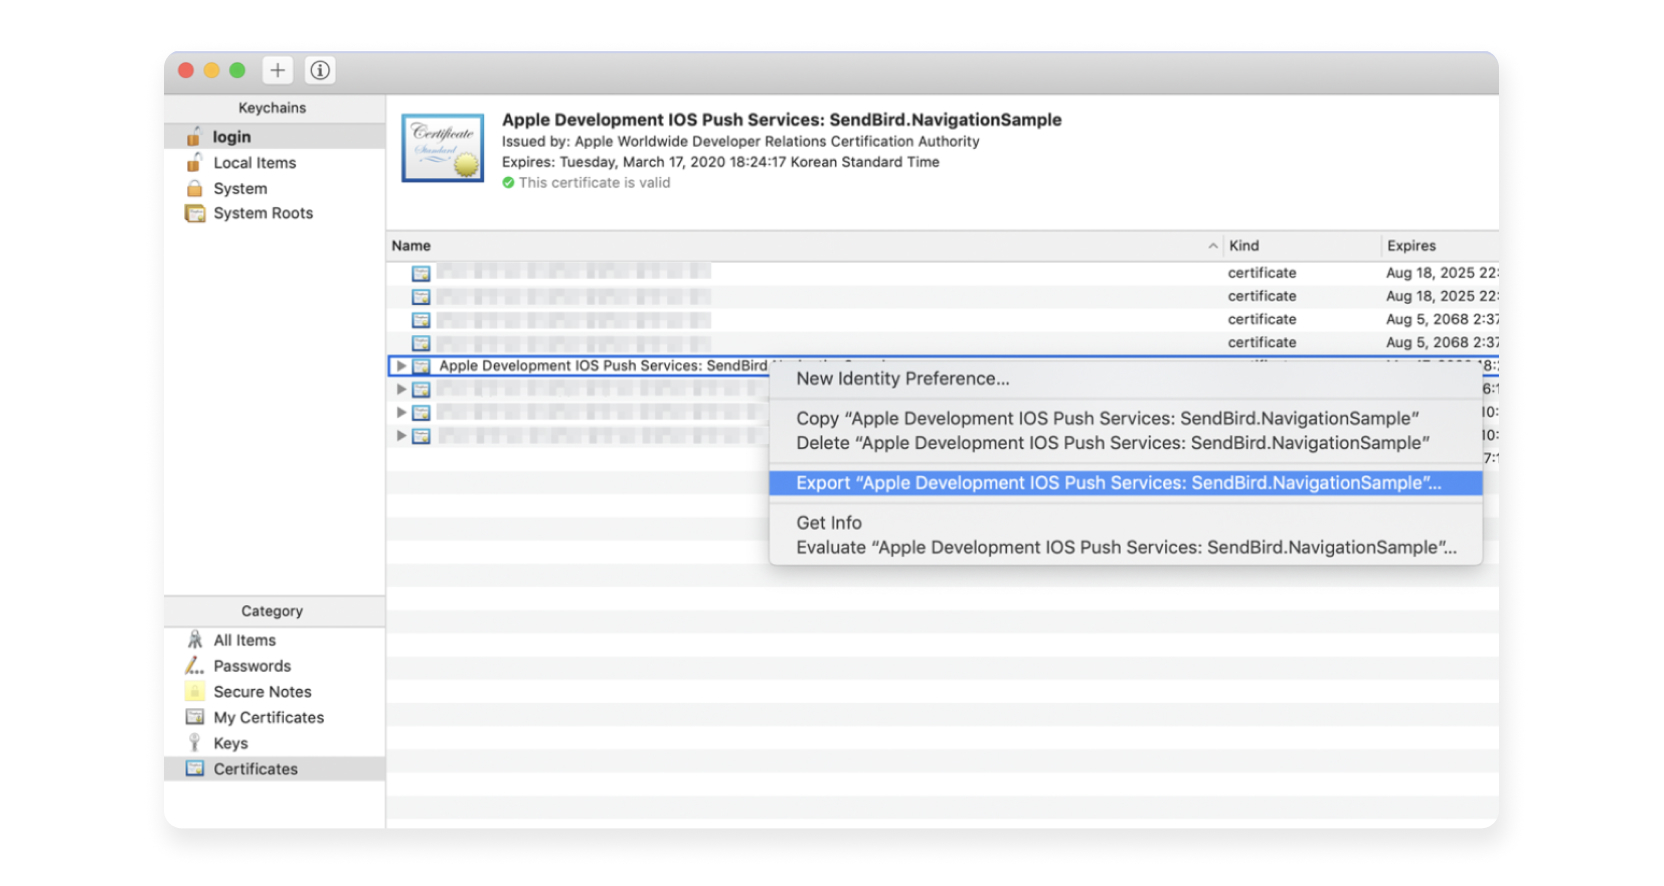
3.1 Open Keychain Access and go to login > Certificates. Find the push notification SSL certificate you just added, right-click the certificate, and then select Export "YOUR_PROJECT_NAME" from the context menu to get a .p12 file that contains the certificate. Type a name for the .p12 file and save it to your Mac. Do not provide an export password when prompted.
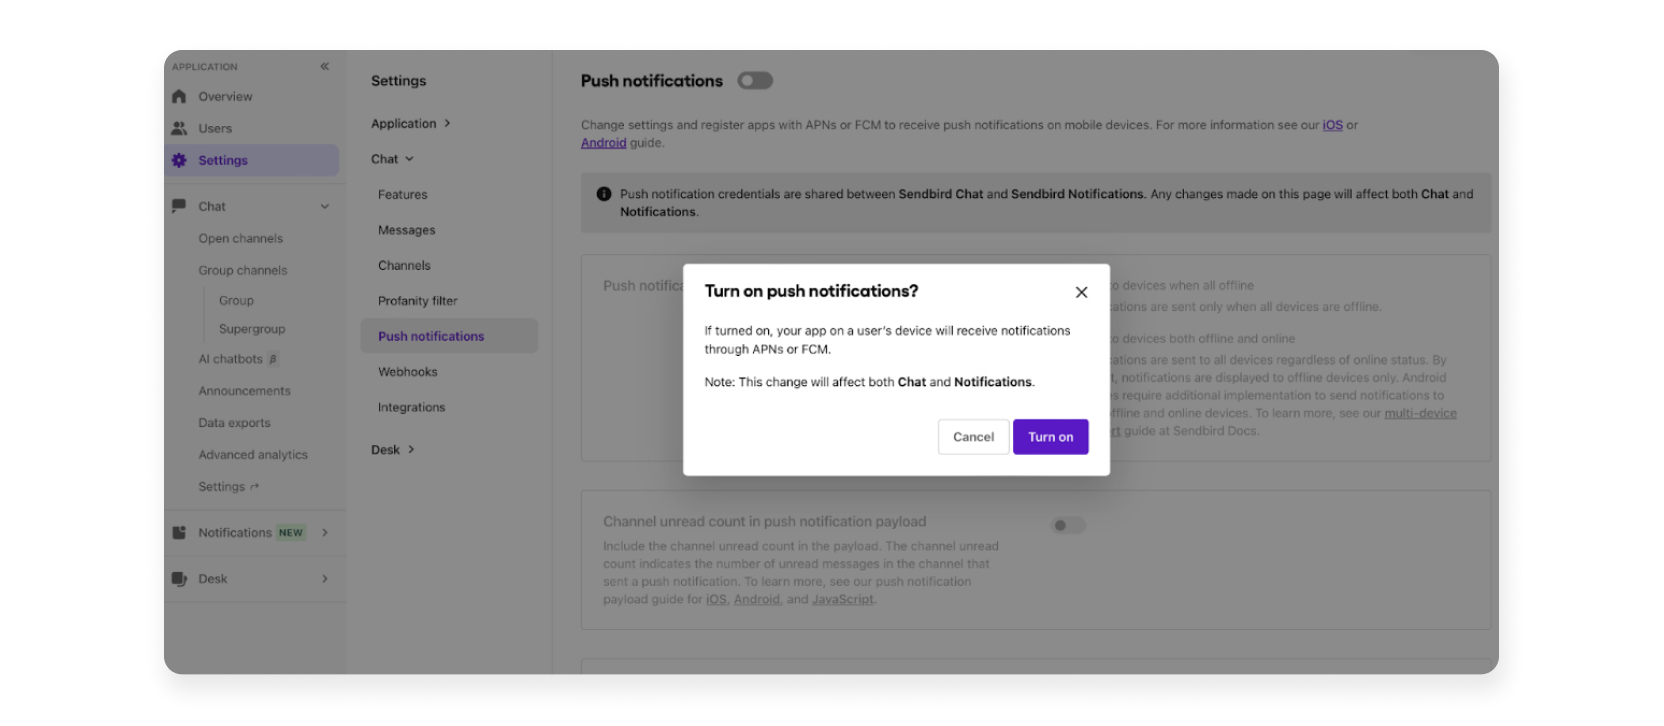
3.2 Sign in to the Sendbird dashboard and navigate to ‘Settings > Chat > Push notifications’. Turn on ‘Push notifications’.
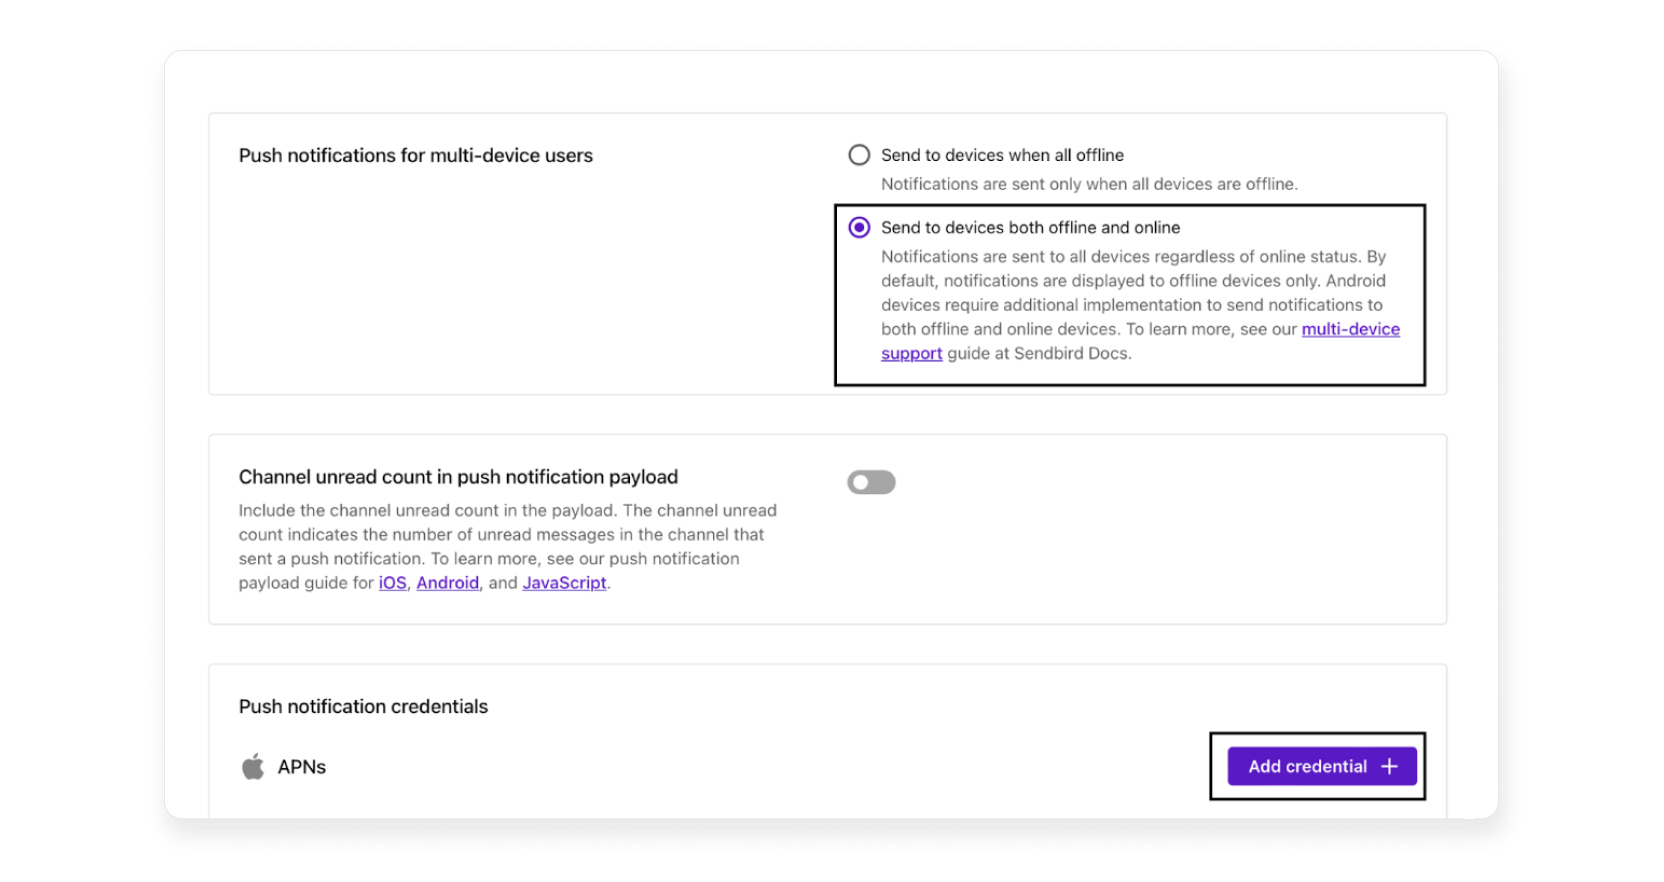
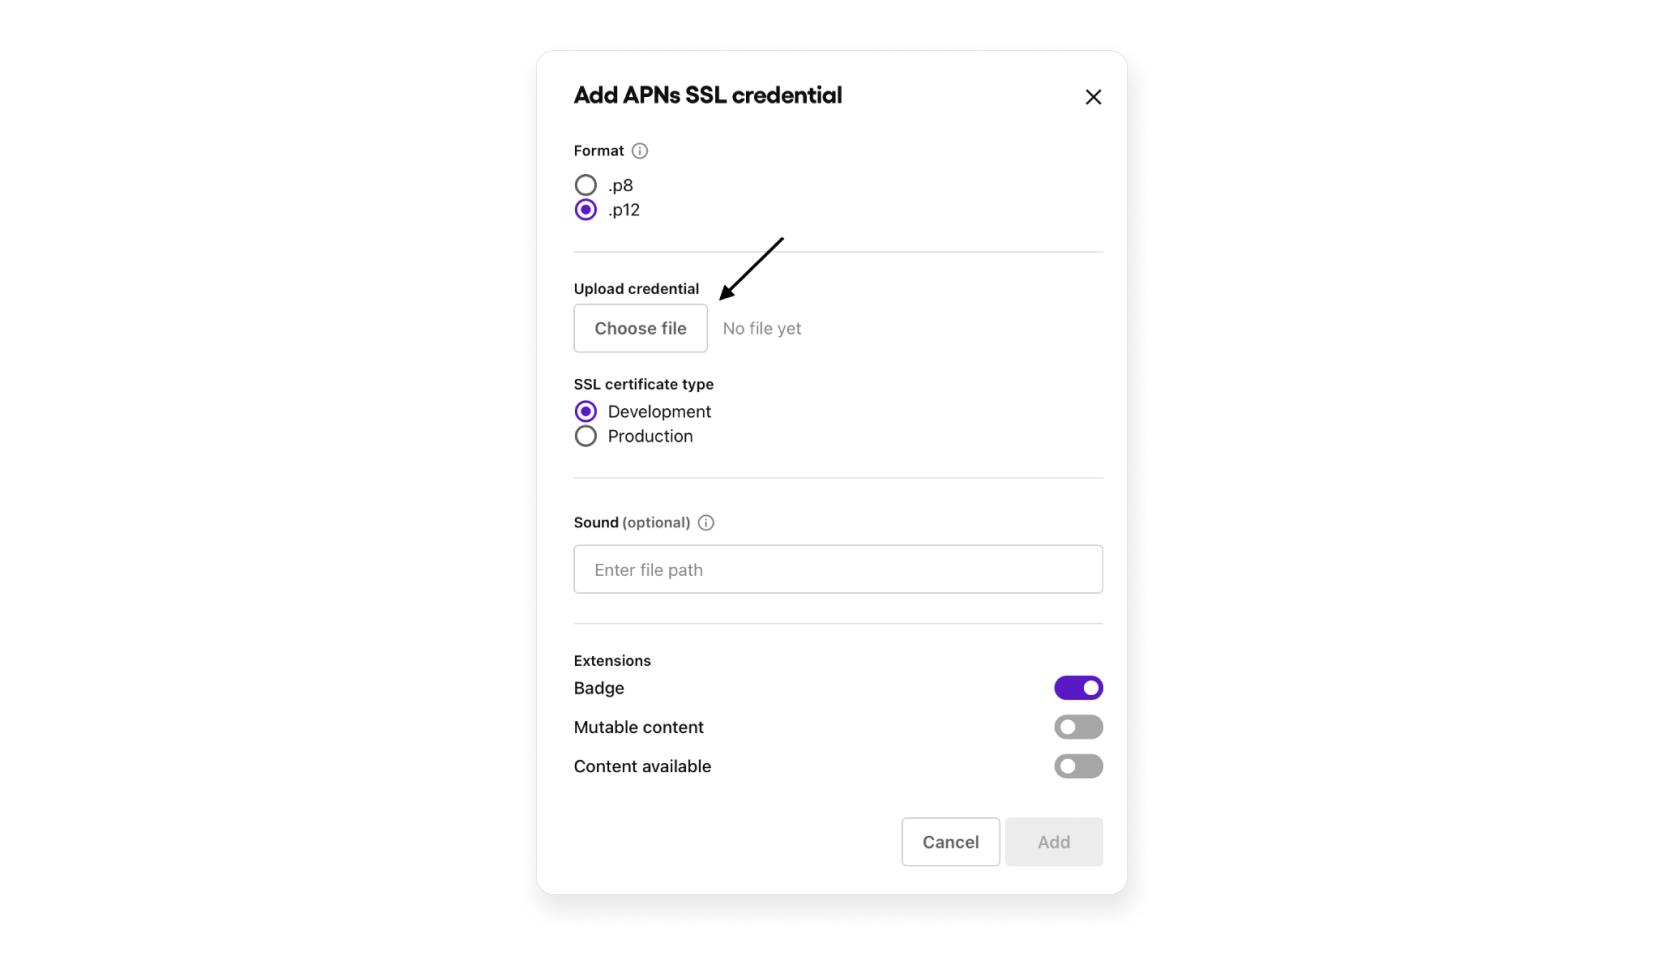
3.3 Now select the ‘Send to devices both online and offline’ option. Next, under Push notification credentials -> Add Credential where a dialog opens up, select .p12 for Format. Then click Choose file and select your .p12 certificate to upload. Once the file is uploaded, a password box appears. If needed, you can also set a password for the file and save the changes.
4. Register a push token to the Sendbird server
In order to send notifications to a specific client app on an iOS device, APNs require the app instance's globally-unique and app-specific device token which has been issued by itself. Therefore, to send notification requests to APNs on behalf of your server, the Sendbird server needs every device token of your client app instances. If an app instance is successfully registered to APNs via the registerForRemoteNotifications method, a device token is passed to an app delegate object's application:didRegisterForRemoteNotificationsWithDeviceToken: method which is called by the app.
The implementation below allows you to register a token to the Sendbird server by passing it as an argument to a parameter in the registerDevicePushToken(_:unique:completionHandler:) method in AppDelegate.swift.
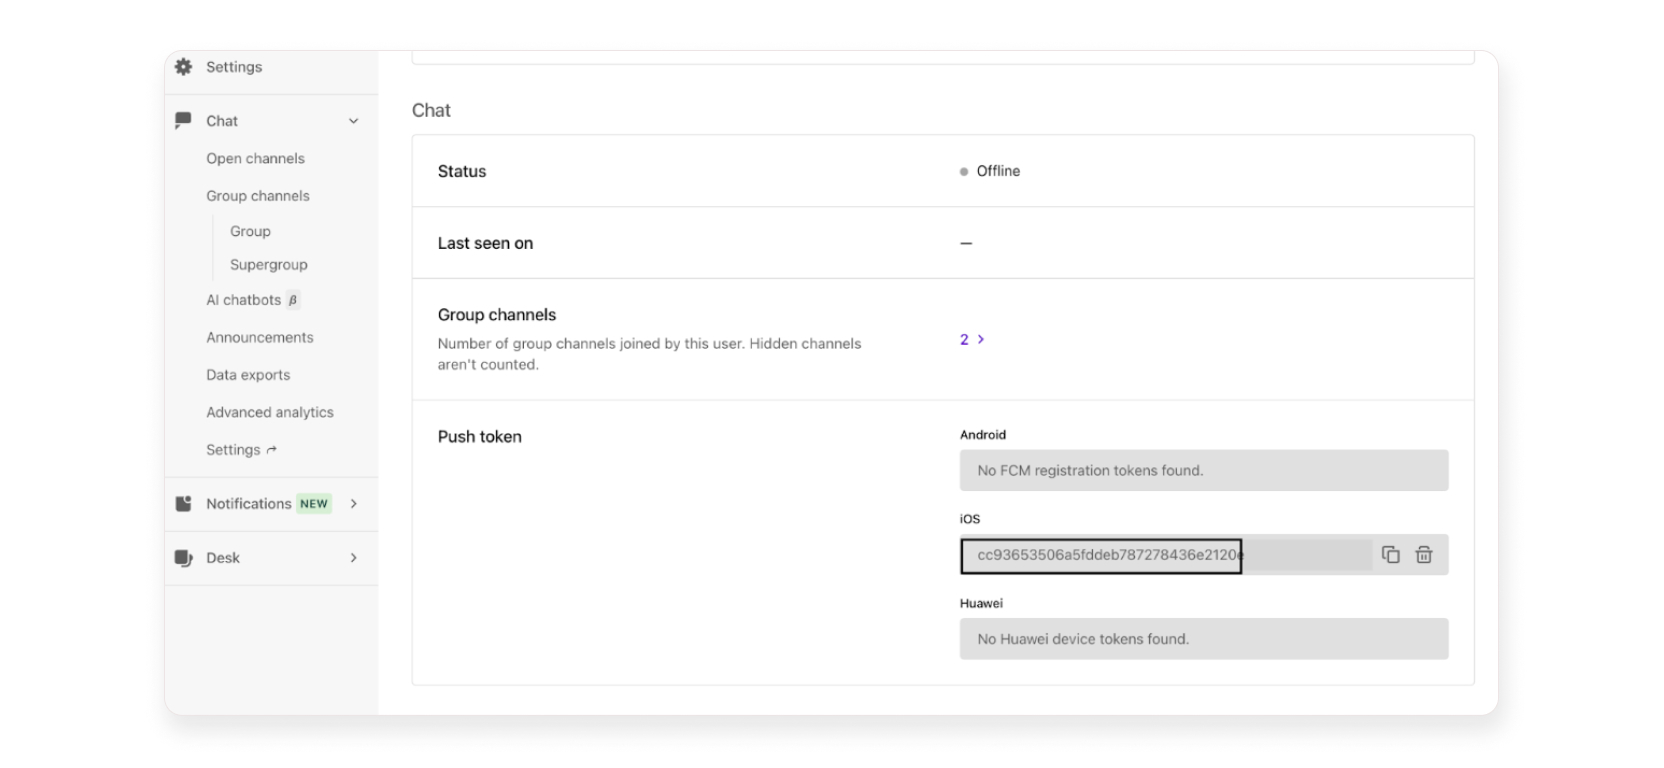
The registered push token appears in the dashboard under ‘Users > user_id > Chat’:
Note: A user can have up to 20 APNs device tokens. If a user already has 20 device tokens, the oldest token will be deleted before a new token is added. Only the 20 newest tokens will be maintained for users who already have more than 20.
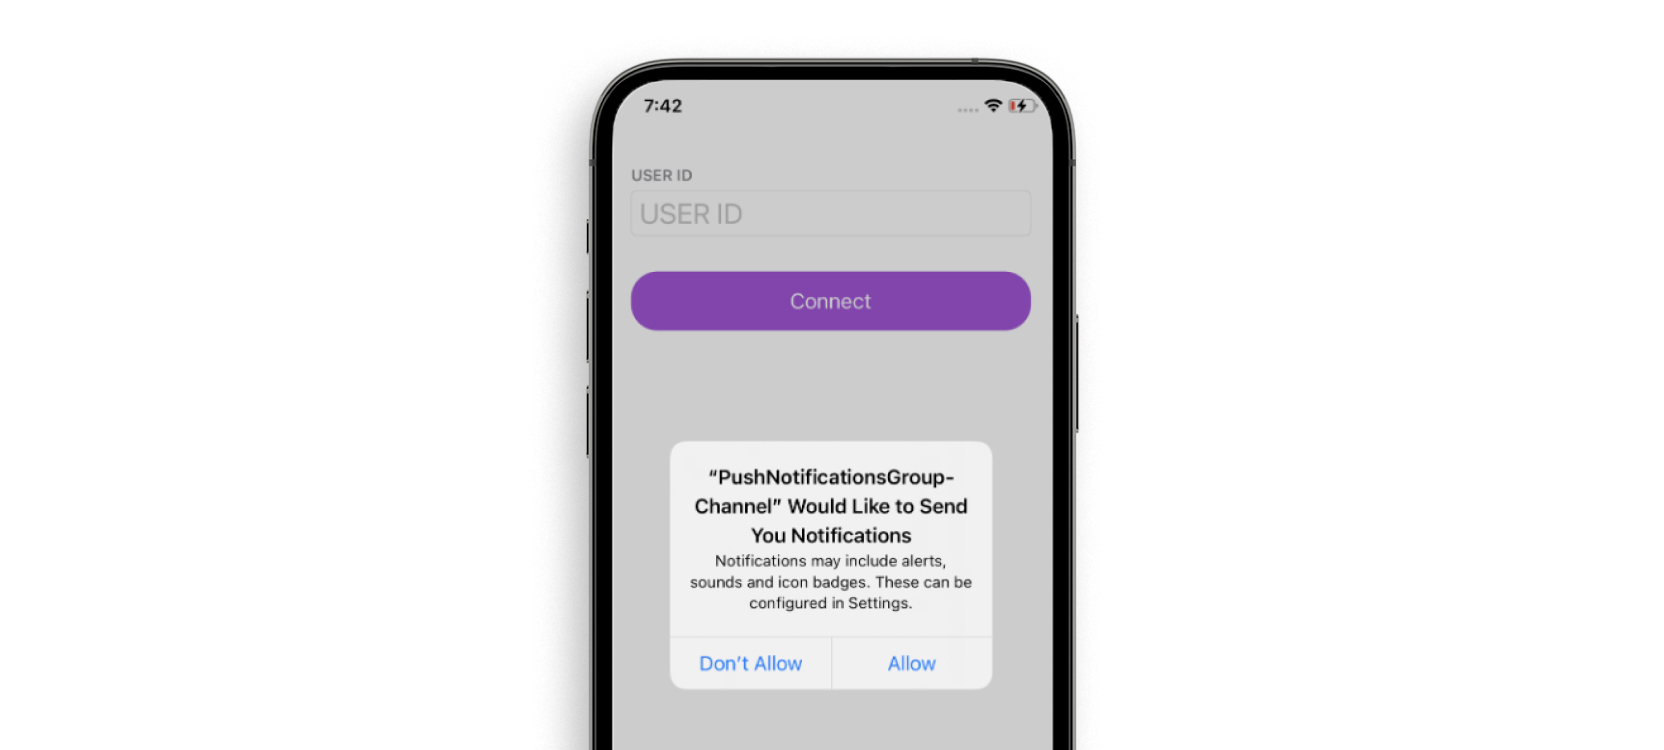
Make sure you call the following code in the appropriate place to receive permissions from your users.
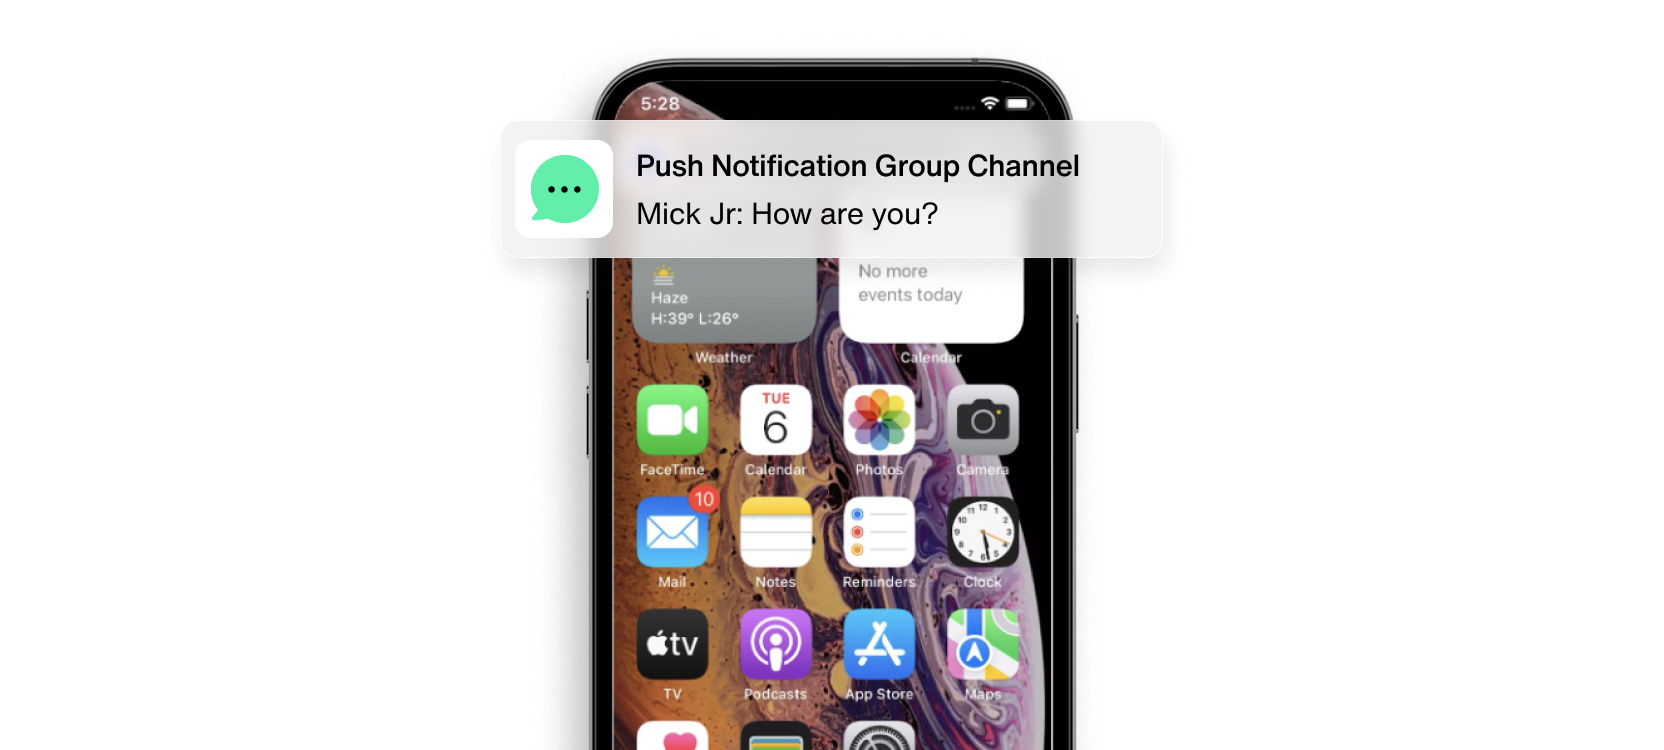
5. Handle a notification payload and deliver to the end user’s device
The Sendbird server sends notification requests to APNs with the following options.
The server also sends an additional JSON object with the sendbird key. For notification requests, APNs then deliver notifications to iOS devices.
At the client side, you can parse the data payload and handle the result to implement user reactions within the application:didReceiveRemoteNotification:fetchCompletionHandler: method, which covers all notifications from the application states of inactive, foreground, and background.
The following is a complete payload format of the sendbird object, which contains a set of provided key-value items. As for channel_unread_count, the attribute can be added to or removed from the payload in Settings > Chat > Push notifications on the Sendbird Dashboard.
Tips for troubleshooting iOS push notifications
To make it easier for developers to debug and troubleshoot push notifications, we have built a tester tool that you may find useful. Please see this tutorial to understand how to use the tool, which you can access via the Sendbird dashboard.
We also suggest that you check out this comprehensive troubleshooting iOS push notifications guide.
In addition to the above, you can debug the APNS error code by following this Apple guide.
Start building iOS push notifications today
And that’s it! You now know how to send push notifications for iOS apps with Sendbird Chat. With the guidance in this tutorial and the docs, you’ll be on your way to sending timely, relevant, and engaging push notifications in no time! We also suggest that you join the Sendbird Community to tap into more resources and learn from others' expertise.
Our experts are always here to help; contact us with any questions, comments, or concerns. Also, if you are looking for omnichannel notification capabilities beyond push notifications for iOS check out Sendbird's Business Messaging solution spanning SMS, WhatsApp, and in-app notifications.
Happy push notifications building! 💻


