
How to create a voting poll for devs: Using Sendbird Polls with UIKit

Enabling fast, efficient decision making: Create a voting poll
Polls allow users to share opinions and interact with each other. They enable quick decision making by helping individuals to come together to understand others’ preferences in a fast and concise way. Whether it’s choosing a location to meet at, figuring out the best time for an event, or deciding which movies to watch, polls avoid excess conversation and provide a fast clear answer for everyone.
So how can you create a voting poll? This tutorial will show you how to build an application using the Sendbird Chat SDK’s new polls feature integrated within Sendbird UIKit for React.
You may also find it useful to watch this video tutorial.
Getting started
To get started, create a new application and users in the Sendbird dashboard. The dashboard is where you can access everything in your chat service.
To get started, create a new application and users in the Sendbird dashboard. The dashboard is where you can access everything in your chat service.
Now, create a React application and install the Sendbird SDK and Sendbird UIKit for React with npm:
This sample will be using Material UI so install both material and icons-material:
Please refer to MUI docs about Material UI icons.
In your application, create a .env file to store your App ID, user ID, nickname, and access token provided in the Sendbird dashboard. Then, import each variable into the App.js file to initialize the Chat SDK and UIKit.
In App.js, import the Sendbird Provider from Sendbird UIKit. This will be the wrapper for our application. Then create a new file called CustomizedApp.js and import it into App.js. CustomizedApp will be a child component of the SendbirdProvider and contain the ChannelList, Channel, and ChannelSettings components.
SendbirdProvider is the context provider for UIKit. Make sure to pass in the appId, userId, nickname, and accessToken to initialize UIKit.
Initialize the Sendbird Chat SDK for JS in the App.js file. Use the SendbirdChat.init function and pass in the appID and modules that will be used. To be able to use the GroupChannelModule in our application, pass the GroupChannelModule in as a module. With the return of SendbirdChat.init, we use it to call .connect and pass in the userID and accessToken.
UIKit components
In CustomizedApp, import ChannelList, Channel, ChannelSettings, sendbirdSelectors, and useSendbirdStateContext from UIKit.
useSendbirdStateContext is a useState hook that allows you to access the state of sendbirdProvider. When you use sendbirdSelectors, it will require the state from useSendbirdStateContext. This sample will use the sendbirdSelector function getUpdateUserMessage, which will take in the state provided by useSendbirdStateContext.
ChannelList
The ChannelList component will render the channel list within the application. We will use the onChannelSelect property to set the channel that is clicked on in the channel list.
Channel
The Channel component will use the channelUrl, onChatHeaderActionClick, renderMessage, and renderMesageInput properties. channelUrl will set the currentChannelUrl and onChatHeaderActionClick renders the settings options to open on click.
The renderMesage property renders a CustomizedMessageItem component, which for our sample will check the type of message that is in the conversation window and return a specific layout based on the message. The types of messages in UIKit are: user, admin and file message. For this sample, there can be the 3 types of messages UIKit provides, as well as a poll message. We will go into detail about CustomizedMessageItem later in this post.
CustomizedMessageInput
The last property the Channel component will use is renderMessageInput, which returns a custom message input. Create a custom component called CustomizedMessageInput. This component will use the preset UIKit layout of the input field in a conversation window. We will add in the functionality to check if the text being typed in the input box starts with ‘/poll ’. If it does, then it will trigger a form to appear.
How to create a voting poll
Now that we’ve built the app and talked about some essential UIKit components, let’s talk about how to actually create a voting poll.
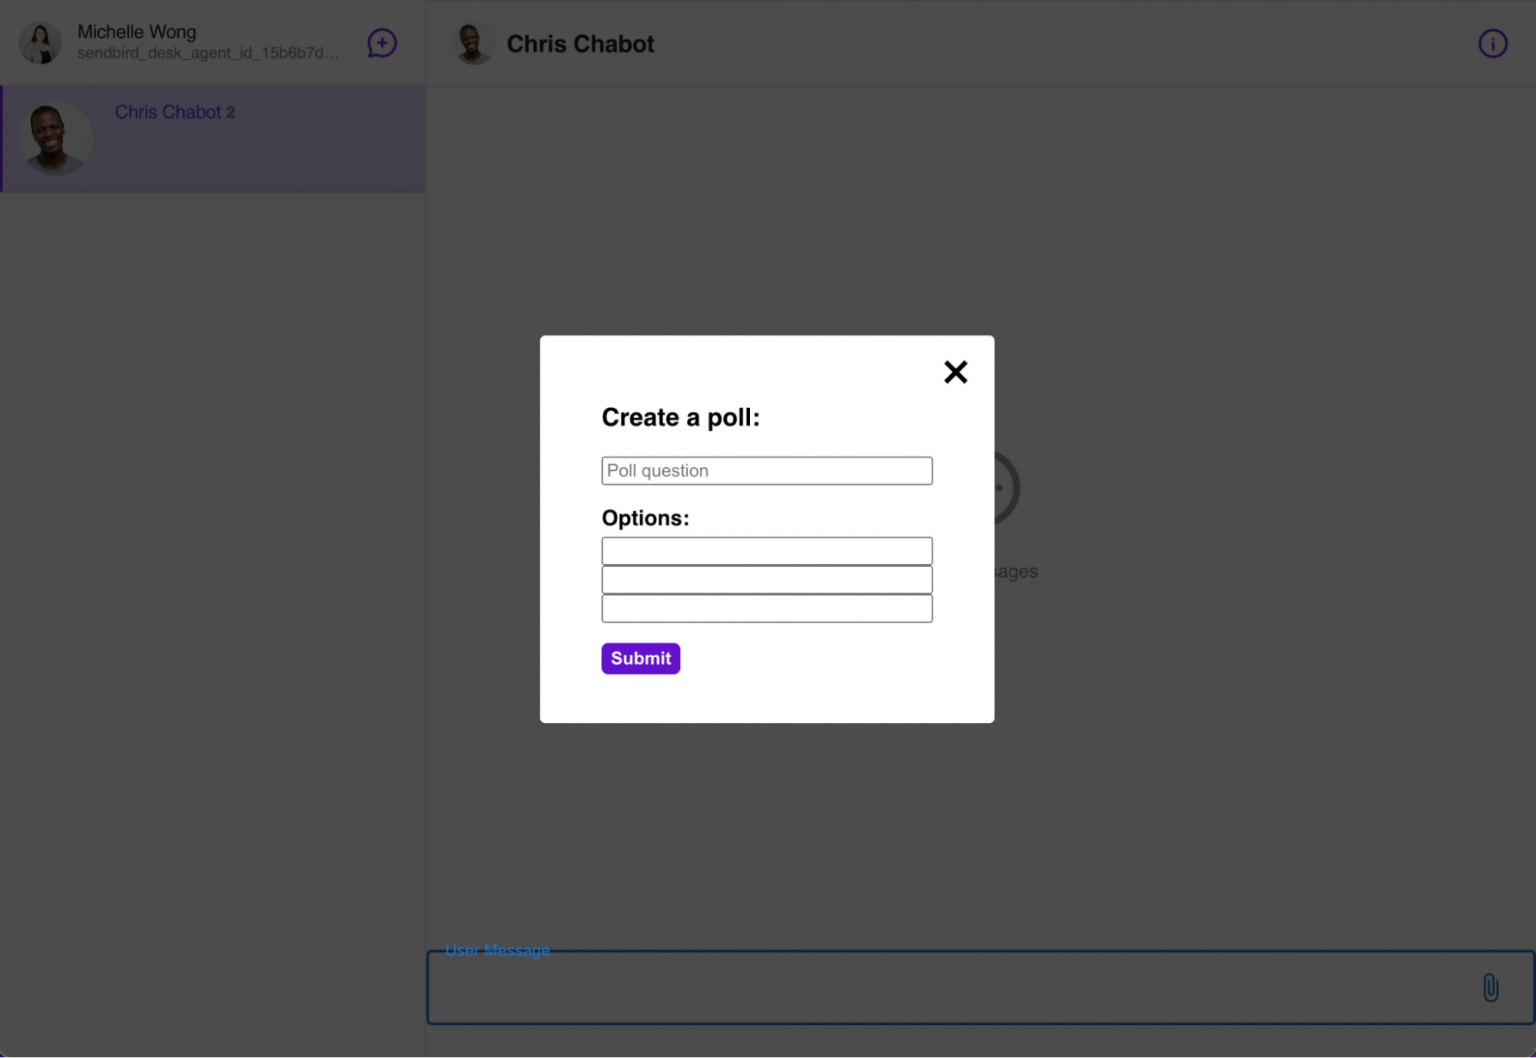
Part 1: Add Poll
Create the form called AddPoll. AddPoll allows the user to enter the poll’s title and add options. AddPoll will look like this:
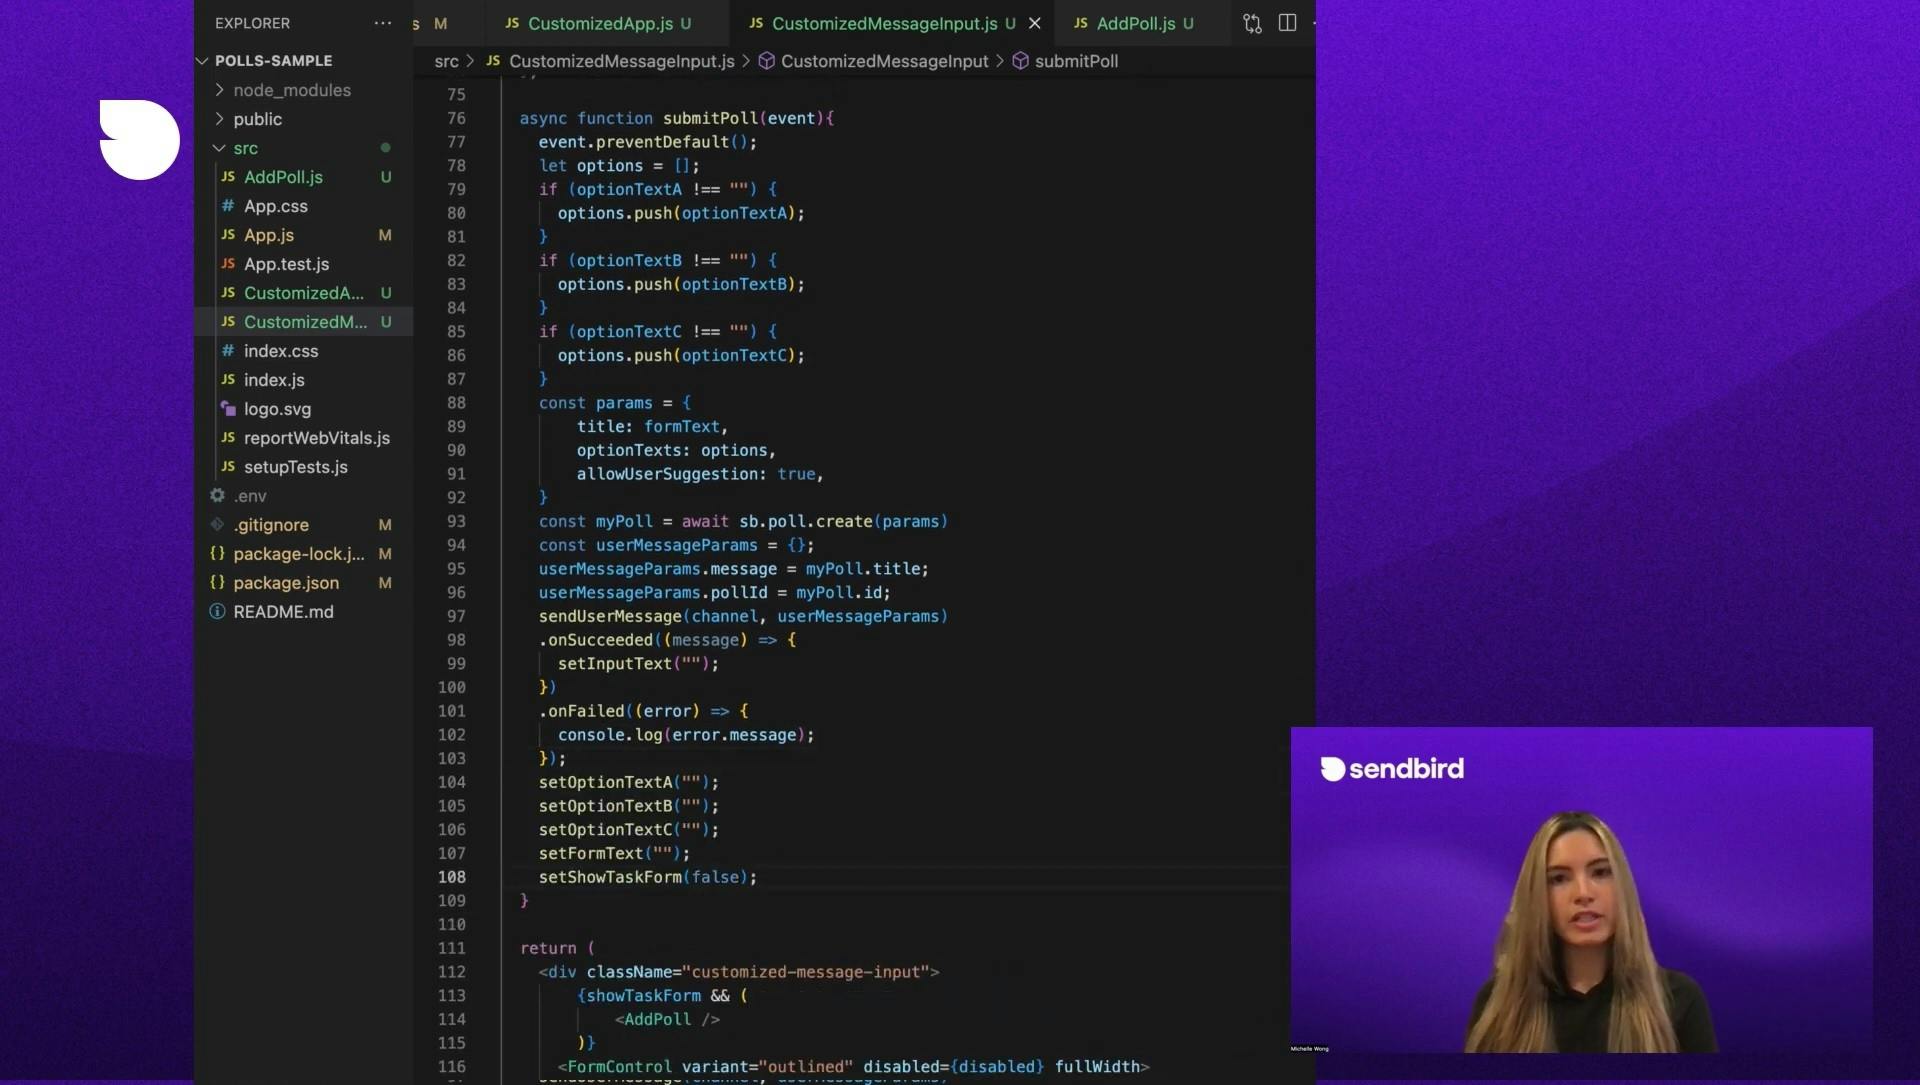
When the user clicks Submit, it will call submitPoll in CustomizedMessageInput. The submitPoll function takes the params, which were the title and options, that were received from the form, and calls the create method from the chat SDK to create a voting poll.
Once the poll is created, use sendUserMessage and pass in the channel and user message params. The user message params that need to be defined are the message and poll ID in order to send the user message and have the poll that was just created attached to that message.
Note: In the params, allowUserSuggestion is being set to true so that the poll will allow other users to add options to the poll.
Now let’s take a step back and see what the chat window looks like.
ChannelSettings
The ChannelSettings component passes in the channelUrl to update the current channel and onCloseClick to close the settings options menu.
After importing UIKit components, add the following elements to wrap around each component:
- A div with the class name “channel-list” around ChannelList
- A div with the class name “channel-chat” around Channel
- A div with the class name “channel-settings” around ChannelSettings
Now, create a div to wrap around all three components and their div wrappers with the class name “channel-wrap”. These class names have preset styling components from UIKit that we want to apply to our application.
To have the chat take up the entire view with the channel list on the left and the conversation window on the right, apply the following styling to the App.css file:
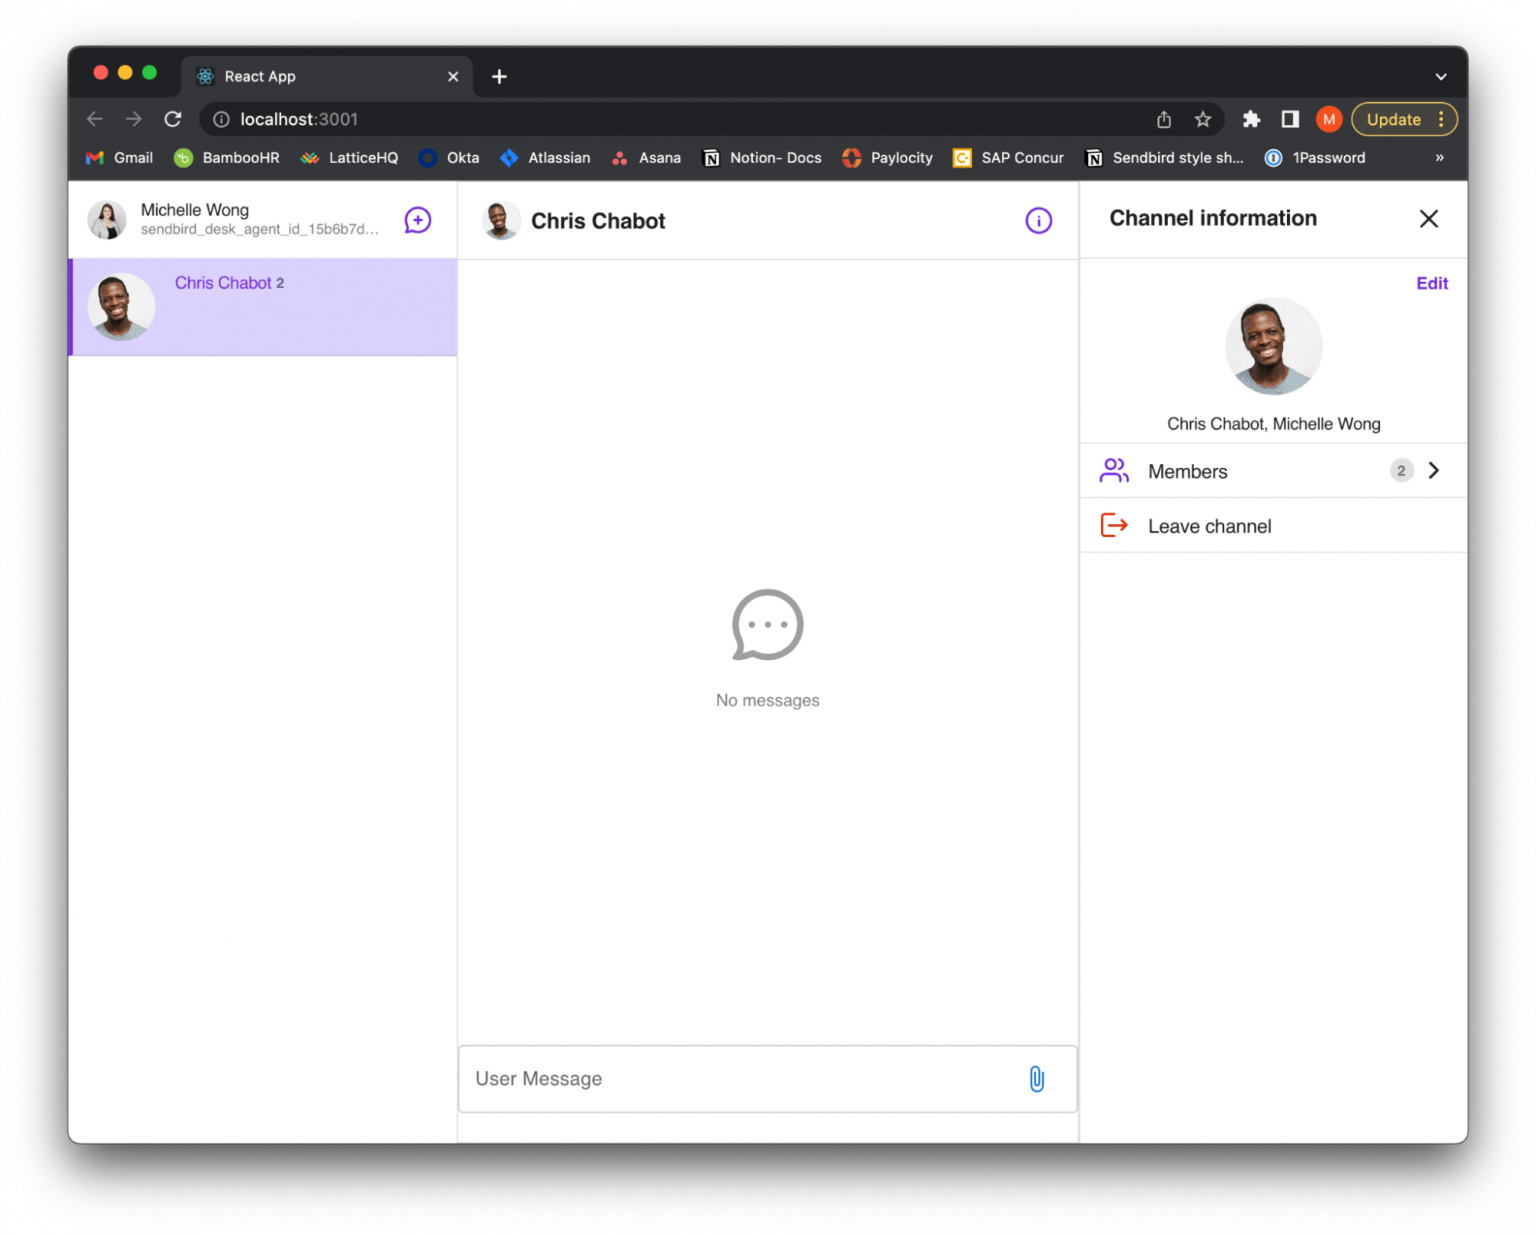
The application will be displayed as the following:
CustomizedMessageItem
As previously mentioned, the Channel component uses renderMessage to return the custom component, CustomizedMessageItem. Pass in message, userId, currentChannel, updateUserMessage and sb.CustomizedMessageItem will check each message in the conversation if it is an admin, file, user, or poll message.
Based on the type of message that it is, it will return the message to be formatted with a certain layout. Import each type of message that it can return, either an AdminMessage, FileMessage, or UserMessage from UIKit as well as a custom PollMessage component.
The AdminMessage, FileMessage and UserMessage utilize the default layouts provided by UIKit.
AdminMessage:
FileMessage:
UserMessage:
While UserMessage uses the preset design from UIKit, we want to add in additional functionality to trigger additional options to create a poll from a user message. A user can click on the dropdown options for their message and view the default options, which are an edit and delete button. Add in another option to create a poll.
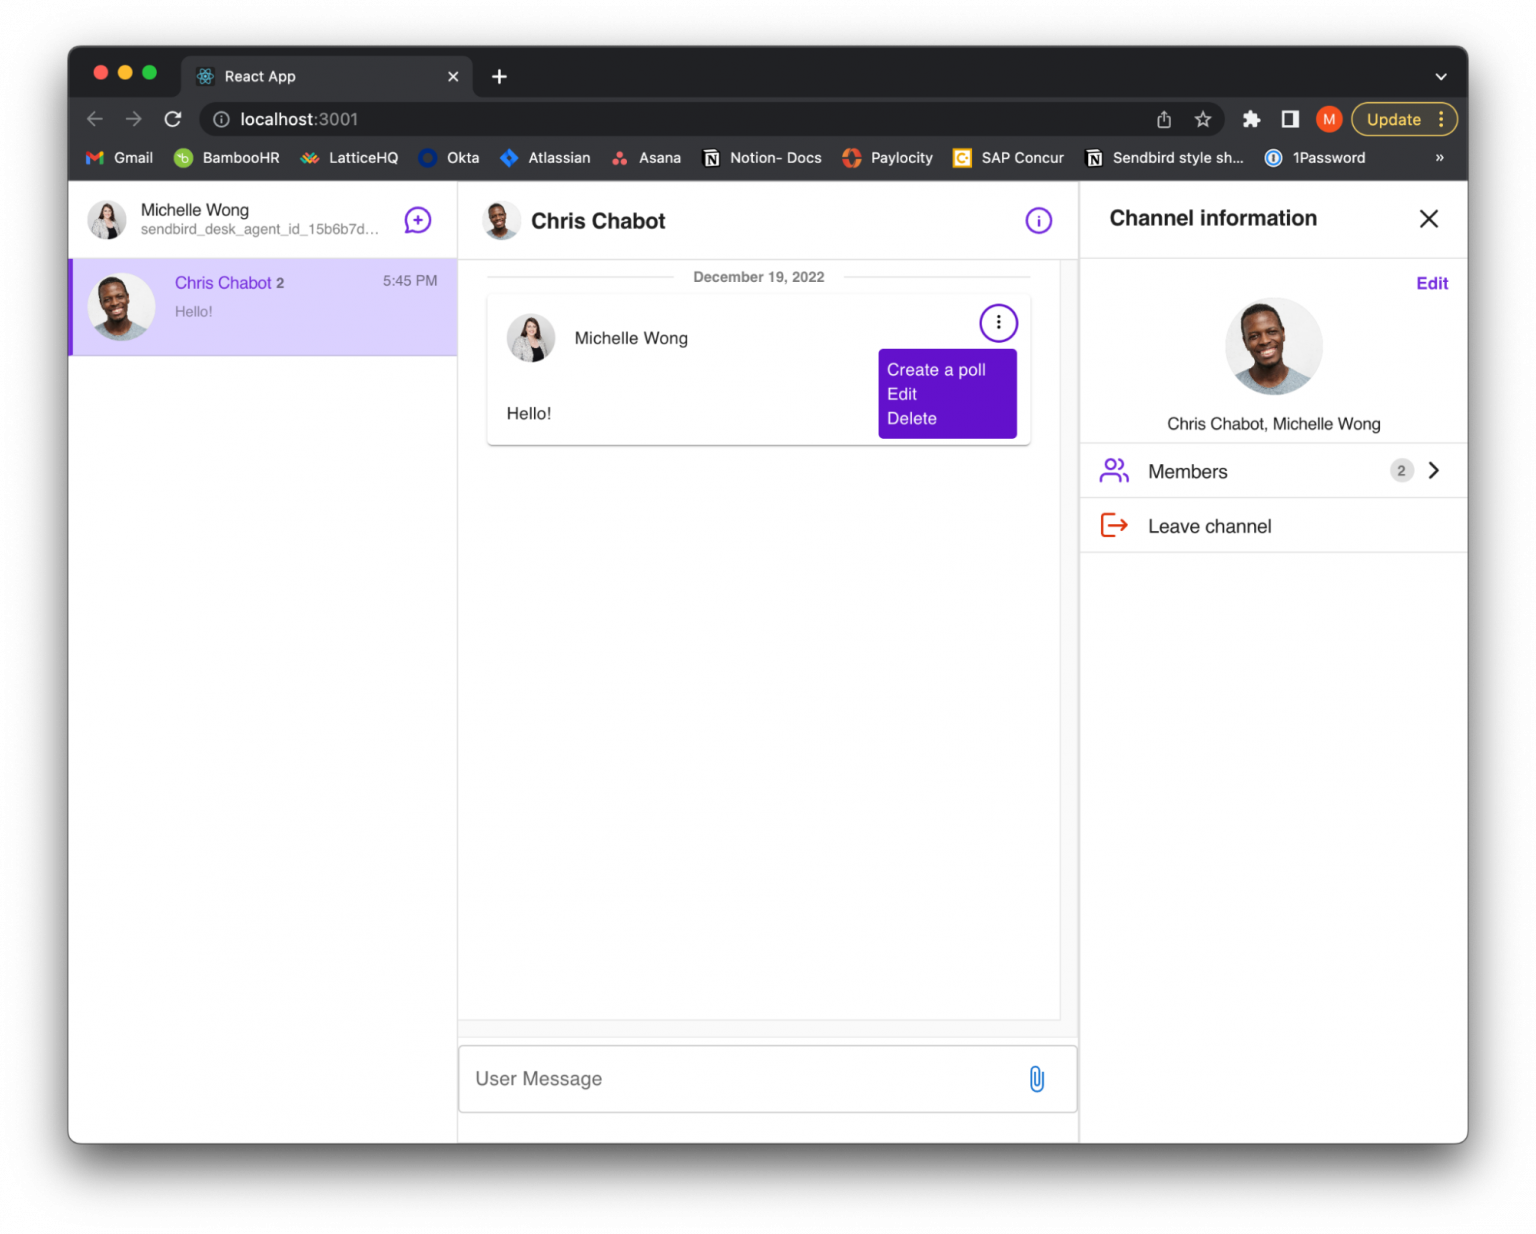
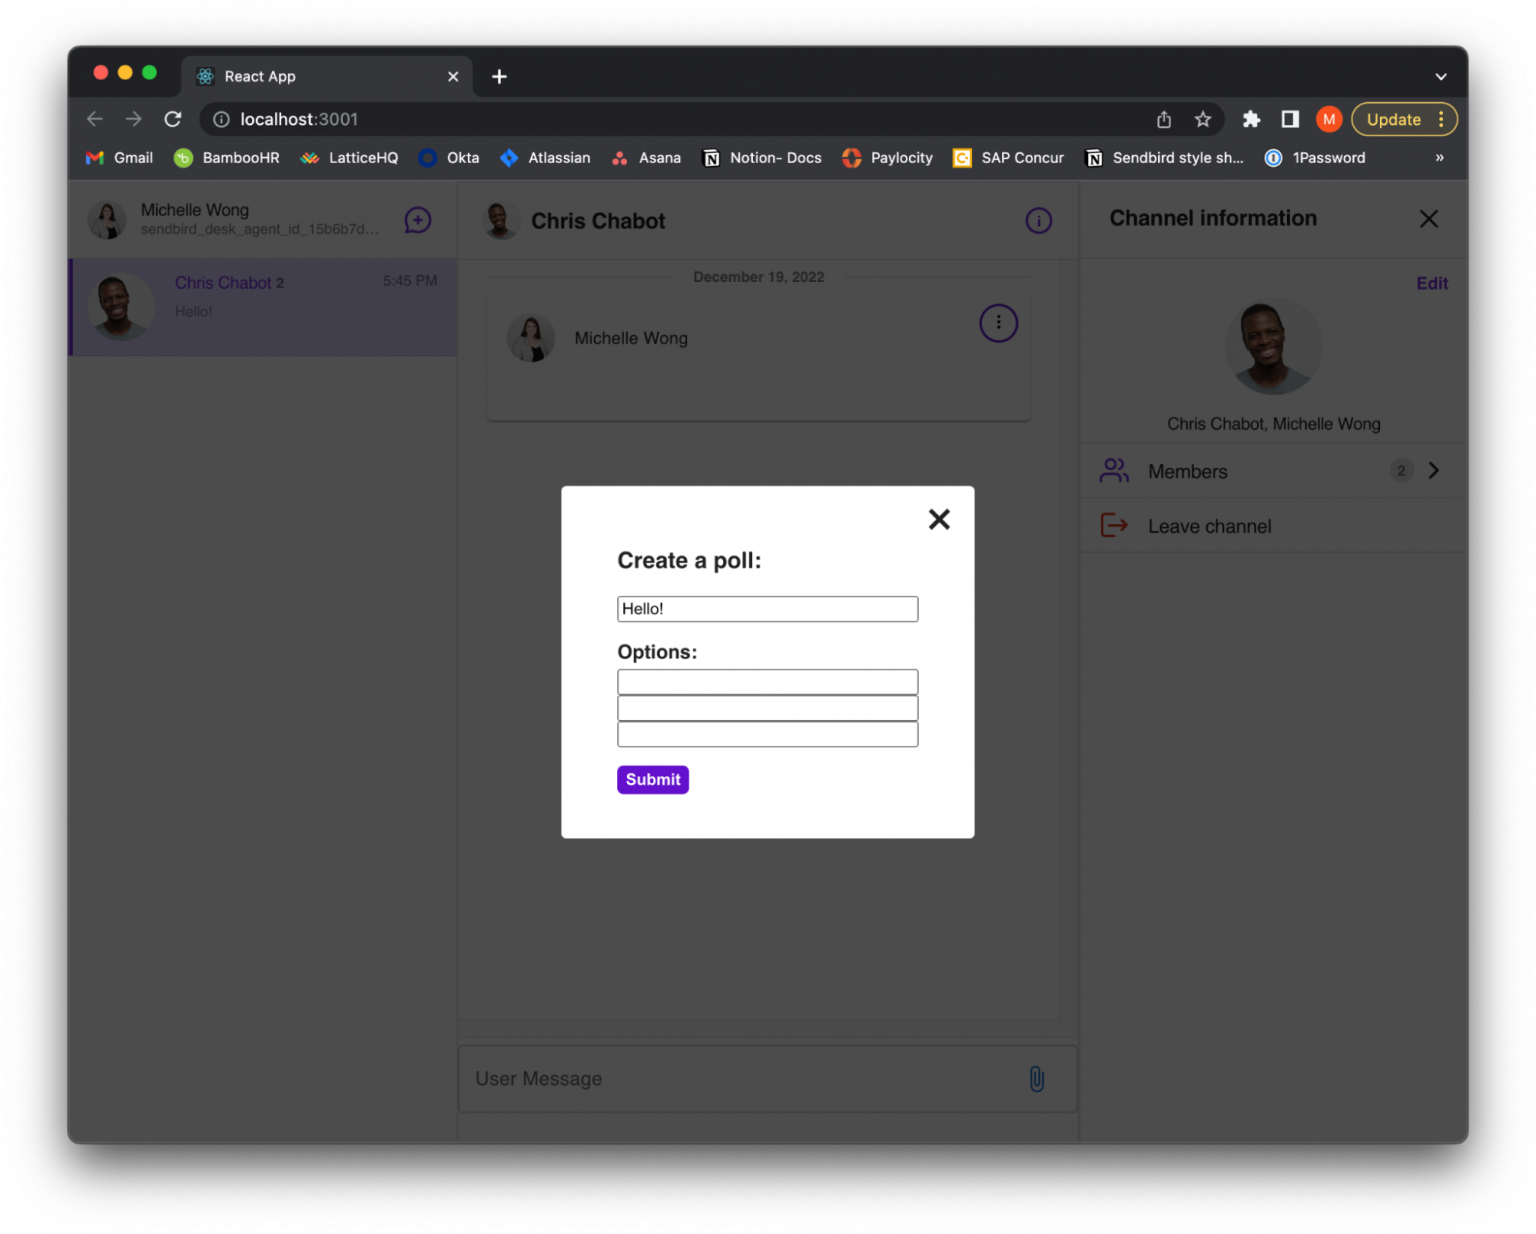
By clicking ‘Create a poll’, a form will render and ask for the poll’s question and options. To render the form, create an AddPoll component. Import this component in UserMessage.
The AddPoll form will be displayed as the following:
When this form is submitted, it will call the submitPoll function in UserMessage. In submitPoll, set the params that are received, such as the title and optionTexts.
Since we want other users to be able to add an option to someone else’s poll, we are also going to set the allowUserSuggestion to true. There are multiple params that are able to be set for a poll. Please refer to the polls properties.
Now, use Poll.create() and pass in the params object to create a poll. Once the poll is returned, set the userMessageParams. Set the userMessageParams’ message as the poll’s title that was passed in and set the userMessageParams’ poll ID; this is the new poll ID that was generated on creation of the poll. This will connect the new poll with the message.
After the userMessageParams are defined, call updateUserMessage and pass in the channel, message ID and userMessageParams. This will update the message to hold the new poll information.
The submitPoll function should look like this:
Now, since the message contains poll data, the message is considered to be a poll and it will be rendered to the conversation window as a poll message. Here is the complete UserMessage component:
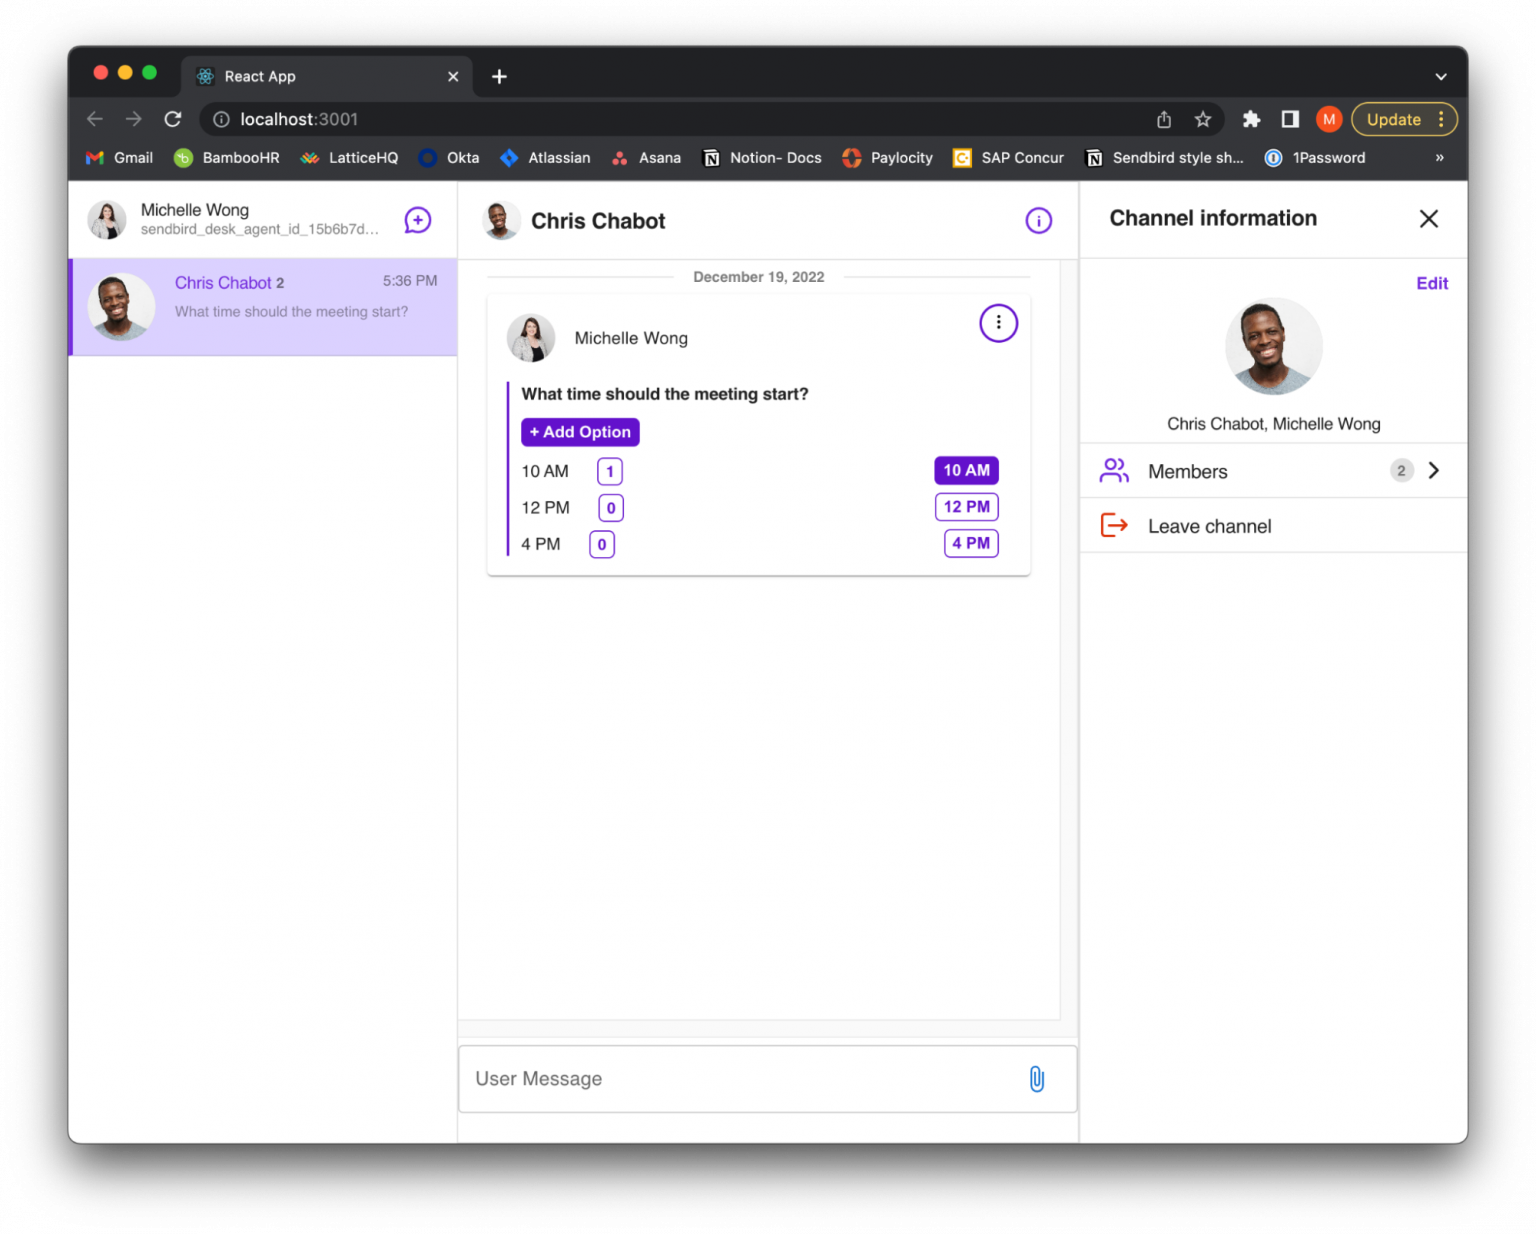
PollMessage
If a message contains poll data, it will render the PollMessage component. PollMessage returns a layout that uses the default styling from UserMessage with additional features. The poll will show the title, an add option button, and will display each option with its vote count and a corresponding vote button.
The user who created the poll will have an options menu to change the poll, delete options, or delete the poll. They will be able to view the menu options as seen below:

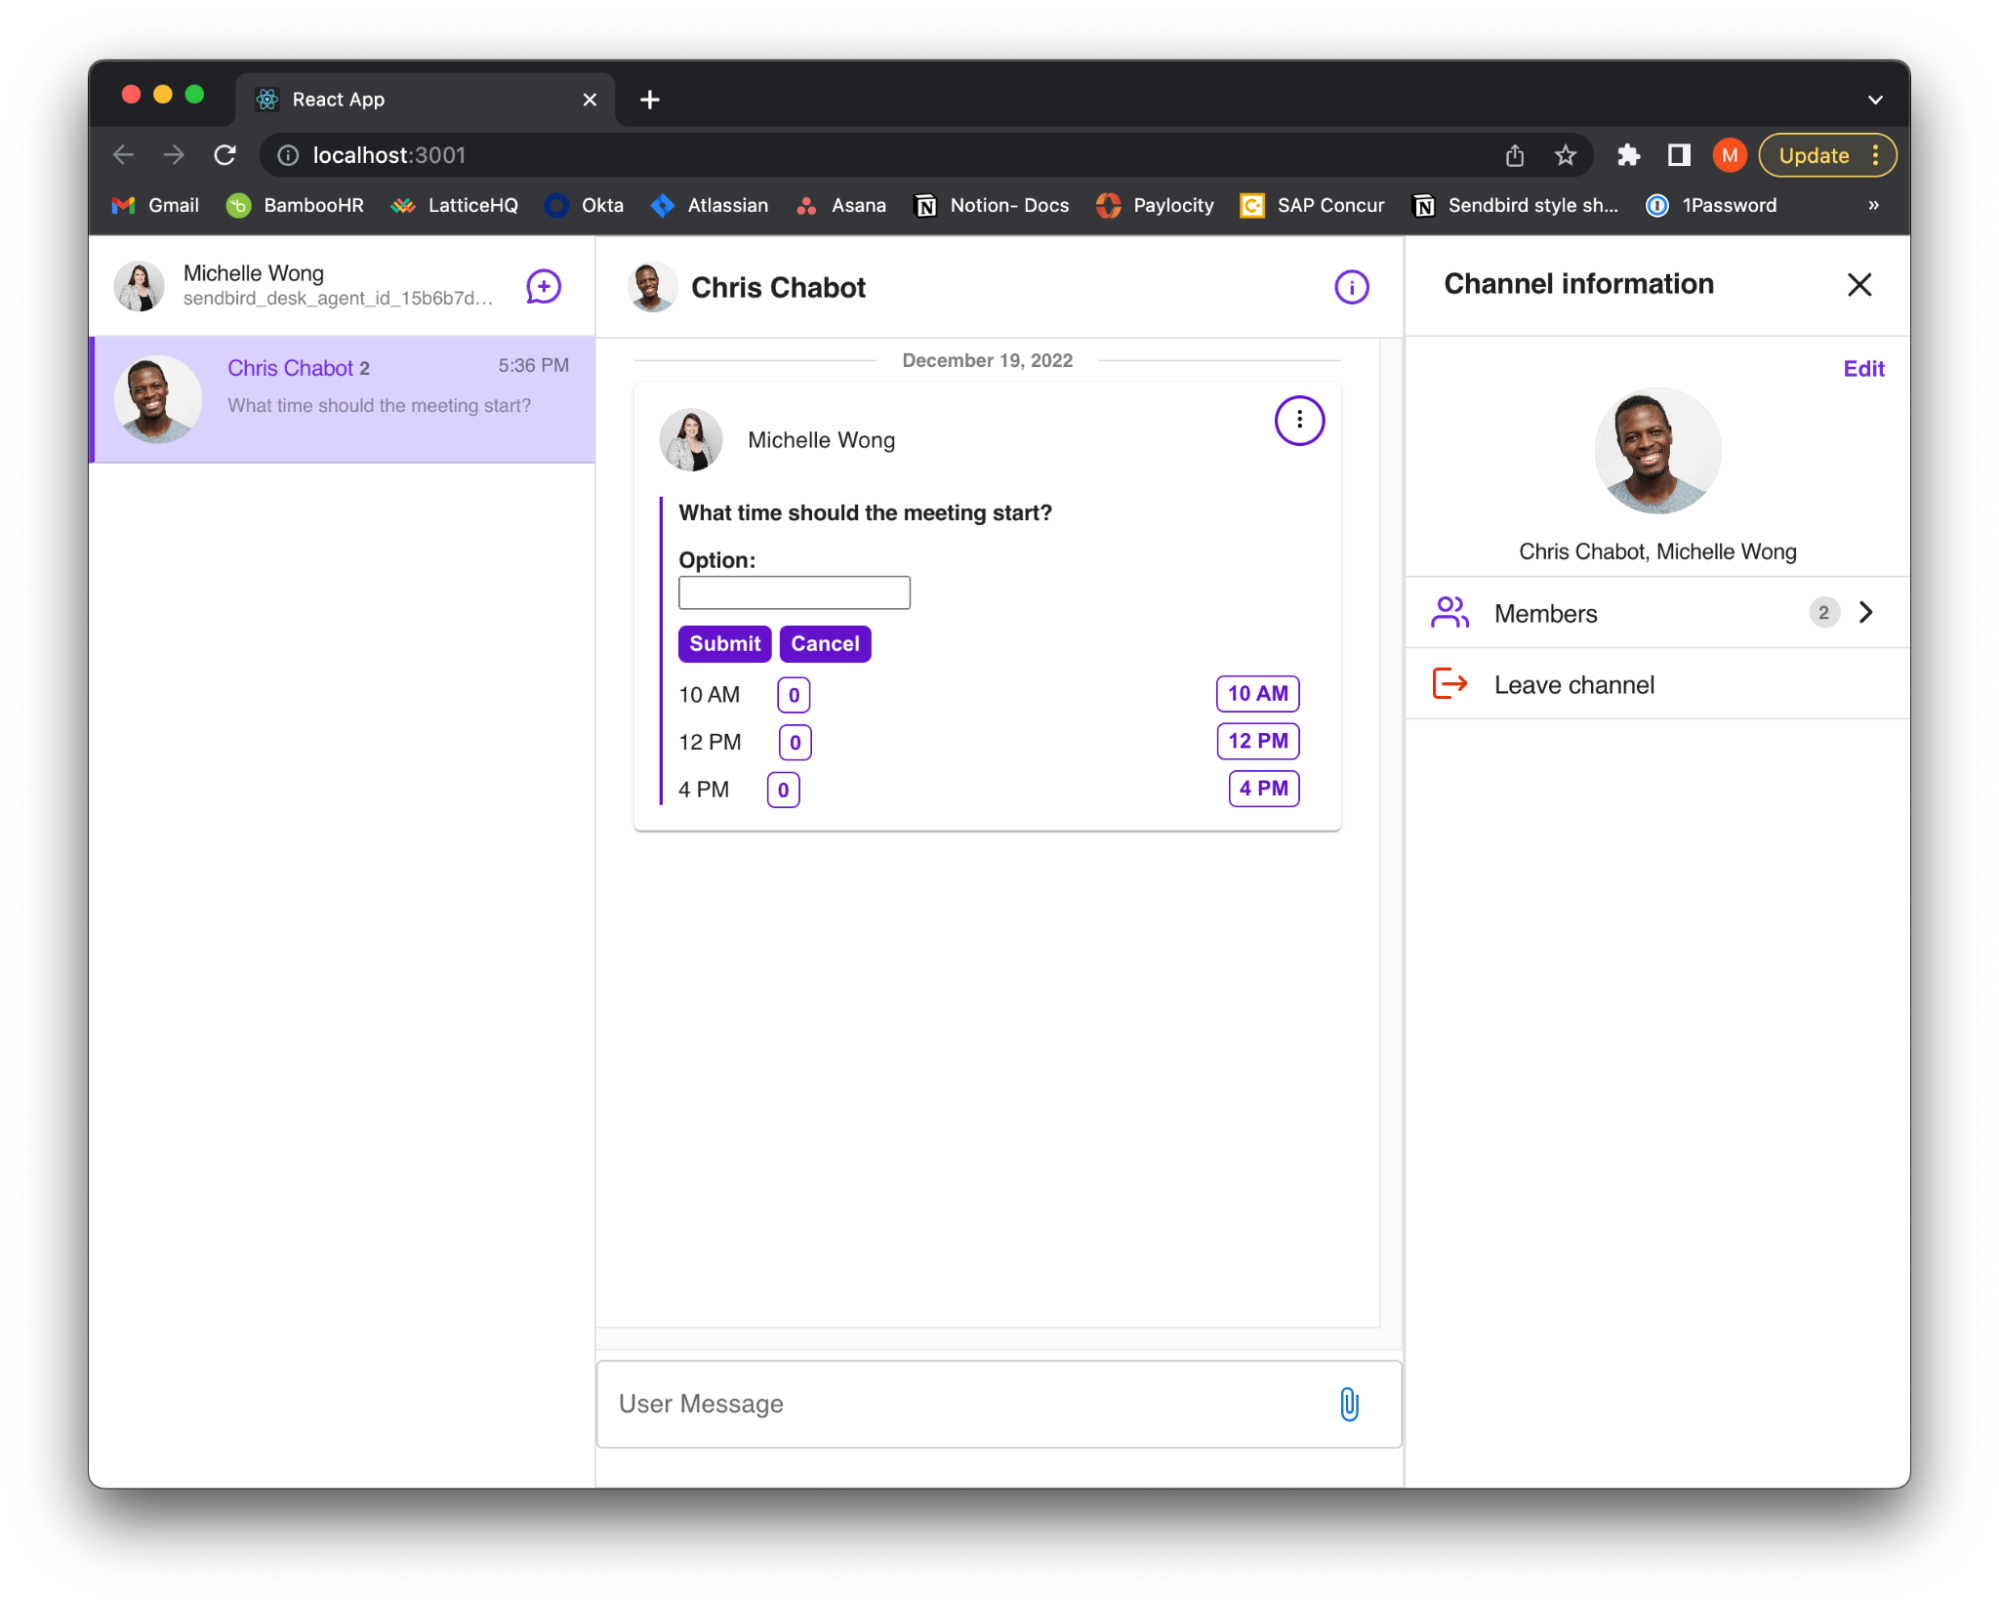
Part 2: Delete a poll option
If the user who has created the poll clicks to delete an option from the poll, it will render the DeleteOptionForm. This form will show each option in the poll.
This will be displayed as:
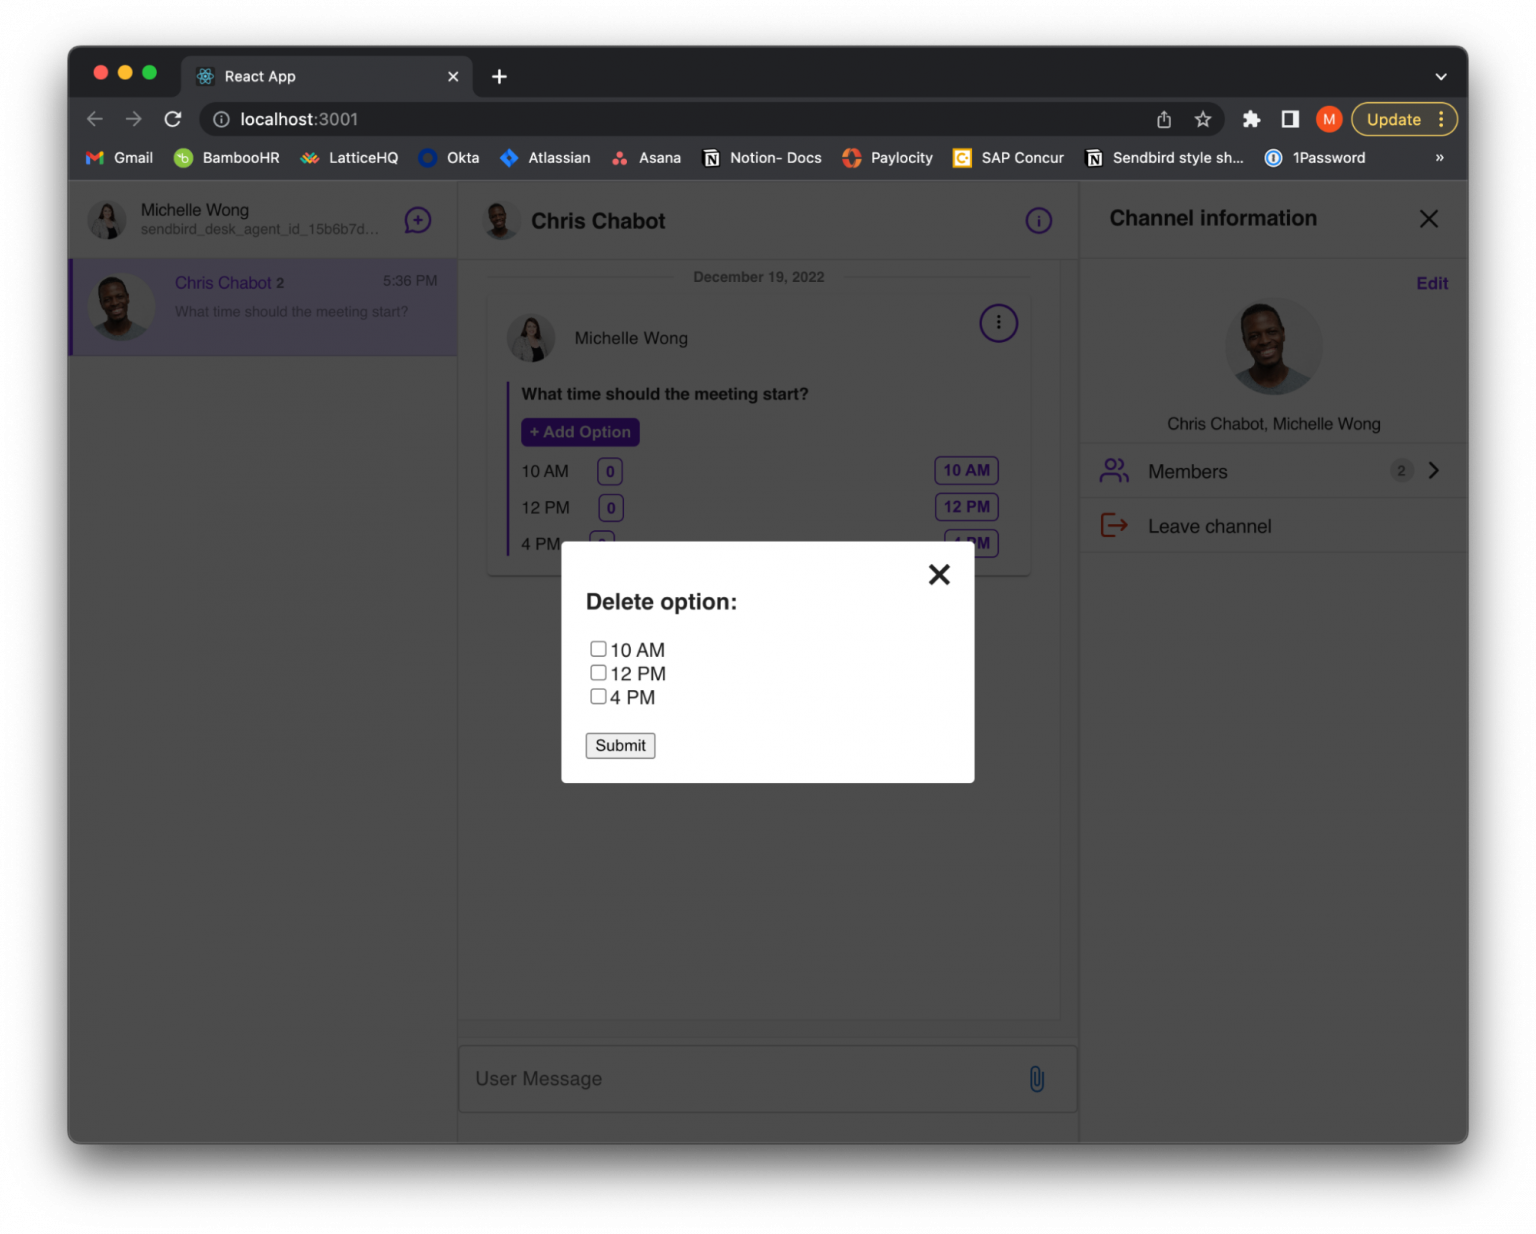
Once the user selects the option or options to delete and the form is submitted, it will trigger the deleteOption function. This function receives the options that were selected to delete and calls the deletePollOption function. It requires the poll ID and option ID to be passed in and deletes the option from the poll.
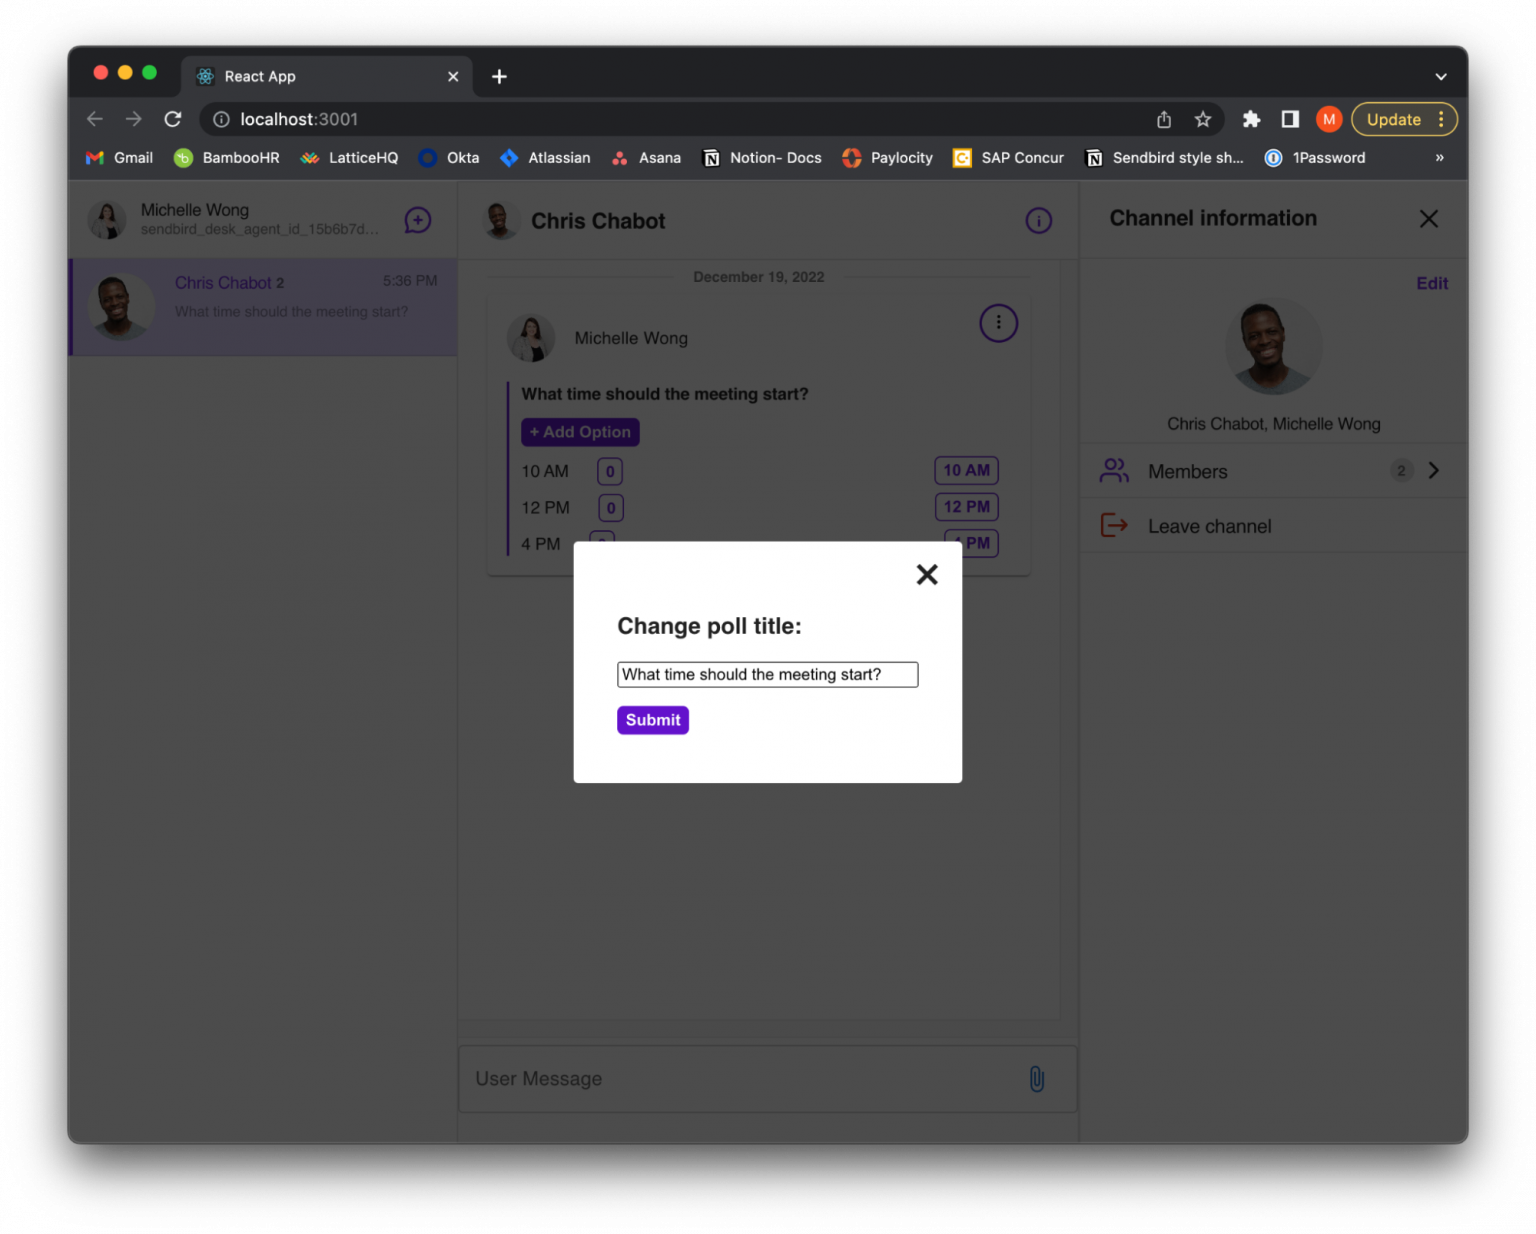
Part 3: Update a poll
If the user clicks the option ‘change poll’, it will render a custom UpdatePollForm component.
The update form will look like the following:
When the user submits the form, it will call updatePoll. In updatePoll, set the updated params, call updatePoll and pass in the poll’s ID and updated params.
Part 4: Delete poll
If the user clicks the delete poll option, it will call the deletePoll function which takes in the poll ID.
Part 5: Add new poll options
Every user will have the ability to add options to the poll. In PollMessage, add a button that will trigger an input box to appear.
When the input box appears, a user can type an option to add to the poll. Once the input is submitted, it will call a handleOptionsSubmit function. handleOptionsSubmit will use the addPollOption function to add the option to the poll. addPollOption requires the poll ID and option as a string to be passed in.
Voting on a poll
To allow users to vote on a poll option, create a button for each option. If a user clicks on the option’s vote button, it will call the handleVote function. handleVote will find the option that was clicked on and increment the vote count by 1.
Create a new object called updatedVoteCounts to hold the vote count and option ID. Next, create a pollVoteEventPayload object and pass in the updated vote counts, timestamp, poll ID, and message ID.
Import PollVoteEvent from the Sendbird Chat SDK and create a new instance of it. The PollVoteEvent requires the following params to be passed in: poll ID, message ID, and pollEventPayload.
Since we have the instance of the poll event, use the votePoll function. The votePoll requires the poll Id, poll’s option IDs, and poll event. Then, with the event that is returned from votePoll, use the applyPollVoteEvent function on the poll and pass in the event.
After applying the vote to the poll, loop through each of the options in the poll. For each option, use the createPollVoterListQuery to receive the voters. Then, loop through each of the voters from the list query and check if the voter matches the current user. If so, set the vote to equal the option’s ID. This will set the state of the current user’s vote within that poll.
Having the user’s vote stored in a state will allow the poll message to be aware of the option that the current user voted on and reflect it in the UI. Now, the button that was clicked on to vote will be bolded to show that this is the option you have voted on.
This will be shown as:
The handleVote function will look like this:
Now that the user’s vote will be shown in the UI when they click to vote, you also want their votes to be seen on the initial page load. So, when a user loads the page, the option’s corresponding vote button that they have voted on will be bolded.
To do this, use the react hook useEffect to get the voters on render. Loop through the poll’s options and for each option get the voters by calling createPollVoterListQuery. Pass in the poll ID and option ID. Then, go through each of the voters for that opinion and check if the current user is in the voters list. If so, set the vote for the poll to equal the option ID that the user has voted on.
useEffect will look like this:
Receiving poll vote changes
At this point, we have the current user able to make changes to the poll. However, you need other active users to receive the changes on their end as well. Import GroupChannelHandler from UIKit. Create a new instance of the handler. Then, get the chat SDK’s group channel and use the addGroupChannelHandler function. addGroupChannelHandler requires a unique handler ID, which will be set as the message’s ID, and the group channel handler instance.
Now that the group channel handler is connected to the group channel, you want to have it listen for an onPollVoted and onPollUpdated event.
The onPollVoted event listener is triggered when a poll is voted on. When that action occurs, use applyPollVoteEvent on the poll and pass in the event that is returned from onPollVoted. Then, you want to import useChannelContext from UIKit in order to get the messageDispatcher. Once you have the messgeDispatcher, set the type and payload to reflect the change on the UI. Now when other users vote on a poll, it will listen for a vote, apply the vote event and update the screen.
The onPollUpdated event will listen for when a poll is changed, such as adding or deleting an option or changing the poll’s title. When this event occurs, it will use the applyPollUpdateEvent function on the poll and pass in the event that has occurred. Then, it will use messageDispatcher to update the change in the UI.
With all of the above implementations, PollMessage will look like this:
Enable fast decisions in group chat by creating a voting poll with Sendbird
And there you have it! You have learned how to create a voting poll. In this tutorial, we talked about how to create a UIKIt application incorporating polls from the Chat SDK. Now, users are able to use polls in their everyday chat experience to avoid wasting time waiting for a concrete answer and come to a consensus in a timely manner. From here, you will understand how to implement polls in your own custom application that fits your needs.
Please check out the full Github repository. For more information on polls, check out the Sendbird documentation. For discussions about all Sendbird products, use cases, and more, check out the Sendbird Community. If you have more questions about the material covered in this tutorial, please contact us! Our experts are always happy to help.
Happy polls building! 📊


