React chat tutorial: How to build a chat app UI
Getting started: Building a React chat app UI
With an ever-growing number of people relying on in-app chat to carry out business transactions, having a chat app is becoming essential for many companies. If you want to build a streamlined and intuitive chat app UI using React, Sendbird’s UIKit for React is a proven solution. The UIKit is a set of rich, modularized, pre-built UI components that you can use to create a modern messenger experience in your app. This chat UI kit allows you to quickly build a powerful, customizable chat app UI without reinventing the wheel.
By the end of this tutorial, you will have built a chat app UI like below:
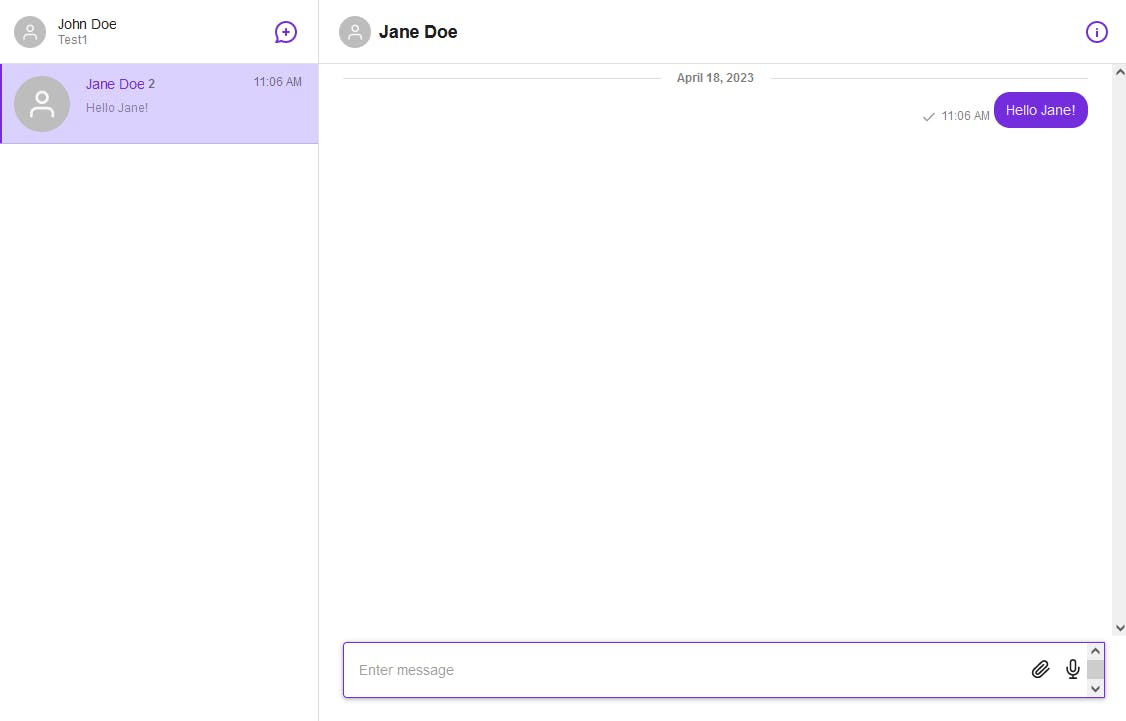
Using the React Sendbird UIKit, you can create a functional and beautiful chat app UI in just a few minutes in 3 easy steps:
Set up a new React application with TypeScript
Add the React chat UI to your application
That’s all it takes to create a user-friendly messaging UI! After we’ve walked through building our basic chat app UI, we’ll also cover chat app customization.
A note on building a chat app UI with modularized UI components
Today, people expect seamless and compelling UIs. To build a custom UI, modularized UI components are essential. What is a UI component? A UI component is a small, standardized, and interchangeable part (or module) of your application’s UI. UI components are similar to Lego blocks, which can be assembled in almost any way you like to build your chosen UI.
With Sendbird’s pre-built chat UI components, you can build an amazing chat app UI in minutes. You can do this with the Sendbird UIKit version 3, which is more customizable than the previous monolithic version.
Here’s an illustration of the change from the monolithic architecture of version 2 to the modular chat UI architecture of version 3:
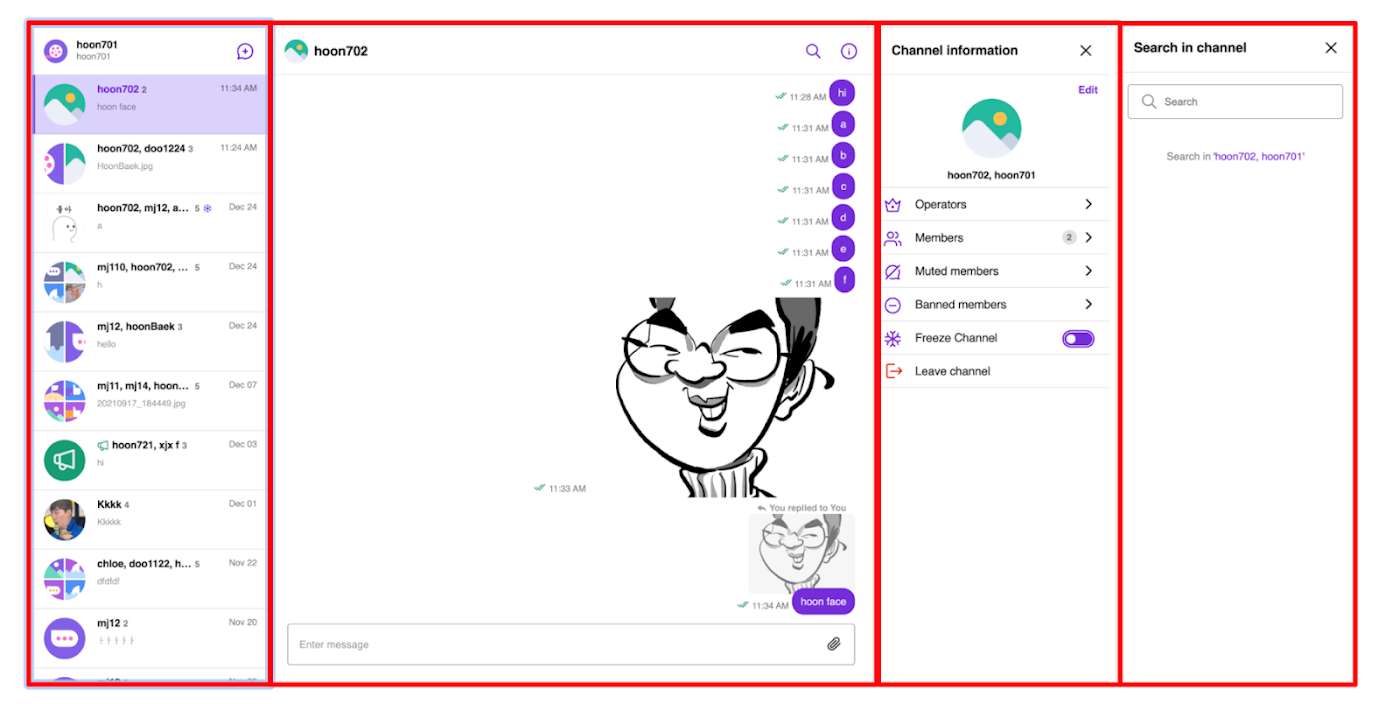
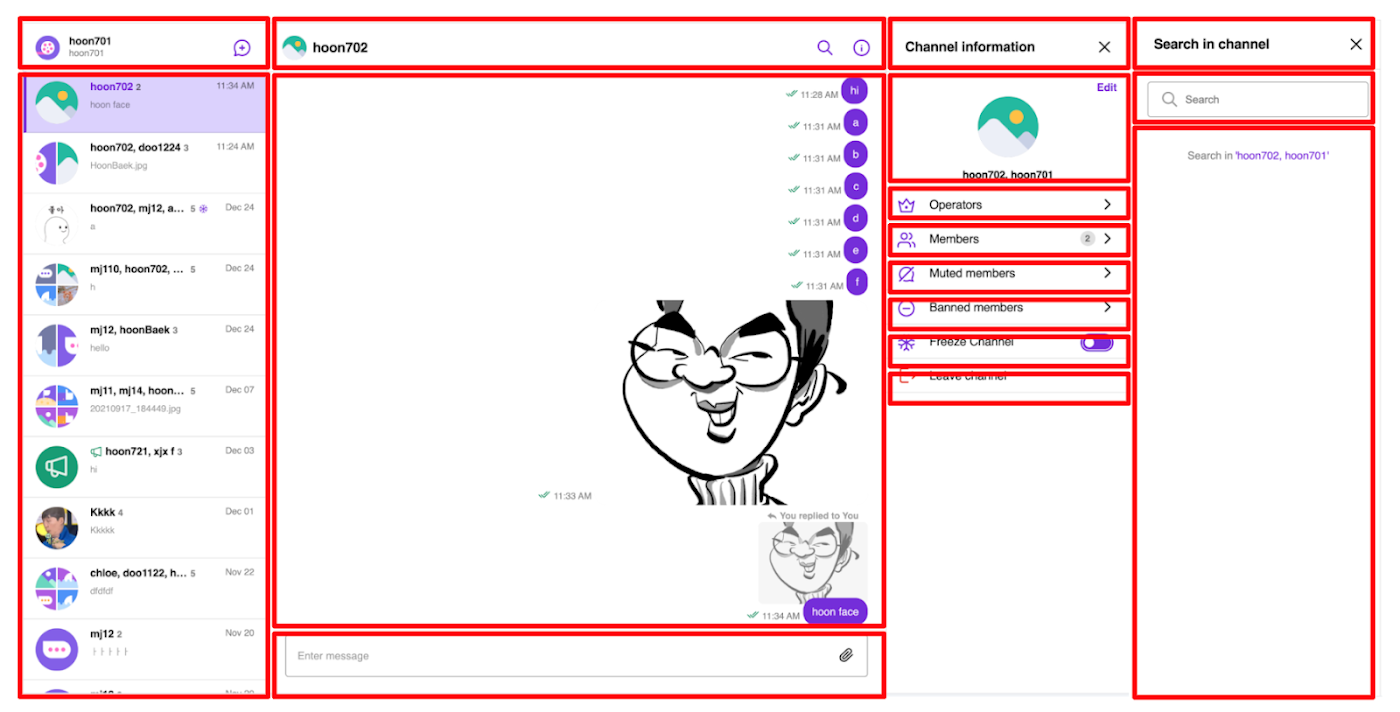
Since the chat app UI is divided into smaller modules, such as the channel list, header, search bar, and individual channel information sections, the modularized chat UI architecture (Figure 2) allows for much greater customizability and flexibility.
On mobile devices, a modular architecture would look like the following:
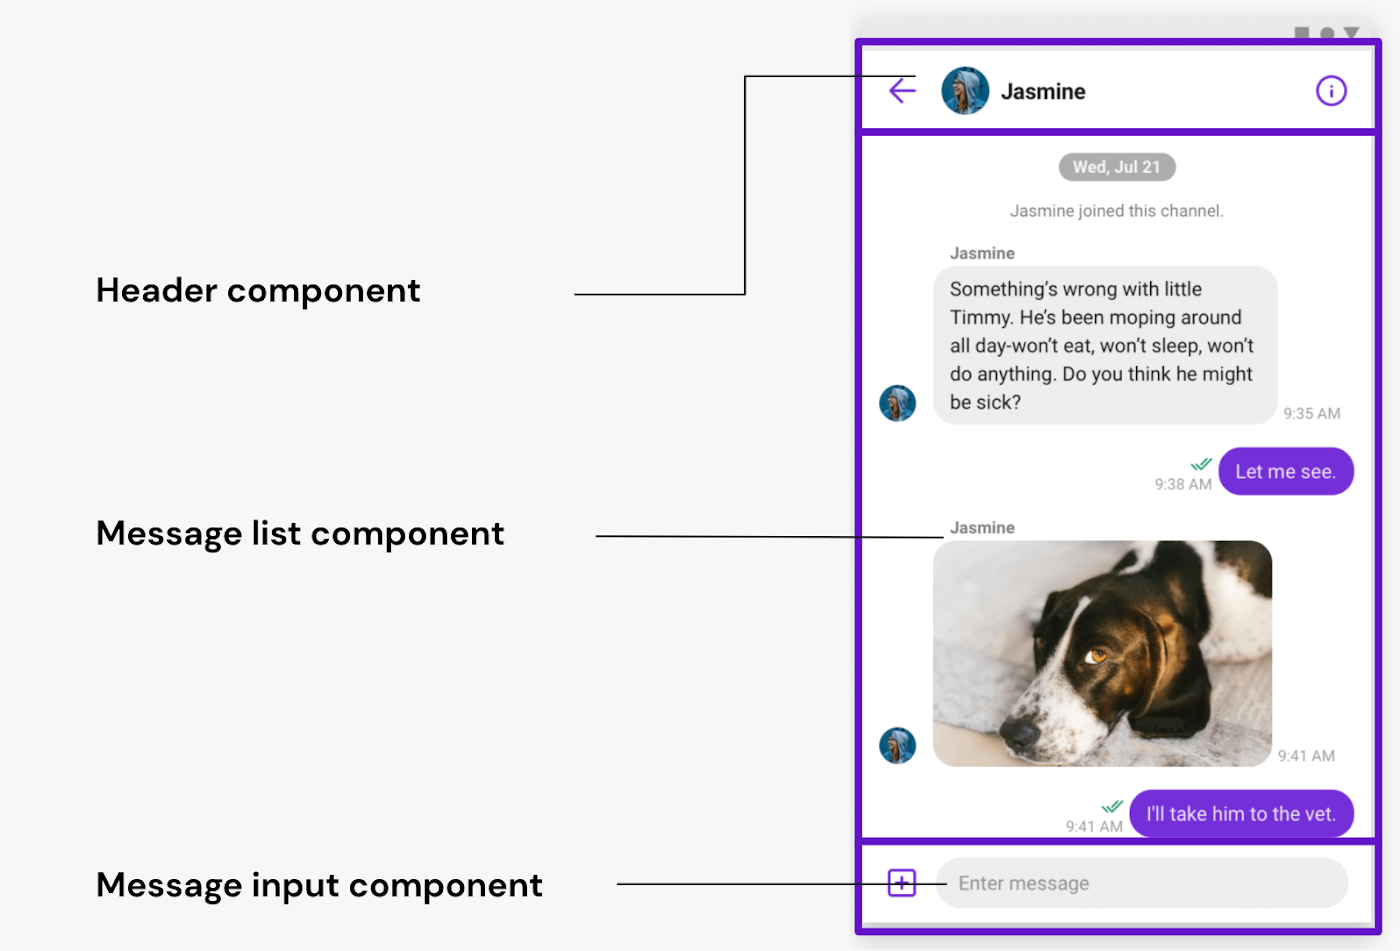
If you’d like to learn more about what a successful, modern chat app UI implementation looks like, as well as the benefits of building with modularized UI components, please see this blog. It has all the details you need!
Prerequisites for building a chat UI in React
For this tutorial, you’ll need:
Node.js installed on your machine
Basic familiarity with JavaScript
Please note that this tutorial only shows you how to build a chat app UI in React. If you’d like to implement chat functionality in your React app, please see this tutorial.
Let’s get started! 💻
Step 1: Create a Sendbird account
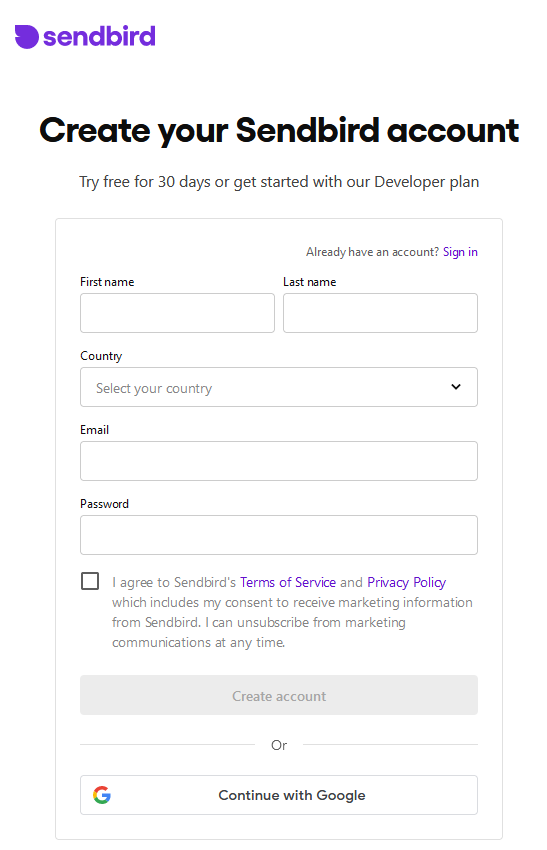
If you don’t have a Sendbird account, start by creating your free account.
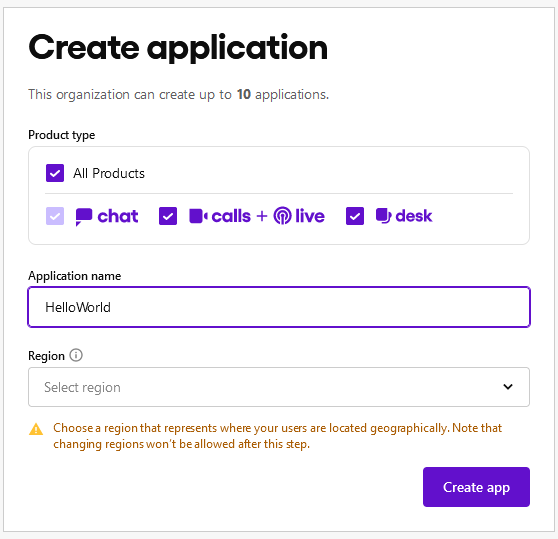
From there, Sendbird will prompt you to create a new application. Choose the defaults, specify an application name, and select a region.
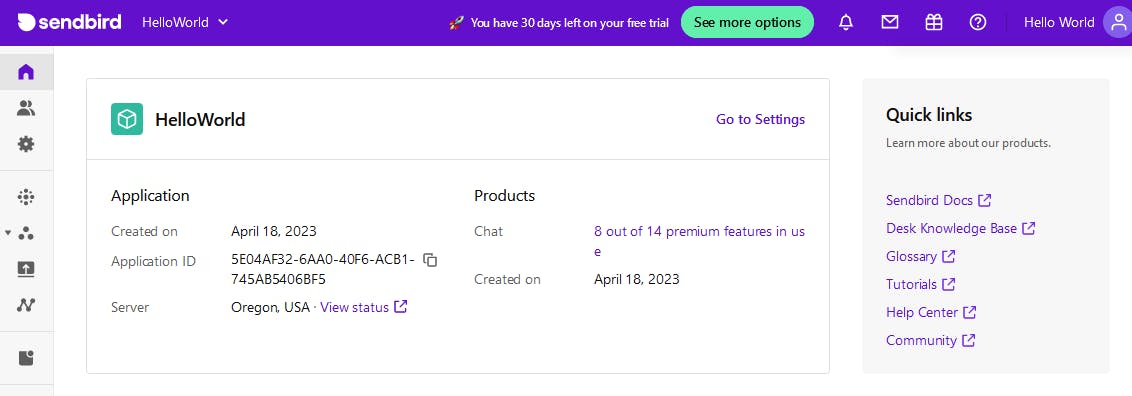
Next, you’ll be sent to your account dashboard. From your dashboard, copy the Application ID. You will need this later.
Under the users menu, create a user and save the User ID. In this example, the User ID we need is Test1. If you want to create more users for testing, please do so now.

We now have the Application ID and the User ID. Our setup is complete!
Step 2: Set up your React chat app
Next, we’ll create a sample app with React 18 and TypeScript. We’ll use Create React App, a Meta-supported way to create single-page React applications. Feel free to substitute your React development environment of choice.
We’ll use Create React App to give us a starter template, creating a project called sendbird-chat-app. You may specify any name of your choosing. Enter the following command into your terminal:
Once the project has been created, navigate to the project directory and install the Sendbird UIKit for React.
Since we are using TypeScript, we must include UIKit’s type definitions so that our TypeScript server will detect them. To do this, we’ll need to modify our tsconfig.json file, adding node_modules/@sendbird/uikit-react/index.d.ts under the include property. The resulting tsconfig.json file should look like this:
From here, we’re ready to implement our chat application. Open up src/App.tsx and replace its contents with the following:
Make sure you enter in the Application ID and User ID which you saved earlier. The User ID should be the ID of one of the users which you created in the Sendbird dashboard.
Next, let’s replace the contents of src/App.css. We’ll make the size of the app match our browser window.
Now, in your terminal, run the following command:
From there, navigate to your local dev environment (by default, that’s http://localhost:3000). Assuming all went well, you should see the React chat interface!

Step 3: Customize your React chat UI
Now let's walk through some examples of customizing your chat UI.
For instance, let's move the list of users to the right side of the screen and have the main chat interface on the left.
To do this, let's first switch our main App window to use CSS flexbox:
Next, let’s replace the code in App.tsx with the following. Again, remember to enter your Application and User IDs.
In this example, we’ve taken the App component and replaced it with three components and one React state. The SendBirdProvider is a context provider which passes the chat SDK down to the child components. The Channel and the ChannelList are UI components from the UIKit. The state we’re managing is the current channel URL, which keeps track of which chat channel you are currently viewing.
Going to your local dev environment, you should see that the channel list has now moved to the right side:
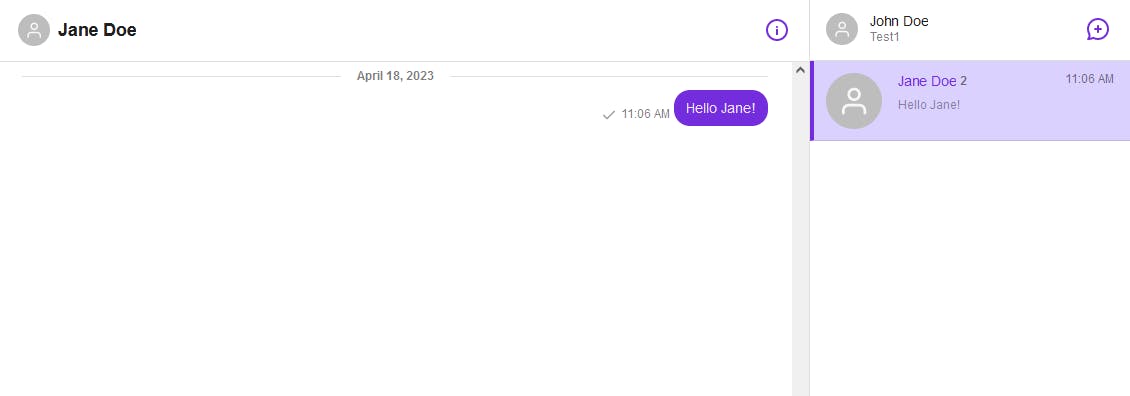
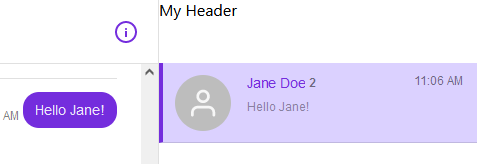
This code can serve as a base for many customizations. Note that one approach to customization is to modify the props. For example, if we wanted to replace the header of the ChannelList with our own custom version, we would do so by using the renderHeader prop:
This would result in a header that looks like this:
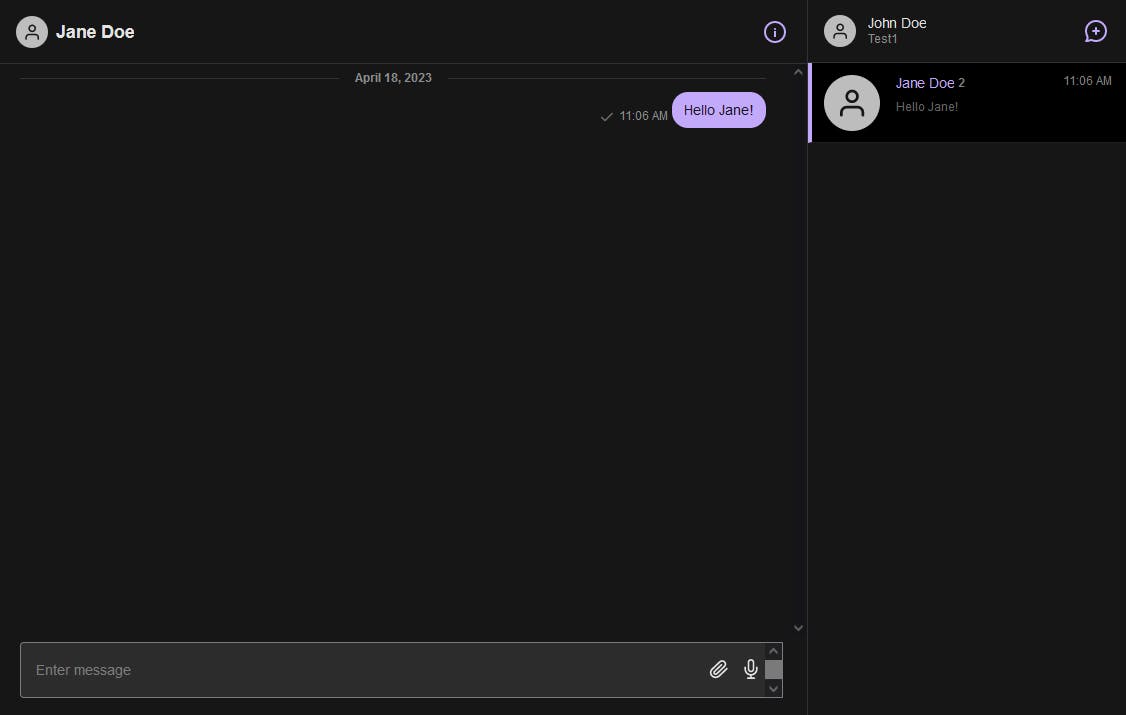
Perhaps you want to implement a dark theme. You can do this via the theme prop in SendBirdProvider.
And voila! We have a dark-themed chat.
Remember that the UIKit is modular, which allows for greater flexibility in customization. If we only wanted to customize the chat side, we can do that. If we want to add additional modules such as message search and message threading, we can do that as well. For more information, refer to the docs.
Create a chat app UI and send your first chat message in React
This tutorial demonstrated how simple and efficient it is to create a chat app UI using Sendbird Chat and React's UIKit. We quickly built and customized a functional UI in a matter of minutes. We also explored a few of the UIKit's customization options, demonstrating how to modify the layout, replace the header with a custom version, and apply a dark theme. With the UIKit's modularity and flexibility, you can easily tailor your React chat interface to suit your specific needs and preferences.
Now that you have your chat UI, send your first messages by following this step-by-step tutorial! You will learn how to use the Sendbird dashboard to manage your chat application, create new users, and monitor your app's performance. If you get stuck, you can get help from the Sendbird Community to engage with developers and Sendbird experts. For additional information, please see the docs or contact us directly - our experts are always ready to help!
Happy chat app building! 💬
