
React Native chat app tutorial: Build a chat app using React Native Hooks & Firebase

Build a chat app with React Native Hooks
This React Native chat app tutorial will show you how to build a messaging app using React Native Hooks and Firebase. First, we’ll set the stage for this tutorial by understanding why you should use React Native in the first place. Then, we’ll explain React Native Hooks functions before diving into the implementation details of how to build a chat application with React Native and Firebase.
By the end of this tutorial, you will have built your very own React Native chat app that will allow you to send and receive messages!
Prerequisites to building a React Native chat app
To get the most out of this tutorial, you’ll need:
A free Sendbird account
A basic understanding of React Native
With this in mind, let’s begin! 💻
Why use React Native?
Most applications today are built natively, but there are also hybrid applications developed using a WebView. The properties and features of WebViews introduce limits to applications in comparison to their native counterparts, however. Applications using WebViews are also relatively slower than native applications. React Native allows you to bridge this gap by providing applications access to native functionality and properties.
React Native does this by separating the JavaScript code and native code into different threads. It also enables communication between the two, which boosts the overall app performance. Moreover, since React Native uses JavaScript, developers unfamiliar with native applications can use their existing knowledge and experience to reduce coding time.
Who is using React Native?
Because of its advantages of code reusability, reliability, robustness, and the existence of a helpful community, many businesses, from established Fortune 500 companies to high-growth startups, develop applications with React Native. Some well-regarded organizations using React Native include Instagram, Shopify, Tableau, Tesla, UberEats, and Skype.
Now that we have understood the basics, let’s move on to React Native Hooks functions.
What are React Native Hooks functions?
React Native Hooks are functions that let you “hook” into React states and lifecycle features from function components. Hooks don’t work inside classes; they let you use React without classes. React provides a few built-in Hooks, such as useState.
We don’t recommend rewriting your existing components overnight, but you can start using Hooks in the new ones if you’d like. You can also create your own Hooks to reuse stateful behavior between different components. For more information about Hooks, check out the React site.
Let’s look at the built-in Hooks first.
Now, let’s understand how to work with Sendbird and React Native Hooks for your chat application. After installing React Native, here are the 8 steps you need to follow:
Step 1. Download the Sendbird sample
Once you have the React Native CLI installed, you can download the sample code. First, clone the repository:
Then, open the following folder using your favorite IDE:
As the next step, let’s install all the dependencies. Run the following command (it takes some time to download all packages):
You can run this either for Android or iOS. Open the package.json file and check the scripts we have for you to use:
To run Android, just type:
Troubleshooting Android
If you have problems running the Android version, you can try the following:
If you run on an actual device, check if everything is installed – especially Android Studio.
Check if your device is visible by adb devices; sometimes, it may not work or have lags. In this case, call adb kill-server and then adb start-server.
You might want to build the project using react-native run-android. If it fails, you might need to run it with Android studio.
Make sure your ANDROID_HOME is in the path. Something like:
Troubleshooting iOS
For iOS, you may need to install Pods once:
This will install all the libraries to run the iOS version.
If you have problems running the iOS version, you can try the following:
Complete a pod update and then pod install from inside the ios/folder.
Delete the ios/build folder.
It is better not to change any build phases, rules, or settings in XCode, as this may cause further issues.
It is better not to update the packages listed in the package.json file or the ones inside ios/Pods. This is because these are the versions used in our testing.
Troubleshooting for both platforms
Make sure you are not running any VPN. Sometimes, this creates problems.
If you have a React Native terminal window running, try closing it and running the command above again.
You can run yarn clean from the root directory. This will clean old builds.
You can delete the file yarn.lock, and try running yarn install again, but we do not recommend this because of compatibility issues.
Note: We recommend checking the list of prerequisites before running this sample.
Step 2. Debugging your React Native chat app
From your iOS simulator, you can debug the application and see console outputs to Chrome. Press Command + D to see a screen like below:
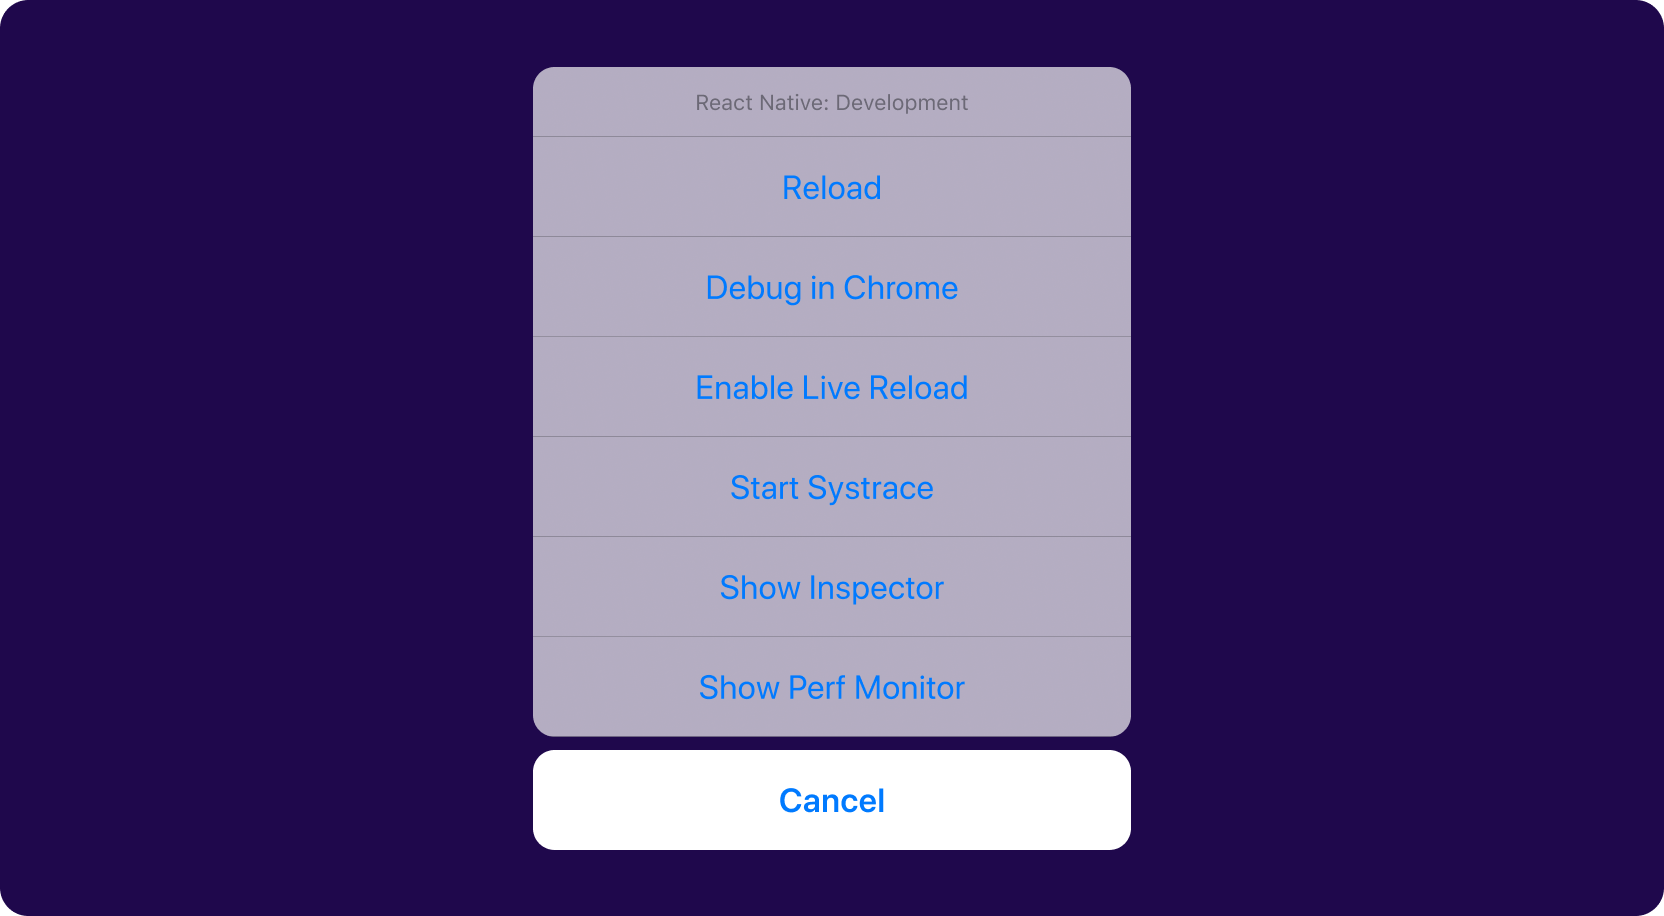
When you click Debug in Chrome, a Chrome window will open. Use the Chrome developer tools to monitor the outputs written by console.log().
Step 3. Understanding the folder structure
The following is a description of the most important files and folders for this sample application.
package.json
This file contains all the packages this project will use. Because of compatibility issues, we recommend not changing the version of these packages.
The file also contains the scripts you can run:
node_modules
This folder contains all the downloaded libraries this project will use. This folder is created every time you run yarn install.
android
This folder contains all the files for an Android project. You can use Visual Studio to open and run the project.
ios
This folder contains all the files for the iOS project. You can open it with Xcode.
src
This folder contains all the Javascript files for our demo application.
index.js
This is the first file to be executed by React Native.
We define which function will process the information when we receive a push message for Android devices. In this example, the function setBackgroundMessageHandler will do the work. It is inside the ./src/libs/notifications.ts file.
App.tsx
This file is called from the file index.js. It shows the first screen we see when users run our application.
You will see where your Sendbird application ID (you can get this from your Sendbird Dashboard) is defined:
We are now ready to initialize the Sendbird SDK in the . At this point, we are not connected.
Notifications with Firebase for your React Native chat app
We will use our first Hook to ask permission to receive notifications.
If we already have a token from Firebase, we use the Sendbird function registerAPNSPushtokenForCurrentUser to register it for an iOS device and registerFCMPushTokenForCurrentUser for an Android device.
For detailed information, we recommend that you see this tutorial about implementing push notifications in a React Native app using Sendbird Chat.
The next step is to define our Stack Navigator. A Stack Navigator provides a way for your app to transition between screens. Each new screen can be placed on top of a stack.
By default, the stack navigator offers a familiar iOS and Android look and feel. New screens slide in from the right on iOS, and the default OS animation is used on Android. You can customize the animations to match your needs.
Step 4. Building the login component for your React Native chat app
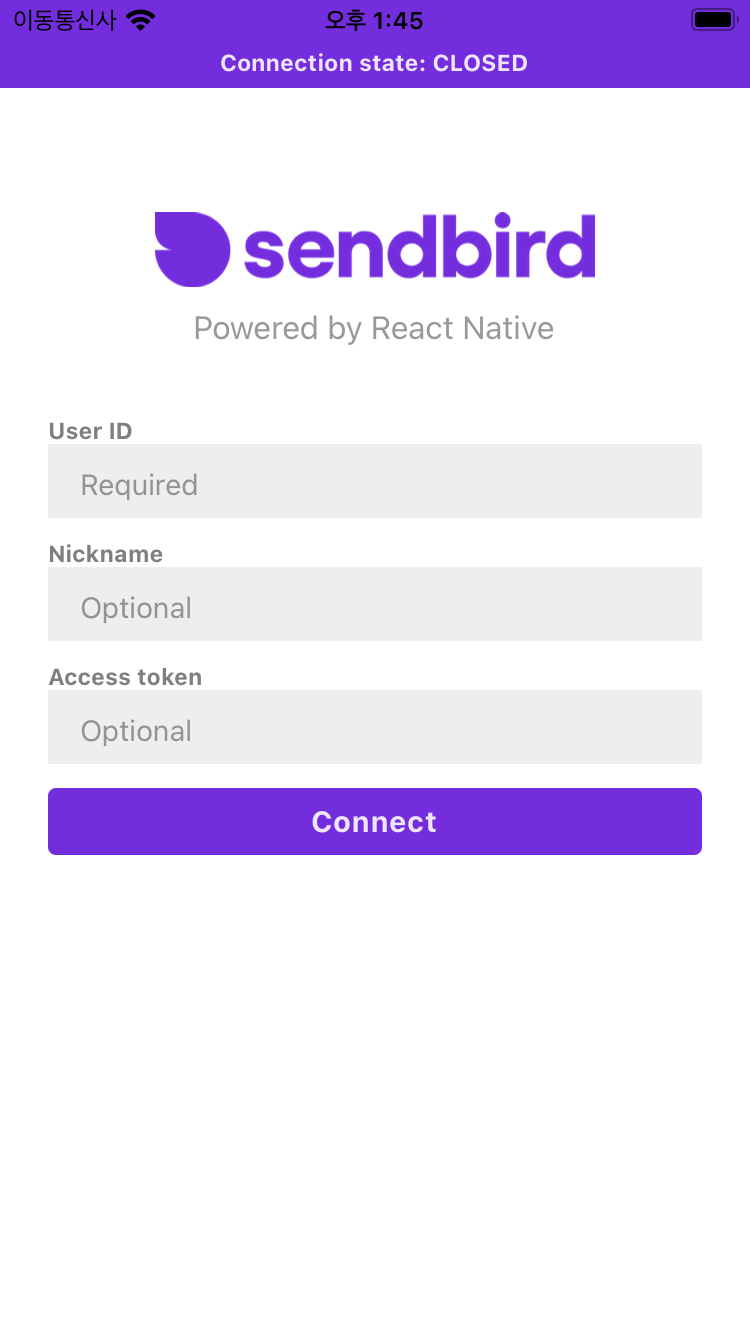
The Stack Navigator will ConnectScreen first. This file is in ./src/screens/ConnectScreen.tsx.
Many Hooks are applied here, and the principal actor is currentUser. Because it depends on the user previously signed, we will show a connectscreen or the list of chat channels.
This sample uses AsyncStorage to read (and save) the value of a previously signed user. If there’s a value, we read it and define the user as initialized.
We build the screen accordingly. If we have a signed user, we show the GroupChannelList screen. Otherwise, we show the Connect screen.
Once the Connect screen responds, the connect function executes. We run the token registration for iOS and/or Android to receive push notifications.
The Connect screen will paint the screen we see above and wait for the user to click on the Connect button.
When clicked, the button calls the connect function to connect.
Connecting to Sendbird
As you can see, the sendbird.connect(…) function call connects the device with the Sendbird servers via websockets. If you see any error here, it is because the user ID selected is invalid, your Sendbird application ID is incorrect, the function is not defined, or because you’re not connected to the Internet.
We suggest you check for any error code and inform your users.
Foreground and background
You must check if your application goes to the background. If this happens, then you should invoke setBackgroundState. You will appear as disconnected for the rest of the users. Call setForegroundState once the application returns to the front. This will make websockets connect and the logged user appear online again.
After a successful connection, we store this user (from the connect method) to RootContext. Once the user is set, the GroupChannelList screen appears.
Step 5. Building the Channels List component
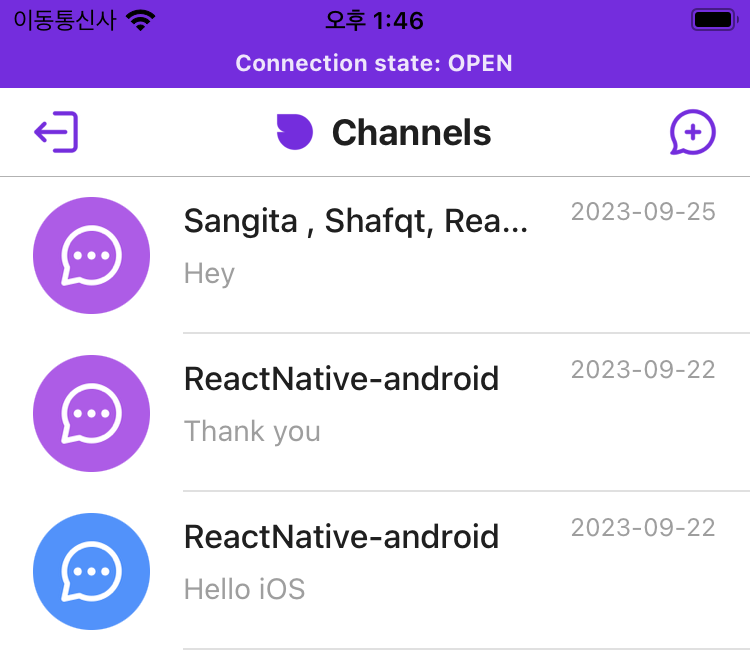
Sendbird works with public Open Channels and Group Channels. You don’t need an invitation; users can enter a message for the Open Channels. Group Channels are the opposite. You need an invitation to join the channel and send messages.
To learn more about channel types, see the docs or this tutorial.
Now, open the ./src/components/ConnectionStateView.tsx file and see all the essential parts that should be there.
Add a connection handler to receive Websocket disconnections events.
Customers must know when the SDK is not connected because your application should stop all requests until a connection is made. Otherwise, your users will think that your application is not working.
Open the ./src/screens/GroupChannelListScreen.tsx file and see all the essential parts that should be there.
Add a group channel collection handler to receive updates from Sendbird about group channel events. You will be able to react to channel modifications.
Also, remember to dispose of your collection when destroying each view.
Read more about connection and channel handlers in the docs.
Listing your channels
When listing channels, the maximum number of records you can receive from the server is 100. If you need more, you must use loadMore() to call the server again:
Once the user selects a channel, our application will navigate to the GroupChannelScreen, passing the selected channel url.
This leads us to the messages screen.
Step 6. Building the message components
After selecting a channel, the application will show you a list of messages for this channel only:
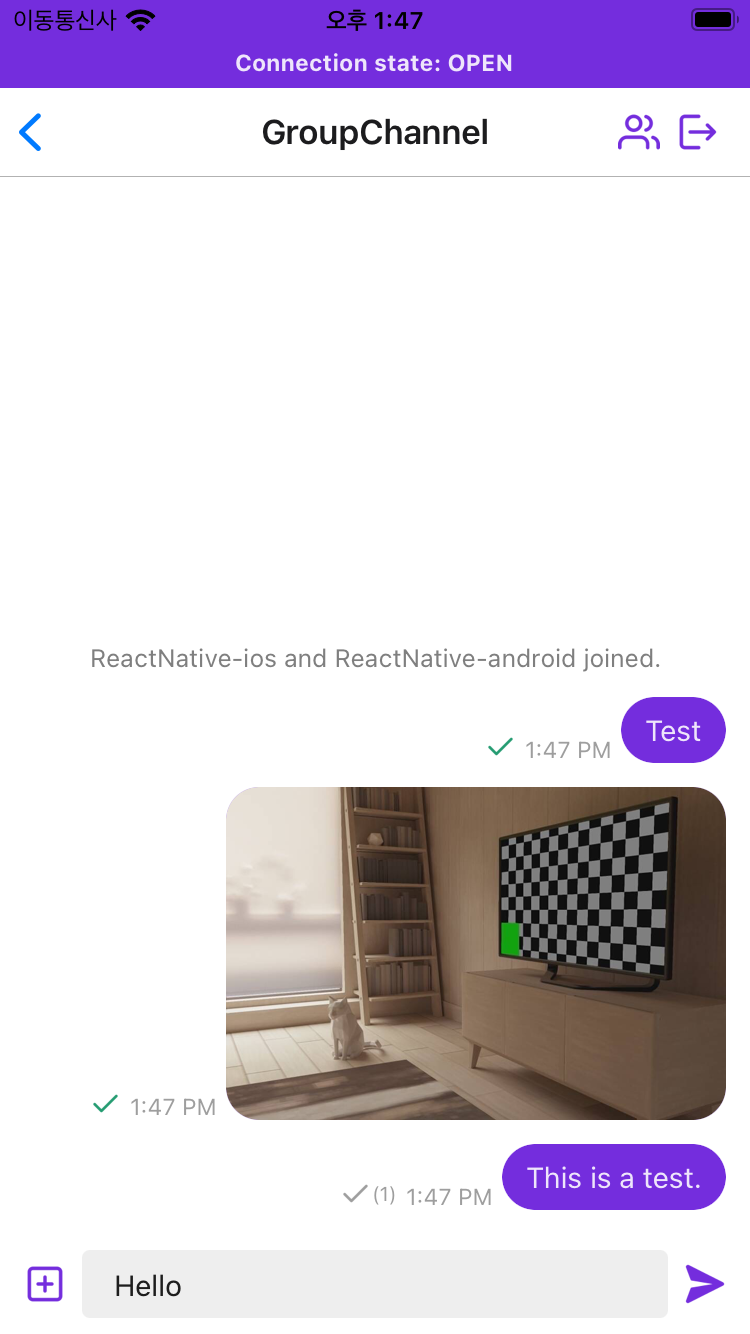
The code for this screen is in ./src/screens/GroupChannelScreen.tsx.
Naturally, the list of messages is the most important part of this screen. But let’s take a look at other parts that must be included:
A message collection handler to receive any changes related to the channels (including messages added, removed, etc.), via Websockets
You need to dispose of the collection when this view is no longer active for users.
In this sample application, we will take action for the following events:
onMessagesAdded: A new message is received via Websocket. Add this new message to the list of messages only if the channel URL informed from the event is the same channel that is active in this view.
onMessagesUpdated: A message has been updated. If this informed message belongs to this active channel, you must update its content from the list.
onMessagesDeleted: A message has been deleted. If this informed message belongs to this active channel, you must remove it from the list.
You can also receive events about this user and the channel. For example:
onChannelUpdated: The channel information that is included in the user's current chat view is updated as a real-time event.)
onChannelDeleted: Another critical check is the existence of the channel that contains the messages you are showing. If this channel is missing for any reason, you should also return to the main screen with the list of remaining channels.
Mark channel as read
When you enter to see the messages in a channel, you should mark all messages as read.
Listing your messages
We will ask Sendbird for the list of messages in this active channel. To do this, we use createMessageCollection:
Getting messages according to the timestamp
You also can request a list of messages according to a specific timestamp. Use something like newDate().getTime() and define how many previous messages you want to show.
This technique will help you load previous messages if the user scrolls up to get a long history of messages. You just need to keep sending the message’s timestamp and ask for previous records to show until you reach the first message sent to the channel.
To find more information, check our docs.
Step 7. Sending and receiving messages
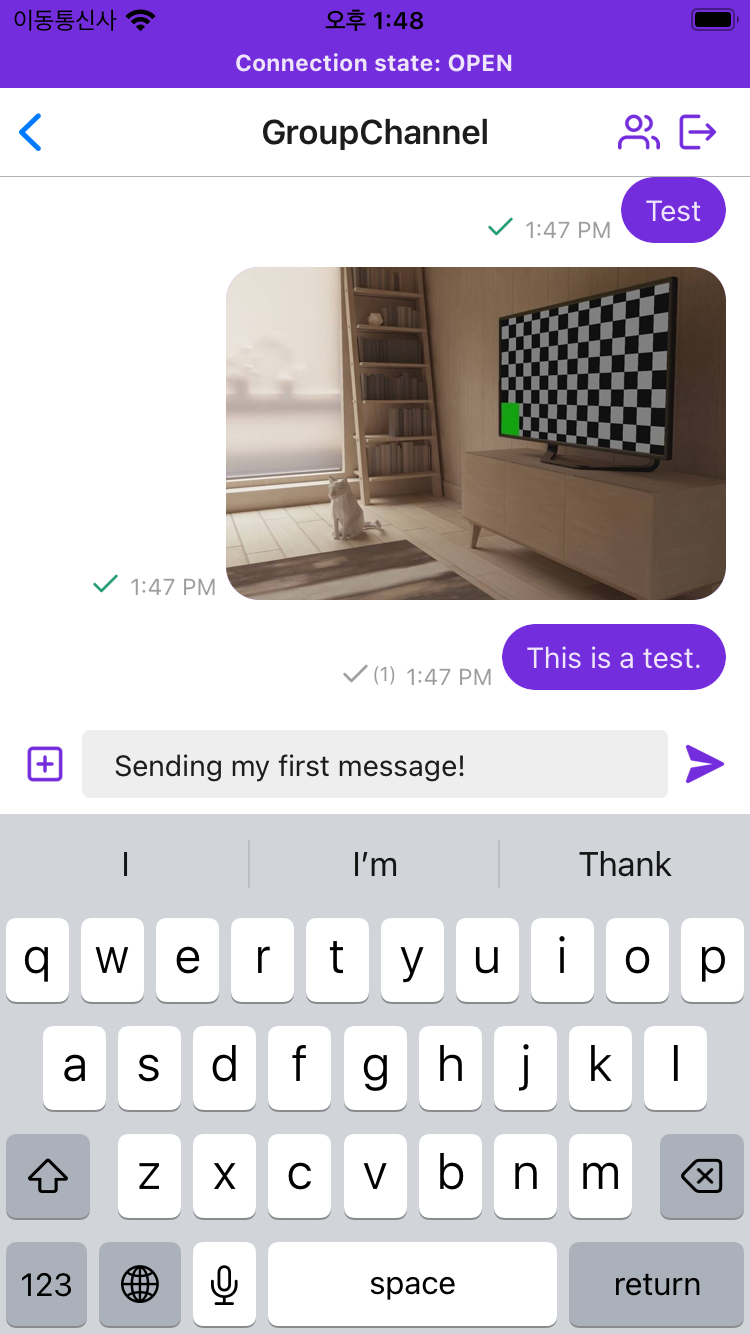
With Sendbird, you can send a text or a file message.
Note that a message for Sendbird is not just a text or a file; we have other attributes to send confidential information to your server or to the other connected users.
Custom type
This attribute is part of the message object, and it specifies a custom message type for message grouping. The length is limited to 128 characters.
Sendbird’s Advanced Analytics also uses custom types to segment metrics. They enable the sub-classification of data views.
Data
Data is another attribute you can use for your internal logic. It specifies additional message information such as custom font size, font type, or any data you want to handle with a JSON formatted string.
See this list of attributes for a message. To get more information about sending a message via the SDK and Javascript, see the docs.
Below is the code to send a message.
File messages
With Sendbird, you can also send file messages. In this application, we allow users to select the file from the device and then send it.
Remember to request permission!
When working with Android and iOS, you must request permission from users before using an imagepicker.
Important: In React Native, Sendbird requires a Javascript object as the file to upload. You may receive errors or have a failed upload if you try to send another format. Sometimes, the custom file pickers used from public repositories don’t deliver the proper object type.
For more information, please refer to this GitHub file.
Remember that when sending file messages, you cannot send text along with it. However, you can use other message object attributes to send a text and display it on the chat list. Check out the list of available attributes for a file message:
More information is in the docs.
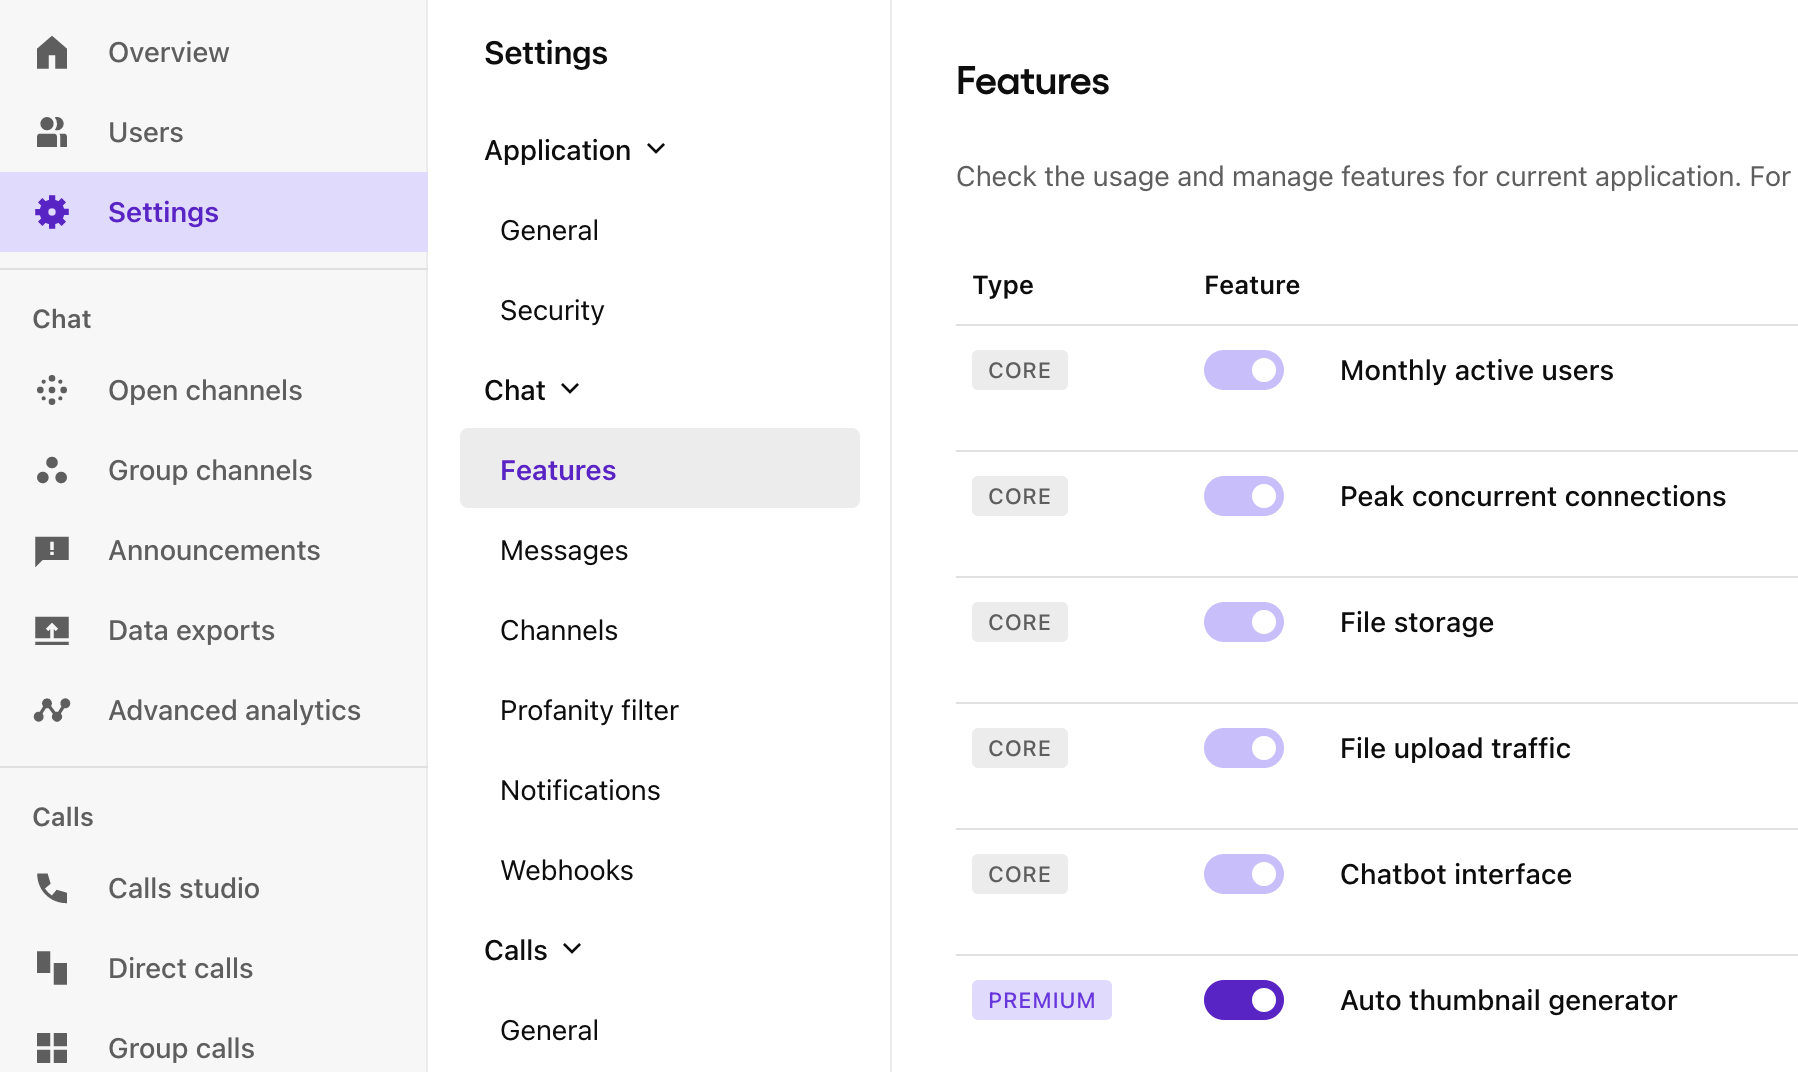
Thumbnails for image files
When uploading image files, you can ask Sendbird to generate a thumbnail automatically. Enable this from your dashboard:
Voice messages
You can send voice messages with file messages. Your frontend application should implement a voice recording function and save the result as a file. Then, you just upload that file, along with any of the custom attributes we provide for the message object, indicating that this is a voice message file. When drawing this message in the channel, analyze the information and show it properly.

Reply to messages
Sendbird supports message threading so you can respond to messages.
To do this, you must indicate the parent message ID when sending a response.
You can respond with a text message:
Or with a file message:
Step 8. Other Sendbird features
Sendbird offers a variety of features for your chat experience.
Typing indicators
In this example, you can see the use of startTyping() and endTyping() to send events to all members of the channel.
This event triggers the onTypingStatusUpdated function from the channel handler.
The rest is to show a label saying that user XXX is typing a message.
Moderation
Sendbird provides powerful tools for moderation. You can use the Sendbird Dashboard to moderate messages and users. You may also register or unregister channel members as Operators so that they can freeze channels, block, or mute users.
To review all the features that Sendbird offers, check out the JavaScript docs and a tutorial about moderation best practices.
Ready to build a React Native chat app with Hooks?
So that’s a wrap! This tutorial gave you a taste of building a React Native chat app with the Sendbird JavaScript SDK. We talked about the folder structure for your React Native chat app, the Login, Channel List, and Messages components, and advanced Sendbird features. To learn more about React Native, refer to the official documentation.
If you have any questions regarding this tutorial or using Sendbird in general, please drop us a note on our community page here. Remember that many more features are available in the JavaScript SDK, so make sure to check out the docs to build an even more advanced messaging app. If you need help, please contact us! Our experts are happy to help you on your React Native chat app journey.
Happy React Native chat app building! 💬


