
How to build an Android video chat app with Sendbird Calls & Firebase

Introduction
This guide is a two-part guide. Part one shows how to set up calls within Sendbird, and the second part shows how you can implement a screen-sharing functionality with minimal changes to your implementation.
Note: For the simplicity of this tutorial, we will use targetSdkVersion 28 in our gradle file, so we don’t have to implement a service required by Google if you work with version 29 or older.
Step 1. Create a Sendbird Account
1. Sign up for a free Sendbird account
2. Create an account using your email id or `Continue with Google`
3. Setup your Organization by entering `Organization name` and `Phone number`
4. Create a new “Chat + Calls” Application in the region closest to your locale.
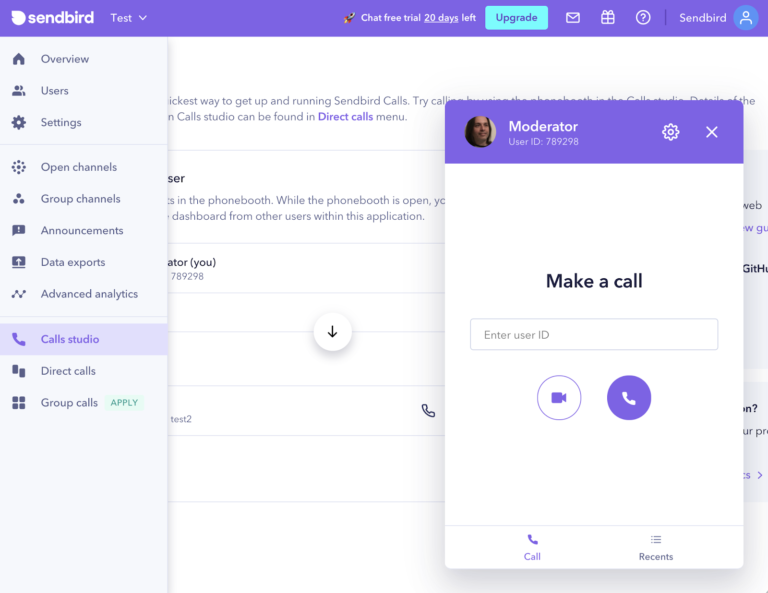
- On the left side of the screen, you should see a “Calls” menu, go into the “Studio” and create a new “phonebooth” user.
- Define a USER ID to call to. The ID of the moderator for us will be 789298. You can name it whatever you want.
Step 2. Create a new project
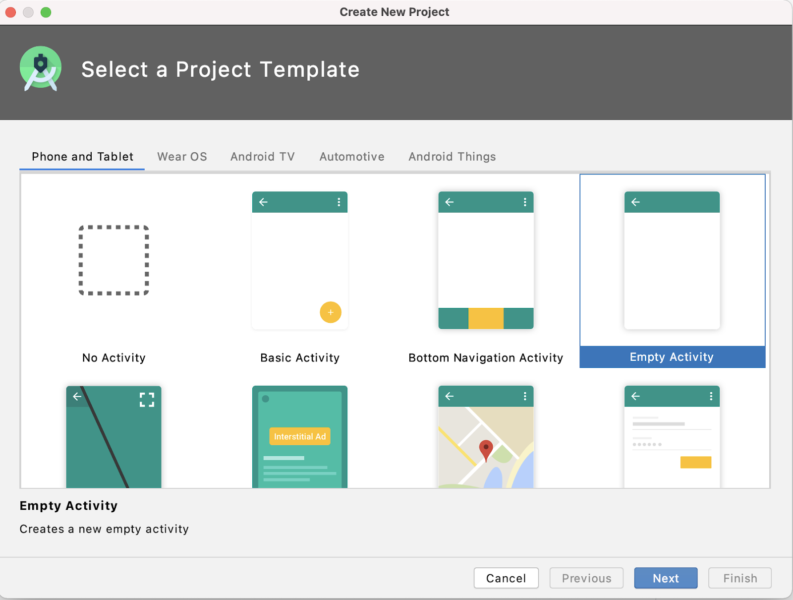
1. Let’s start by creating a blank project using Android Studio. Select Empty Activity.
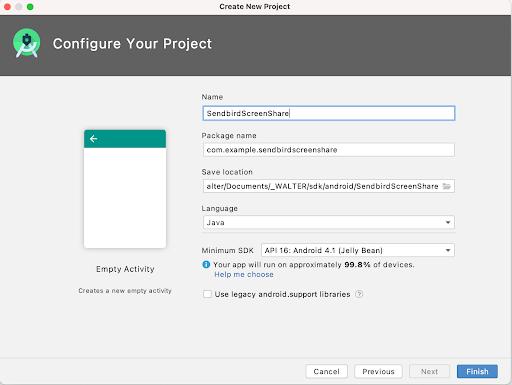
2. Next step is to provide a name. We will call it SendbirdScreenShare, as part two of this guide covers screen sharing to complete our tutorial.
3. Find your build.gradle file (the one for your Module) and include the implementation for Sendbird Calls (your version may be higher than the one shown in this tutorial)
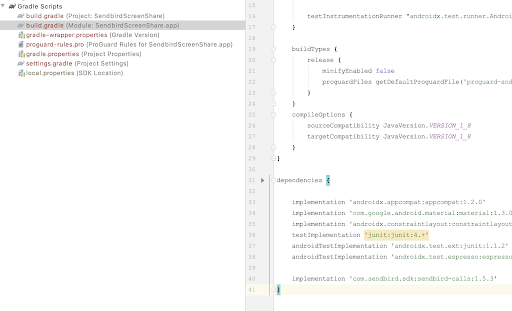
4. You will need to do another change for this file. Make sure that these values are as follow:
minSdkVersion 21
targetSdkVersion 28
As mentioned before, these values allow us to implement Media Projection without a foreground service. This will be needed in part two of the guide.
Android Manifest
1. Open your AndroidManifest.xml file and add the following permissions:
Adding permission to Android Manifest
2. We are telling Android that we will have access to:
- This device’s camera
- Modifying audio settings.
- Record audio.
- Access Bluetooth.
- Access to the Internet.
- Access to the network state.
Step 3. Create the UI for your Android video call app with Firebase
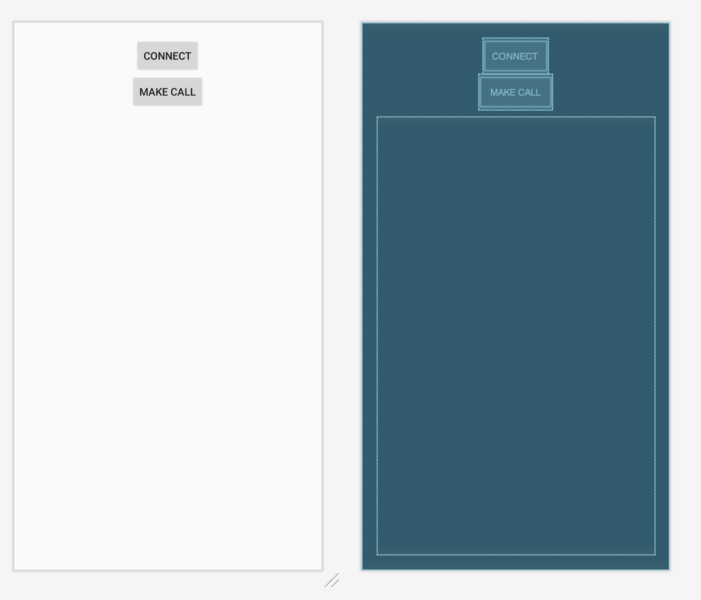
1. To keep this tutorial simple, we will use one screen only. And we will show:
- A button to connect to Sendbird.
- A button to make a Call.
- Two video elements (one for my camera and the other for the remote user)
- We recommend adding an “End” button to end a call, but we will skip that for this tutorial.
2. Open your activity_main.xml layout file and add the following:
3. Please read the comments (in gray) to understand what is each element. They will be one below the other on the screen. Sendbird video elements will adjust automatically when a call is established, so don’t worry about moving those around.
Step 4. Implementing Firebase video calls on Android
- For the simplicity of this example, we will add all of our logic for this screen in the MainActivity.java file.
Global variables
Define your information for connecting to Sendbird: Your Application ID, any of your USER IDs, and user’s ACCESS TOKEN if necessary.
Next, specify the CALLEE_ID, this ID is the userId of the person you will be calling. For this example, we will refer to the user we created in Part 1.
For Sendbird Calls we will need a unique handler ID (which can be anything you want)
One important object to keep global is a DirectCall. This element is provided by Sendbird and it will hold a reference to our established call with another remote user. Refer to our API in detail for more information: https://sendbird.com/docs/calls/v1/android/ref/index.html
We also have a reference to our objects on screen (buttons and video elements)
Android also requires that we request permission to the user on runtime:
onCreate
In Android, everything starts with the onCreate method. From here, we initialize our elements on the screen. (buttons and video elements that we show to the user)
Connect your Firebase video call app to Sendbird
Once the Connect button is pressed, we call the connect() method to validate our information with Sendbird. We also need to establish a WebSocket connection for receiving and making calls.
Authenticate your USER ID (send an ACCESS TOKEN if necessary) and validate:
Check for camera permissions
Android requires that we request permission to access this device’s camera on runtime (users should approve this once only)
Make a call
Once connected and validated, we are okay to make a call. Do this by clicking the Make Call button on the screen.
This method will be invoked:
Inside this method, we will:
- Set some basic options:
a. Video element we will use for our camera.
b. Video element we will use for the remote camera
c. If audio is enabled (true)
d. If video is enabled (true). - We also set dialing parameters:
a. Send our authorized USER ID.
b. If this will be a video call (true).
c. We pass the CallOptions above.
Next step is to dial. This dialing process has a handler which we will use to validate if any error occurred.
Immediately after a successful connection, we set some listeners for the following events:
- onConnected: Our device is connected to the remote device.
- onEstablished: Remote user accepted the call.
- onEnded: The call has ended.
You can also define which video elements will be used for a local and remote camera after the call is established:
At this point, you are connecting with the dashboard.
Receive a call
If you want to test this sample using another Android device (and not your dashboard), then you should implement the following method
But, before doing this, we need to do some Firebase work. Sendbird works with FCM to send notifications when a call is required from another device.
Creating your Firebase application to build a video call app
These steps are part of Google Firebase. If you can’t follow these steps or something is not working accordingly, please get in touch with Google Firebase support.
After following these steps, you must have:
- A new Firebase Android application.
- Your private Server key.
- A google-services.json file.
Go to the Firebase console. If you don't have a Firebase project for your client app, create a new one.
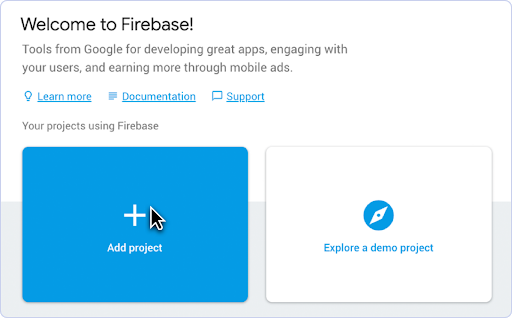
- Select your project card to move to the Project Overview.
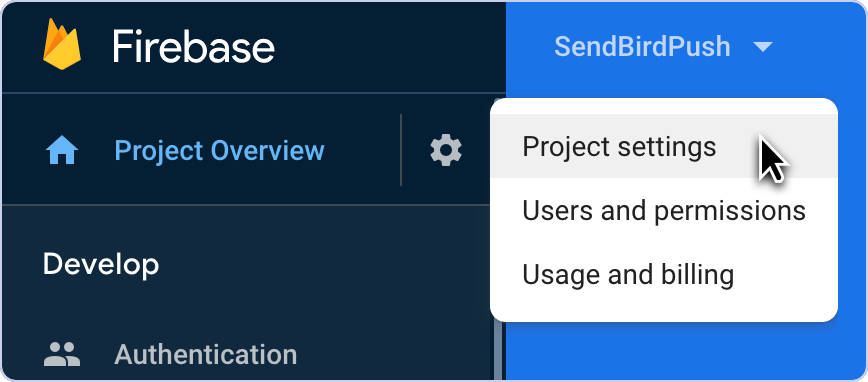
- Click the gear icon at the upper left corner and select Project settings.
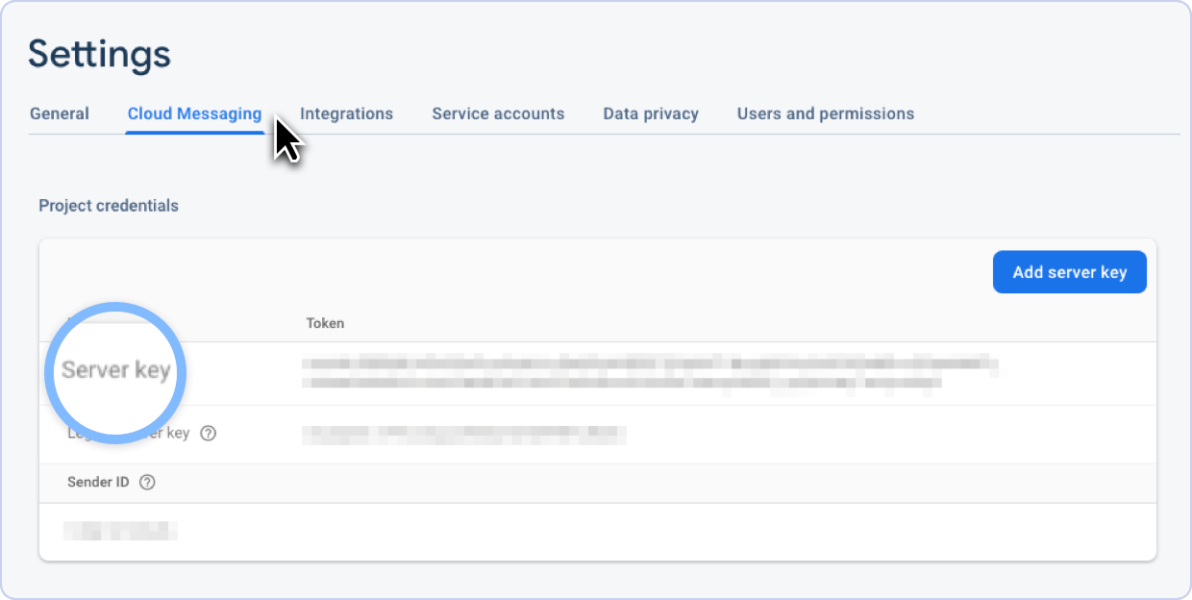
Go to Cloud Messaging > Project credentials and copy your server key.
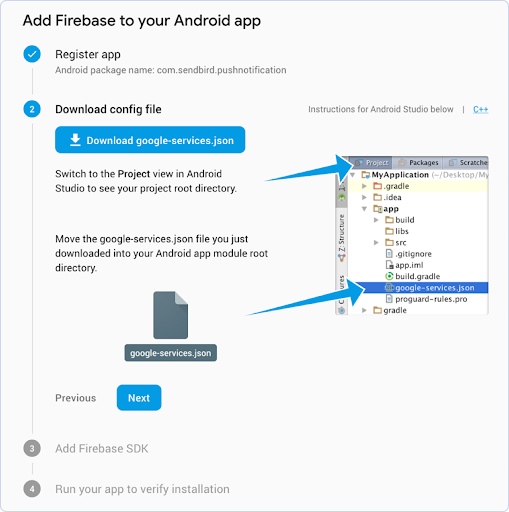
Go to the General tab and select your Android app to add Firebase. Enter your package name, download the google-services.json file, and place it in your Android app module root directory during the registration process.
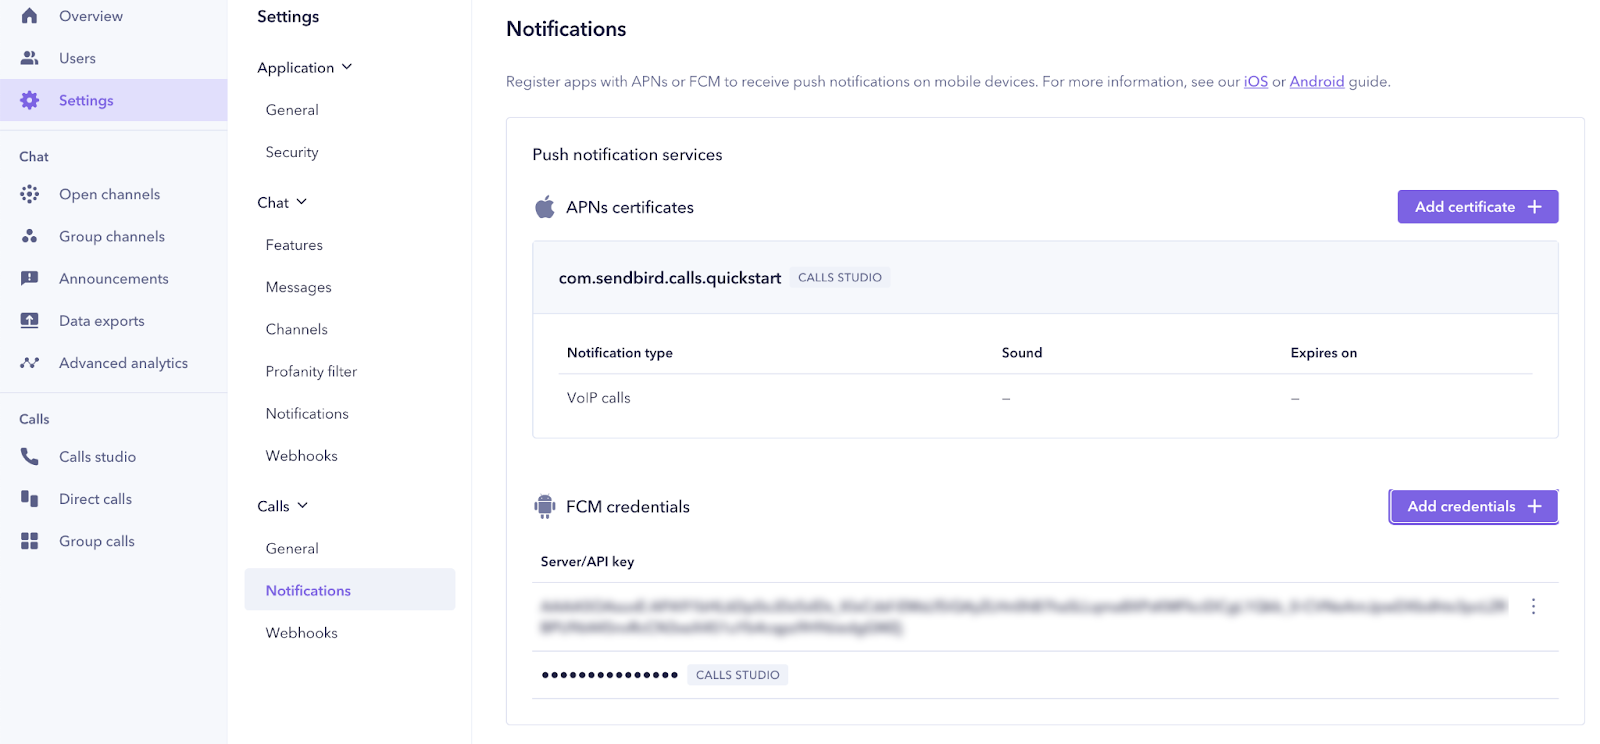
Registering your server key in the Sendbird dashboard
You need to add the server key you copied from step 5 into your Sendbird Dashboard to allow Sendbird to send messages to your clients.
- Sign in to your dashboard and go to Settings > Calls > Notifications.
- Click the Add credentials button and register your server key.
Update your Gradle files
You need to go to your build.gradle files (for both, project and application) and add some lines for including Firebase. This one is how your build.gradle file at project level should look like:
And this one is how your build.gradle file should look like (at application level)
Remember to click again on the Sync Now button to download the new files.

Obtain a token from Firebase for your video call app
Once this is done, you can use all the classes and methods from Firebase. We will use them to obtain a token and register it at Sendbird.
Sendbird will finally use this token to send messages to this device.
Open your MainActivity.java and add this new method:
Inside this MainActivity.java modify the waitForCalls() { … } method:
Run your application again and let these new methods obtain a token from Firebase and then send them to Sendbird.
You can verify this from your Sendbird Dashboard. Find your user and check the Push token value for Android.
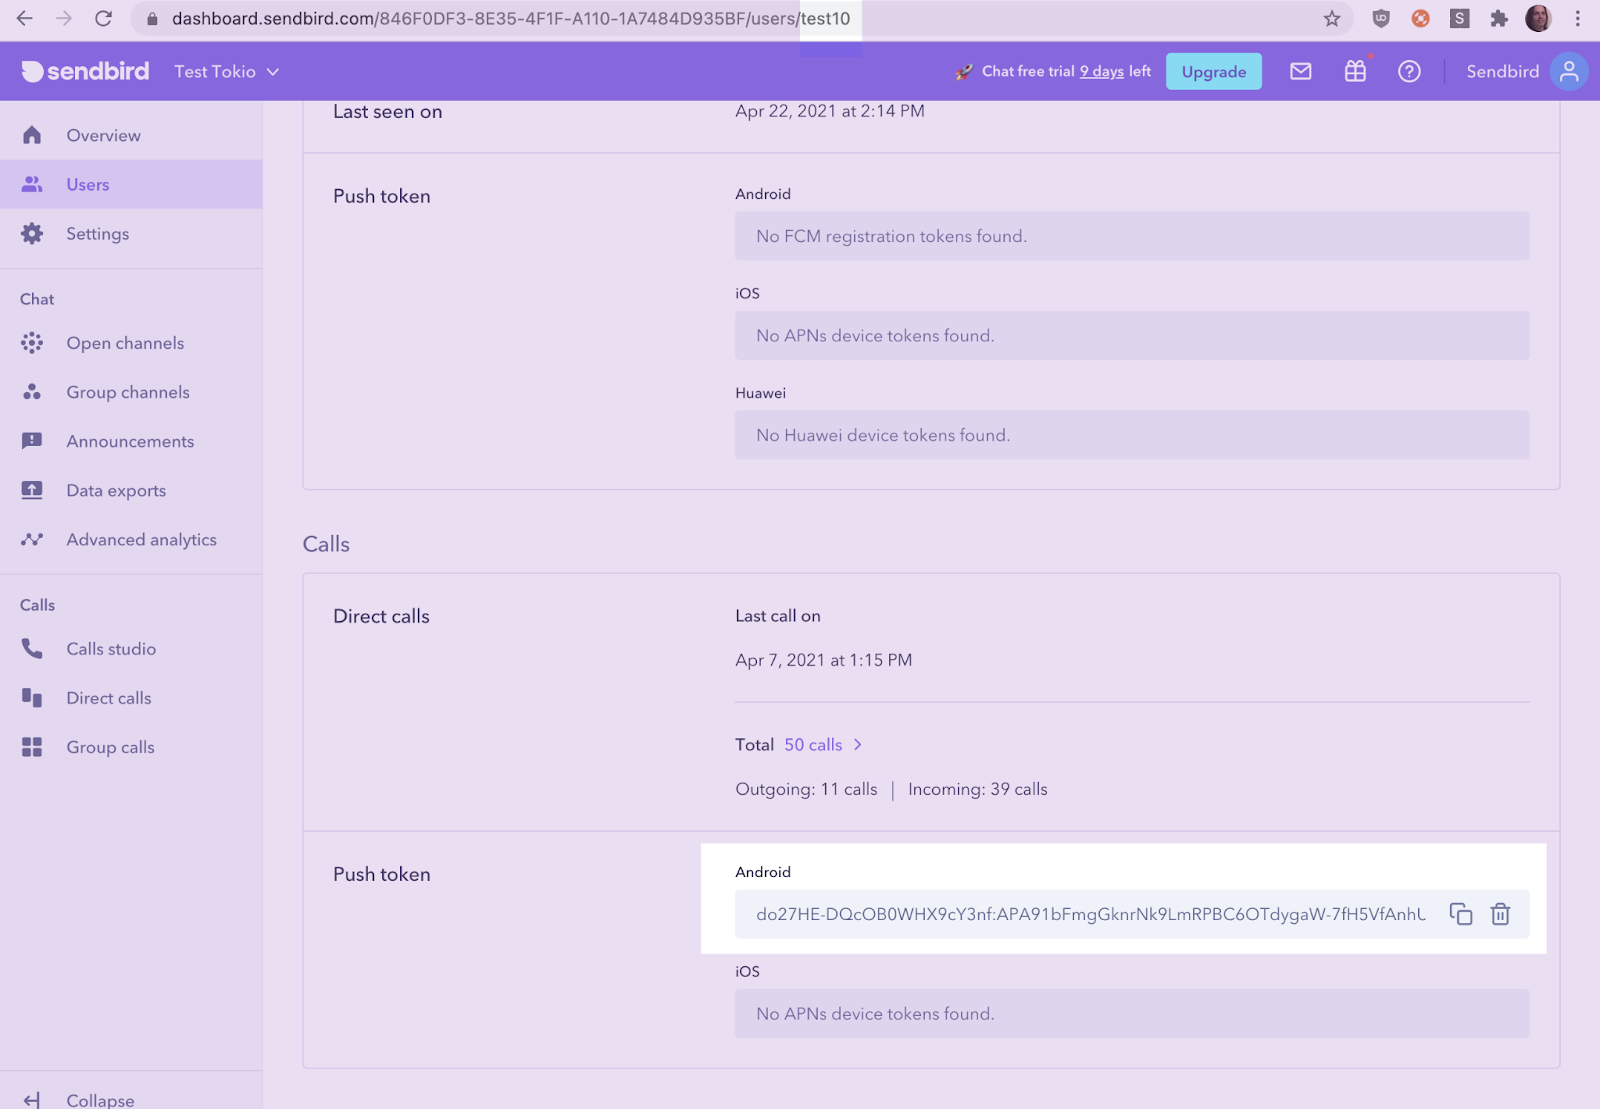
As you can see above (at the top), my user ID is test10. At the bottom of the screen, you can see the Push token for this user.
You must see something similar to be able to receive a call notice from Sendbird.
Conclusion
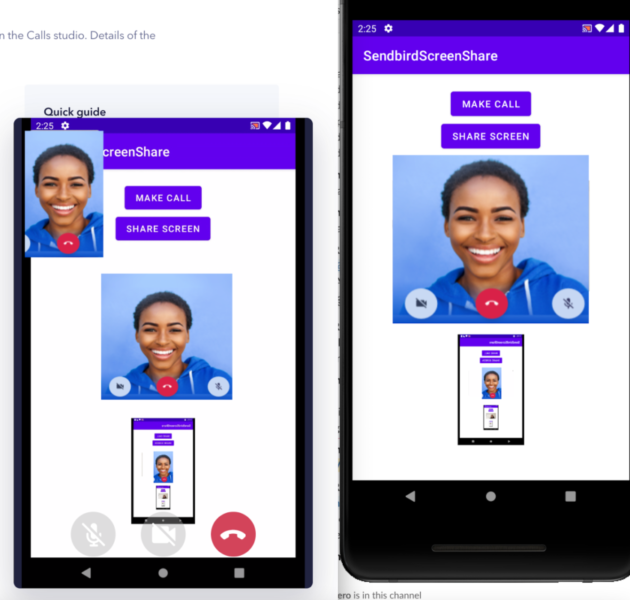
This is all it takes! This guide has covered how to create a new application on the dashboard, create users, and create a sample app capable of making and receiving video calls with Firebase on Android.
As mentioned at the start, this is a two-part guide with our next section showing how you can implement screen sharing.
Check it out, and happy in-app calls building.


