
Building a Vue chat app: Using Sendbird’s UIKit in a Vue.js application

Create a Vue chat app with pre-made chat UI components
Building chat is a complex endeavor. Whether you’re building for healthcare, gaming, on-demand services, or any other industry, building feature-rich chat requires effort. It’s also essential to choose the right tech stack; in this tutorial, we’ll explore how to build chat with Vue.js, a popular front-end JavaScript web framework for building user interfaces and small applications. You will also learn how to use Sendbird’s UIKit, a feature-rich set of chat UI components, inside your Vue chat app.
There are times when you may want to render components written in a different frontend framework to your app; for example when migrating a project between frontend frameworks or using a 3rd party library (e.g. vuetify) that has not been ported to your framework of choice. In these cases, a number of bridging libraries are available. For example, it’s possible to render Angular components in React apps with angular2react or Vue components in a Svelte project with svelte-adapter. For this tutorial, we will use Veuary to bridge the React and Vue worlds.
We recommend watching this video tutorial about how to build a Vue chat app with Sendbird’s UIKit.
Prerequisites for building your Vue chat app
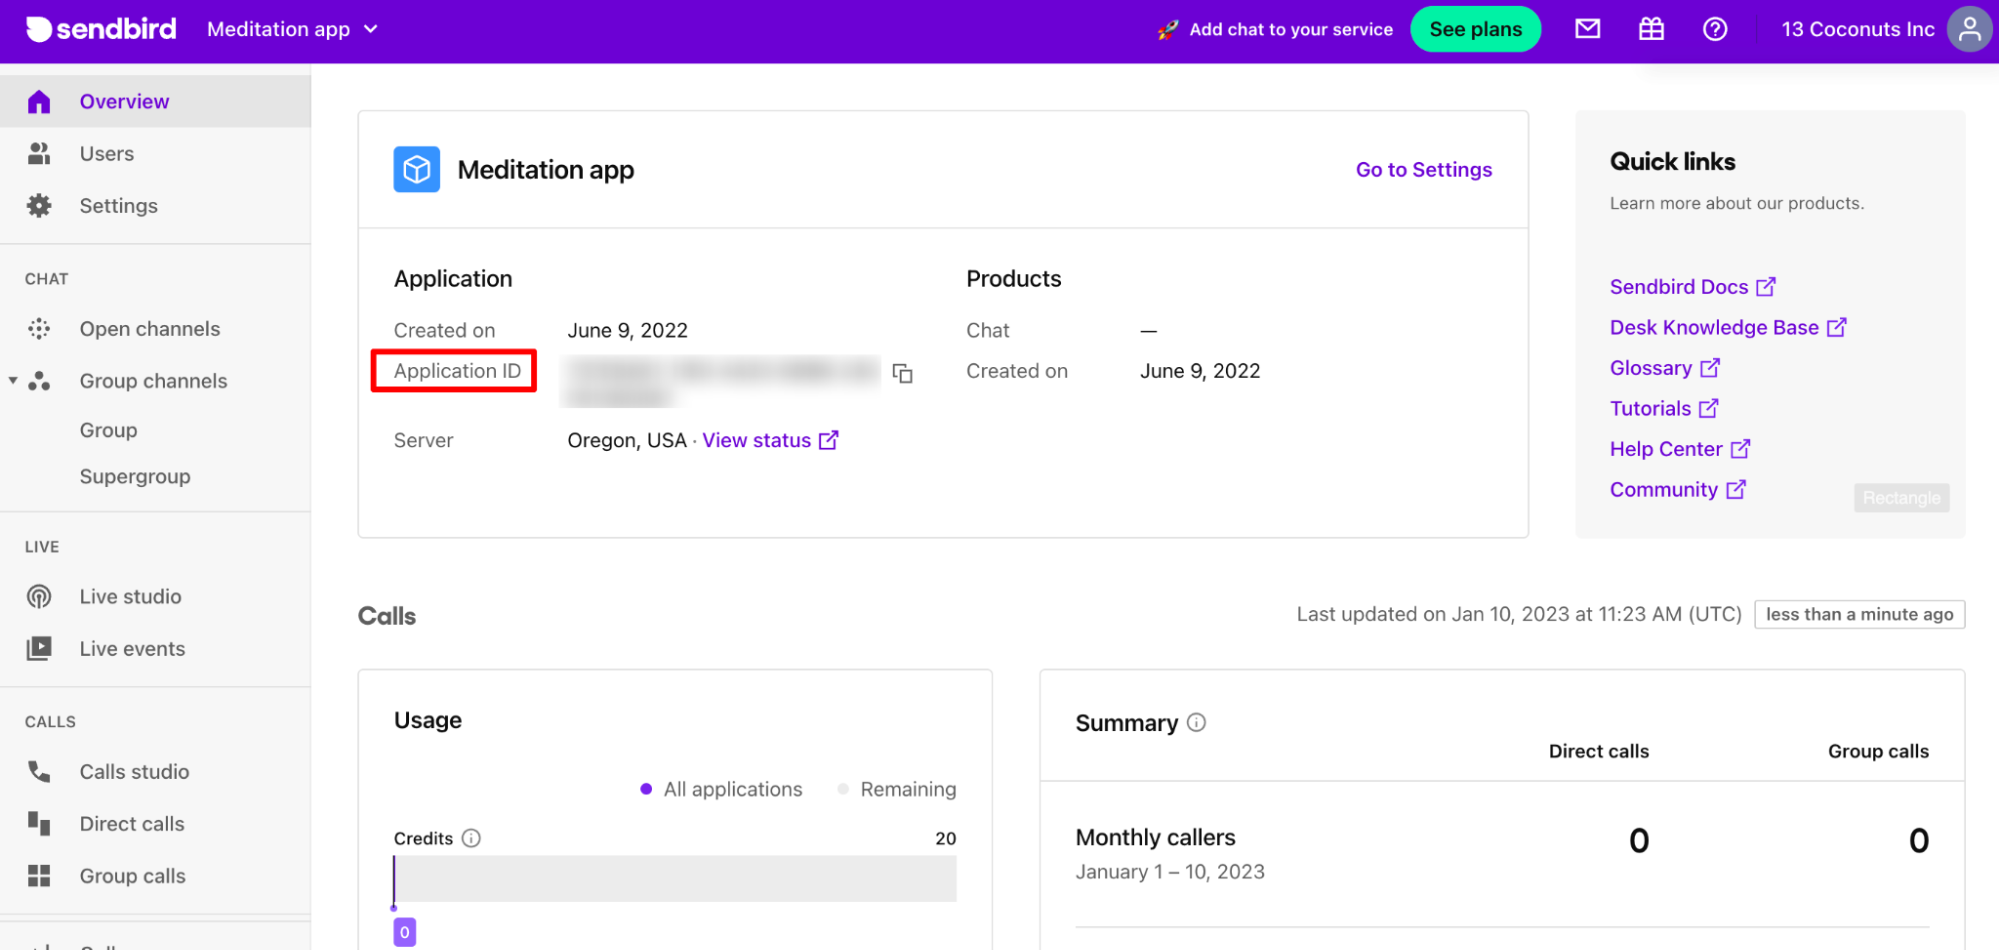
To build your Vue chat app, you will need node.js installed and a Sendbird Application ID. If you haven’t already, you can set up a Sendbird account and create an application in the dashboard.
You can find your Application ID in the Sendbird dashboard.
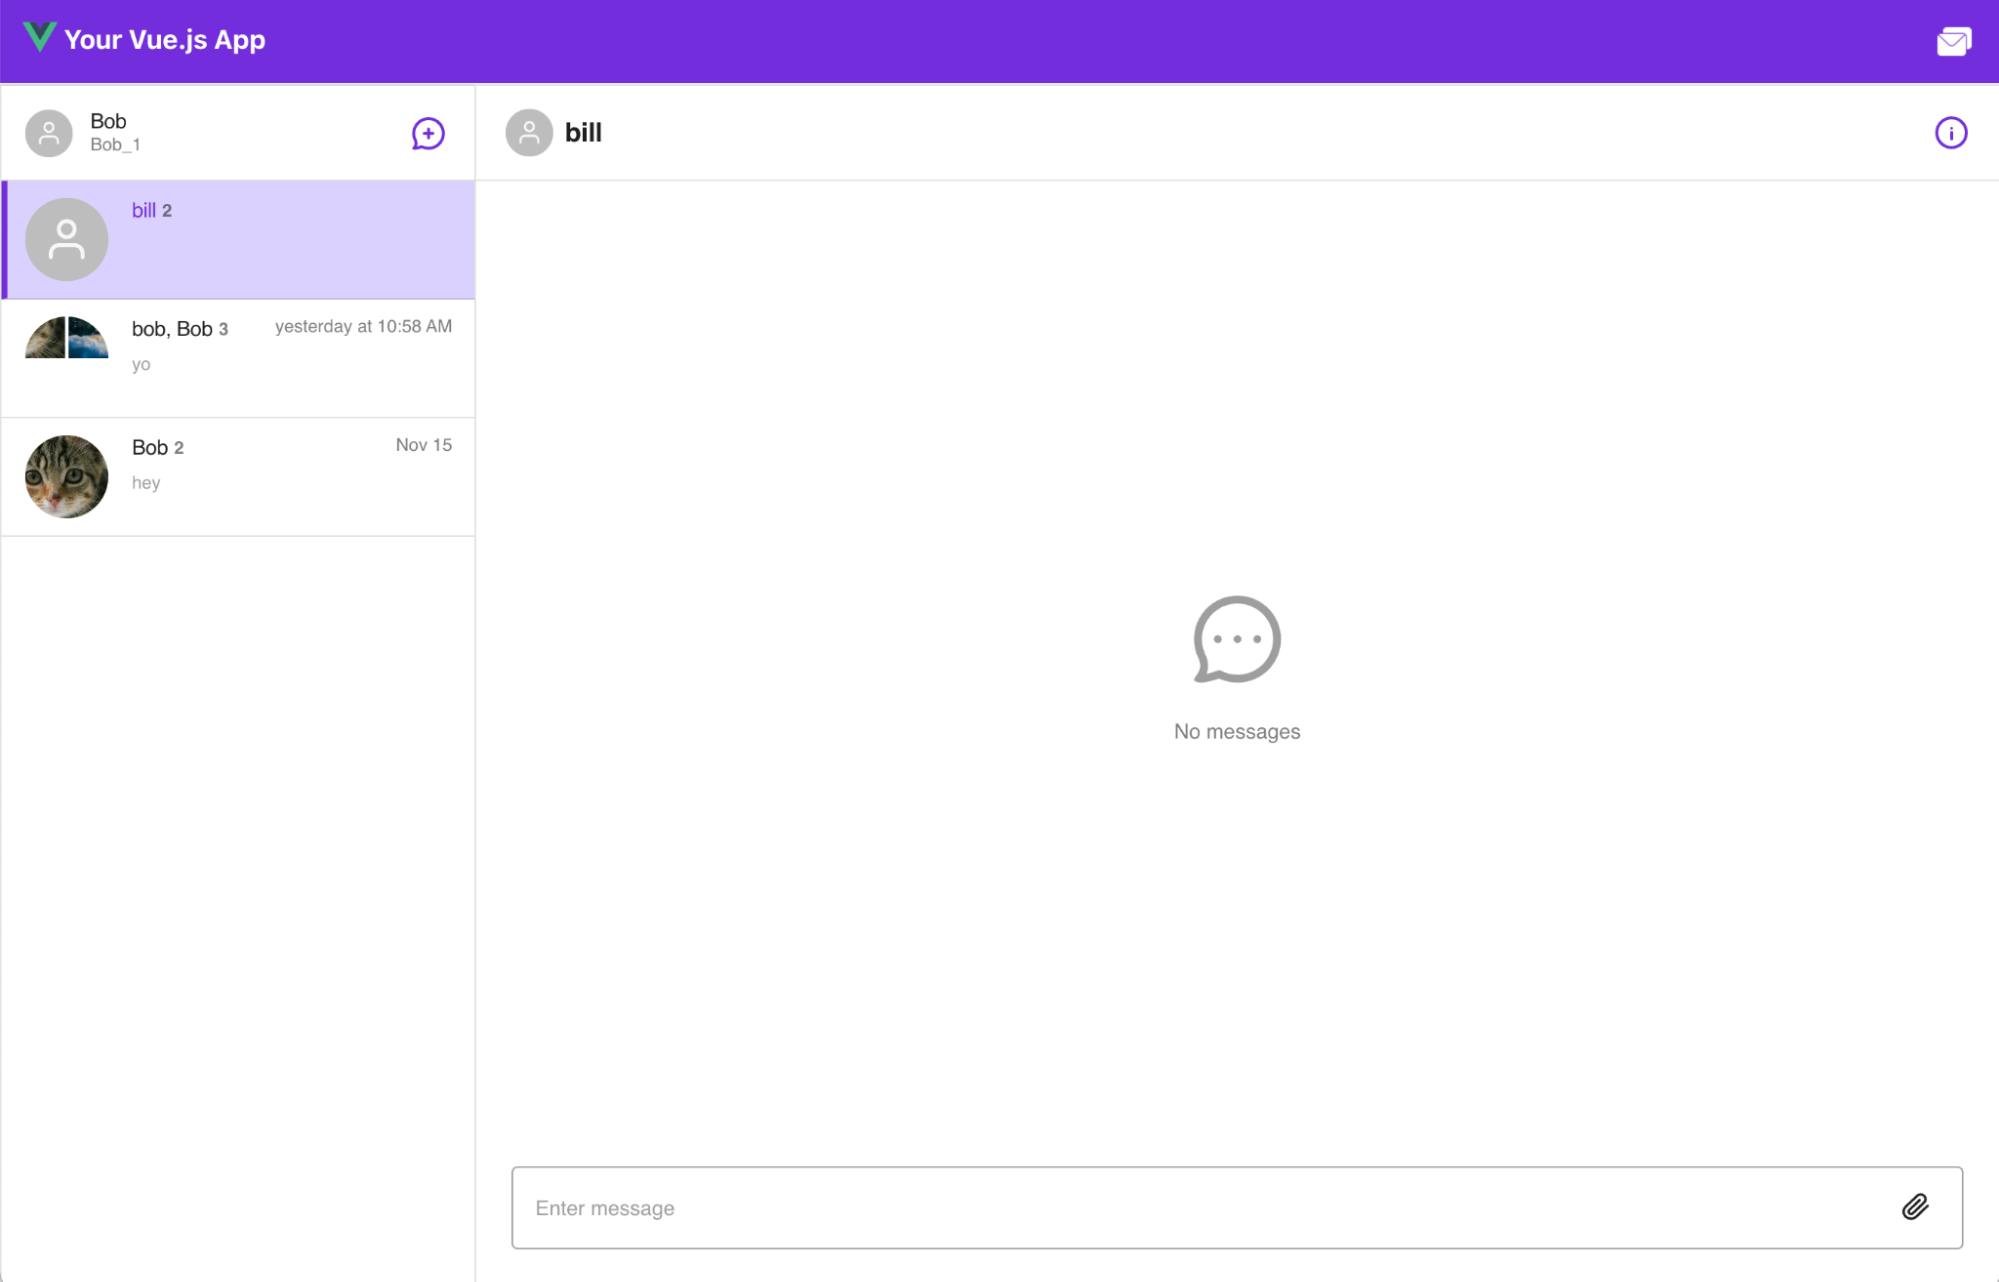
What we are going to build: What your Vue chat app should look like
In this tutorial, we’ll build a Vue chat app with a similar UX to WhatsApp for desktop. The final project code is available on GitHub, and we also recommend that you check out the live demo.
Our project will be built using Vue 3 and the app will render a fully working version of Sendbird’s React UIKit inside the main Vue chat app. The Vue app will pass configurations into the UIKit and UIKit will also pass user information back to Vue. This two-way communication will allow us to display a Sendbird user’s name and unread message count in the top header of our Vue app. The result will look like this.
Step 1: Setting up your Vue chat app
Vue has a handy command line tool to quickly scaffold applications. Just run the following wherever you want your project to live.
This command will walk you through the options when creating a new project. The settings used for this tutorial are listed below.
To start the app in dev mode, run the below commands.
You should now see a shiny new landing page when you run and visit http://localhost:5173. This is what it should look like:

Step 2: Install and configure Veaury
Veaury is a library that enables the rendering of React components inside Vue apps. It’s worth noting that Vue components in React apps are also supported, but are out of scope for this tutorial. Veaury works with both Vue 3 and Vue 2, and the library can be installed from npm with the following command:
To allow our newly created Vue chat app to import and render React components, you need to make a small change to the build configuration. Therefore, we need to update the vite.config.js file in our project to use the Veaury plugin.
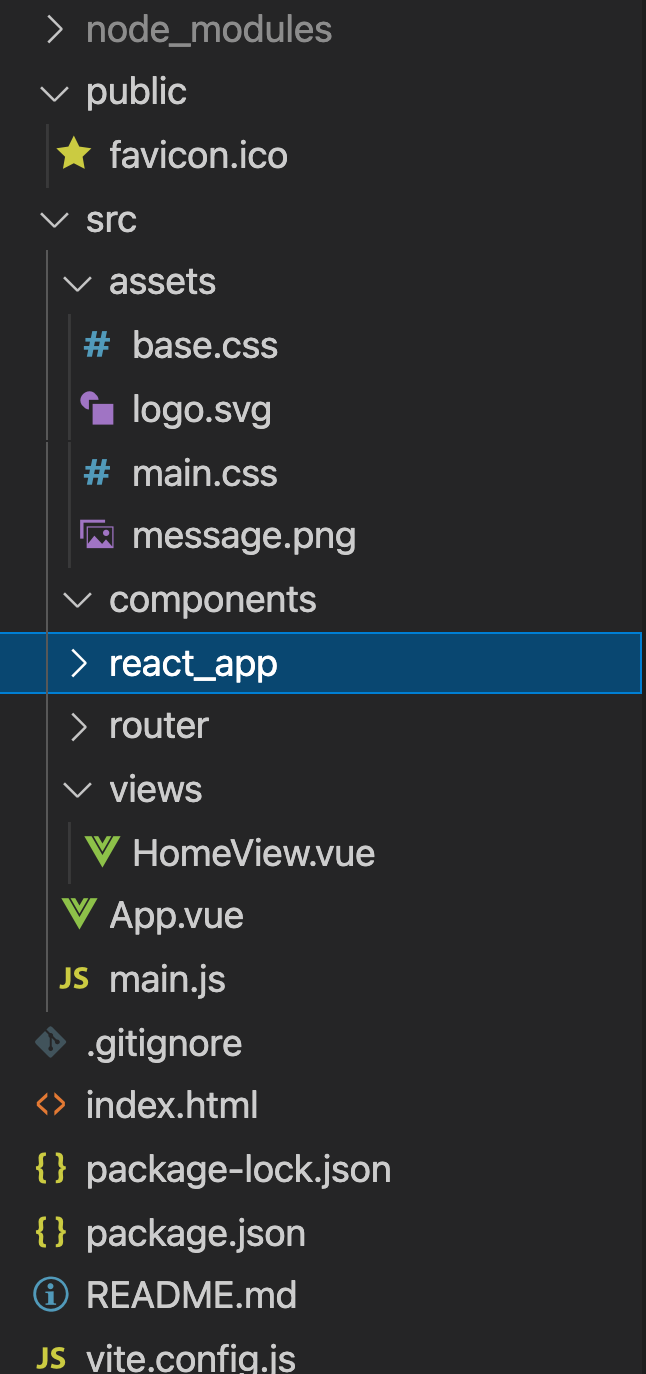
After this configuration change, you can add any React components you want to a directory called react_app. Those React components can then be imported into .vue files and rendered inside standard Vue components.
Step 3: Creating a React component in our Vue project
First, you need to create a new React component in react_app. This component is responsible for importing, configuring, and rendering UIKit.
You don’t have to do anything special to this React component to make it play nicely with Vue. The code here does the following:
- Imports Sendbird UIKit dependencies
- Initialises UIKit with an app id and user id
- Uses withSendbird HOC for access to the Sendbird SDK. This will give us access to the user information needed to be passed back to the Vue app
It’s worth noting that the props that are passed into ChatReactComponent are passed in from a parent Vue component. Passing in props here is the way to get the React side of things to communicate with Vue. How to define and pass in these properties is covered in the next section.
Step 4: Add UIKit to the page
Next, add the ChatReactComponent to your Vue chat app. The page that needs to be updated is views/HomeView.vue. Remove all the code currently in views/HomeView.vue and add in the code below.
This code does the following:
- Imports Veaury and our new React chat component
- Converts our React component to a Vue component using the applyPureReactInVue function from Veaury
- In the setup function, set the data and callbacks to pass as props to our React component
- Define our HTML to render a top header. The header includes the username and unread message count. This data will be passed back from UIKit in a later step of this tutorial
- Render the React Chat component in the HTML, passing in the data and callbacks defined earlier as attributes on the Chat element
- Finally, add some styling to make it all look nice
You will now see UIKit rendering in the browser when you visit http://localhost:5173. This is what it should look like:
Step 5: Pass user information to Vue
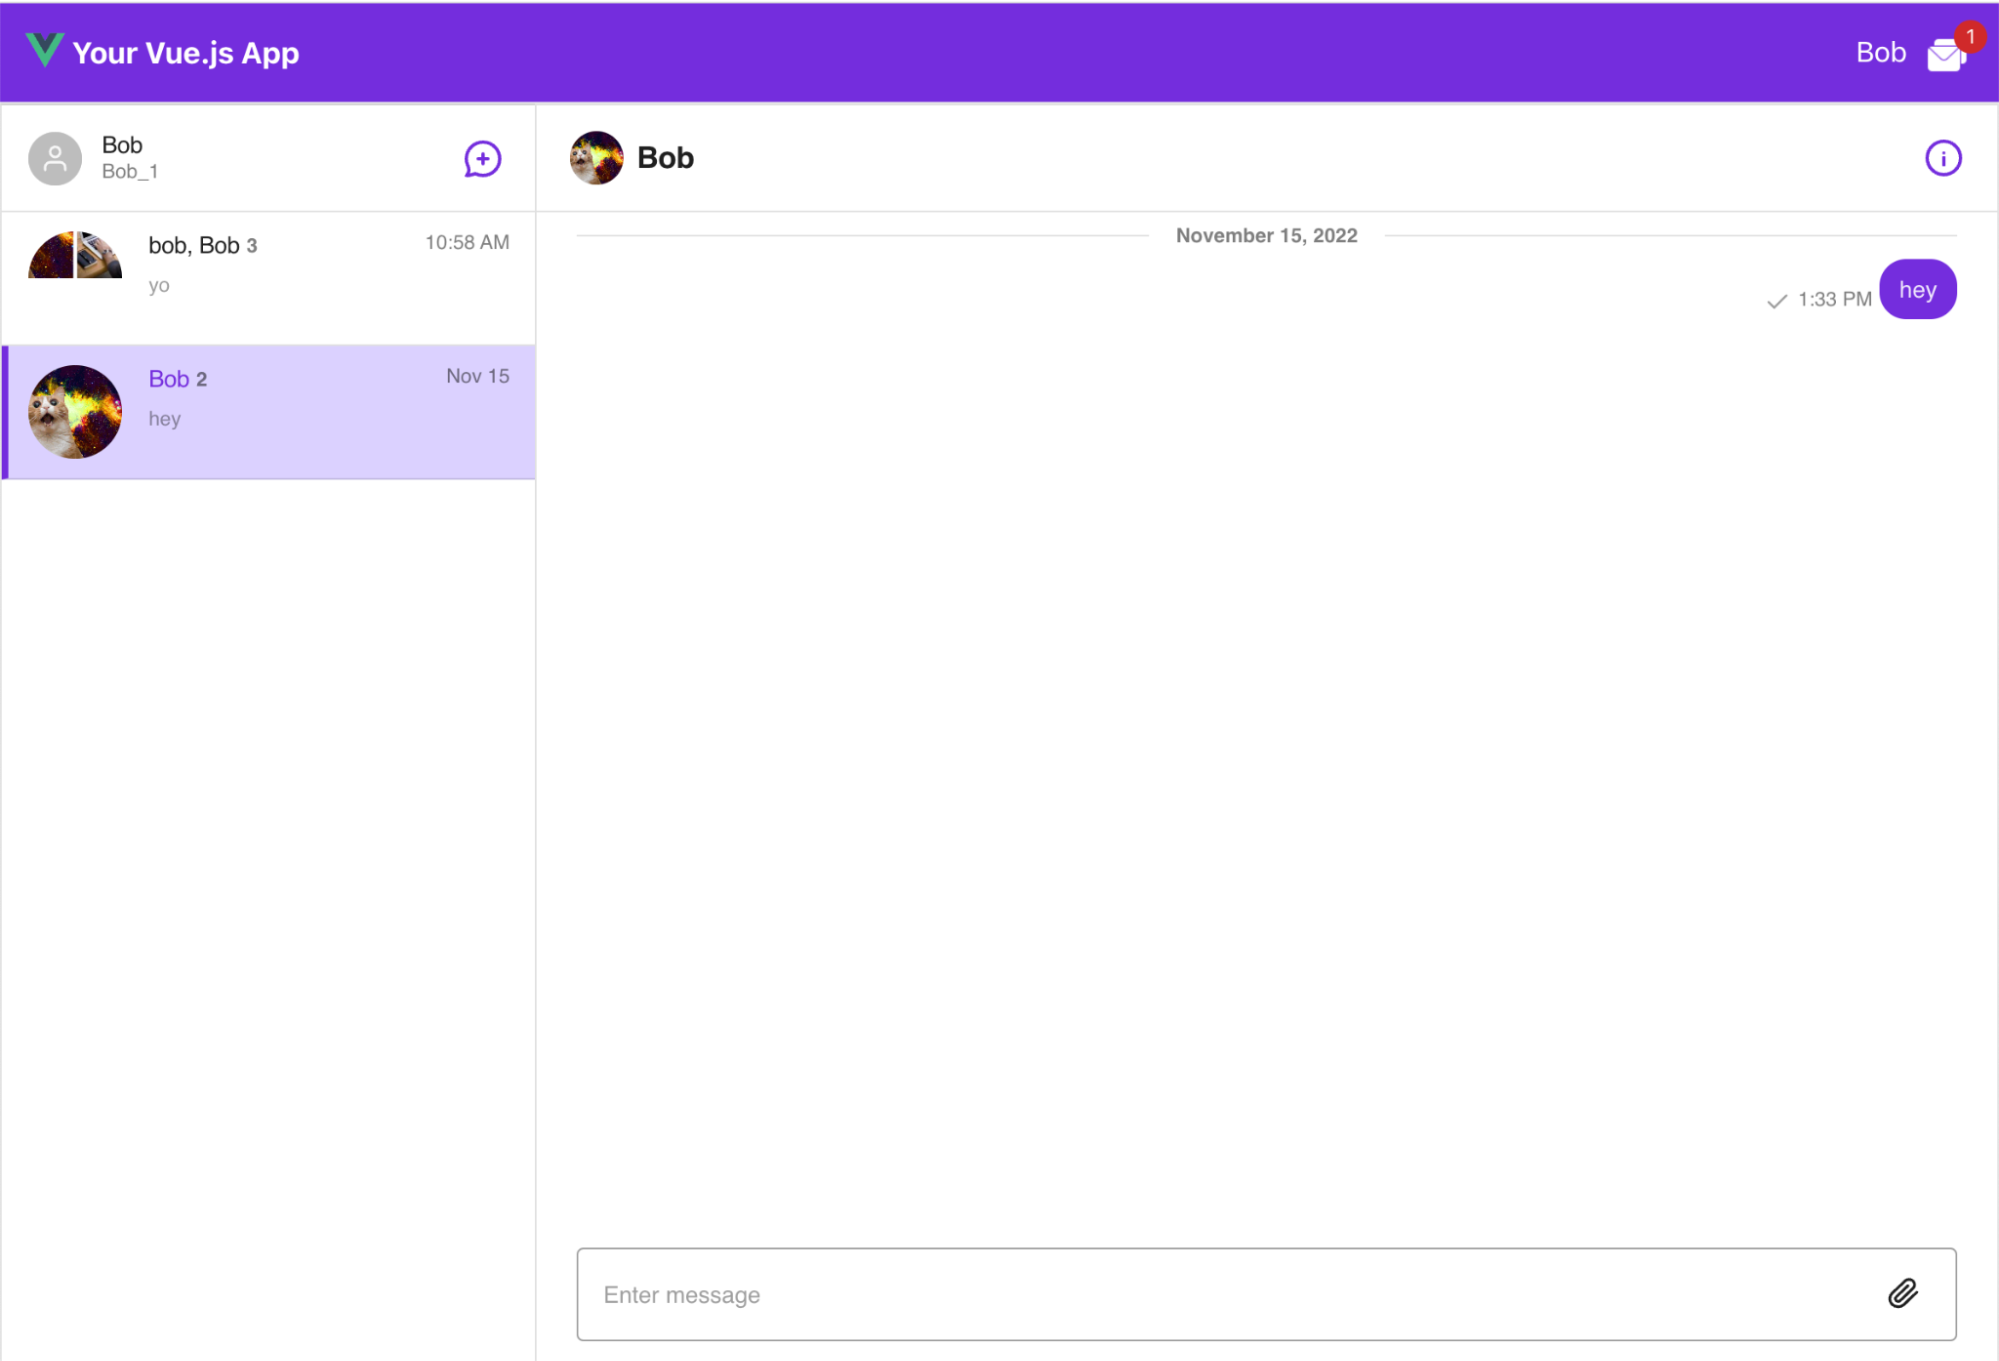
Finally, the user info and the unread message count will be passed back to your Vue chat app so it can display that information in the application’s top header bar. This information is accessed via the Sendbird SDK. To access the SDK from UIKit, you can use a helpful function called getSdk. Calling that function as shown below will give you the underlying SDK. You can then access the relevant methods to get what’s needed (unread message count & user info) and pass that information back to Vue using the callbacks passed in as props (setUnreadMessageCount & setSbUserInfo).
The app top bar now renders a visible user name and message count. Notice the user name “Bob” and the unread message count of 1 in the below screenshot.

Build a Vue chat app using Sendbird's UIKit
Congratulations! You now have Sendbird UIKit running in your Vue chat app. In this tutorial, we talked about how you can create a Vue chat app using the feature-rich, premade design components provided by Sendbird UIKit. Now you can happily create groups and start chatting!
Remember that data flows both ways between the Vue and React code; a sensible next step would be to try passing in different types of properties to the React chat component and using those properties to configure UIKit in an alternative way e.g. setting the UIKit theme colors.
If you need help with Sendbird Chat or the UIKit, please see our docs for Chat and docs for UIKit! You’ll find guidance about how to get chat up and running in your app with rich pre-built UI components. You can also find answers in the Sendbird Community, a forum where you can ask and answer questions related to all things Sendbird. Please don’t hesitate to contact us if you need help – our experts are happy to assist. Happy chat building! 💻


