
How to connect with Sendbird's chat widget in minutes

How to connect with Sendbird's chat widget in minutes
Dive into the world of advanced language capabilities seamlessly integrated with real-time messaging as we guide you through integrating ChatGPT with the Sendbird messaging platform. Unleash the power of Chatbot API, where artificial intelligence converges effortlessly with dynamic conversations. This step-by-step tutorial demystifies the process, demonstrating how straightforward it is to elevate your Sendbird-powered applications with ChatGPT's linguistic finesse. Whether you're a developer, entrepreneur, or enthusiast, this guide empowers you to create chatbots that not only comprehend but engage on a whole new level. Join us on this journey to integrate ChatGPT, redefine your messaging experiences, and unlock the full potential of the Chatbot API with Sendbird.
In today's fast-paced digital landscape, connecting apps and platforms seamlessly is crucial for enhancing user experiences and driving engagement. With the emergence of ChatGPT GPT integrations, developers can now integrate their apps with Sendbird effortlessly, unlocking a world of possibilities for enriched communication and collaboration. In this article, we'll explore how ChatGPT GPT integrations enable developers to connect their apps with Sendbird in minutes, empowering them to leverage the power of chat widget for enhanced user interactions. Within a few minutes and with some minor adjustments you can copy your GPT over to Sendbird. The essence of what GPTs are equates nicely with Sendbird’s bots as we too are using chatGPT under the hood.
ChatGPT GPT integrations offer a simple yet powerful way for developers to integrate natural language processing (NLP) capabilities into their apps and platforms. By leveraging the power of ChatGPT's AI models, developers can enhance the conversational capabilities of their applications, enabling them to understand and respond to user inputs more intelligently and contextually. When integrated with Sendbird, these ChatGPT GPT integrations enable developers to seamlessly incorporate advanced chat widget functionality into their apps, providing users with immersive and interactive communication experiences.
In this tutorial, we will walk you through the process of transferring a GPT into Sendbird's messaging platform. By following the steps outlined in this guide, you will gain the knowledge and skills required to leverage the power of AI-driven conversations within your Sendbird-based applications.
Prerequisites
Ability to create a GPT, or already have created a GPT.
Access to Sendbird’s bot building interface.
Access to your original “Knowledge” documents for uploading to Sendbird.
Note: For transferring GPT’s Actions to Sendbird’s Functions you will need to make a small adjustment to your API, if you were using a PUT or POST request in your GPT.
Use Cases
Transfer the service you built in Chat GPT to work in Sendbird.
Automated content generation in chat applications.
Real-time language translation and understanding in chat interactions.
Increase the coverage of where the service you built in GPT can be used.
Most any GPT functionality except DALL-E, Web-browsing and Code Interpreter
Implementation
In this section, we will provide a step-by-step guide to move a basic GPT model to Sendbird and migrate GPT actions to Sendbird Functions.
A video guide of building a basic GPT to Banana Savvy
A video guide of the whole implementation end to end
Step by step instructions are laid out below!
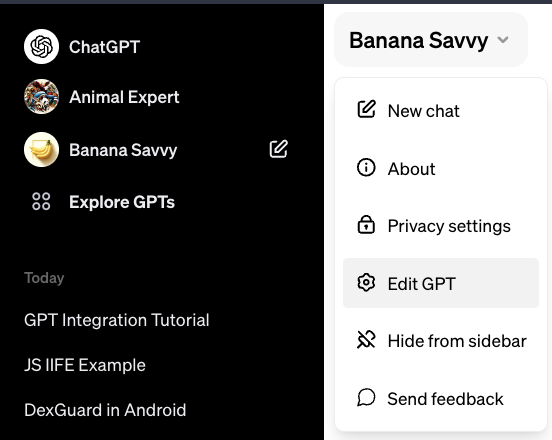
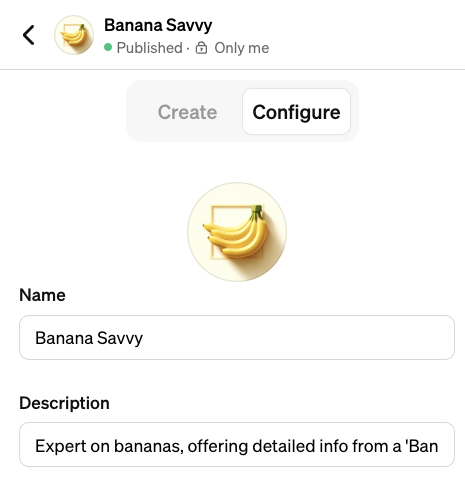
1. Open GPT and locate the Configure view (Open ChatGPT → Open your GPT → Edit GPT → Click → Configure)
2. Create a new bot in Sendbird Dashboard. Go to Sendbird Dashboard → Left menu → AI Chatbot → Manage Bot → Create Bot

3. Copy the configure details from GPT to your Sendbird bot.
From (GPT) | Required effort/action | To (Sendbird) |
GPT’s Image | Add image url to Sendbird bot | Profile image |
name | Copy and paste as is to | Bot name |
Description | Copy and paste as is | Welcome message |
Instructions | Copy and paste as is | System prompt |
4. Upload your knowledge documents to Sendbird. In this case we recommend using the default “Additional system prompt for source” as these are battle tested guard rails.
5. Click → Create (Top right corner).
6. Test your bot. Open Manage bots → Select your Bot

7. Transfer GET Actions from GPT to Sendbird's Functions!
Consider that ChatGPT’s GPT Actions are similar in function to Open AI Functions. Those very same Open AI Functions are used by Sendbird. There is a full walkthrough video here. If you can jump straight to transferring GET requests here.
7.1 This step is only for GET Actions.
7.2 Access your GPT’s Configuration view ready to copy from.
7.3 GPT Configure → Actions → Action name → Schema.
7.4 Next, create a new Function in Sendbird. Go to Sendbird Dashboard → AI Chatbot → Function Calls → Create function.
7.5 From your GPT Configuration Schema get the following items and add them to Sendbird. (url, paths, HTTP method → get, description, operationId, parameters (optional))
7.6 GPT → Settings → Configuration → Selected Action → Schema
"servers": [ |
7.7 Transfer Actions to Sendbird’s Functions mapped as below
From (GPT) Action Schema | Required effort/action | To (Sendbird) Function |
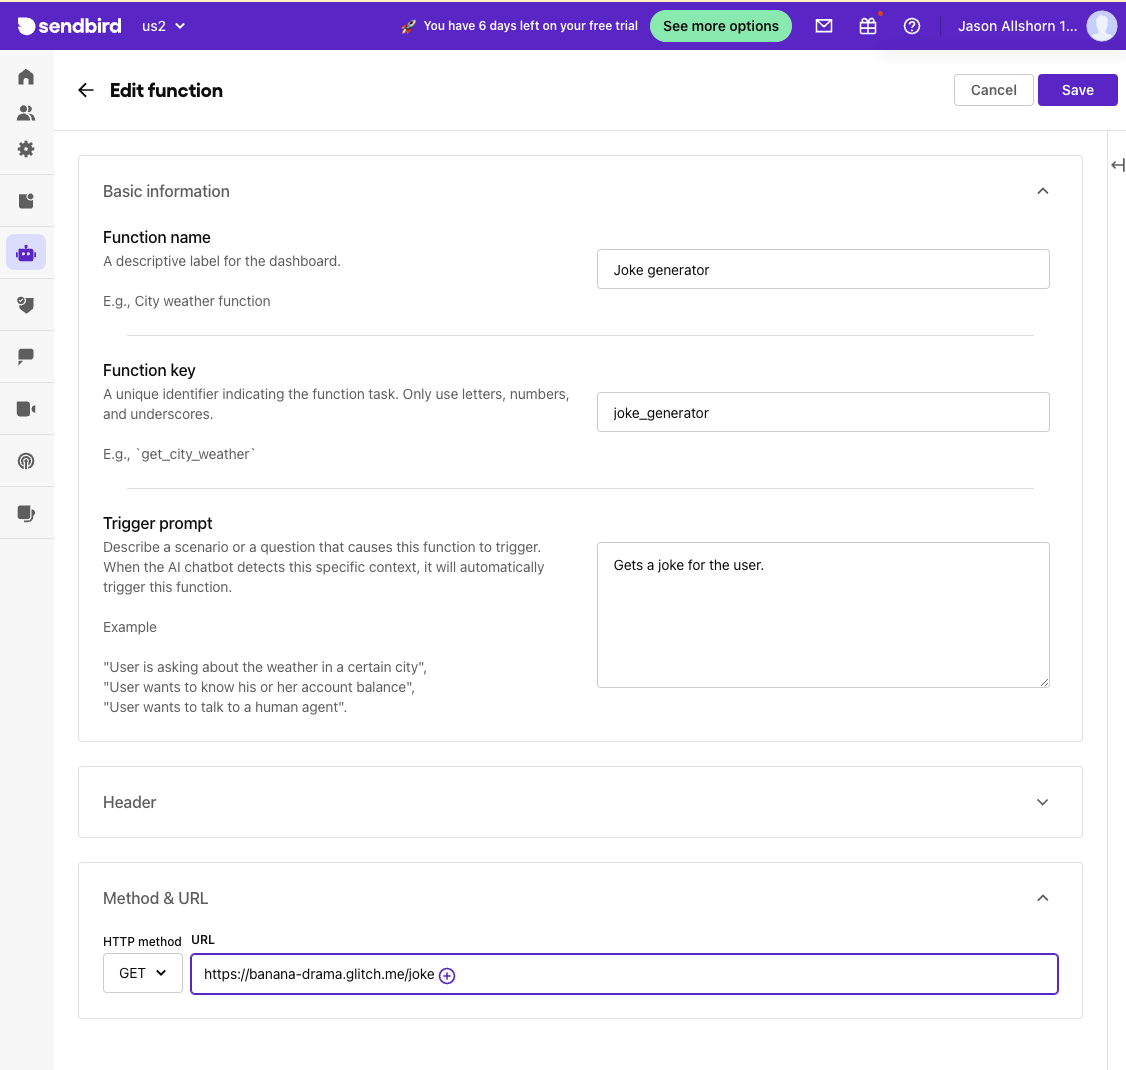
paths.get.operationId | Copy and paste “Joke generator” | Function name |
paths.get.description | Copy and paste “Gets a joke for the user.” | Trigger prompt |
url + paths.[end point] | Example → “https://banana-drama.glitch.me...” | Method & URL HTTP method = GET URL = see left example |
paths.get.parameters | Copy and paste using the intuitive Sendbird interface. | Use “+” and add dynamic parameters as needed. |
Example Sendbird Function creation Dashboard
7.8 Click Save
7.9 Open the bot you made in Step 2 earlier in this document and edit it.
8.0 Sendbird Dashboard → Left Menu → AI Chatbot → Manage bots → YOUR_BOT → Click “Edit”(Top right) .
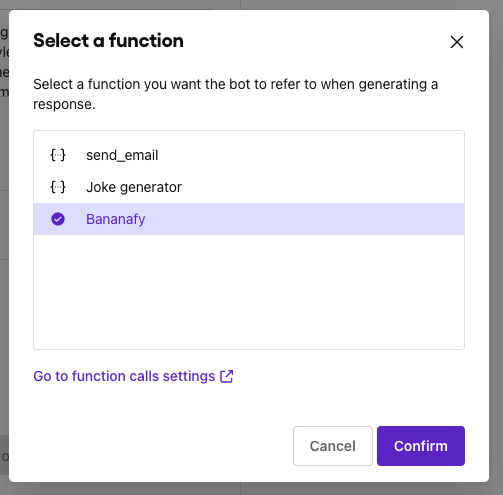
8.1 Scroll down and Click → Select function → Select “Joke Generator”
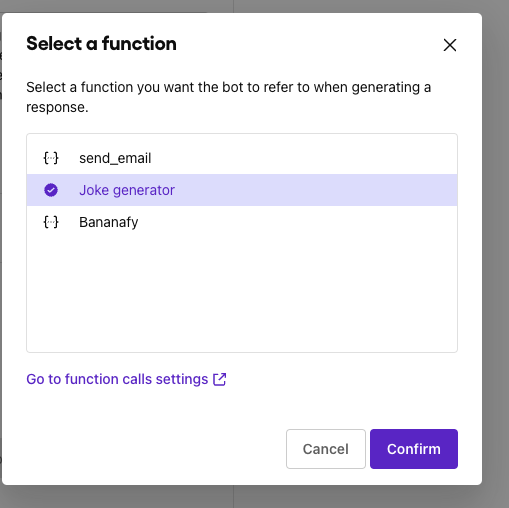
8.2 Click → “Confirm” → Click → “Save” (Top right side).
8.3 Test your bot. For example, “Tell me a joke”.
9. Transfer GET Actions from GPT to Sendbird’s Functions. From the same walkthrough video as above you can jump to Part 3 here.
9.1 This step is only for POST Actions. Access your GPT’s Configuration view ready to copy from.
9.2 Go to GPT Configure → Actions → Action name → Schema.
9.3 Next, create a new Function in Sendbird. Go to Sendbird Dashboard → AI Chatbot → Function Calls → Create function.
9.4 From your GPT Configuration Schema get the following items and add them to Sendbird. (url, paths, HTTP method → post, description, operationId, parameters)
9.5 GPT → Settings → Configuration → Selected Action → Schema
{ |
9.6 Transfer Actions to Sendbird’s Functions mapped as below
From (GPT) Action Schema | Required effort/action | To (Sendbird) Function |
paths.get.operationId | Copy and paste “Bananafy” | Function name |
paths.get.description | Copy and paste “Gets a joke for the user.” | Trigger prompt |
url + paths.[end point] | Example → “https://banana-drama.glitch.me...” | Method & URL HTTP method = POST URL = see left example |
paths.post. parameters.name | Copy and paste “text” | Request body → Key = “text”. Where Parameter type = Dynamic |
paths.post. parameters.in | See technical note below* | N/A |
paths.post. parameters.description | Copy and paste “Take the user's text and randomly add banana emojis” | Input field for Prompt describing data to be gathered or generated. |
Technical note:
The POST method from your GPT uses "in":"text", to determine the name of the key where the params JSON object will appear on the incoming HTTP request to your end point. By convention most POST requests usually put the payload in a key called “body”. But for GPT you can name your own top level key. Sendbird follows the use of “body” convention and doesn’t let you choose. Therefore, it is likely you will need to make a small adjustment to your API. For example the below code is used in a JS express server to handle the aforementioned case.
app.post("/drama", async (req, res) => { |
9.7 Click Save.
9.8 Open the bot you made in Step 2 earlier in this document and edit it. Go to Sendbird Dashboard → Left Menu → AI Chatbot → Manage bots → YOUR_BOT → Click “Edit”(Top right) then scroll down and Click → Select function → Select “Bananafy”
9.9 Click → “Confirm” → Click → “Save” (Top right side).
10. Test your bot. For example: “Add bananas to my poem In orchards green, they sway and gleam, A golden fruit, a luscious dream. Peel the skin, taste nature's grace, Bananas bring a smile to your face”
Summary of the transfer process.
From (GPT) | Required effort/action | To (Sendbird) |
GPT’s Image | Add image url to Sendbird bot | Profile image |
name | Copy and paste as is | Bot name |
Description | Copy and paste as is | Welcome message |
Instructions | Copy and paste as is | System prompt |
Knowledge | Upload original files | Response supplements |
Actions | Copy and paste Also, a small API change if using POST or PUT. Sendbird uses req.body but GPT uses whatever is set using “in”. | Functions |
Benefits of Chat Widget Integration with Sendbird
Enhanced User Engagement
Integrating chat widgets powered by Sendbird into apps using ChatGPT GPT integrations creates a more engaging and interactive user experience, driving higher levels of user engagement and retention.
Improved Communication
Chat widgets facilitate seamless communication and collaboration between users, enabling them to exchange messages, share files, and collaborate on projects in real-time, regardless of their location or device.
Scalability and Flexibility
Sendbird's chat widget solutions are highly scalable and flexible, allowing developers to customize and extend their functionality to meet the unique needs of their apps and user base.
Data Security and Compliance
Sendbird prioritizes data security and compliance, ensuring that user data is protected and that chat widget integrations adhere to industry standards and regulations.
Conclusion: Elevating User Interactions with Chat Widget Integrations
In conclusion, ChatGPT GPT integrations offer a seamless and efficient way for developers to connect their apps with Sendbird and leverage the power of chat widget for enhanced user interactions. By integrating chat widgets powered by Sendbird using ChatGPT GPT integrations, developers can create more immersive, engaging, and intuitive communication experiences for their users.


