
Sendbird content moderation: Verifying user-generated content toxicity using Ngrok and the Perspective API

Content moderation for in-app chat
In online communities, especially multi-user chat, it’s difficult to predict the appropriateness of user messages. Therefore, monitoring and controlling disrespectful behavior within a chat conversation is ideal to ensure community trust and safety.
How do we do this? Using a webhook, we can deliver information to our application in real time, analyze the content being sent, and take action if it contains hostile or insulting language. This ensures that there’s no abusive content within conversations so that the application can provide a friendly and safe user experience.
This blog talks about how to implement content moderation with Sendbird. Before we begin, please ensure you have logged in to your Sendbird account.
Getting started with content moderation for chat
In the application you’re working on within the Sendbird dashboard, activate the webhooks feature by going to the left hand sidebar and clicking ‘Settings’. Under ‘Chat’, click on ‘Features’ and scroll down to enable the webhooks feature.

Next, go under ‘Chat’ to ‘Webhooks’. In ‘Events’, select the webhook event you want to look out for. In our case, we’re going to go under ‘Group channel’ and select ‘group_channel:message_send’. This will have the webhook notify you when a message is sent. On this page, under ‘URL’, you’ll place the webhook URL that we’re going to receive from Ngrok.
Ngrok allows the Sendbird backend to call locally running endpoints on your machine. It hosts webhooks from your local environment to the web environment, thereby allowing end to end testing. Install Ngrok and in a separate terminal, run it by starting HTTP tunnel forwarding to your local port. The local port should be the corresponding port that your application is running on. For this app, set the port to equal 3000.
When Ngrok begins to run in the terminal, you will see an ngrok.io URL next to ‘Forwarding’. This points to the locally hosted URL (https://localhost:3000). Grab the personalized ngrok.io URL next to ‘Forwarding’, and then combine that URL with the path name you’re going to use in your post method. For this app, the post method will be going to the path ‘/analyze_message’.
On the Sendbird dashboard, under Settings in Webhooks, paste the full URL. This will connect the localhost running from your computer, to Ngrok which is connected to receive webhook events from the Sendbird server. Ngrok needs to be left running in the background for when we begin our tests and sending messages in the app.
The next thing we’ll need to install is the Sendbird Platform SDK. Since it’s not a package in NPM, in order to run it, follow these instructions to install for local development. After it’s installed, import the Sendbird Platform SDK into the application.
Lastly, to run our server, we’re going to install Express. Once installed, we’ll set the variable ‘app’ to equal ‘express()’ and set a variable ‘port’ to equal the port we want to be listening on (corresponding to the port that is listening from Ngrok: 3000).
Post method
Create a post method on the express server. This will take in the path we’ll set as “/analyze_message” and has an asynchronous function callback that passes in a request and response.
Within the callback function, the request body contains information about the message that has been sent. Take the channel URL, message content, and sender’s ID and pass them to the function testToxicity.
Perspective API
The testToxicity function uses the Perspective API to analyze the message being sent and to see if it is considered a toxic message. Create an account with Perspective API to obtain a personalized API key. Then, use the Perspective API sample request for Node.js within the testToxicity function. Set your Perspective API key as the variable API_Key. Within the Perspective API sample request, you will see that it utilizes the Google APIs. Install and import the Google API to your file in order to use it.
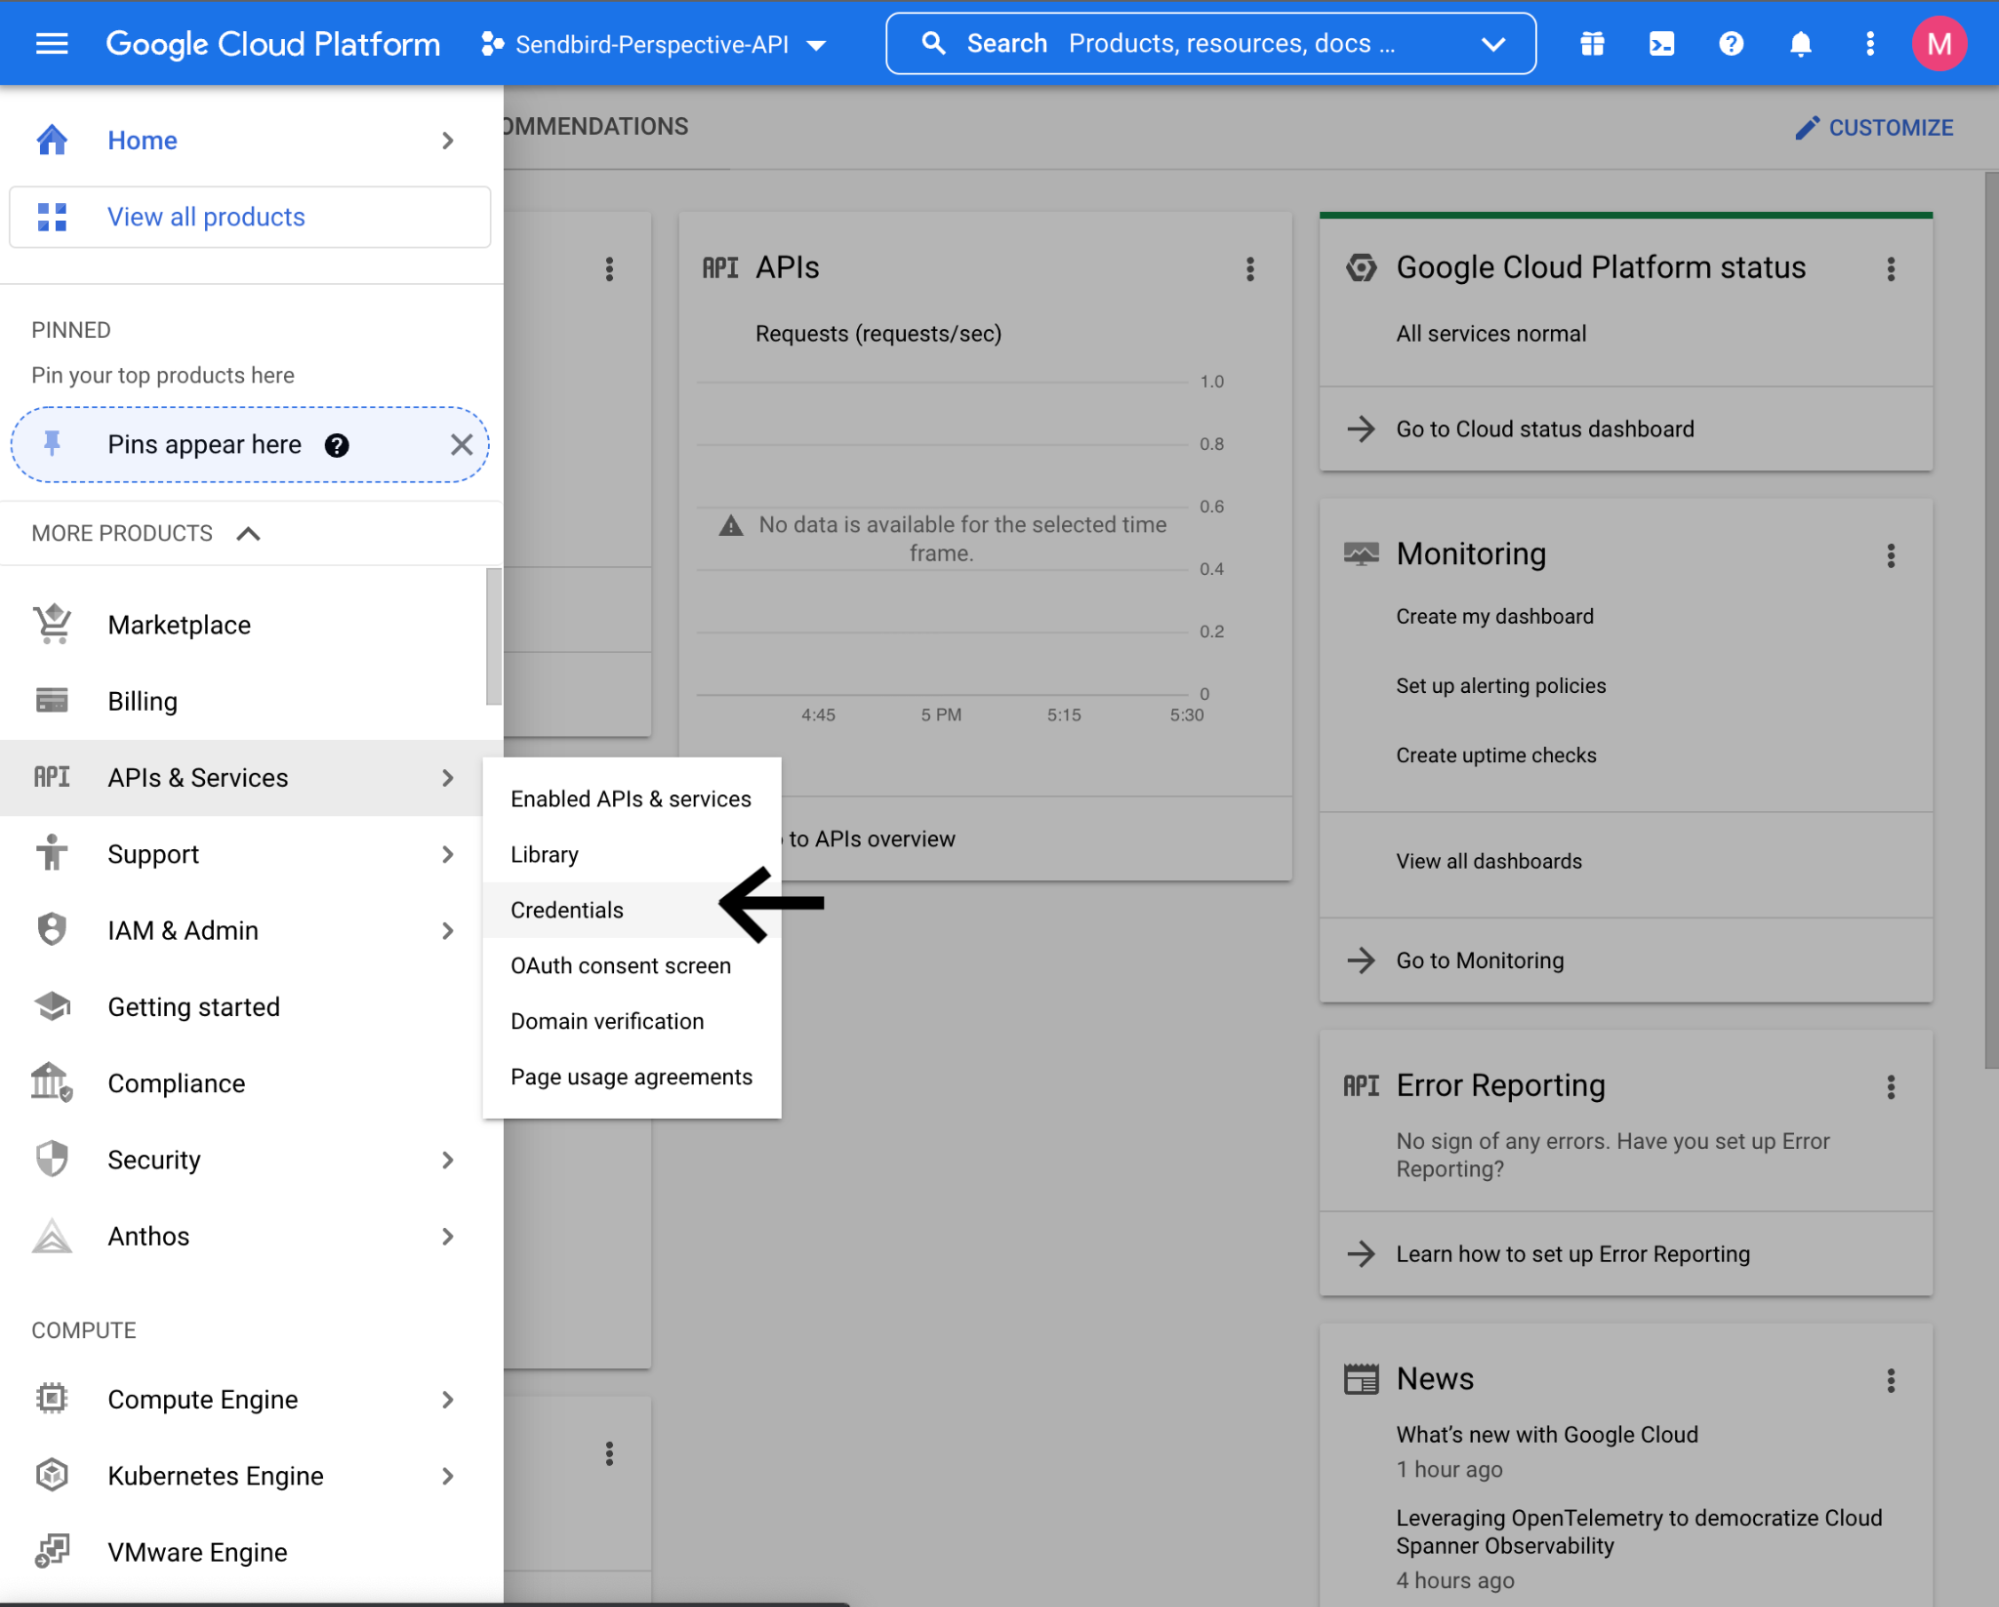
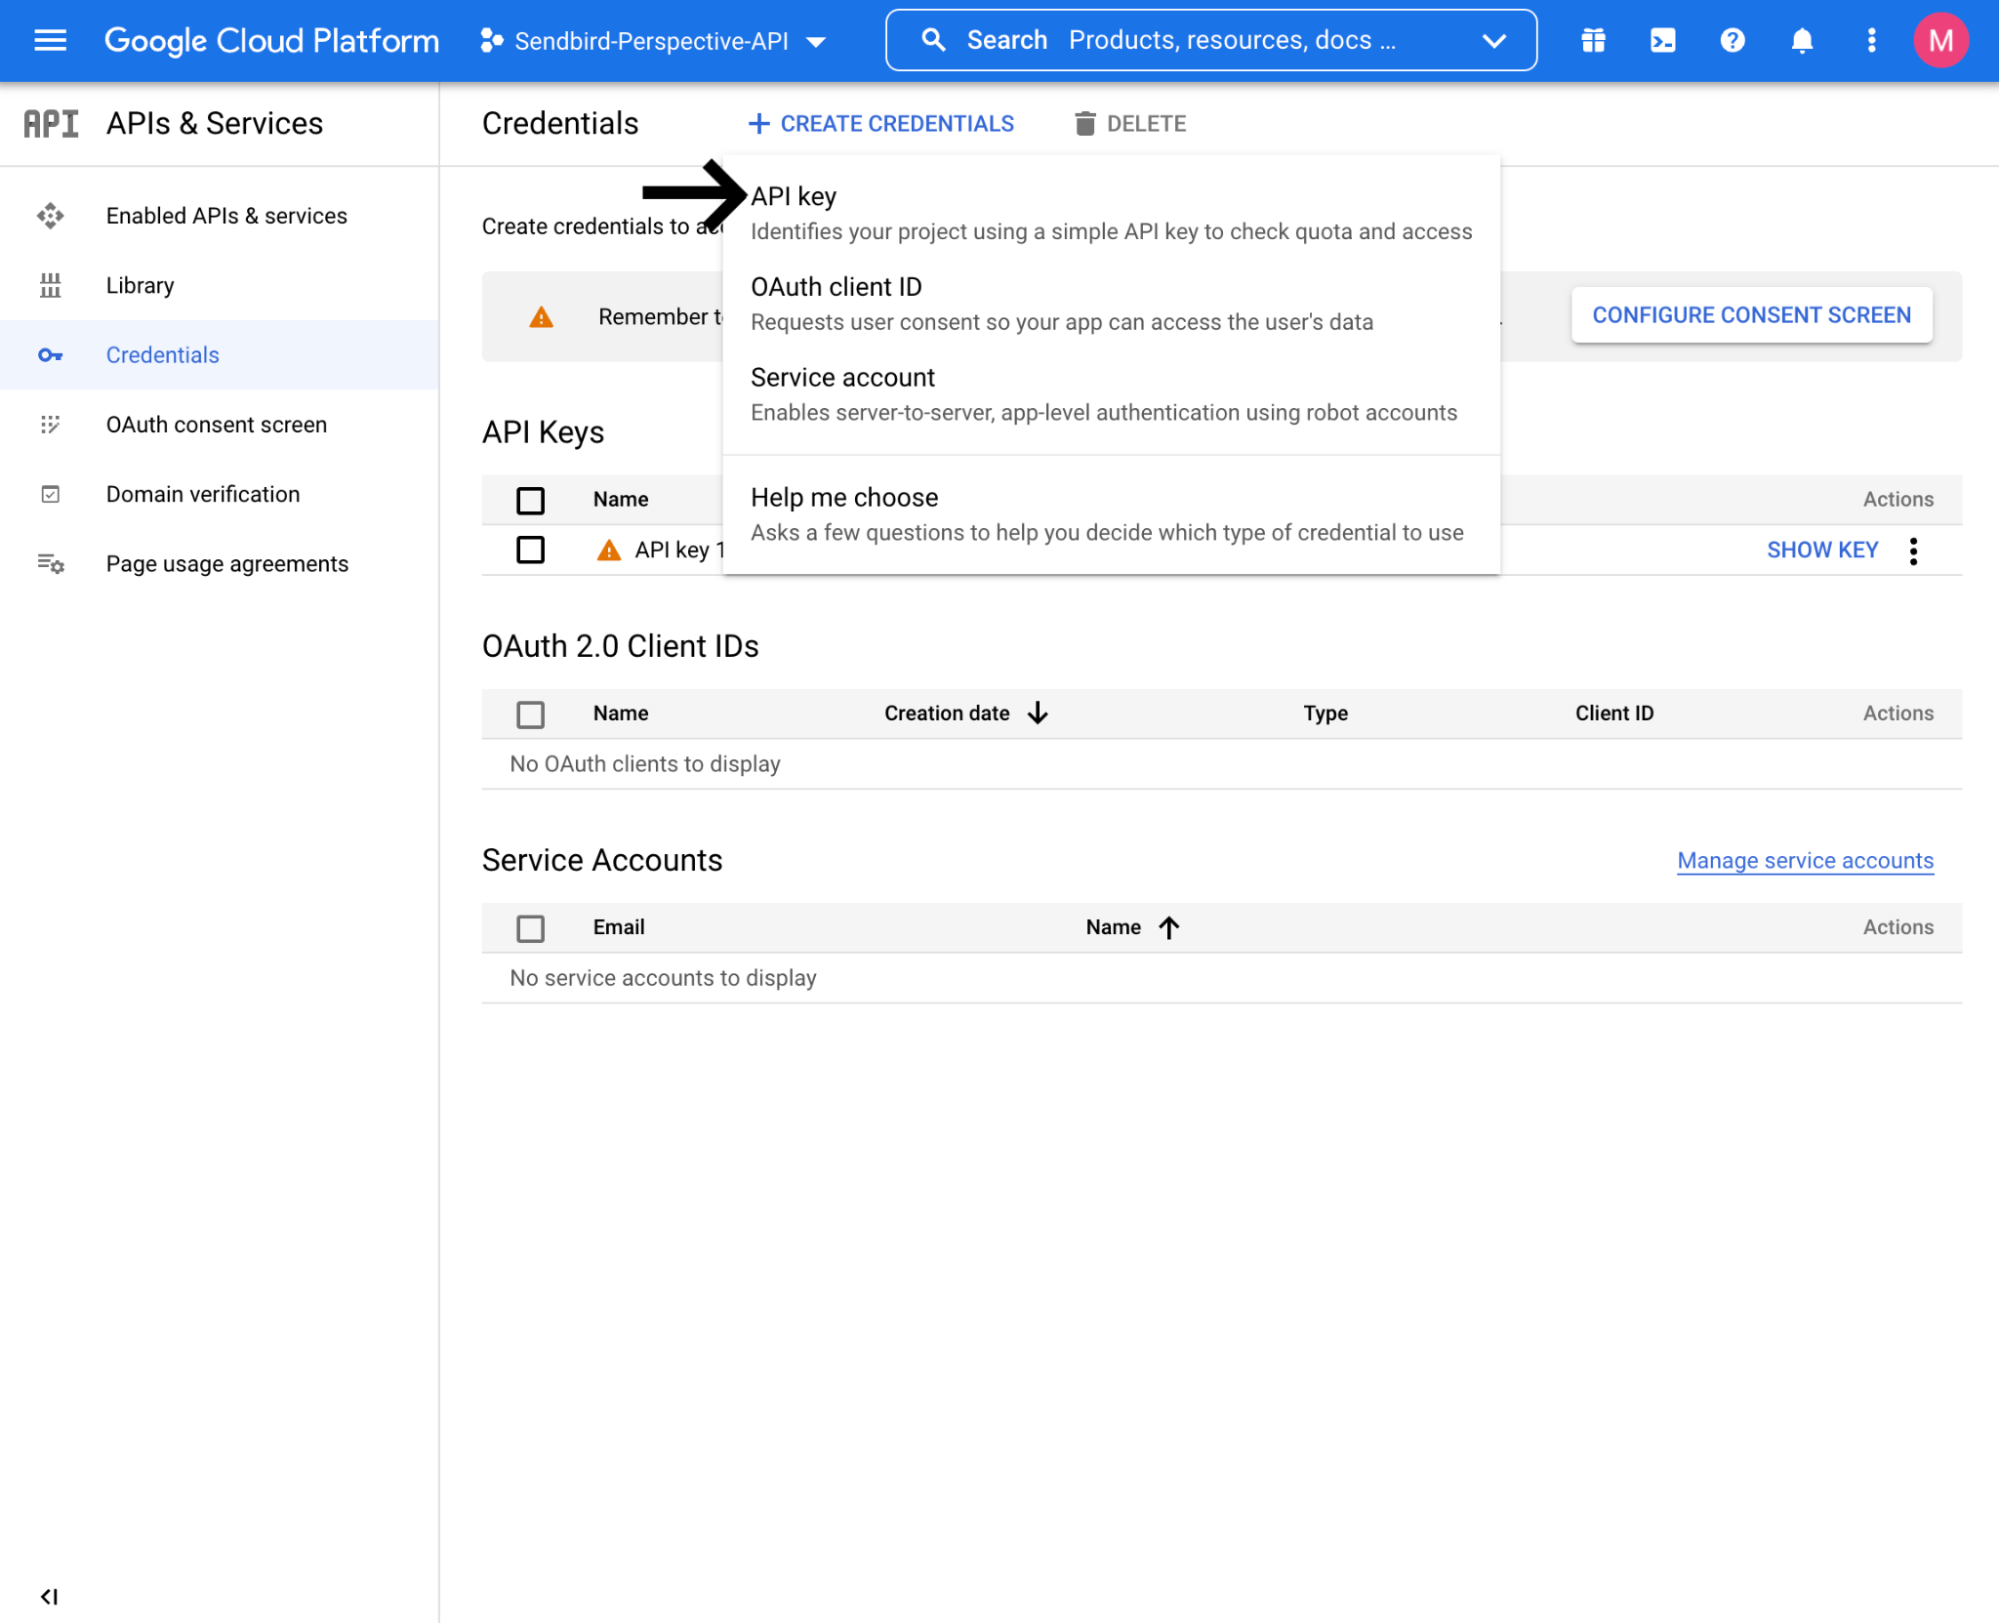
To use the Perspective API, connect the API to your Google Cloud Platform. In the Google Cloud Platform, create a new project. Within that project, click on the left hand sidebars navigation menu, select ‘APIs & Services’ then ‘Credentials’ and create a new API Key. This is where you will store your Perspective API key.
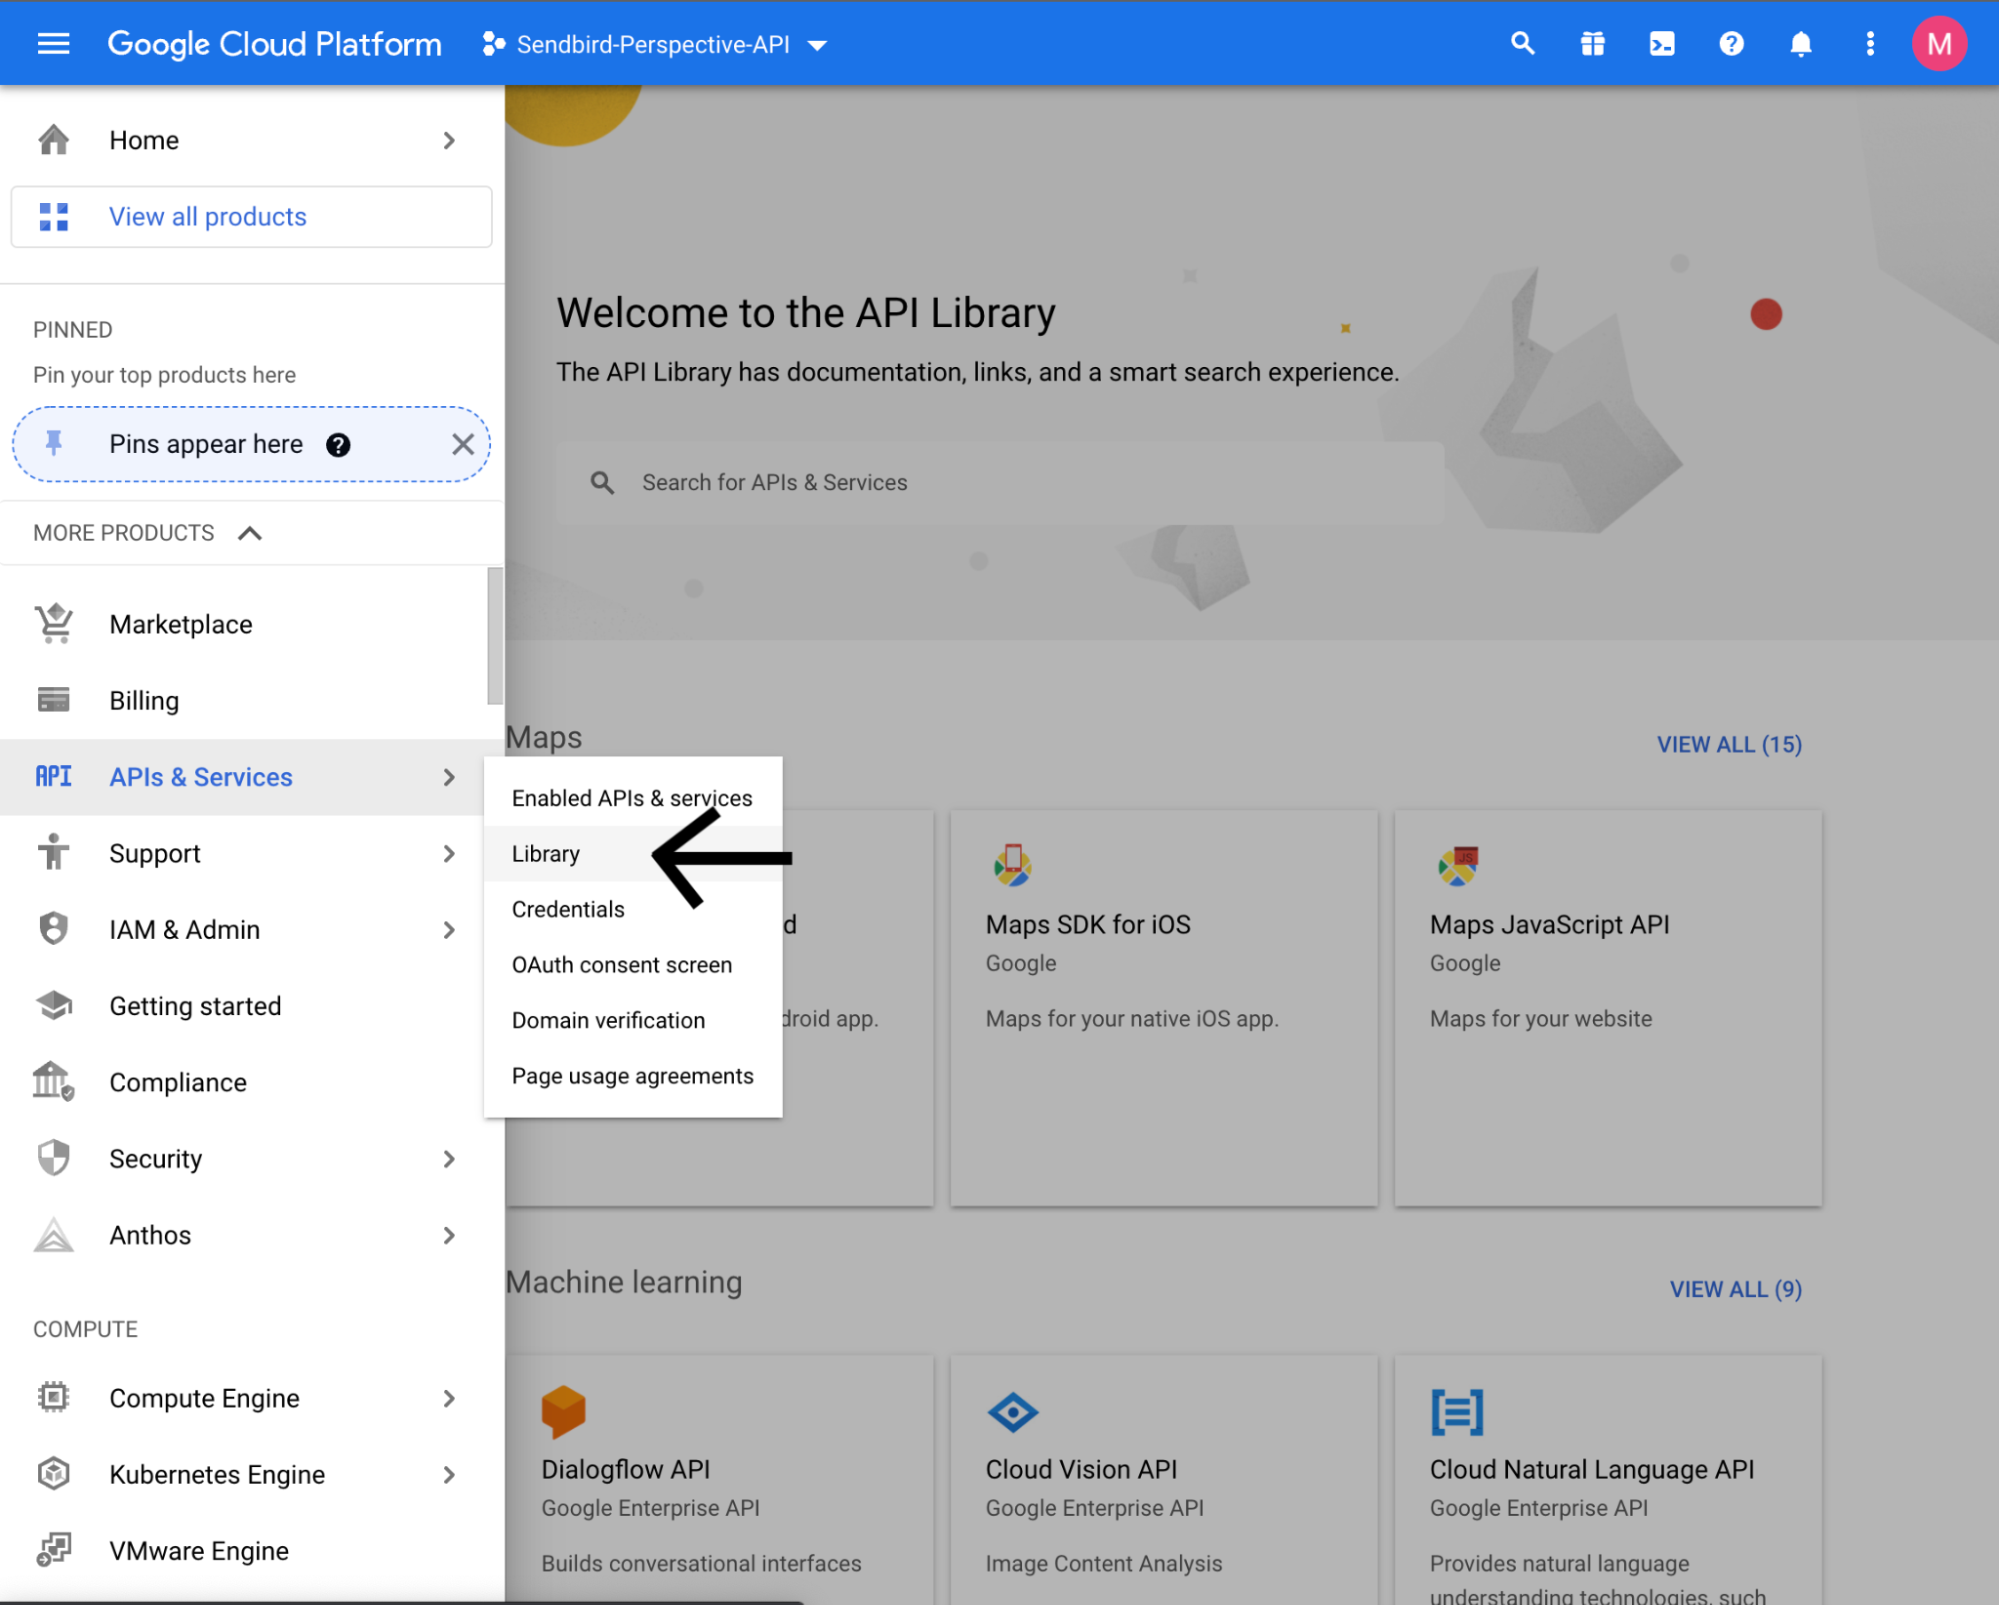
After you have the Perspective API key defined, enable the Perspective API for your project. To do so, in the left hand sidebar of the Google Cloud Platform, go to ‘APIs & Services’ and click ‘Library’. From there, search for ‘Perspective Comment Analyzer API’.
This will bring you to the overview page of that API. On the top, click ‘Enable’ (In the example above, since it is activated for my account it will say ‘Manage’). See these additional instructions if you need help. Once the Perspective API is enabled for your project and the API key is connected, you’ll be able to utilize it within the application, and in our case for the testToxicity function.
Perspective API analyzes the content of the message and returns a score between 0 and 1, where 1 is highly toxic and 0 is not toxic. If the toxicity number is greater than 0.5, we’ll take action against that toxic message using the Sendbird Platform SDK and call the function banUser. However, if the score is less than 0.5, nothing will happen since it’s not a toxic message.
Sendbird Platform SDK
Now that the foundation is set, let’s talk about how to ban users with Sendbird.
Within banUser, pass in the channel URL and sender ID. This is where we will begin to utilize the Sendbird Platform SDK. First, we’ll need to create a new instance of the Sendbird Platform SDK’s Group Channel API. Then, set the API instance’s base path equal to `https://api-${APP_ID}.sendbird.com’, where the APP_ID passed into the link is the app ID located on your Sendbird dashboard. You can find this full link in your dashboard settings in ‘General’ and under ‘API request URL’.
Now that the instance and its base path is set, call the Group Channel API function to ban a user, gcBanUser. For a list of other Group Channel API functions, please check this GitHub page.
gcBanUser accepts the channel URL, ‘options’ object, and returns a callback function that passes in the variables ‘error’, ‘data’, and ‘response’. The options object in this case will contain the apiToken, which is located in your Sendbird Dashboard settings, and requires ‘gcBanUserData’ which is set to ‘new SendbirdPlatformSdk.GcBanUserData()’. You can pass in the ban user data to that function.
The ban user data will include the channel URL, user ID that is being banned, agent ID that is banning the user, seconds to specify the duration of the ban, and a description. Once those data points are set and gcBanUser is called on the API instance, it’ll immediately ban the user from the group channel where they sent the toxic message.
In summary, while Ngrok is running and once the Express server is started up by calling ‘node index.js’, every message that is sent within a group channel will pass through the post method, sent to testToxicity where it’ll be analyzed, and then banned by the Sendbird Platform SDK in banUser if the toxicity score is over 0.5.
Ensuring safe, healthy conversations through content moderation for chat
Hosting ethical conversations for any application is critical to guarantee that there will be no abuse of content. Using the Sendbird Platform SDK and the Perspective API, we can moderate the user-generated content in group chats.
If you’d like more resources on this sample, check out the associated Github repository — In addition, on the topic, check out this Sendbird moderation dashboard sample and tutorial that show how to build an automated moderation dashboard.
If your content moderation requires additional capabilities, visit our advanced content moderation product page, which combines automated moderation tools for consistency and scalability and a moderator dashboard for content managers to process content queues, log moderation events, and moderate live in chat groups to preserve their communities' trust and safety.
Happy chat moderation! 💬


