
How to build a React Native video chat app with Sendbird Calls

We recently launched our new React Native SDK, which makes it easier than ever to add chat to your apps. Please note that this tutorial is a workaround that you don’t need anymore.
To start building calls, please download our new SDK and sample apps for direct and group calls. You can also download the demo apps for iOS and Android to experience Sendbird Calls – you may find the quickstart code on GitHub useful as well! Check out the docs for additional guidance, and the blog for more information! Happy calls building! 📞
Introduction
This article demonstrates how to implement Sendbird Calls within a React Native application. By the end of this tutorial, you will learn how to call another user and receive incoming calls with Push Notifications enabled for both Android and iOS.
There are two solutions covered in this tutorial, both of which use a WebView component for WebRTC communication.
- WebView with remote server
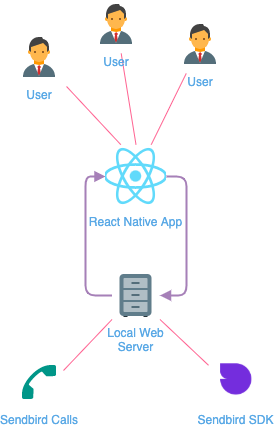
- WebView with local server
The remote server solution is ideal if you are already hosting a web app that implements Sendbird Calls, since you can link it from within the React Native app.
The local server solution (2) is the more maintenance-friendly solution and one that will have the fastest and friendliest development experience since you will have all physical files under one project or repository.
Before moving on to the two solutions, which we will look at separately, there is some groundwork we need to do to prepare.
Step 1: Environment setup
As a prerequisite, you will need a React Native app. For fast setup, use create-react-native-app. If you already have your own application, you can apply the following steps to your codebase.
Note: the native react-native WebView is deprecated. Therefore, you should use react-native-webview instead.
If you are using React Native >= 0.6.x, manual linking is not required. Just run pod install in the ios directory after installation. If you are using an older version, please check the Getting Started documentation of React Native Webview.
Next, go to the component in which you want to render the <WebView> component (in this example, the <App> component) and insert the following code:
The allowsInlineMediaPlayback property along with a ?playsinline=1 parameter in uri should be true in iOS. If not, the video inside the WebView component will be shown in fullscreen.
Push notifications
If you would like to include Push Notifications, make sure you check out react-native-push-notification to learn how to handle remote push notifications. Note that to handle remote push notifications from Sendbird Calls, you have to implement the onRegister callback which is called when the registration token is published. You then have to pass it to the Sendbird server by SendBirdCall.reigsterPushToken() to get push notifications from the Sendbird server.
Remember that the SendBirdCall.reigsterPushToken() function should be called after authentication.
The onNotification callback is called whenever your application gets a remote push notification. This means you have to decide whether or not it is a Sendbird message. You can distinguish them by looking up the sendbird_call property of the data object. If the property is set, then it is a Sendbird message so you can pass it to the JavaScript SDK to handle it properly.
For an example implementation, please refer to the RemotePushController.js file.
Polyfill WebView
In order for the WebView to work uniformly on different devices, we will have to polyfill it using react-native-webrtc.
Inside your App.js file, add the following code:
It is important that the bypass function is called as early as possible.
Also note that the minimum Android version that supports WebView v37 in which WebRTC was introduced, is Android 5.0 (Lollipop).
Add login functionality
For basic authentication functionality, we will add text input fields where we can add our app ID, user ID, and access token (if applicable). Inside your App.js file, add the following:
The authQuery variable contains encoded information about app ID, user ID, and access token which will be used to login to the website rendered inside the WebView component. To check out how the authQuery is encoded, check out the following steps.
Now, let’s add the state hooks and event listeners:
In the next steps, we will look at the two options we have for the uri field of the WebView component. Let’s start with WebView with a remote server.
Step 2a: WebView with remote server
You have to prepare the public remote server to serve the HTML page, including the Sendbird Calls JS SDK. In this guide, we will use our self-hosted sample.
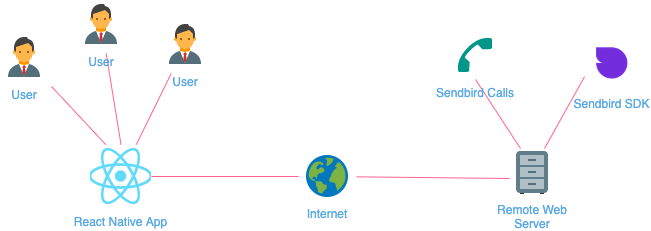
This remote server has to serve the HTML page which eventually goes to the call view. The call view should contain <audio> or <video> tags, and the tags need to have autoPlay, playsInline, and possibly muted as their properties. Check out the minimal form of call view in our example repository.
Following the setup detailed earlier, we can render the Sendbird Call sample web app from within our React Native app by using the WebView component.
The only thing required here is to pass the above URL into the uri field of the WebView‘s source prop:
Step 2b: WebView with local server (recommended)
Alternatively, you can launch a local server that hosts some local files within your React Native app project. This allows you to develop faster by having all files consolidated in a single project/repository. It also reduces overhead costs because there is no need to host a live website for this to work.
First, install the react-native-static-server and react-native-fs packages. Depending on your React Native and Gradle versions, install the appropriate react-native-fs version.
If you are using React Native >= 0.6.x, manual linking is not required. Otherwise, run the following commands:
Then run the following command for iOS:
Create files for local server
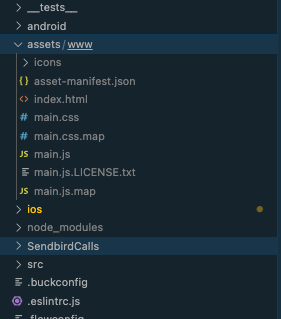
Add a directory named assets/www at the root of your project. This is where our build artifacts will go and will be hosted by our local server. We will create this local server during the next steps.
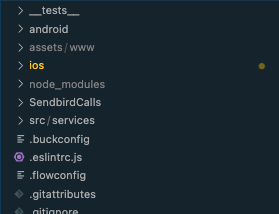
Now for the source of these build artifacts, we will clone this repository inside a folder called SendbirdCalls. Inside the root of our React Native project, run the following command:
So your project structure should now look like this:
Finally, install dependencies and build the SendbirdCalls project we just cloned.
Once the above command has finished, you should get the build artifacts inside the <project root>/assets/www/ directory.
Add files to iOS bundle
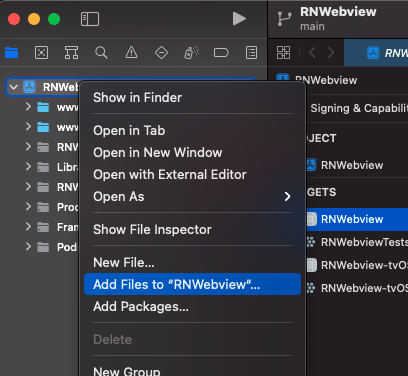
First, open your iOS project in Xcode. The iOS project should be located within the root of your React Native project under ios/<ProjectName>.xcodeproj.
Then, right-click on the topmost directory of your project and select ‘Add Files to <ProjectName>’.
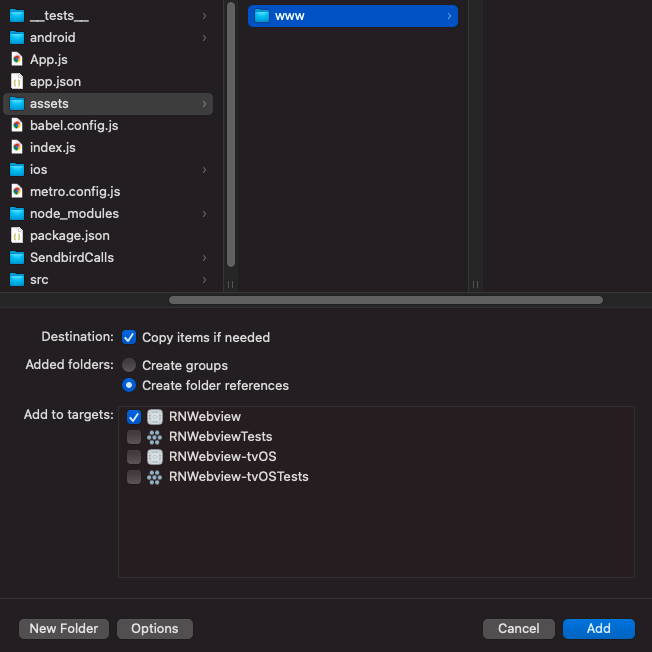
Then select the assets/www directory within the root of your project.
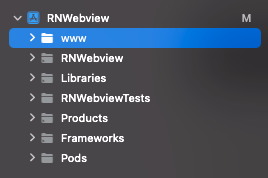
After clicking on ‘Add’, you should see the assets bundled into the iOS project.
Add files to Android bundle
Inside the <project root>/android/app/build.gradle file, add the following line to bundle the static server’s files into the Android app:
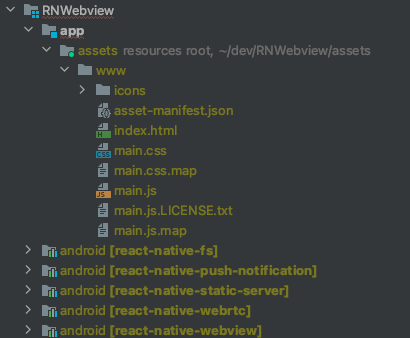
Then if you open the android directory within Android Studio, you should see the assets directory bundled with the Android app:
Enable Cleartext traffic on Android
This step is important for accessing the local server on localhost. Android by default does not allow traffic coming from localhost; to enable that, we will have to configure some network security parameters.
To do this, create a new file called network_security_config.xml under app/src/main/res/xml and include the following code:
Then, inside your app/src/main/AndroidManifest.xml file, add the following two lines:
Now repeat the steps above, but inside your debug directory (app/src/debug/res/xml).
You can read more about it in this article.
Create the local server hook
In this step, we will create a useStaticServer hook that spins up a local static server when the component mounts and returns its URL so that we can then pass it into the <WebView> component.
For the useStaticServer hook, create a file StaticServer.js like below:
It is important that you pass in {localOnly: true} when creating a new StaticServer; otherwise, the hosting will not work on localhost.
If you have been following the whole tutorial until now and cloned this repository inside the SendbirdCalls directory, you can copy the icons as well – although this is not necessary for the purpose of this tutorial. If you would like to do that, you will have to create another directory before copying the icons:
Here is a full list of the icons used in this project.
Bear in mind that this local static server will be running on localhost. If the server is accessed through a device’s local IP, for example 192.168.10.1, Sendbird Calls will not be initialized correctly as it requires either an HTTPS connection, or it needs to be running on localhost.
Finally, inside your App.js code, add the following lines of code and pass the url variable inside the source prop of the WebView component:
Step 3: Run the app
To run the app, simply execute from the root of the project npm run android or npm run ios in the terminal to run the app on either a real device or an emulator.
If you followed the local server implementation and cloned the Sendbird Calls repository, you can run a second terminal command npm run watch inside the SendbirdCalls directory to automatically rebuild the Sendbird Calls website and reload the React Native app running inside an Android device or emulator.
If you are testing Android on an emulator, make sure you close all emulator instances before running npm run android, otherwise the metro server will be disconnected from the app in the emulator. When no emulator is running, React Native scripts should start an emulator automatically and connect to the metro server successfully.
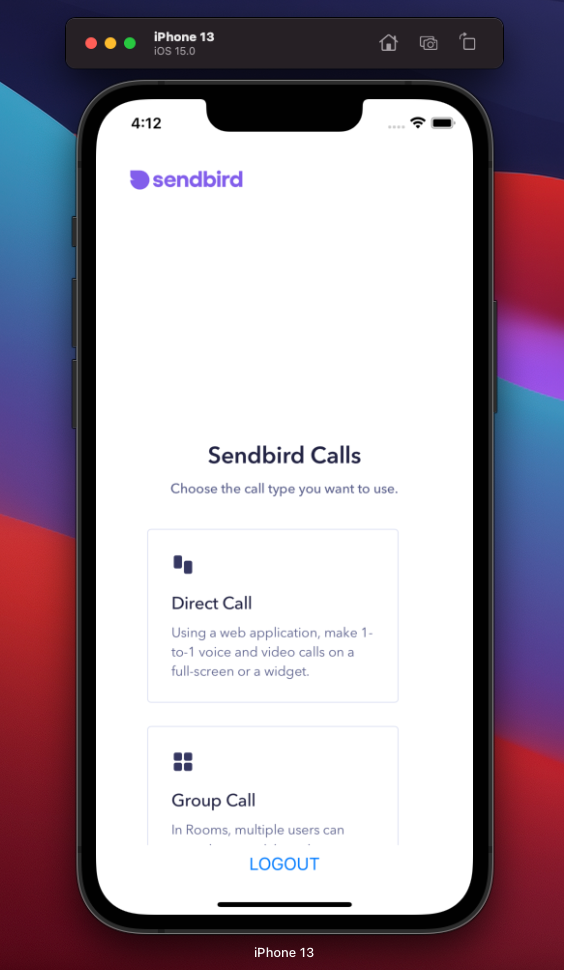
The prompt that requests permission to use the microphone and camera may appear. If you resolve it, you can use the call as you do on the browser version.
Step 4: Troubleshooting
iOS
- Error “JSON value ‘1’ of type NSNumber cannot be converted to NSString”
a. Remove allowReadAccessToURLs attribute from the WebView component – read more in this article. - White screen or HTTPS error
a. You need to visit the URL of the local server on https://localhost/ and not the IP that is returned from the StaticServer (i.e. 192.168.18.1) - Error “Build error domain=com.apple.CoreSimulator.SimError, code=405” after running react-native run-ios on macOS:
a. Run the same command with simulator name supplied:
Android
- White screen or HTTPS error
a. You need to enable Cleartext traffic within AndroidManifest.xml (follow the “Enable Cleartext traffic on Android” step) – read more in this article.
b. If testing on an emulator with no Google Play services and auto-updates, make sure you update Google Play services and Android System WebView from the Play Store (The WebView will auto-update for mobile devices with Android L and above).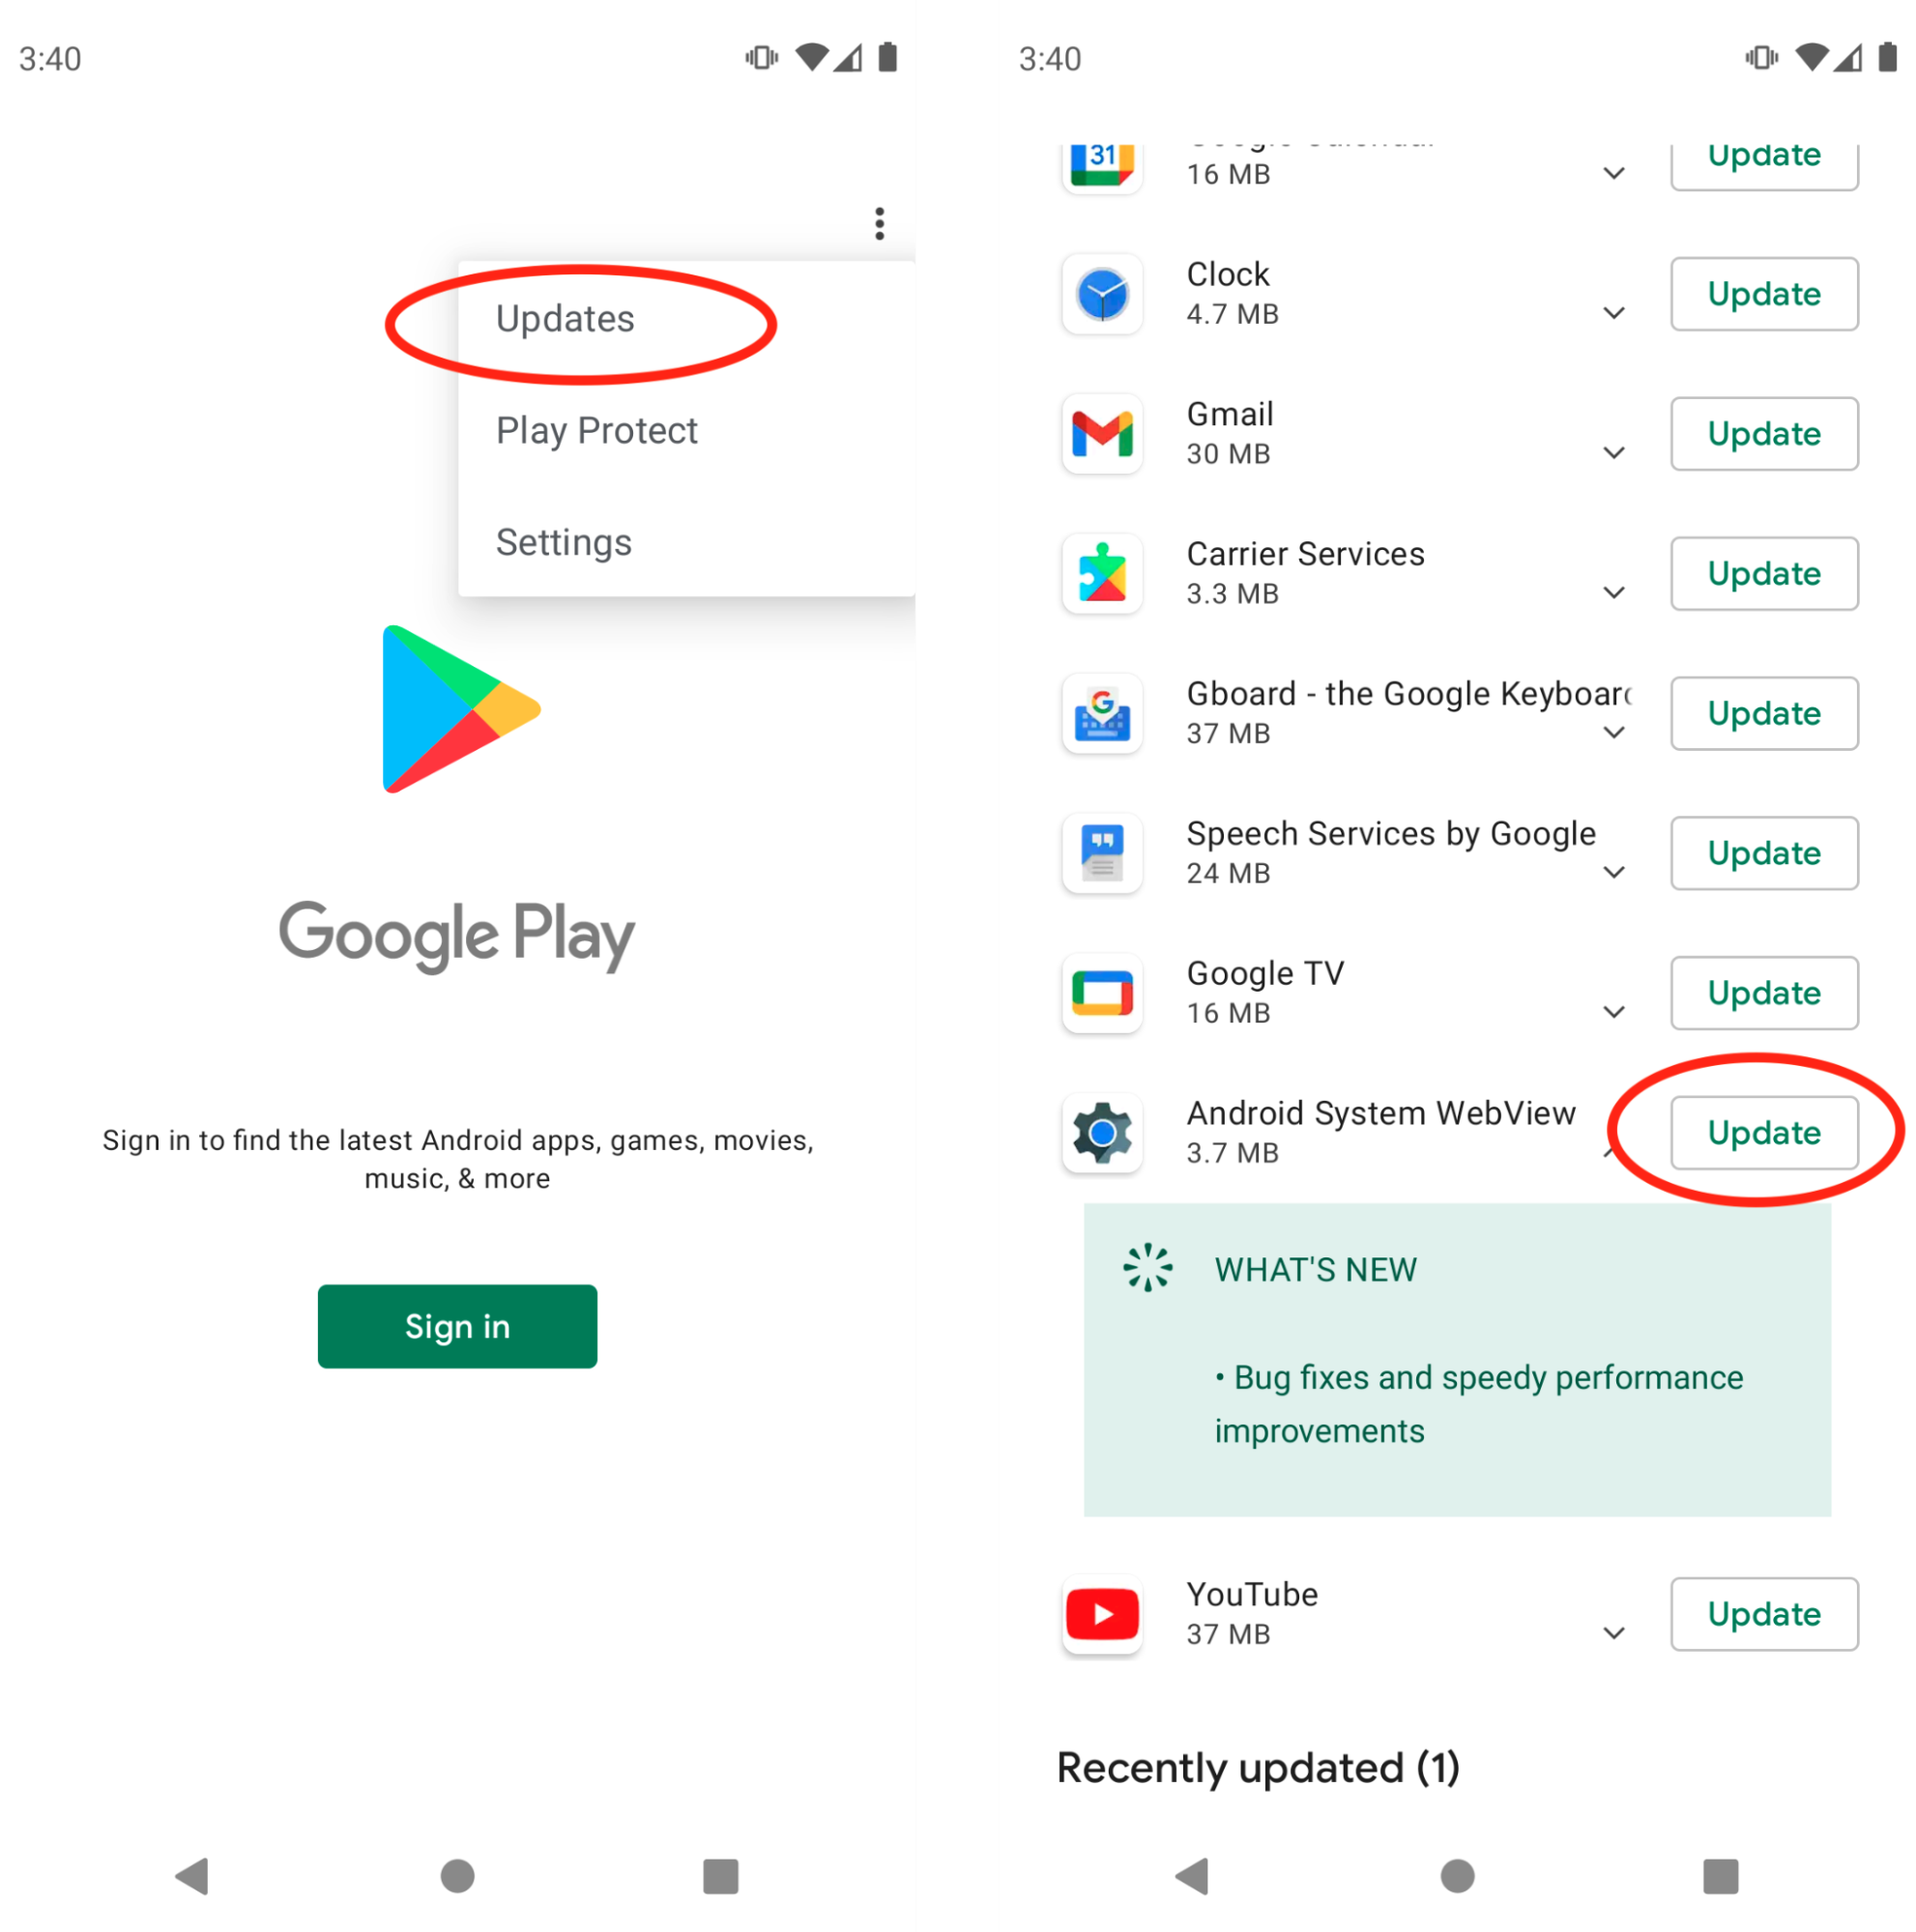
c. If you don’t see Android System WebView under Updates, you may have to enable it on the device from the app info section of the device settings. If you can’t enable it from there either, you may have to temporarily disable Chrome before enabling and updating the Android System WebView. - Error “Unable to load script. Make sure you are either running a Metro server or that your bundle ‘index.android.bundle’ is packaged correctly for release”
a. Make sure you close all emulator instances before running npm run android. When no emulator is running, React Native scripts should start an emulator automatically and connect to the metro server successfully - WebView loads with error “net::ERR_CONNECTION_REFUSED
a. You need to set the localOnly parameter to true when creating a new static server (new StaticServer(PORT, path, {localOnly: true}))
Conclusion
In this tutorial, we discussed the implementation of Sendbird Calls in your React Native application with a WebView. Now you know how to leverage the power of JavaScript to allow users to place 1:1 calls and receive push notifications in your app on Android and iOS devices. Great job!
You are well on your way to boosting your app engagement level and user satisfaction with high-quality WebRTC-enabled voice and video chats.
As always, let us know if you have any questions on our community site, and thank you for using Sendbird!
Happy coding! 🖥


