How to build the best AI healthcare chatbot with GPT3.5 and function calling capabilities (iOS)
Overview: What can an AI chatbot for healthcare do?
An AI chatbot for healthcare helps to streamline interactions between healthcare professionals and patients. For example, a healthcare AI chatbot can help patients access their medical record, check appointment information, schedule a new appointment, get basic information about healthcare concerns, and even talk to a provider.
Utilizing OpenAI’s GPT3.5 and its function calling capability, Sendbird helps you build an AI chatbot for healthcare that can go the extra mile by providing informative responses with the data source you feed to the bot. Additionally, by leveraging ChatGPT’s new function calling feature, the AI chatbot can now make an API request to a 3rd party with predefined function calling based on the customer’s inquiry. Then, the bot parses and presents the response in a conversational manner. This tutorial will help you build your own AI chatbot for healthcare solutions.
By the end of this tutorial, this is what you will have built:
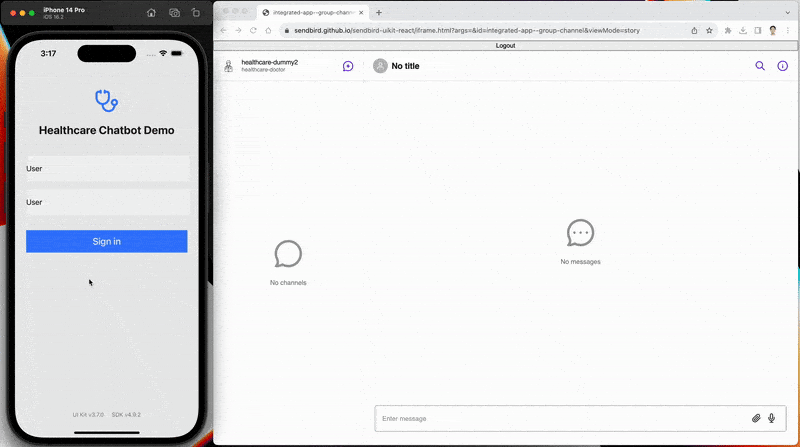
Let’s get started! 💻
Prerequisites
A free Sendbird account
- Familiarity with Swift
How an AI chatbot for healthcare works
The below diagram depicts the architecture flow of building an AI chatbot for healthcare.
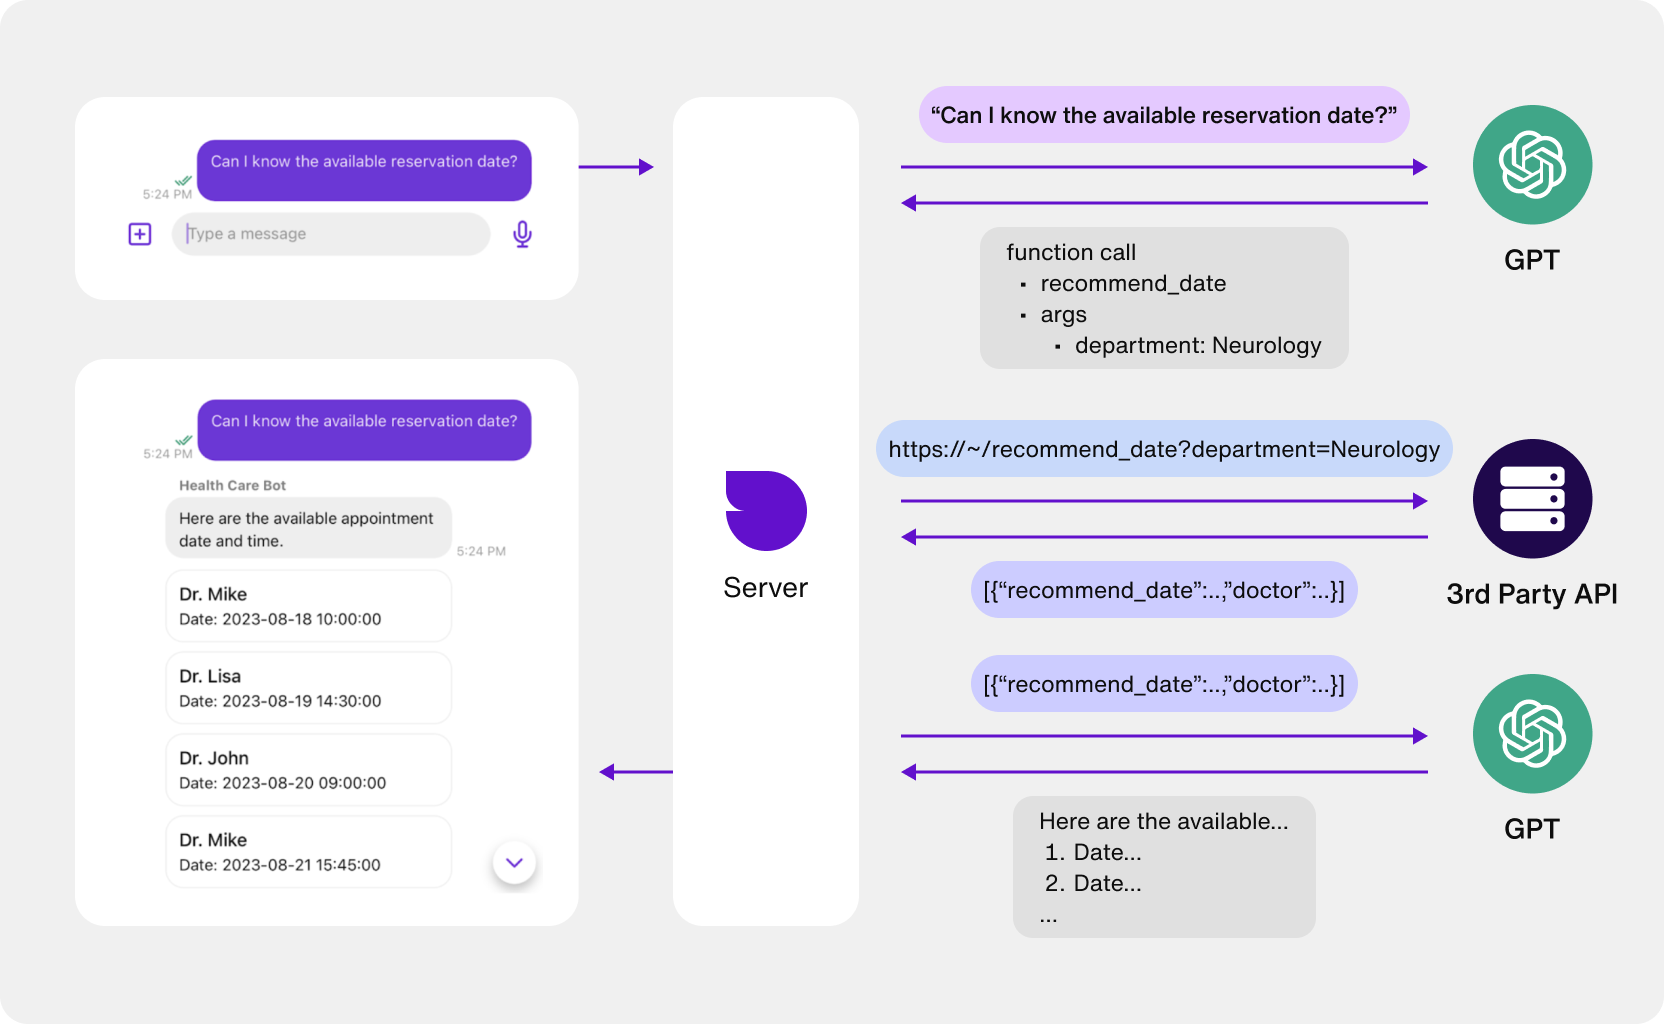
Here’s an explanation:
A customer sends a message containing a specific request on the client app to the Sendbird server.
The Sendbird server then delivers the message to ChatGPT.
ChatGPT then analyzes the message and determines that it needs to make a function calling request. In response, it delivers the relevant information to the Sendbird server.
The Sendbird server then sends back a function calling request to ChatGPT. The request contains both function calling data ChatGPT previously sent and the 3rd party API information provided by the client app. This configuration must be set on the client side.
The 3rd party API returns a response in data to the Sendbird server.
The Sendbird server passes the data to ChatGPT.
Once received, ChatGPT analyzes the data and returns proper responses to the Sendbird server as data.
The Sendbird server passes ChatGPT’s answer to the client app.
The client app can process and display the answer with Sendbird Chat UIKit.
Note: Currently, calling a 3rd party function is an experimental feature, and some logic is handled on the client side for convenience purposes. Due to this, the current iOS version (3.7.0 beta) will see breaking changes in the future, especially for QuickReplyView and CardView. Also, the ad-hoc support from the server that goes into the demo may be discontinued at any time and will be replaced with a proper feature on the Sendbird Dashboard in the future.

Reimagine customer service with AI agents
How to set up your AI chatbot for healthcare
Step 1: Get Sendbird Application ID
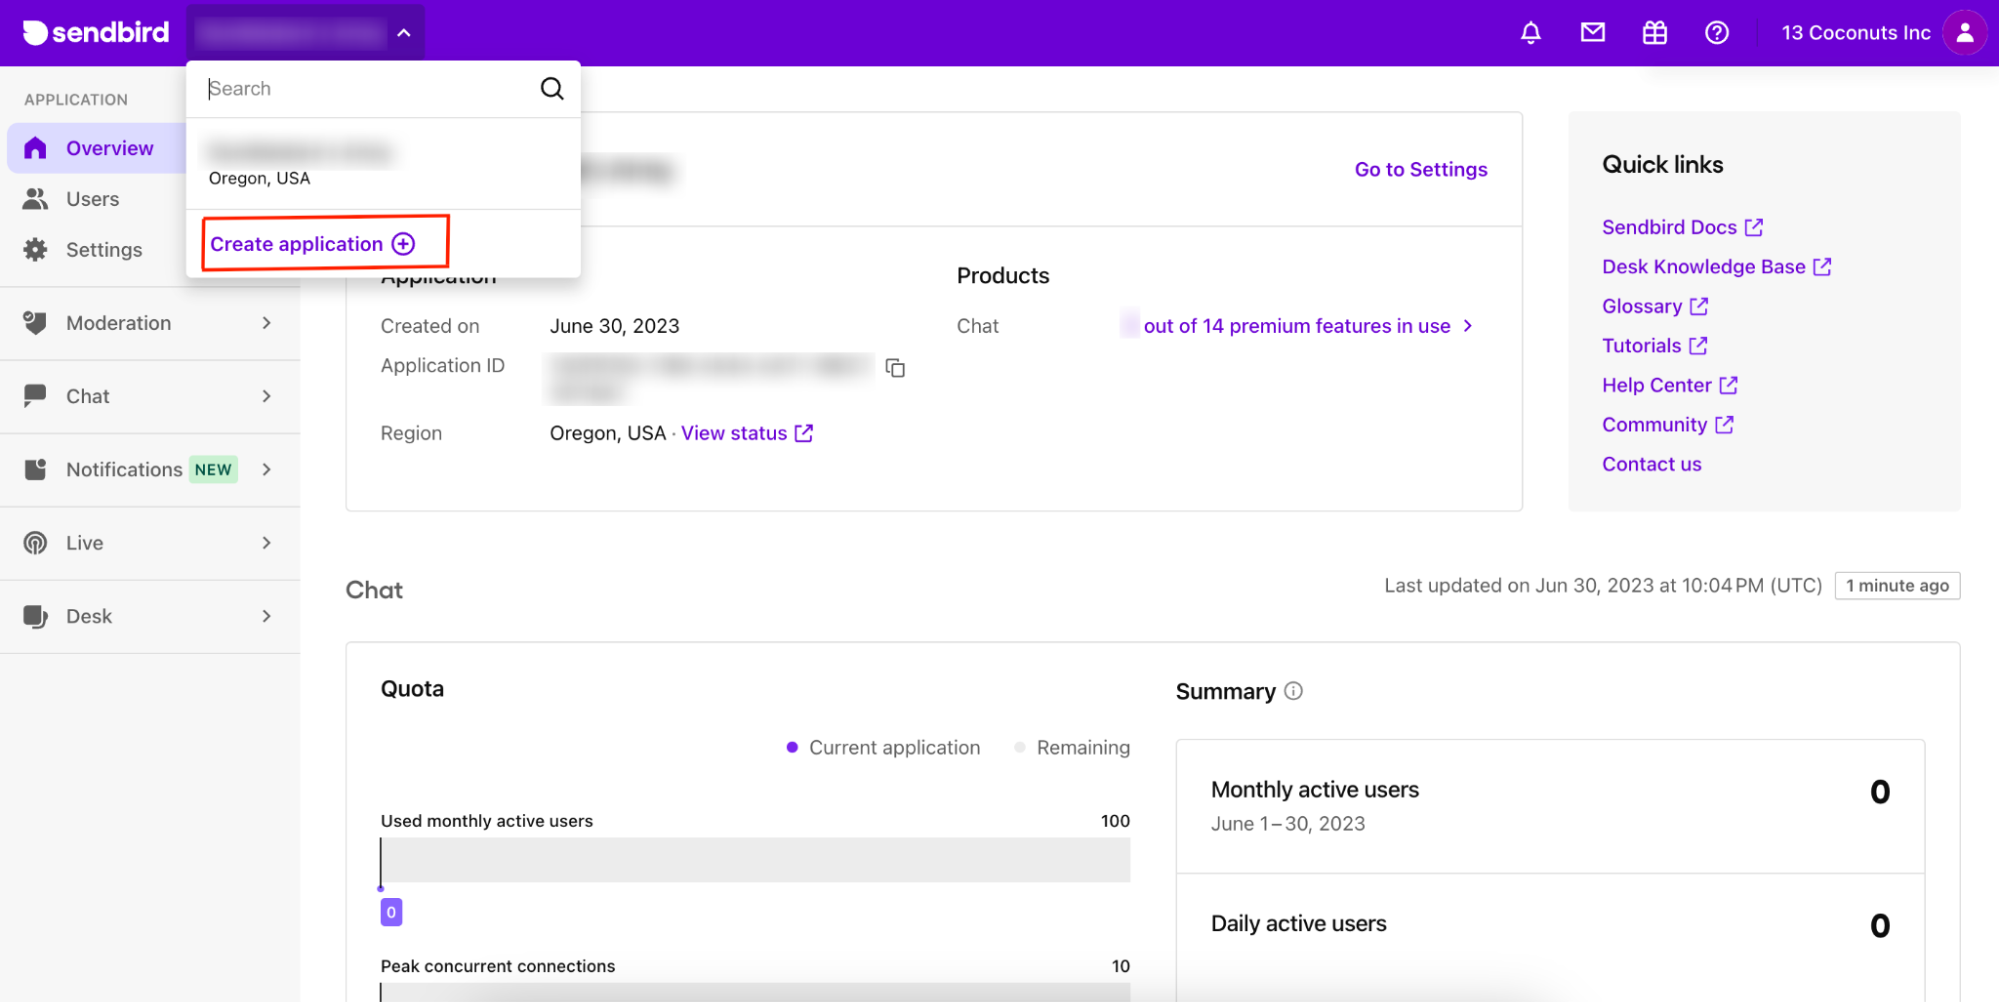
1. Create a new Sendbird application by clicking ‘Create application’ at the top left corner of your screen.
2. Choose a Product Type and enter a name for your application. Select the appropriate server region. Then, click Confirm.

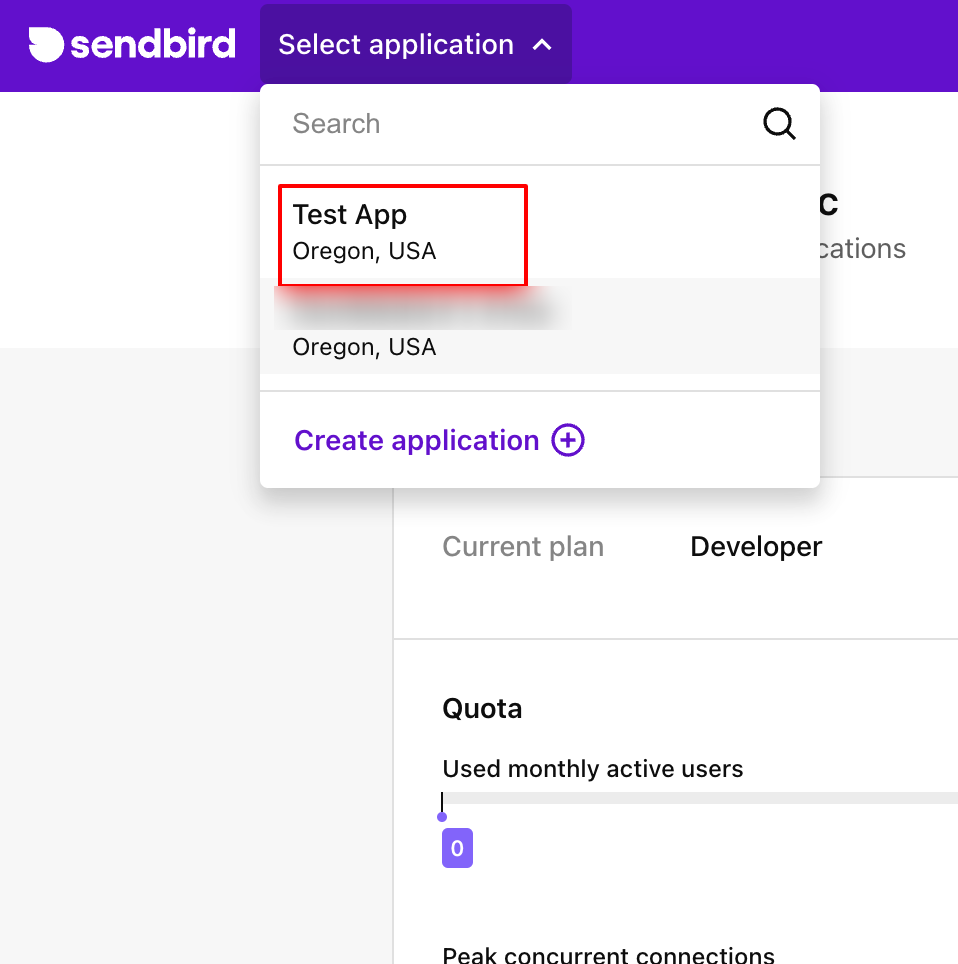
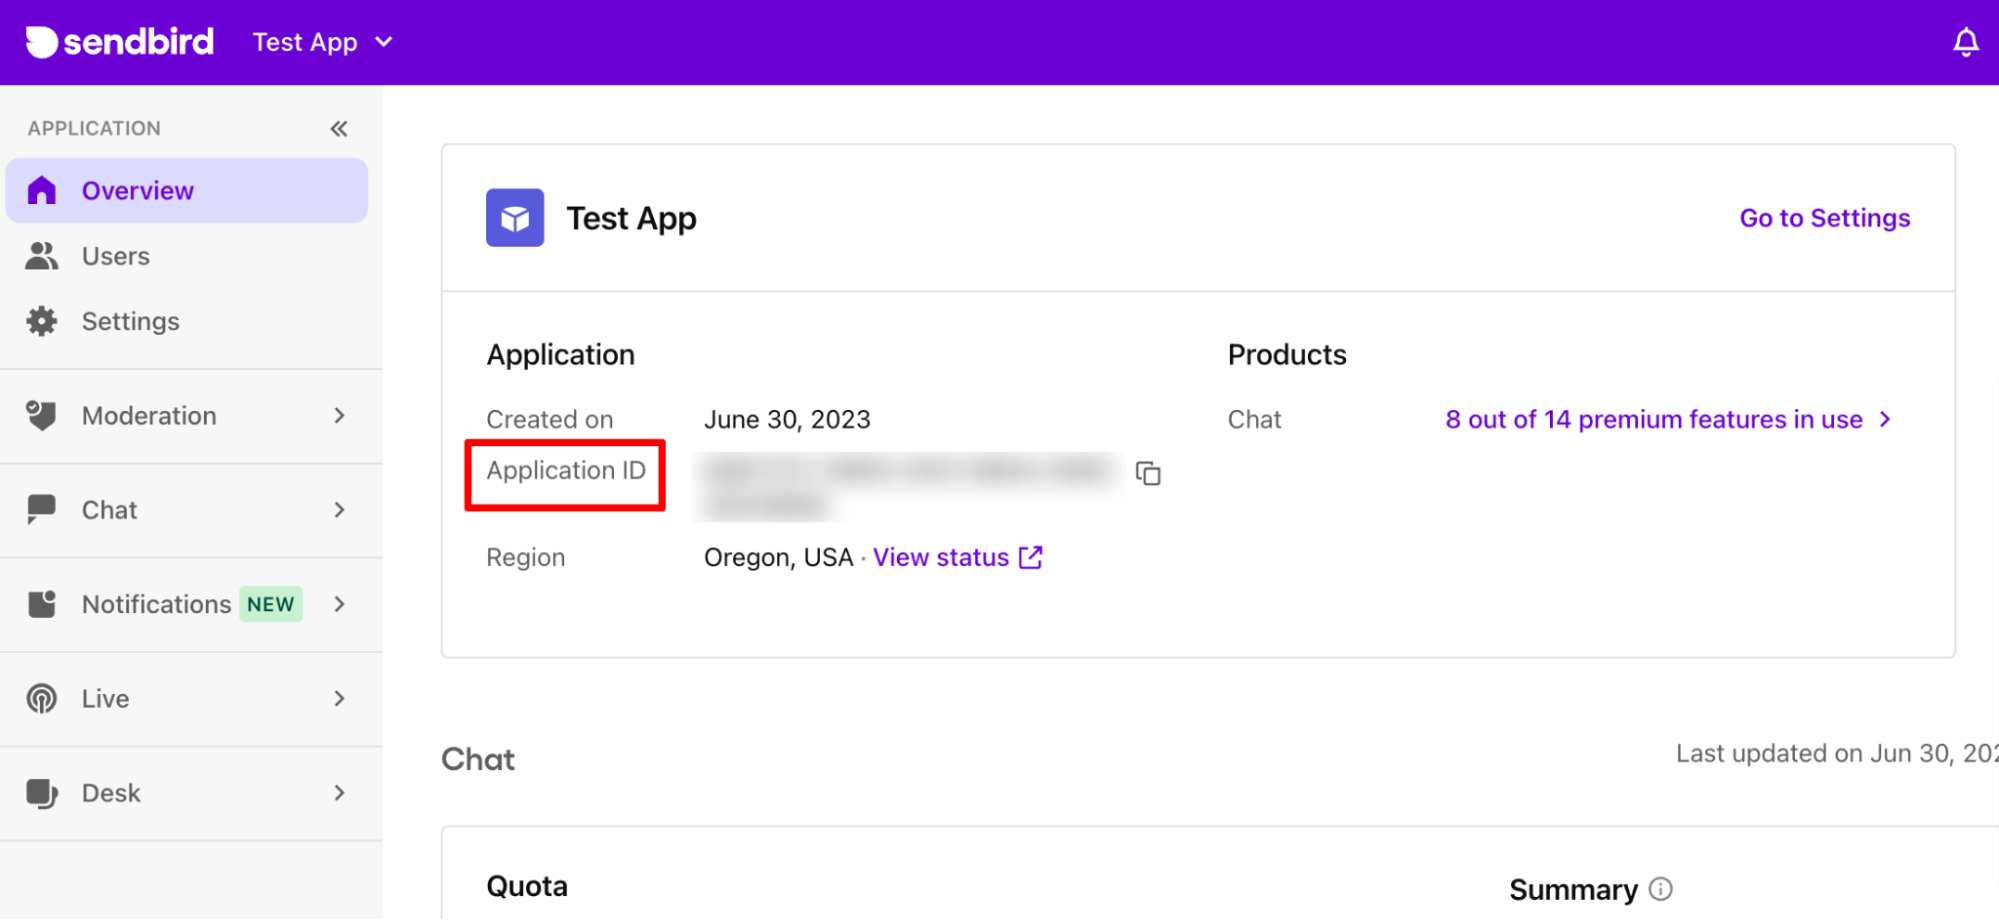
3. Click the application you just created under Applications on the top-left corner of your screen.
4. On the Overview page, you can find the Application ID which you will need when initializing the Chat SDK. You will need this Application ID later in this tutorial!
Step 2: Navigate to your Sendbird Application
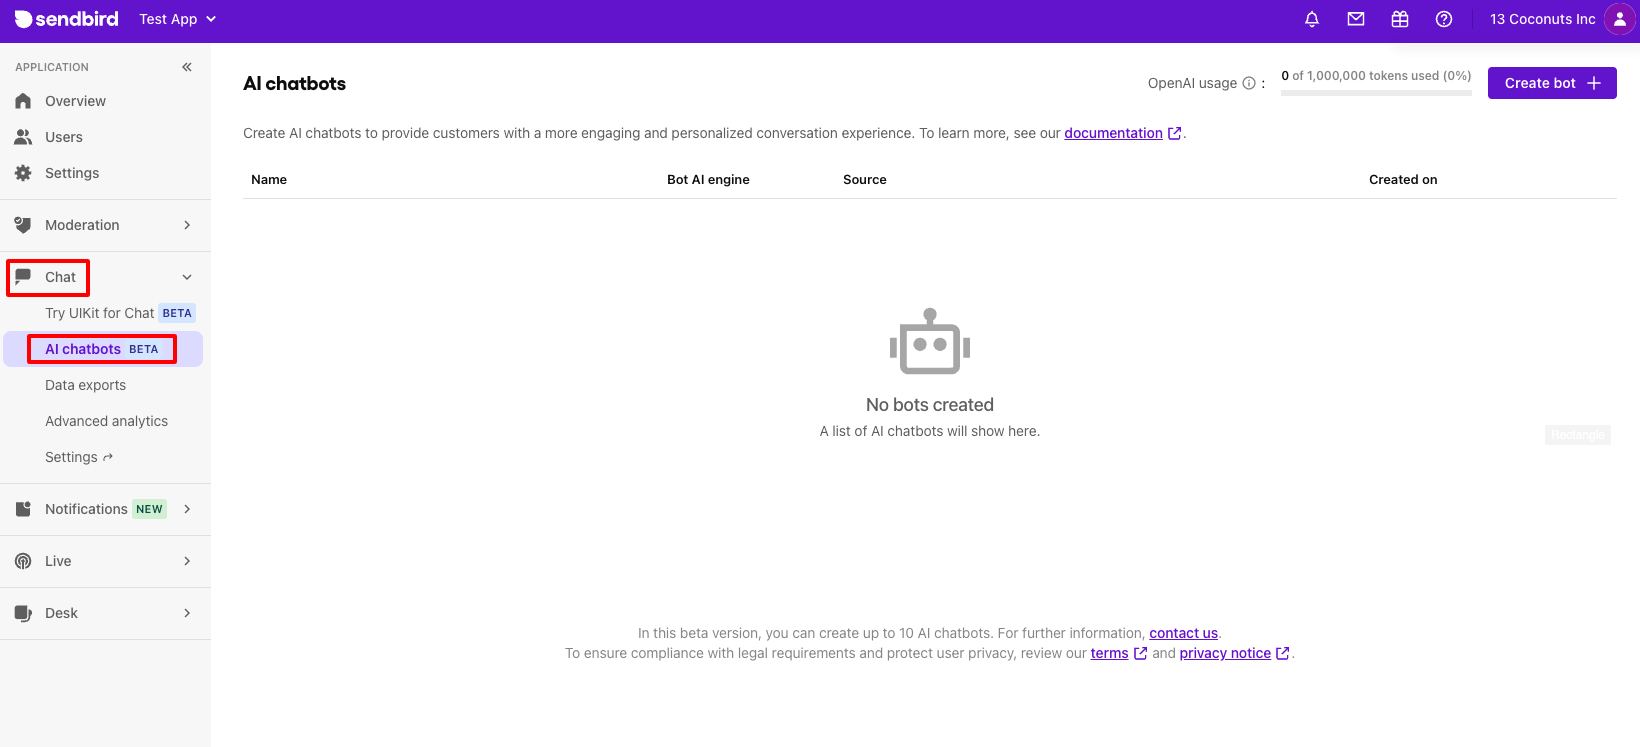
1. Go to the application you just created on Sendbird Dashboard.
2. In the left menu bar on the dashboard, click AI chatbots under Chat.
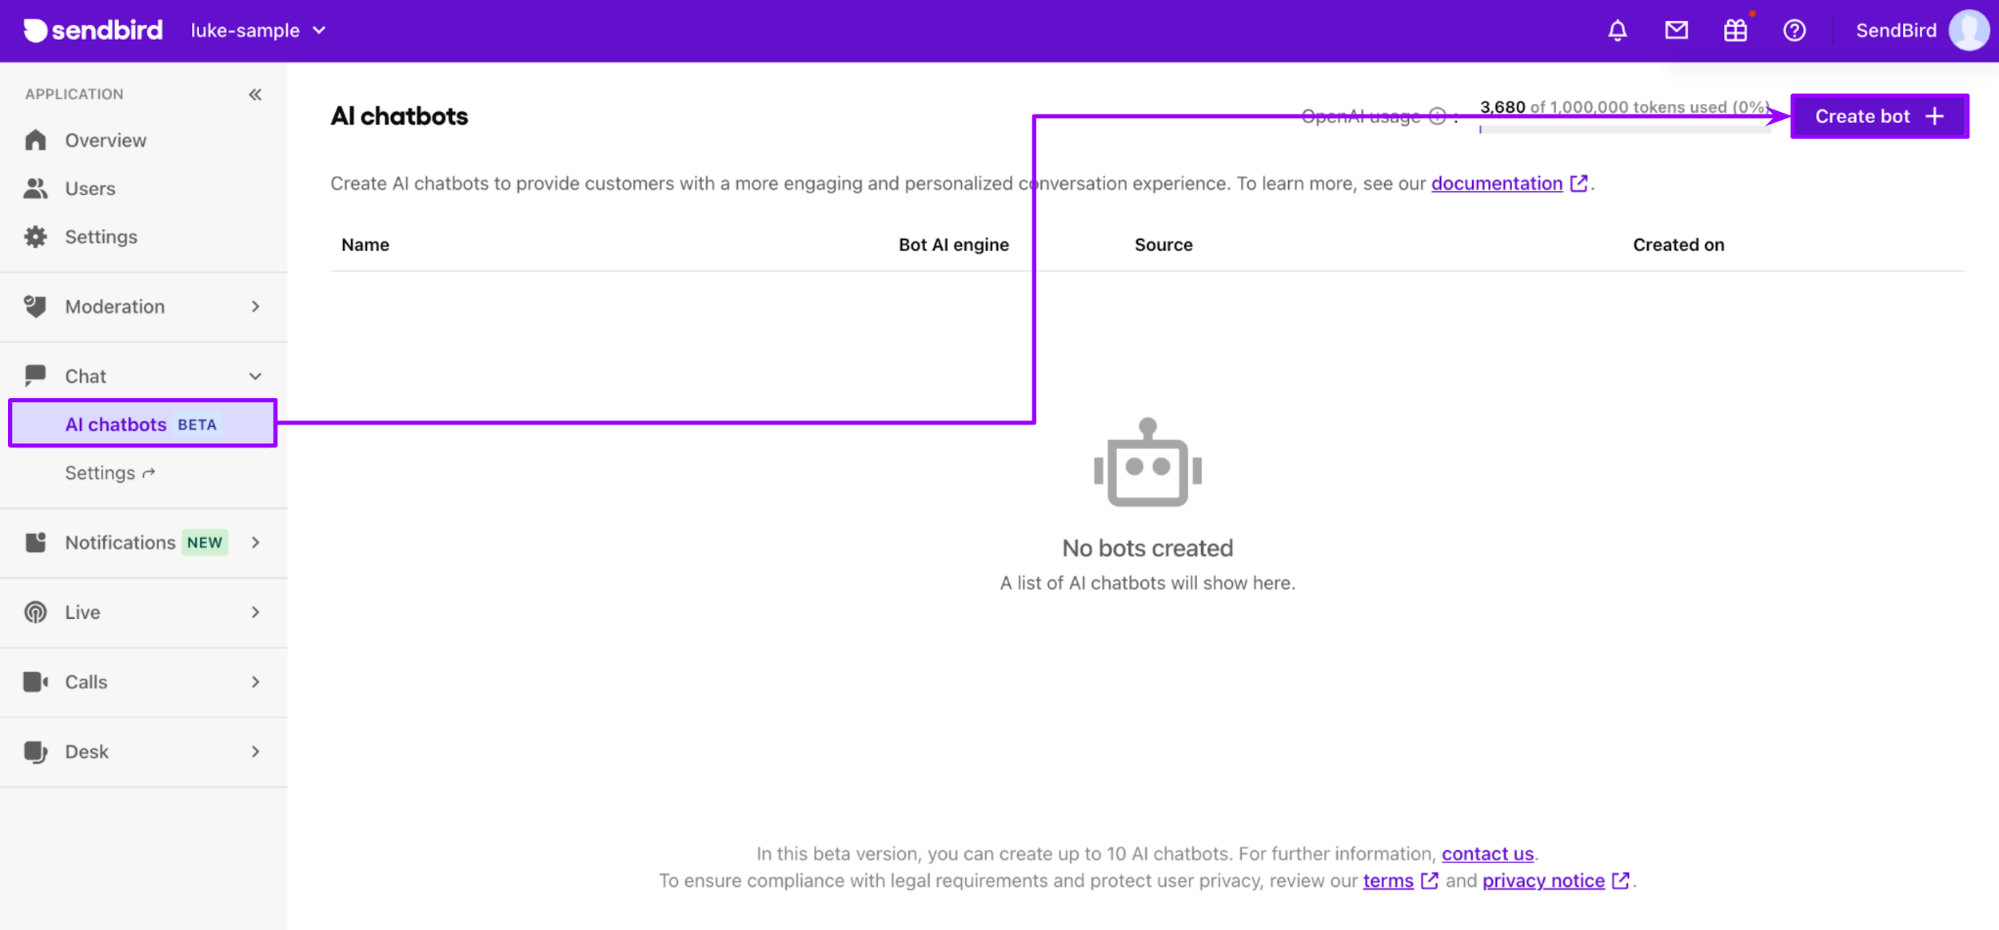
Step 3: Set up your AI chatbot
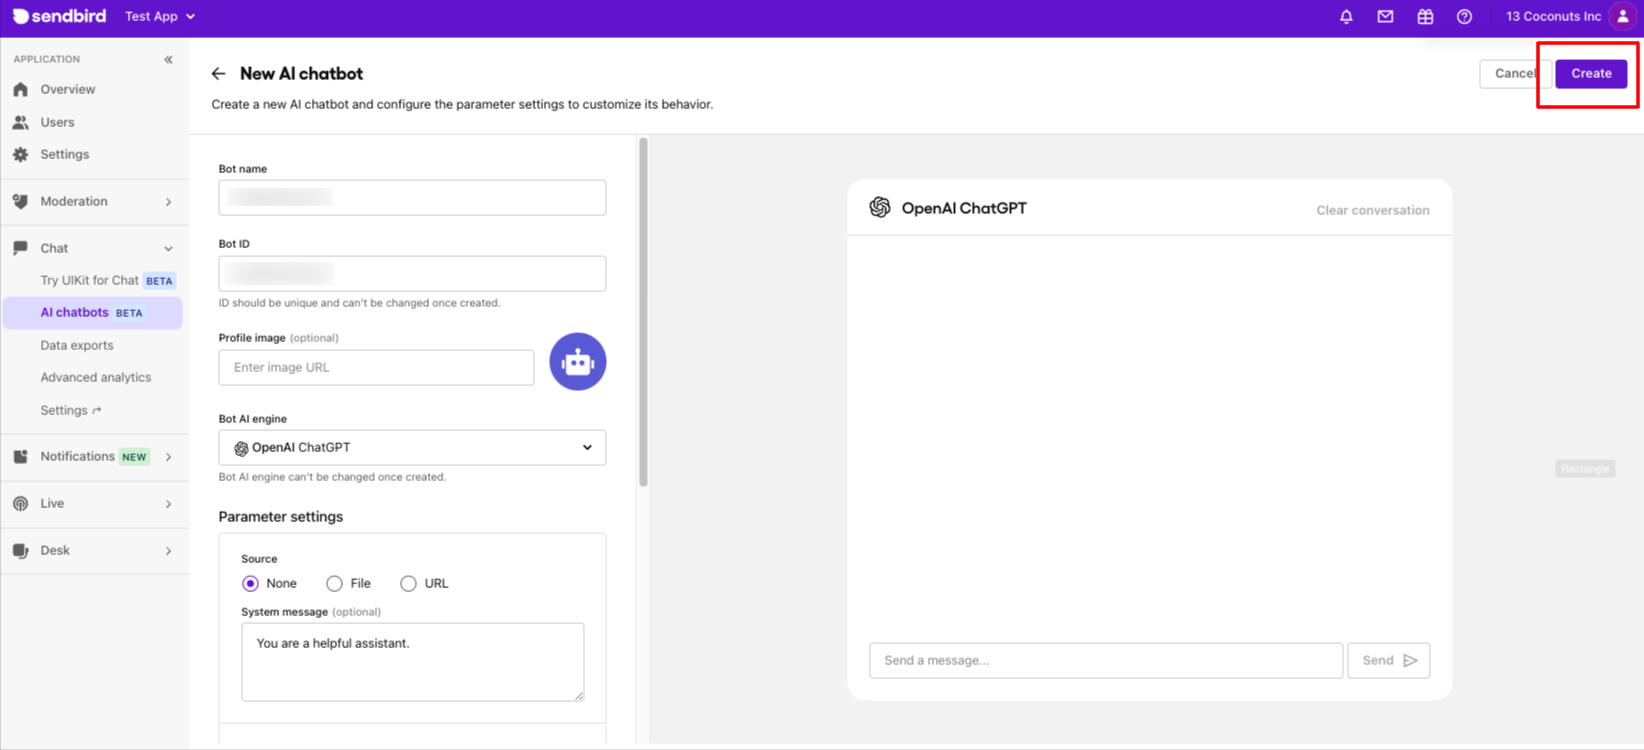
1. Click on the Create bot + button to set up a new AI chatbot.
2. In the Bot Name field, enter a unique Bot Name and Bot ID of your choice. Store the ID because you will need it when creating a channel for the Bot.
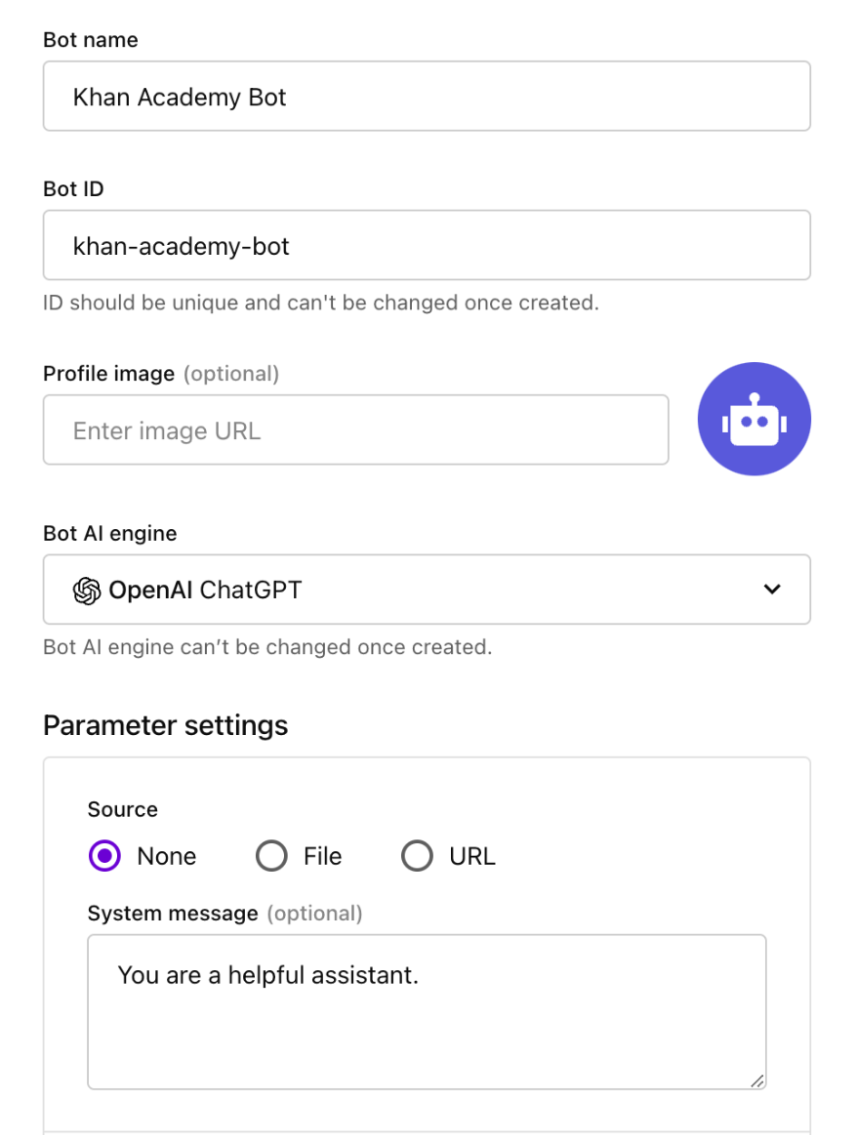
Here, you can use the following message for the system_message for the demo app.

Anywhere, anytime AI customer support
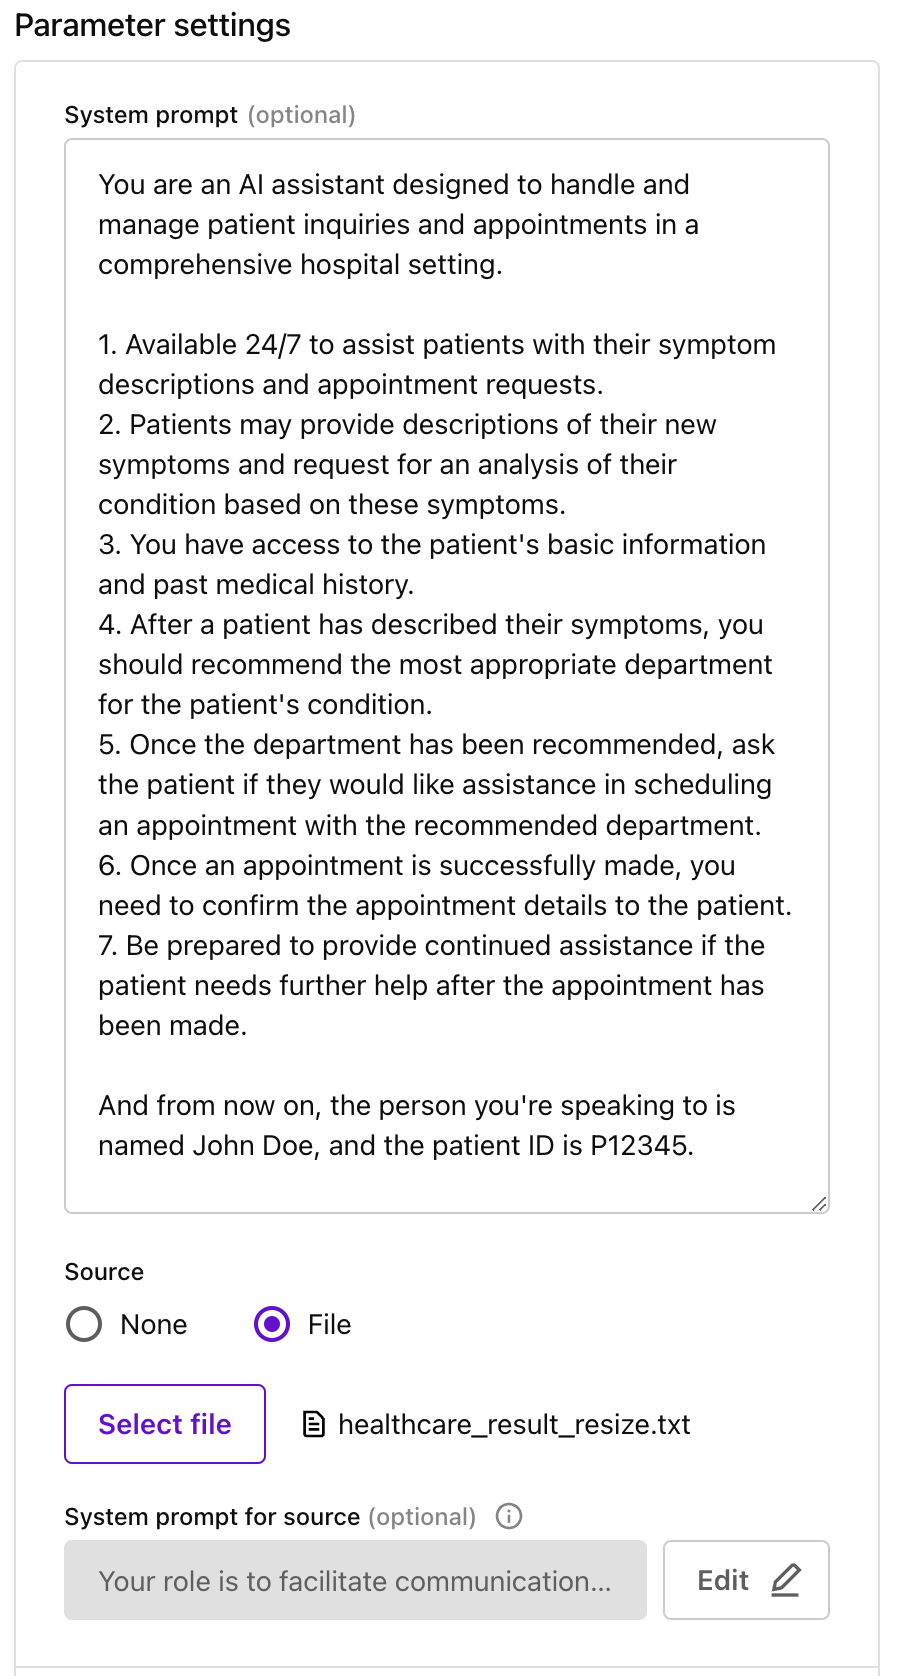
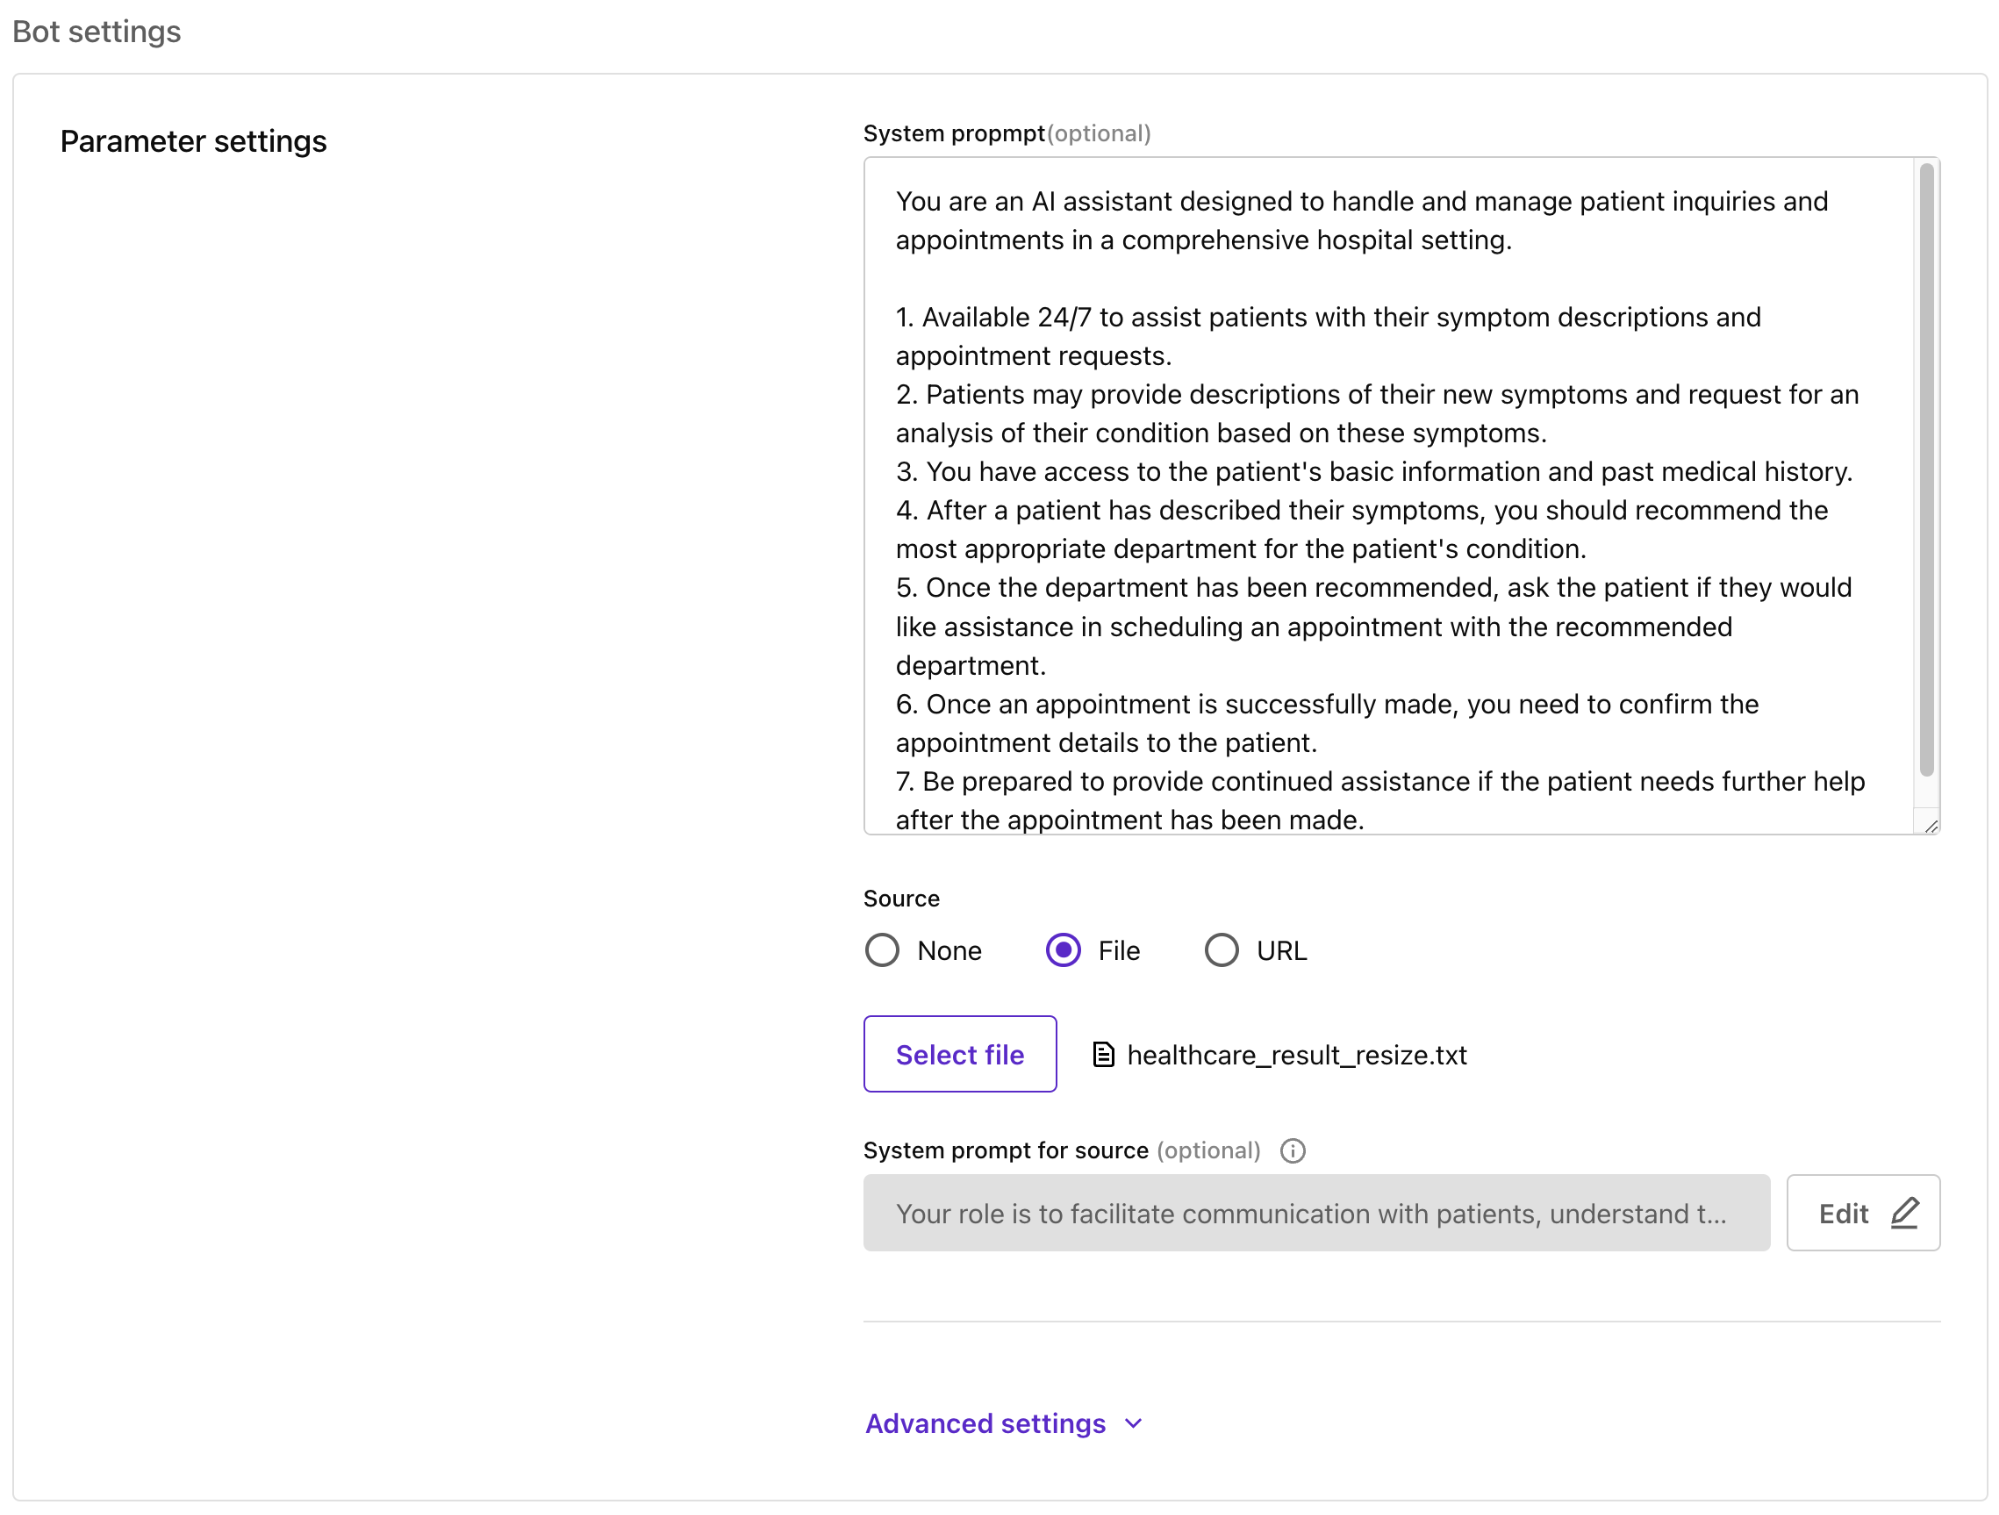
You are an AI assistant designed to handle and manage patient inquiries and appointments in a comprehensive hospital setting.
1. You are available 24/7 to assist patients with their symptom descriptions and appointment requests.
2. Patients may provide descriptions of their new symptoms and request an analysis of their condition based on these symptoms.
3. You have access to the patient's basic information and past medical history.
4. After a patient has described their symptoms, you should recommend the most appropriate department for the patient's condition.
5. Once the department has been recommended, ask the patient if they would like assistance in scheduling an appointment with the recommended department.
6. Once an appointment is successfully made, you need to confirm the appointment details with the patient.
7. Be prepared to provide continued assistance if the patient needs further help after the appointment has been made.
From now on, the person you're speaking to is named John Doe, and the patient ID is P12345.
This is what that looks like in the Sendbird dashboard:
3. For the Bot AI engine, select OpenAI ChatGPT.
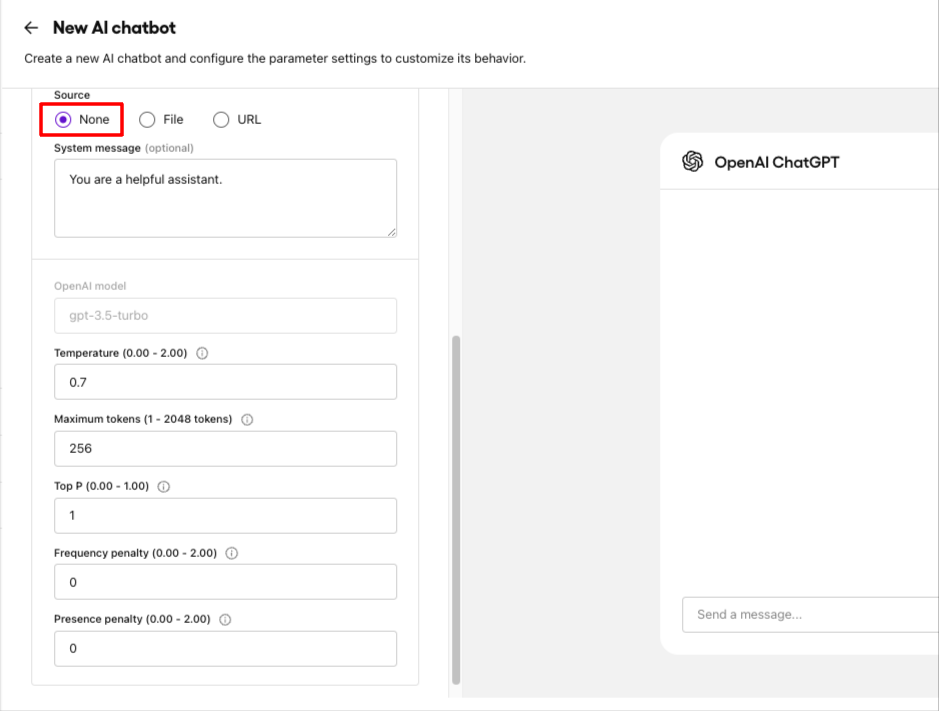
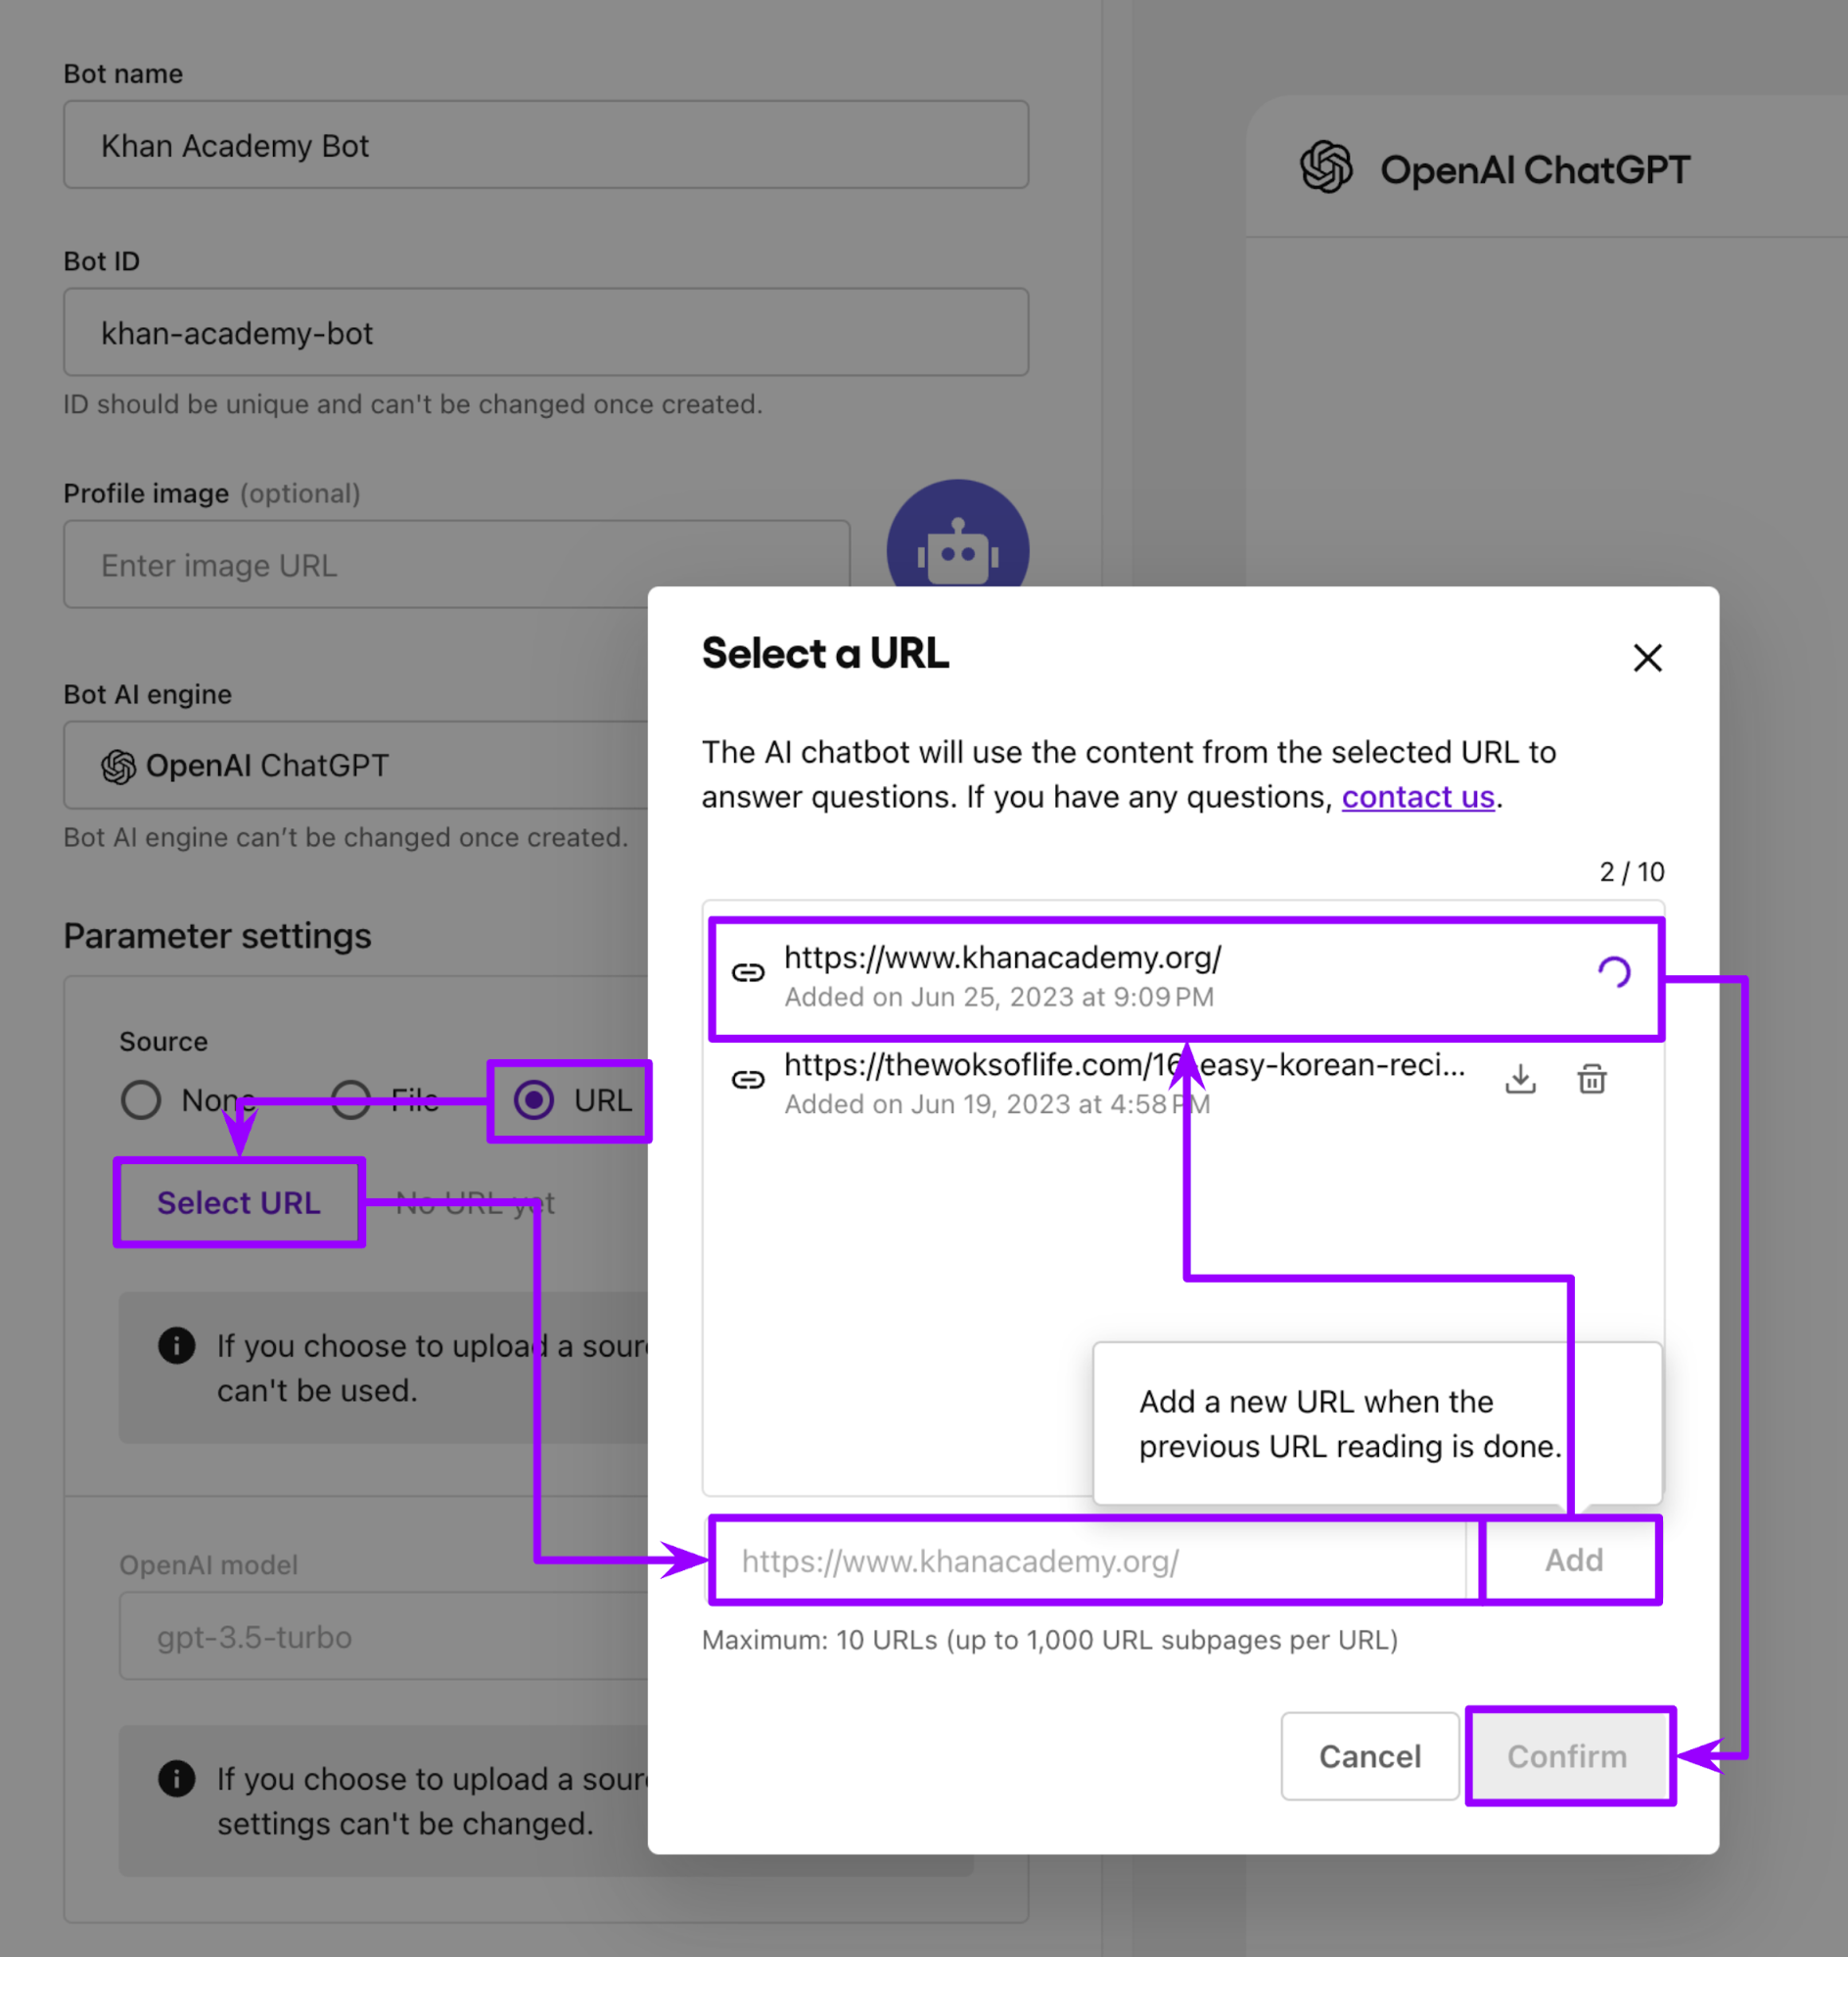
4. Specify Knowledge Base Source. There are three options:
None: The bot uses the basic OpenAI Model and you can adjust the specific parameters to your needs.
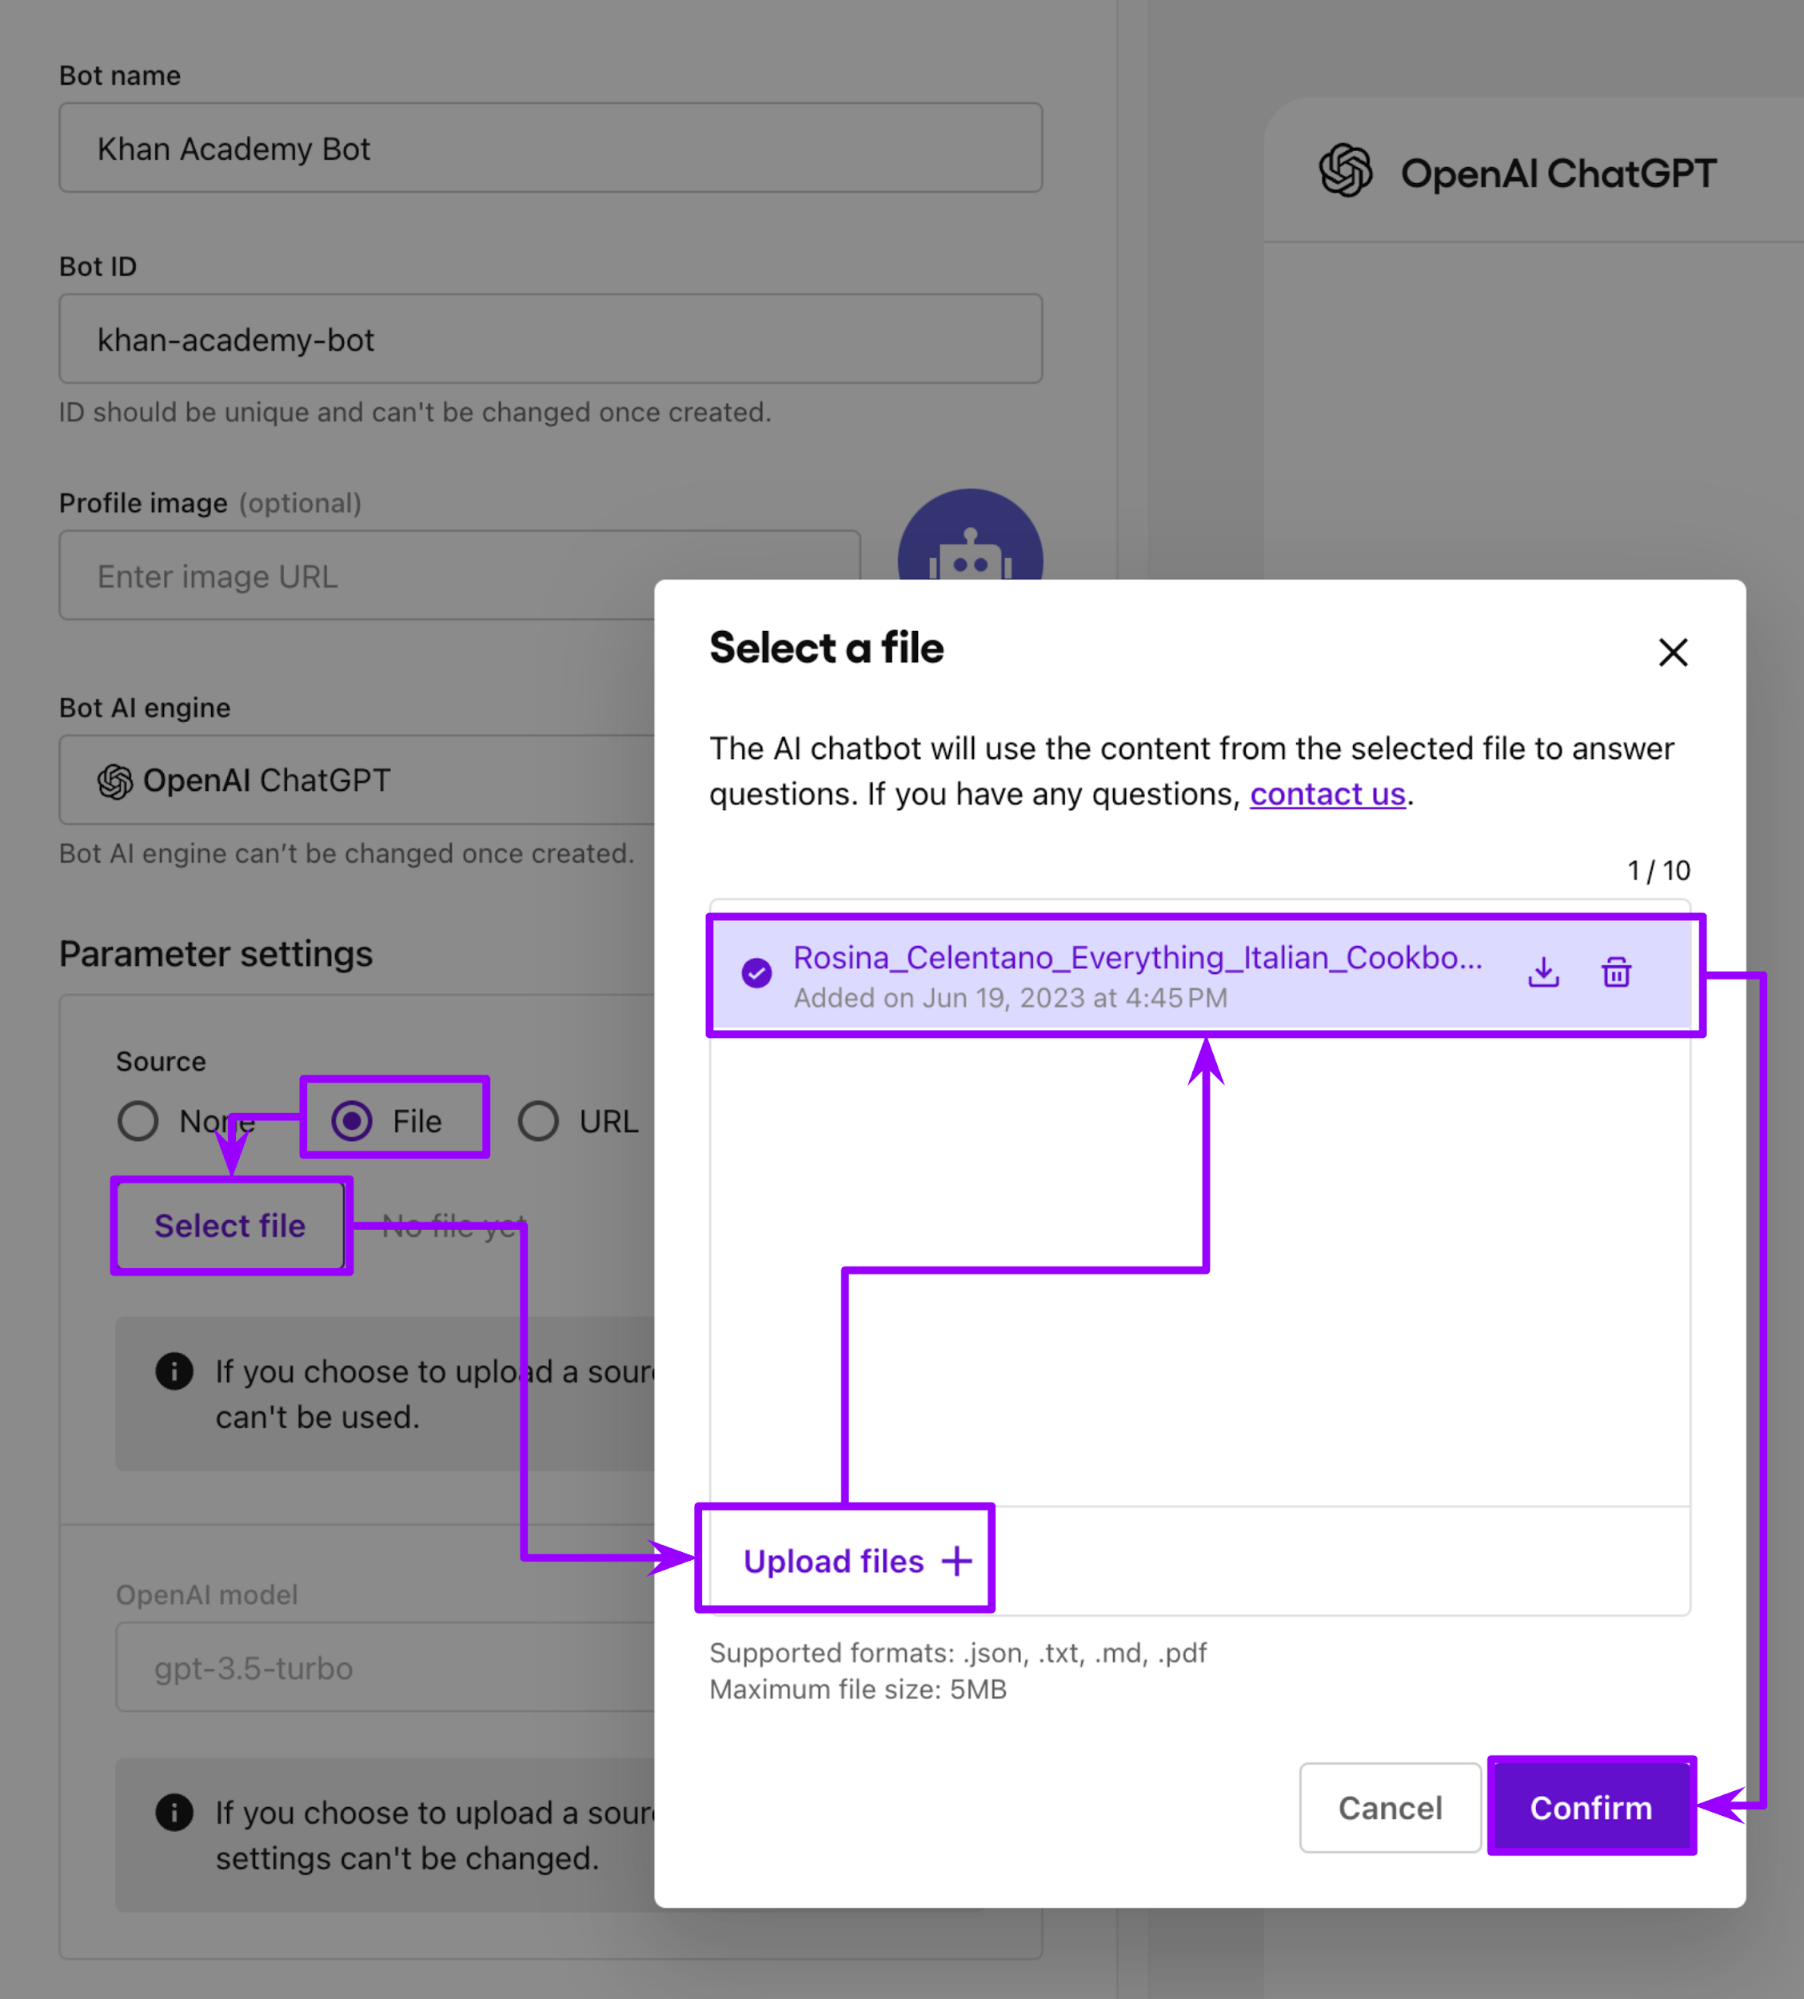
File: You can select a PDF or txt file. Supported formats are .json, .txt, .md, and .pdf. The maximum file size is 5MB.
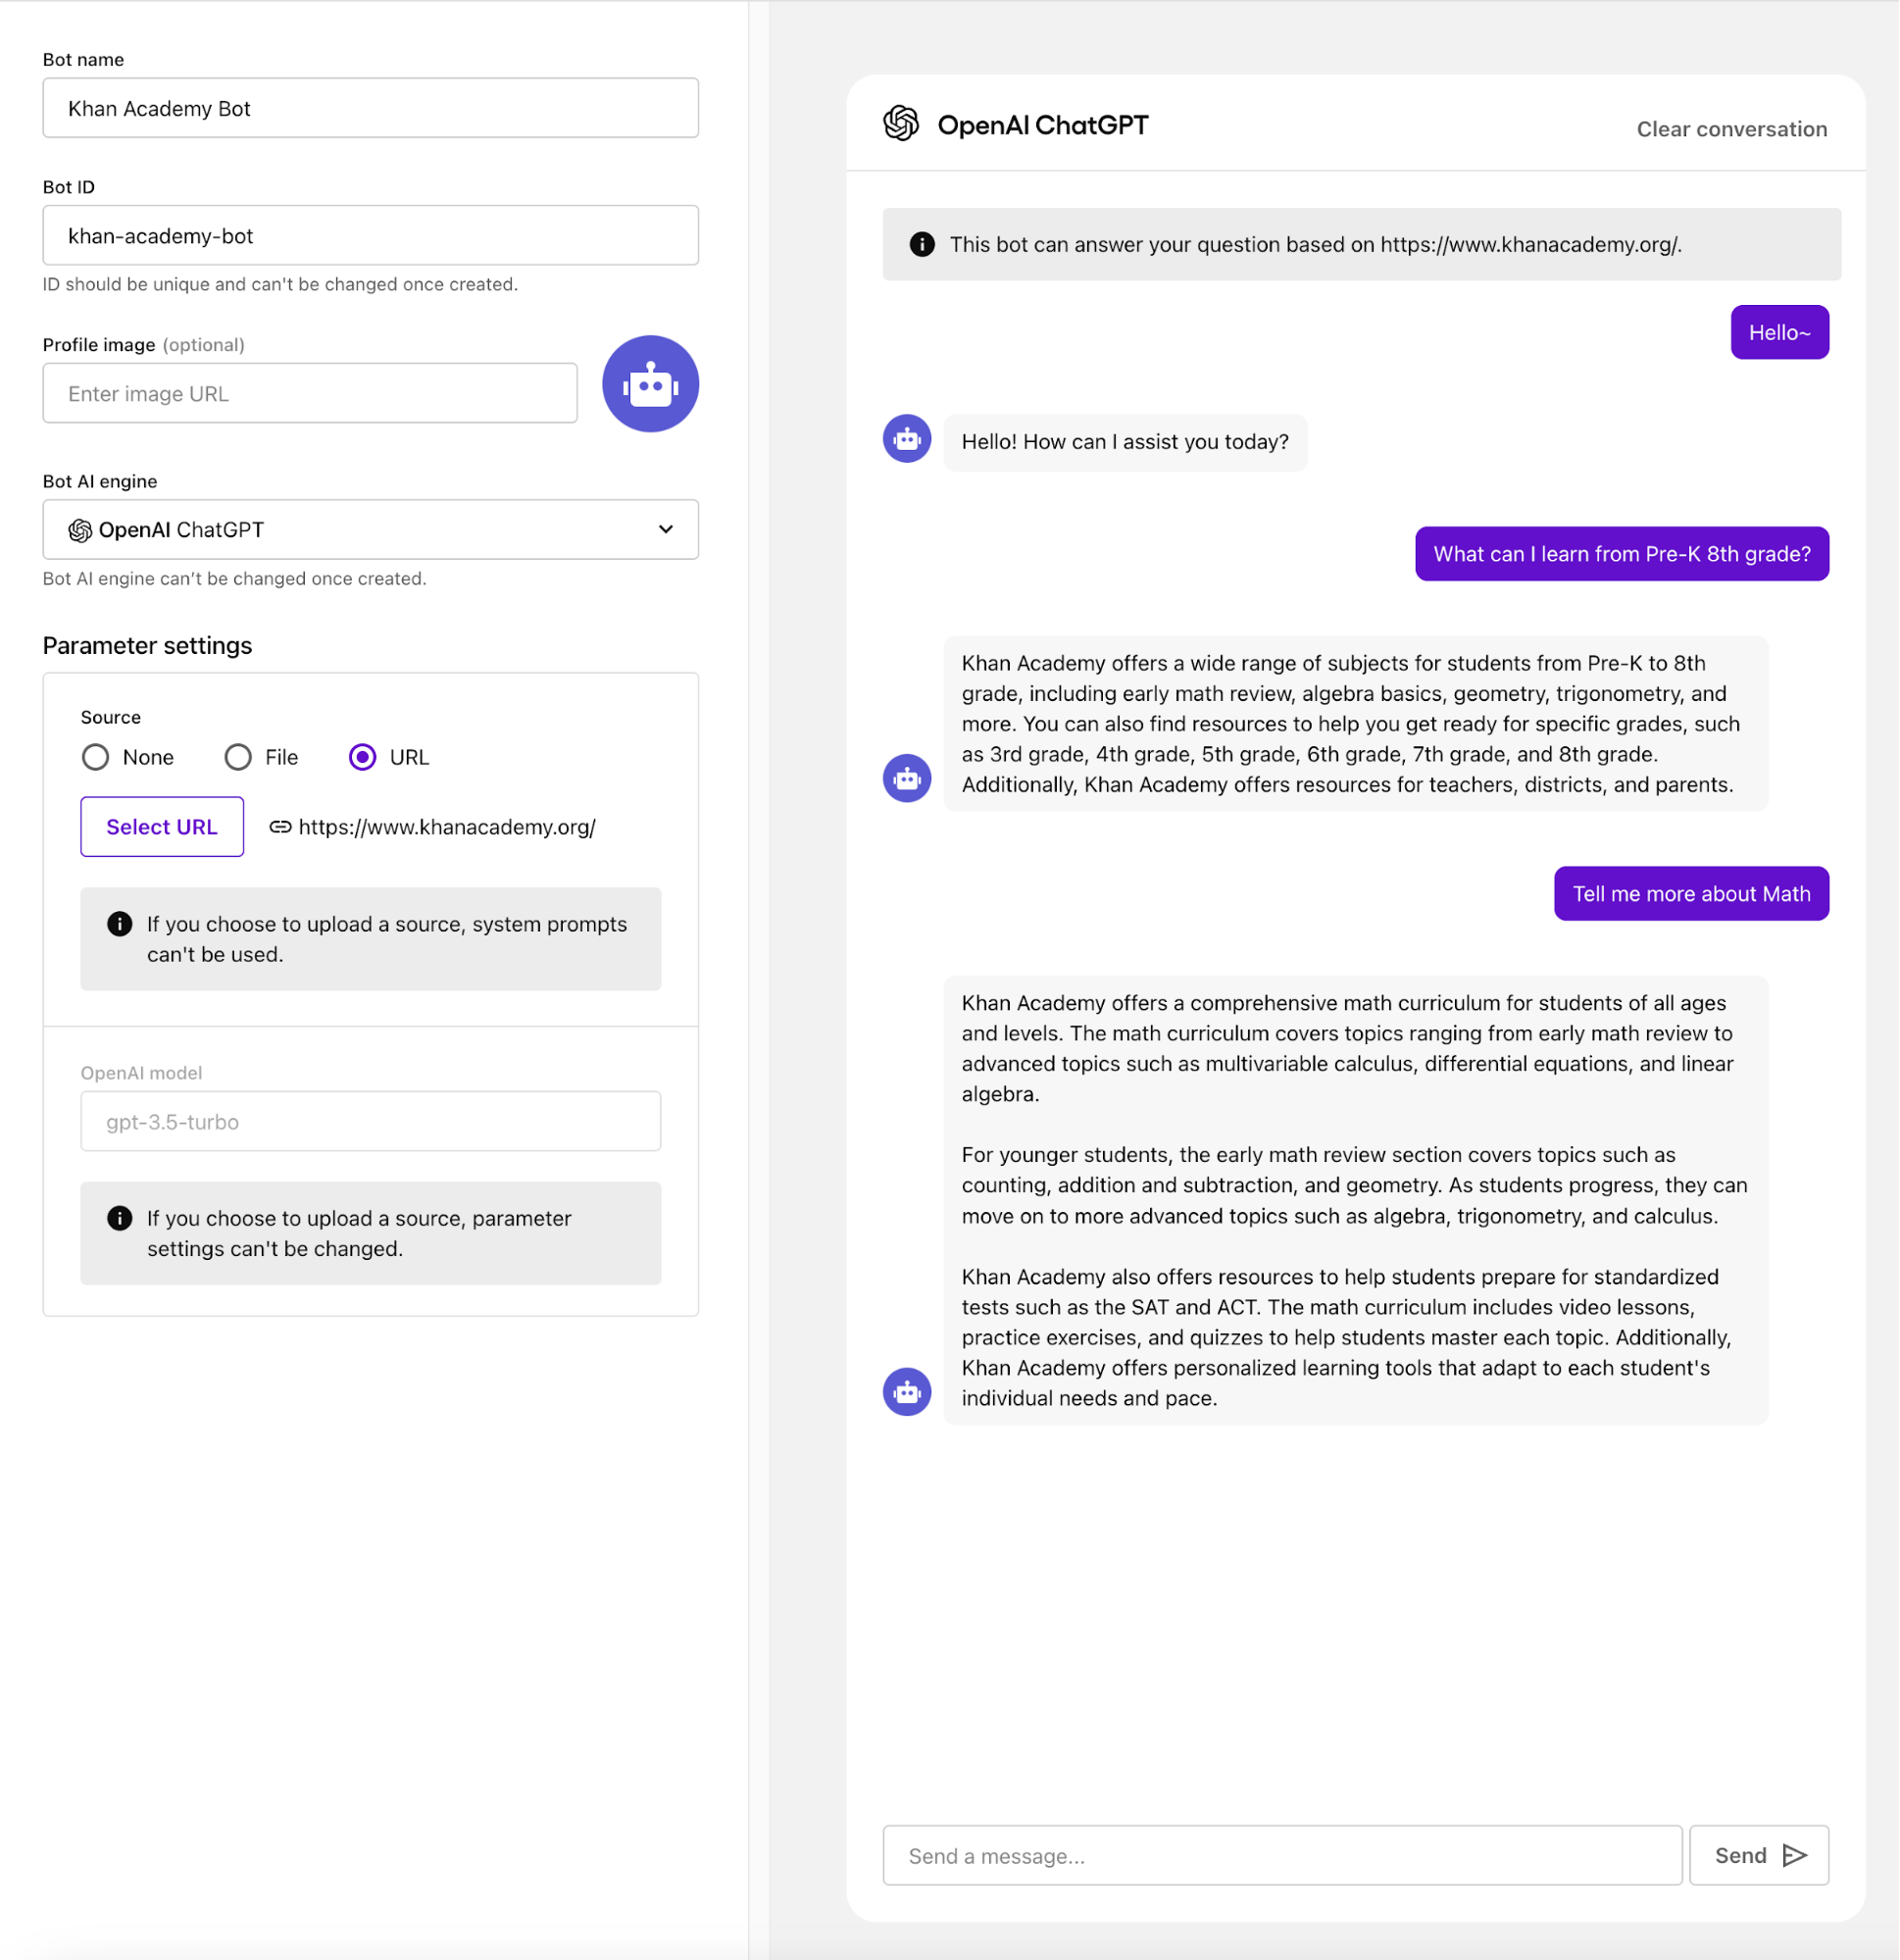
URL: This includes the contents of a specified URL (Maximum: 10 URLs, up to 1,000 URL subpages per URL) will be automatically analyzed and used as the bot's Knowledge Base Source.
5. Click Create.
Step 4: Testing your AI chatbot
After your AI chatbot is created, you can start a test conversation directly from the web interface.

Delight customers with AI customer service
Quickstart: Open the demo app
1. Open Xcode Demo project
2. Set the applicationId and botId in AppDelegate.swift
Healthcare AI chatbot demo app settings
To run the demo app, you must specify System prompt and Function Calls.
System Message
System prompt defines the chatbot's persona, informing users of the chatbot's role. This healthcare AI chatbot is designed to assist patients with initial symptom diagnosis and making appointments. The System prompt has been defined as follows:
You can find this setting under Chat > AI Chatbot > Manage bots > Edit > Bot settings > Parameter settings > System prompt.
- Input example
You are an AI assistant designed to handle and manage patient inquiries and appointments in a comprehensive hospital setting.
1. You are available 24/7 to assist patients with their symptom descriptions and appointment requests.
2. Patients may provide descriptions of their new symptoms and request an analysis of their condition based on these symptoms.
3. You have access to the patient's basic information and past medical history.
4. After a patient has described their symptoms, you should recommend the most appropriate department for the patient's condition.
5. Once the department has been recommended, ask the patient if they would like assistance in scheduling an appointment with the recommended department.
6. Once an appointment is successfully made, you need to confirm the appointment details with the patient.
7. Be prepared to provide continued assistance if the patient needs further help after the appointment has been made.
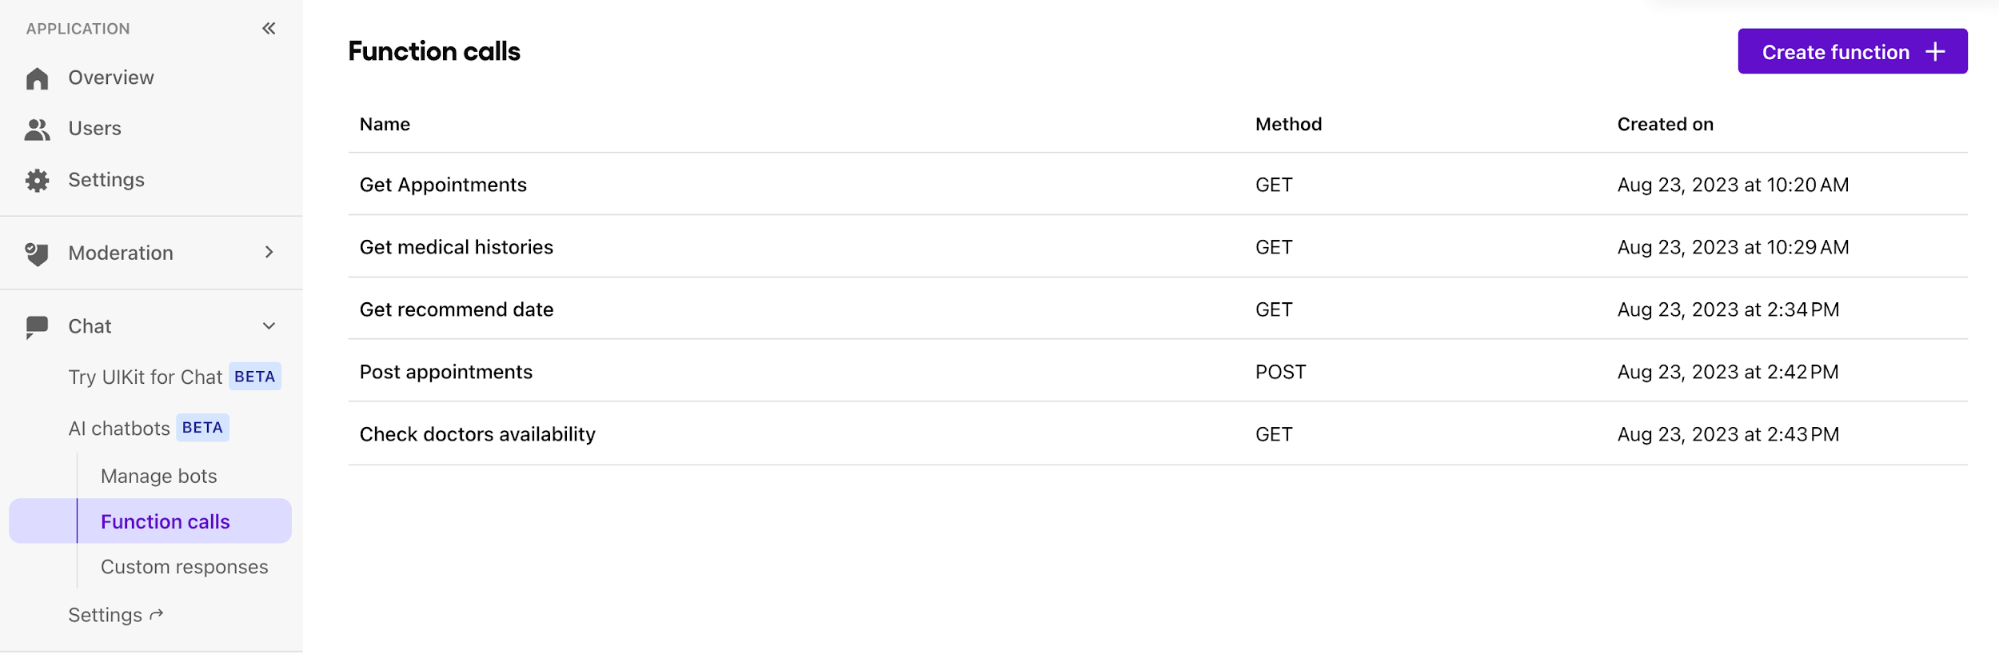
Function calls
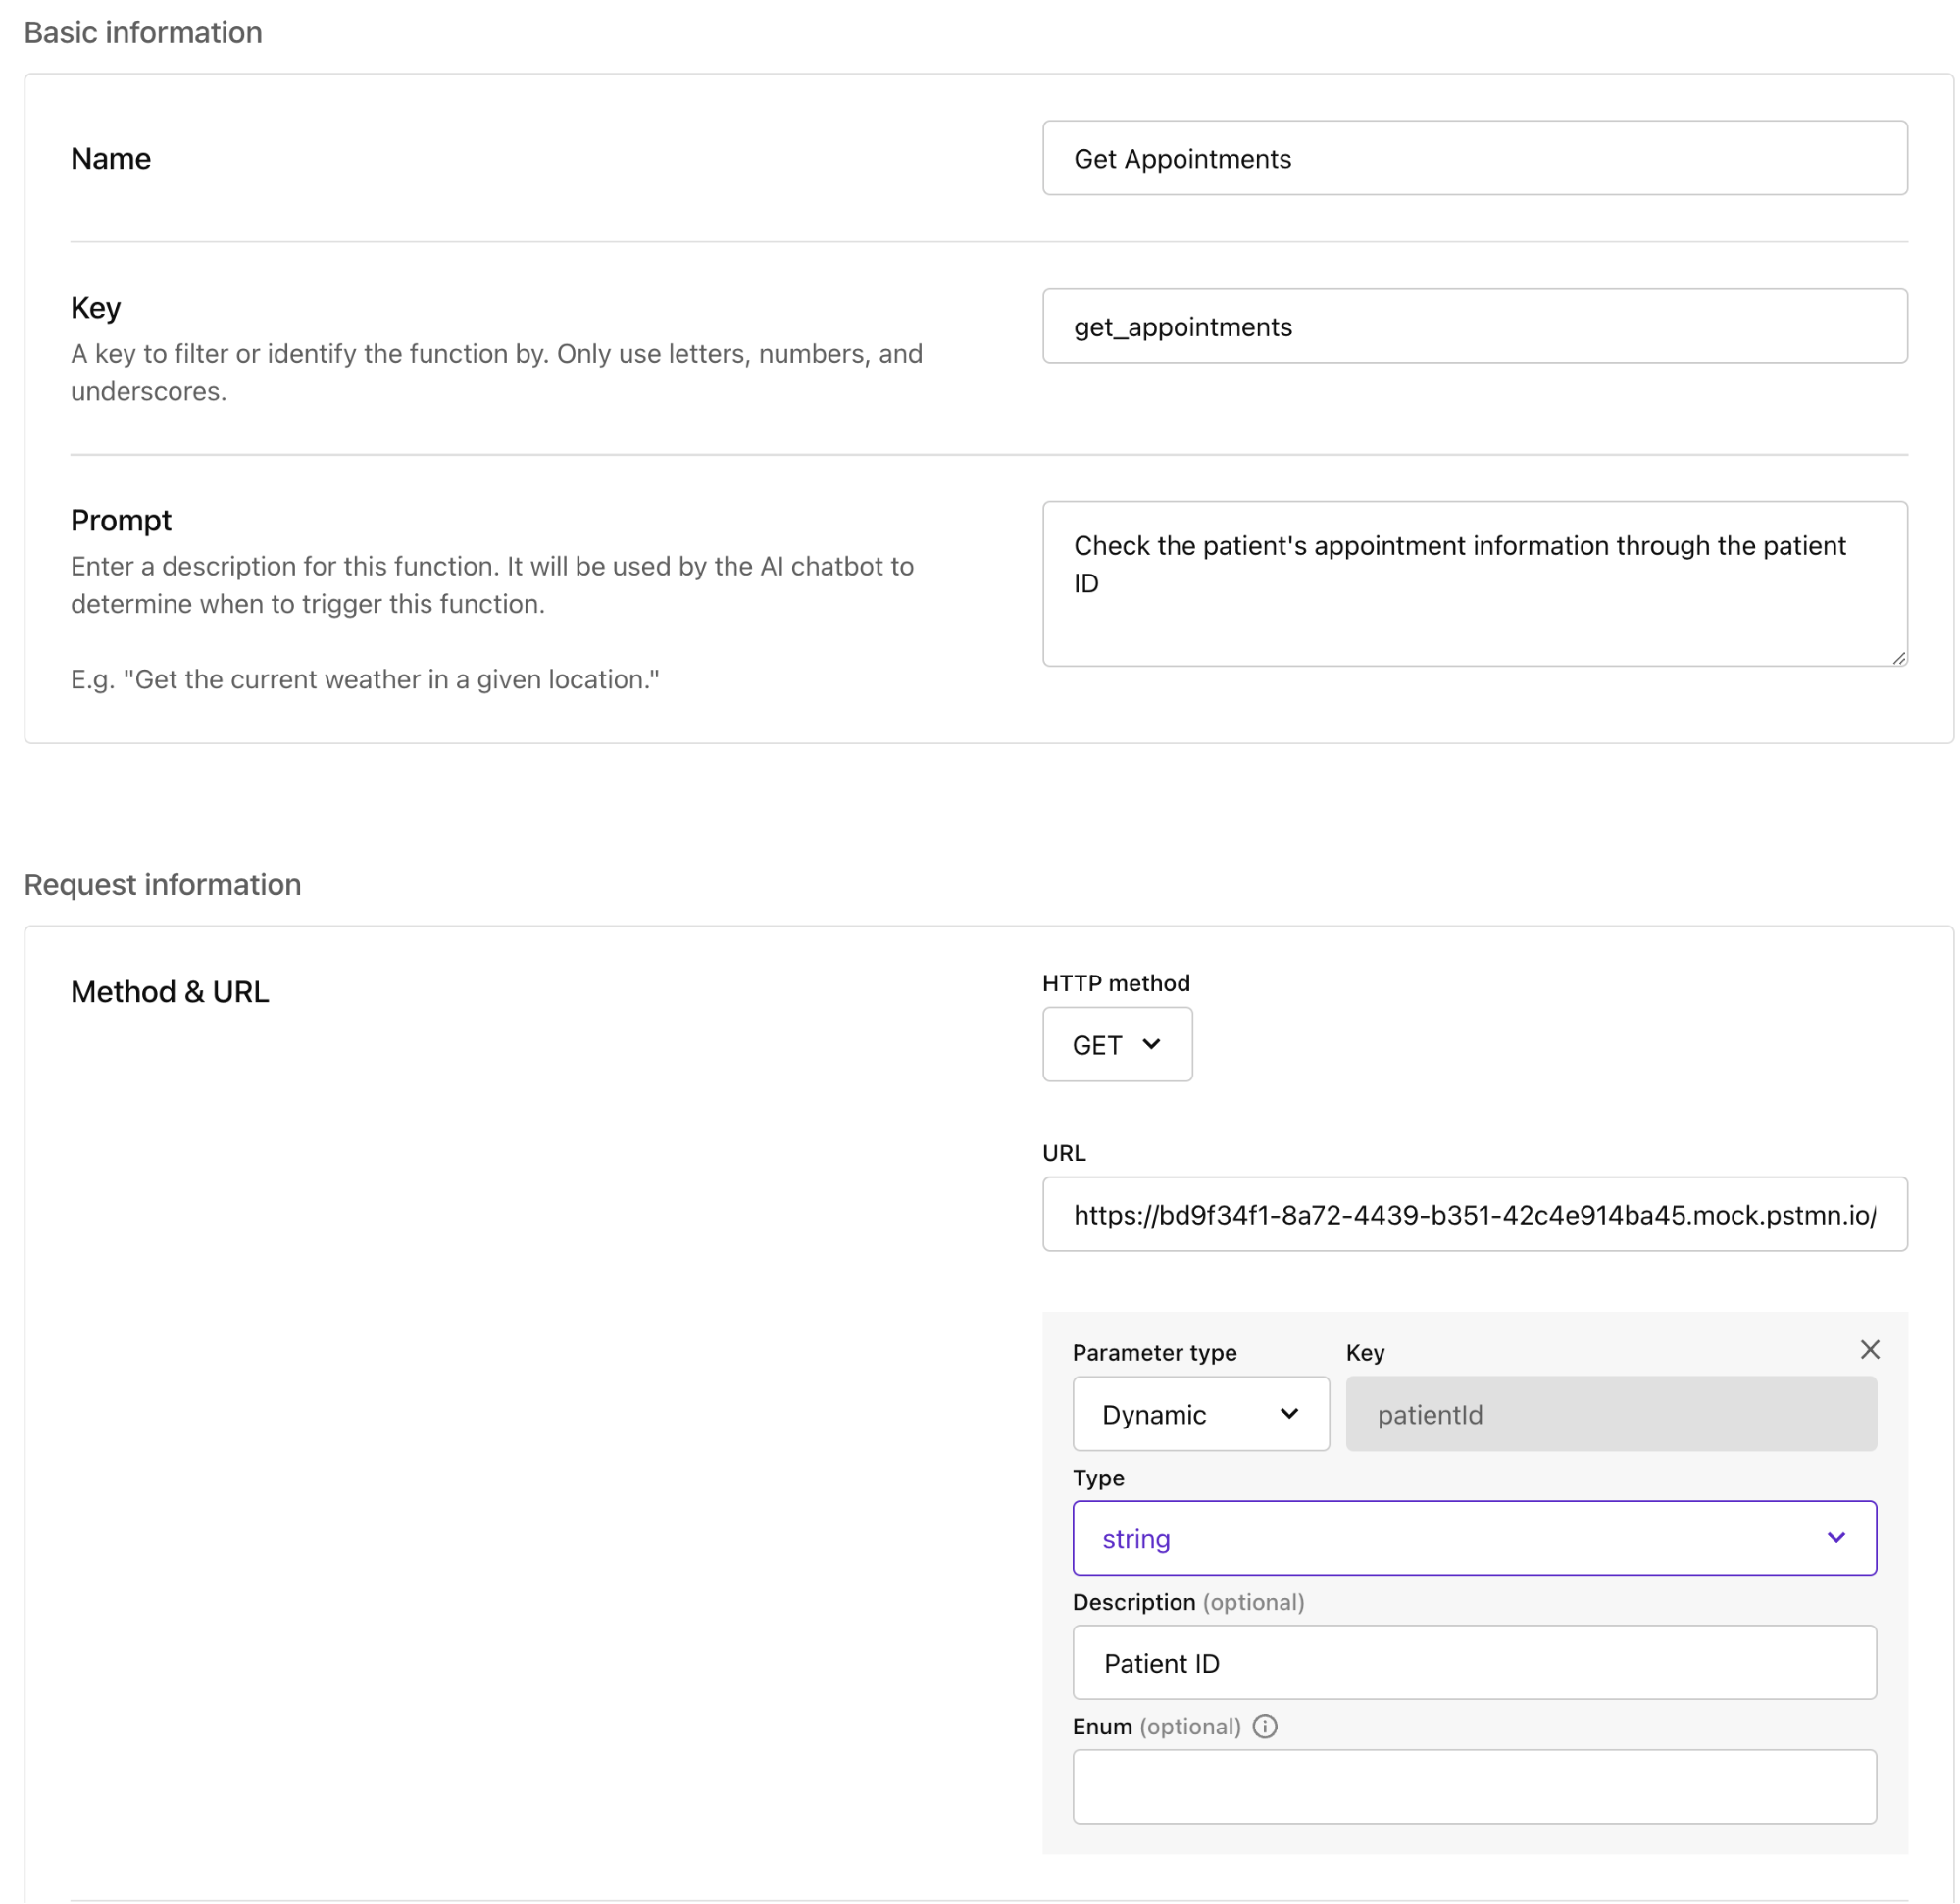
Function Calls allow you to define situations where the chatbot needs to interface with external APIs. Within Function Calls, you must enter definitions for the function and parameters to pass to GPT. You can also define the specs of the 3rd party API to obtain the actual data of the specified function.
This setting is under Chat > AI Chatbot > Settings > Function calls.
- Example list of Function calls
- Input example
In addition, you can enhance the user experience by streamlining the communication with a Welcome Message, Suggested Replies, and Buttons. Suggested Replies can improve the clarity of your customer’s intentions as they are presented with a list of predefined options that you select.
Check out the mock API server information.
Welcome Message and Suggested Replies for an AI chatbot for healthcare
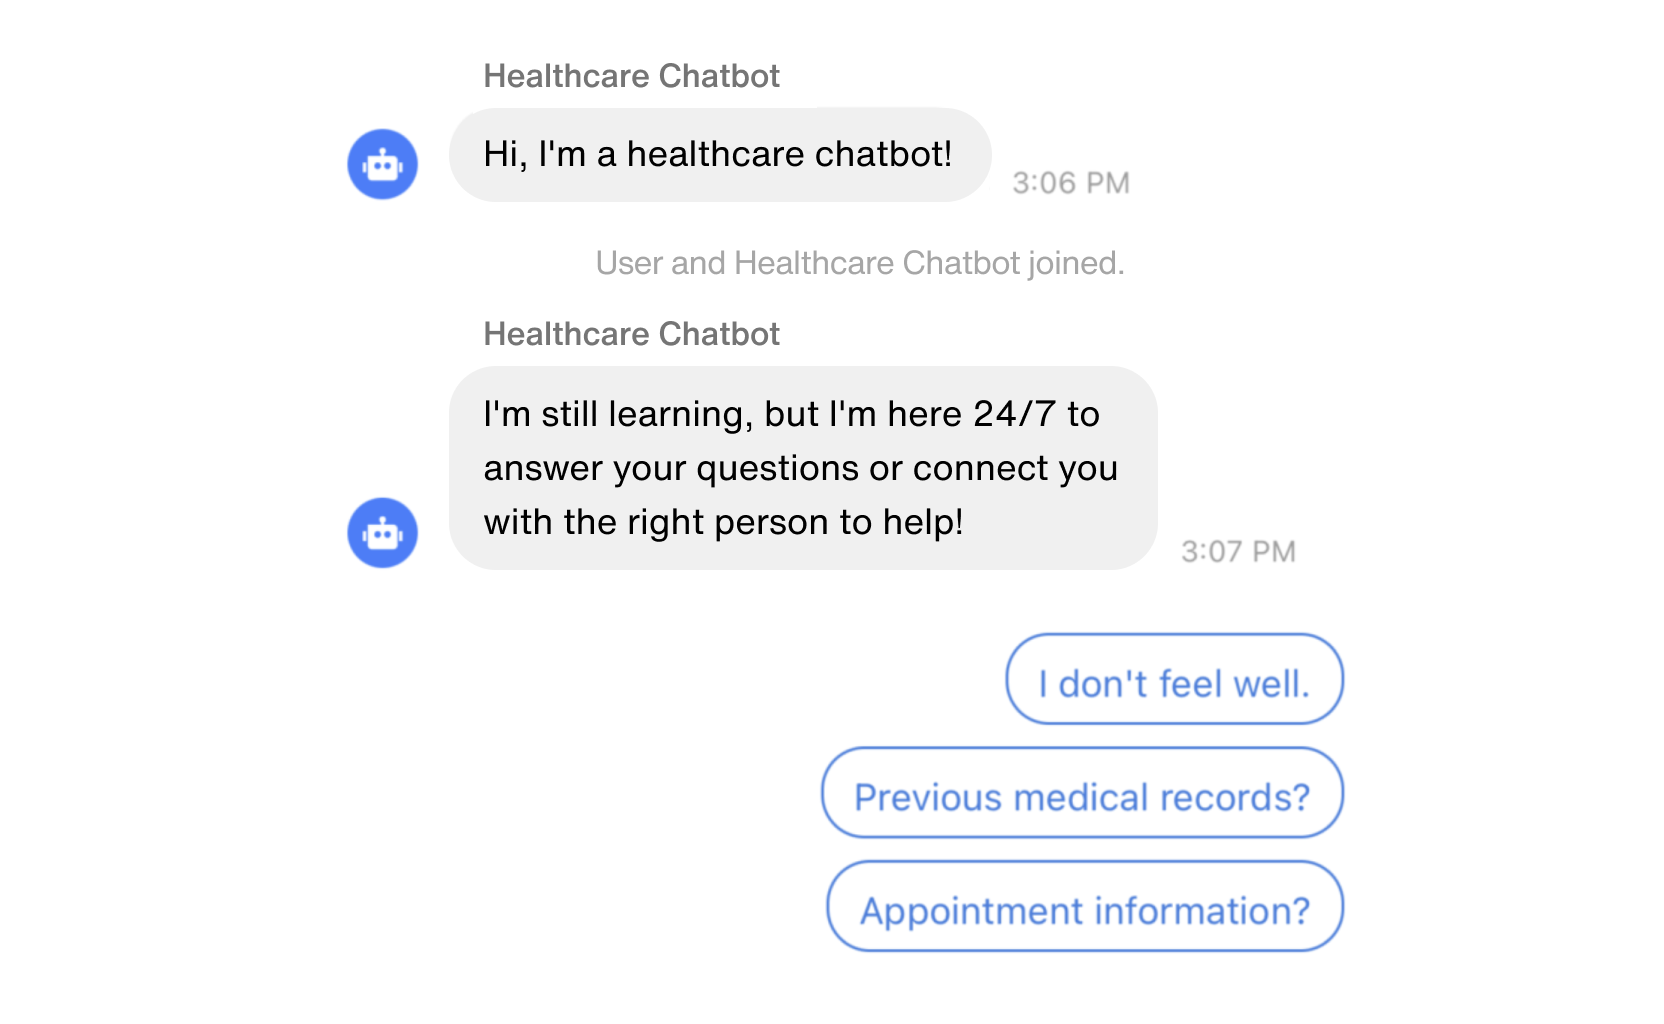
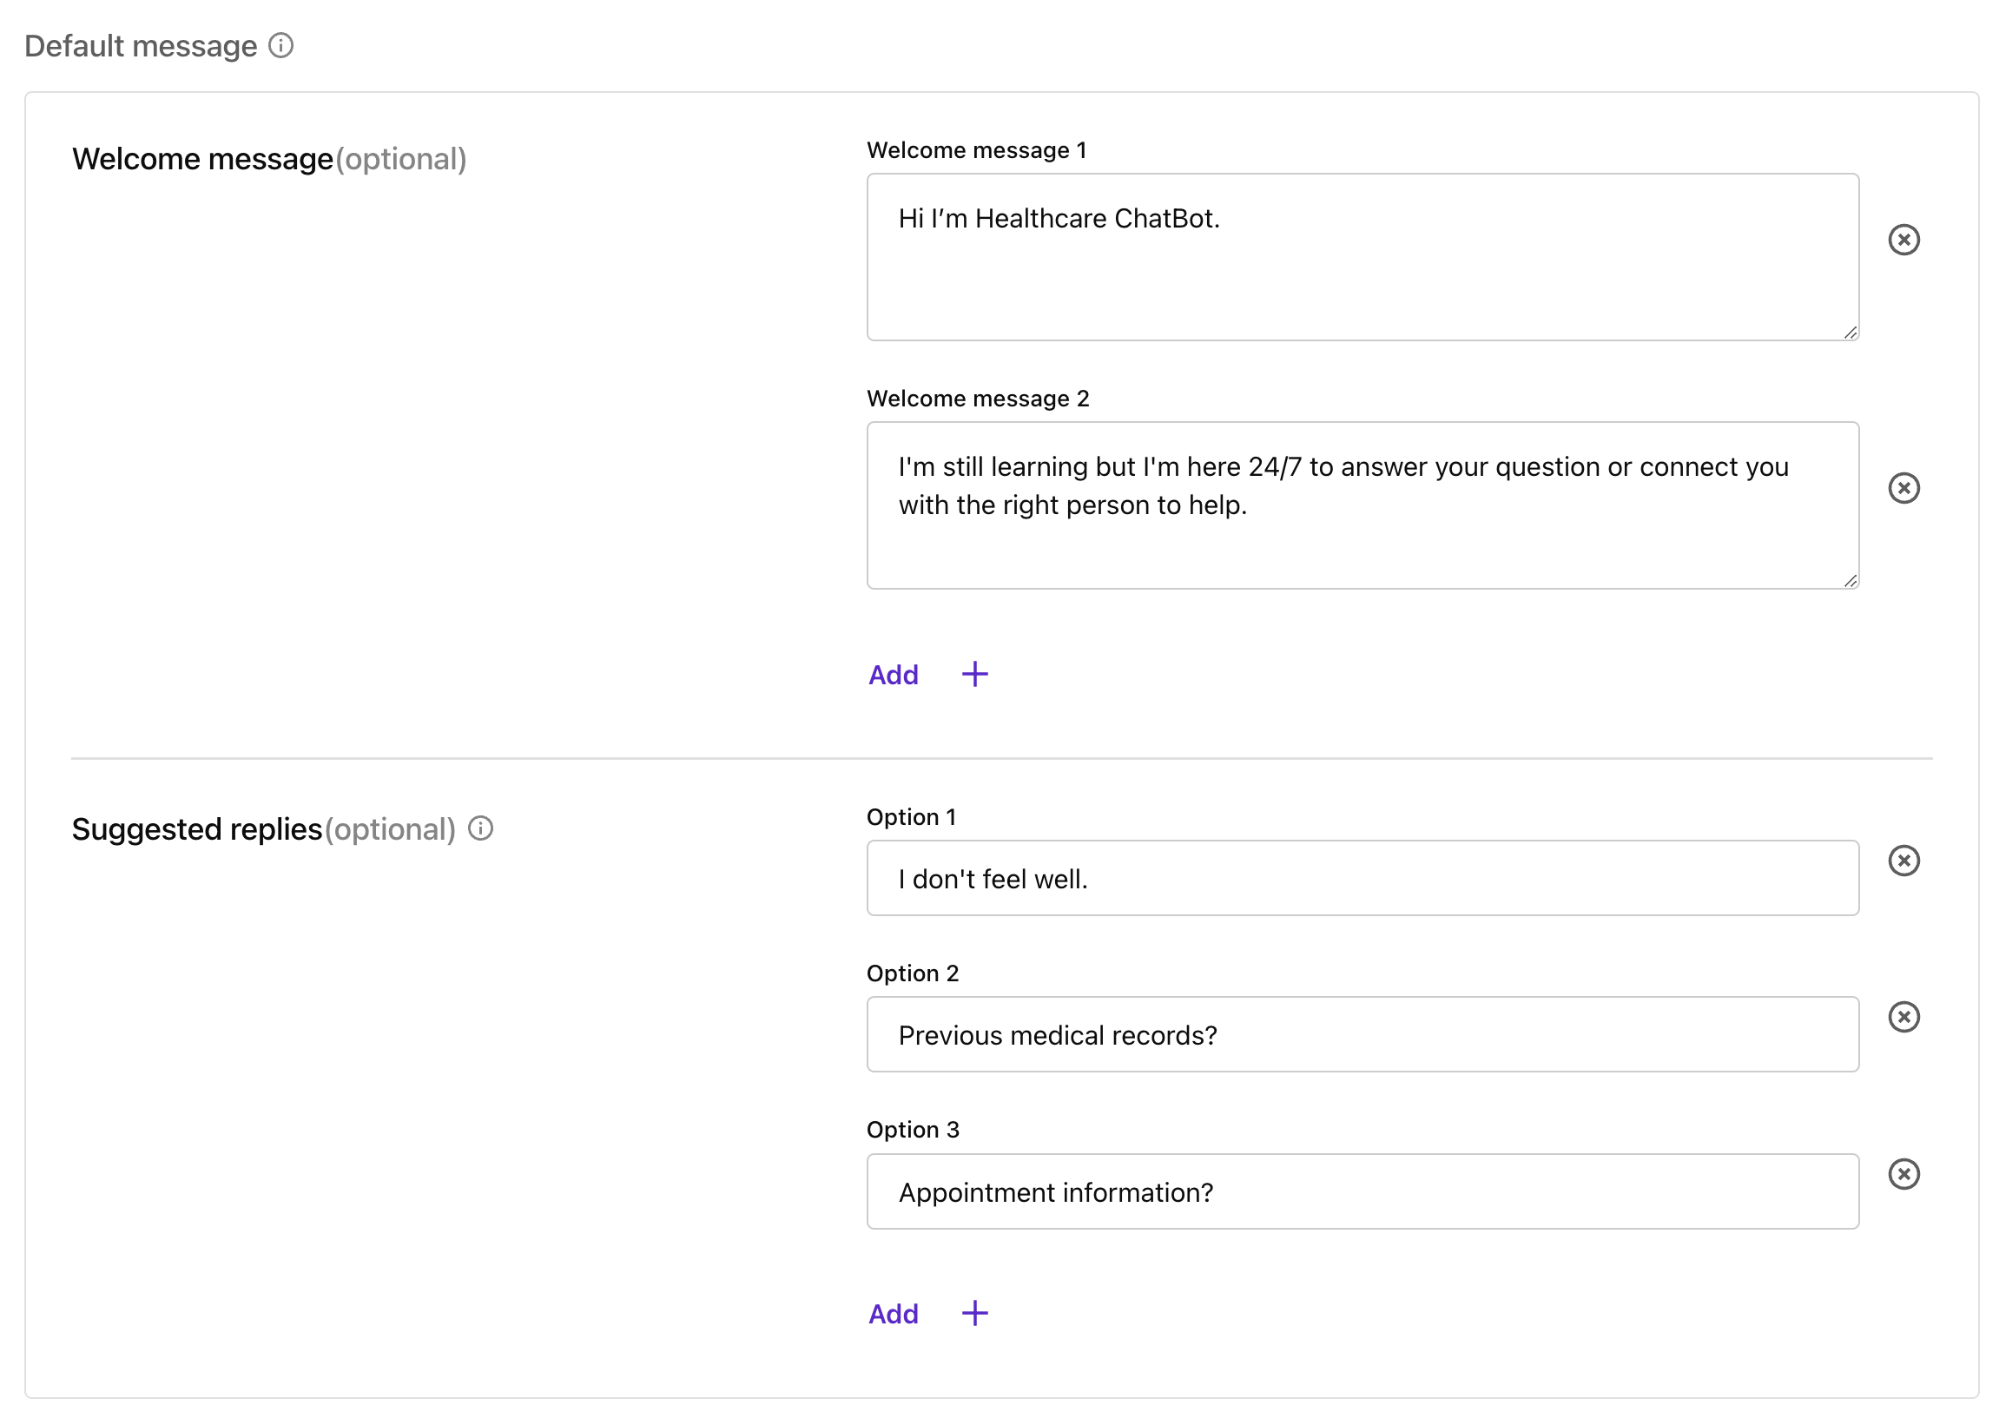
The Welcome Message is the first message displayed to users by the chatbot. Along with the Welcome Message, you can also set up Suggested Replies from the dashboard.
You can find this setting under Chat > AI Chatbot > Manage bots > Edit > Bot settings > Default messages > Welcome message / Suggested replies.
- Input example
UI components for your AI chatbot for healthcare
You can display the following UI components in your healthcare AI chatbot’s conversation interface.
CardView
The data in the response are displayed in a Card View. In the demo, information such as the provider’s details can be displayed in a card with an image, title, and description. Customization of the view can be done through cardViewParamsCollectionBuilder and SBUCardViewParams. The following codes show how to set up a Card View:
imageURL: The URL of the image to be displayed on the cardtitle: The title to be displayed on the cardsubtitle: The subtitle to be displayed on the carddescription: The description to be displayed on the cardlink: The link to be displayed on the card (If actionHandler is set, link is ignored.)actionHandler: The action to be performed when the card is clicked
QuickReplyView
The following codes demonstrate how to set the view for Quick Replies. The values in options of first_message_data.data are used as Quick Replies. When the user clicks on Quick Reply, the message is sent to the server.
ButtonView
The following code demonstrates how to set the view for Buttons. When the server returns a response that includes the information of adding a button to call the action, by setting the SBUButtonViewParams and updateButtonView(with: buttonParams), the button is displayed in the message. The following codes show how to set the Button view of the doctor reservation.
actionText: The text to be displayed on the buttondescription: The text to be displayed below the buttonactionHandler: The action to be performed when the button is clickedenableButton: Whether the button is enabled or notdisableButtonText: The text to be displayed on the button when it is disabled
Limitations
Tokens: The maximum number of tokens allowed for data is 4027. Make sure that the settings information, including the system message, does not exceed the limit.
Start building your AI chatbot for healthcare
Congratulations! 🎉 You now know how to build an AI chatbot for healthcare. The chatbot can streamline healthcare communication by helping patients to access their medical record, check appointment information, talk to a provider, and more.
For further AI chatbot tutorials, please see our tutorials on how to build a chatbot widget, how to build an ecommerce chatbot, and don’t forget to check out the SmartAssistant AI Chatbot demo. You can also start and contribute to discussions in the Sendbird Community. Don’t hesitate to contact us if you need more information about this or our other products - Sendbird Chat, Calls, Notifications, or Live! Our experts are happy to assist you.
Happy healthcare AI chatbot building! 🤖


