
How to build a ChatGPT bot in 4 easy steps: Part 1

ChatGPT integration with Sendbird chatbots
OpenAI’s ChatGPT has taken the world by storm and is now changing every facet of our lives. The technological advancements in deep learning, particularly in Language Learning Models (LLMs) such as ChatGPT, have enabled us to accomplish a wide range of tasks - from analyzing CSV files to updating our calendar and even understanding our financial habits - through simple and intuitive conversational interfaces.
Generative AI offers a unique opportunity for all online businesses to use a virtual assistant to combine a humanlike conversational experience with proprietary customer data to deliver highly contextual and valuable answers.
Sendbird, as the leading provider of mobile conversations to over 300M monthly users, is an expert in all things conversations - and is therefore uniquely positioned to power your mobile applications with a useful ChatGPT integration that boosts app engagement, efficiency, and customer loyalty. Here's an overview of how ChatGPT-powered chatbots can be incredibly useful to increase user engagement and ultimately drive customer loyalty.
In this first part of our 2-part tutorial, you will learn how to integrateChatGPT with Sendbird. The ChatGPT integration you will build will provide users with an interactive and engaging ChatGPT-powered bot right inside your applications. You can choose to train your bot on first-party data to unlock even more targeted insights and streamline your workflows.
The upcoming Part 2 will illustrate how you can create a mobile-friendly ChatGPT experience for your end users by leveraging Sendbird’s UIKit. So keep an eye out for Part 2!
To integrate ChatGPT with Sendbird, we will:
Add an OpenAI API key in the Sendbird Dashboard
Create and test a Sendbird bot
Invite users to channels
Chat!
This is what the ChatGPT integration with Sendbird will look like in the dashboard:

Prerequisites to integrate ChatGPT
To build a robust ChatGPT integration, you will need:
A Sendbird account (you can set this up for free in the Sendbird Dashboard)
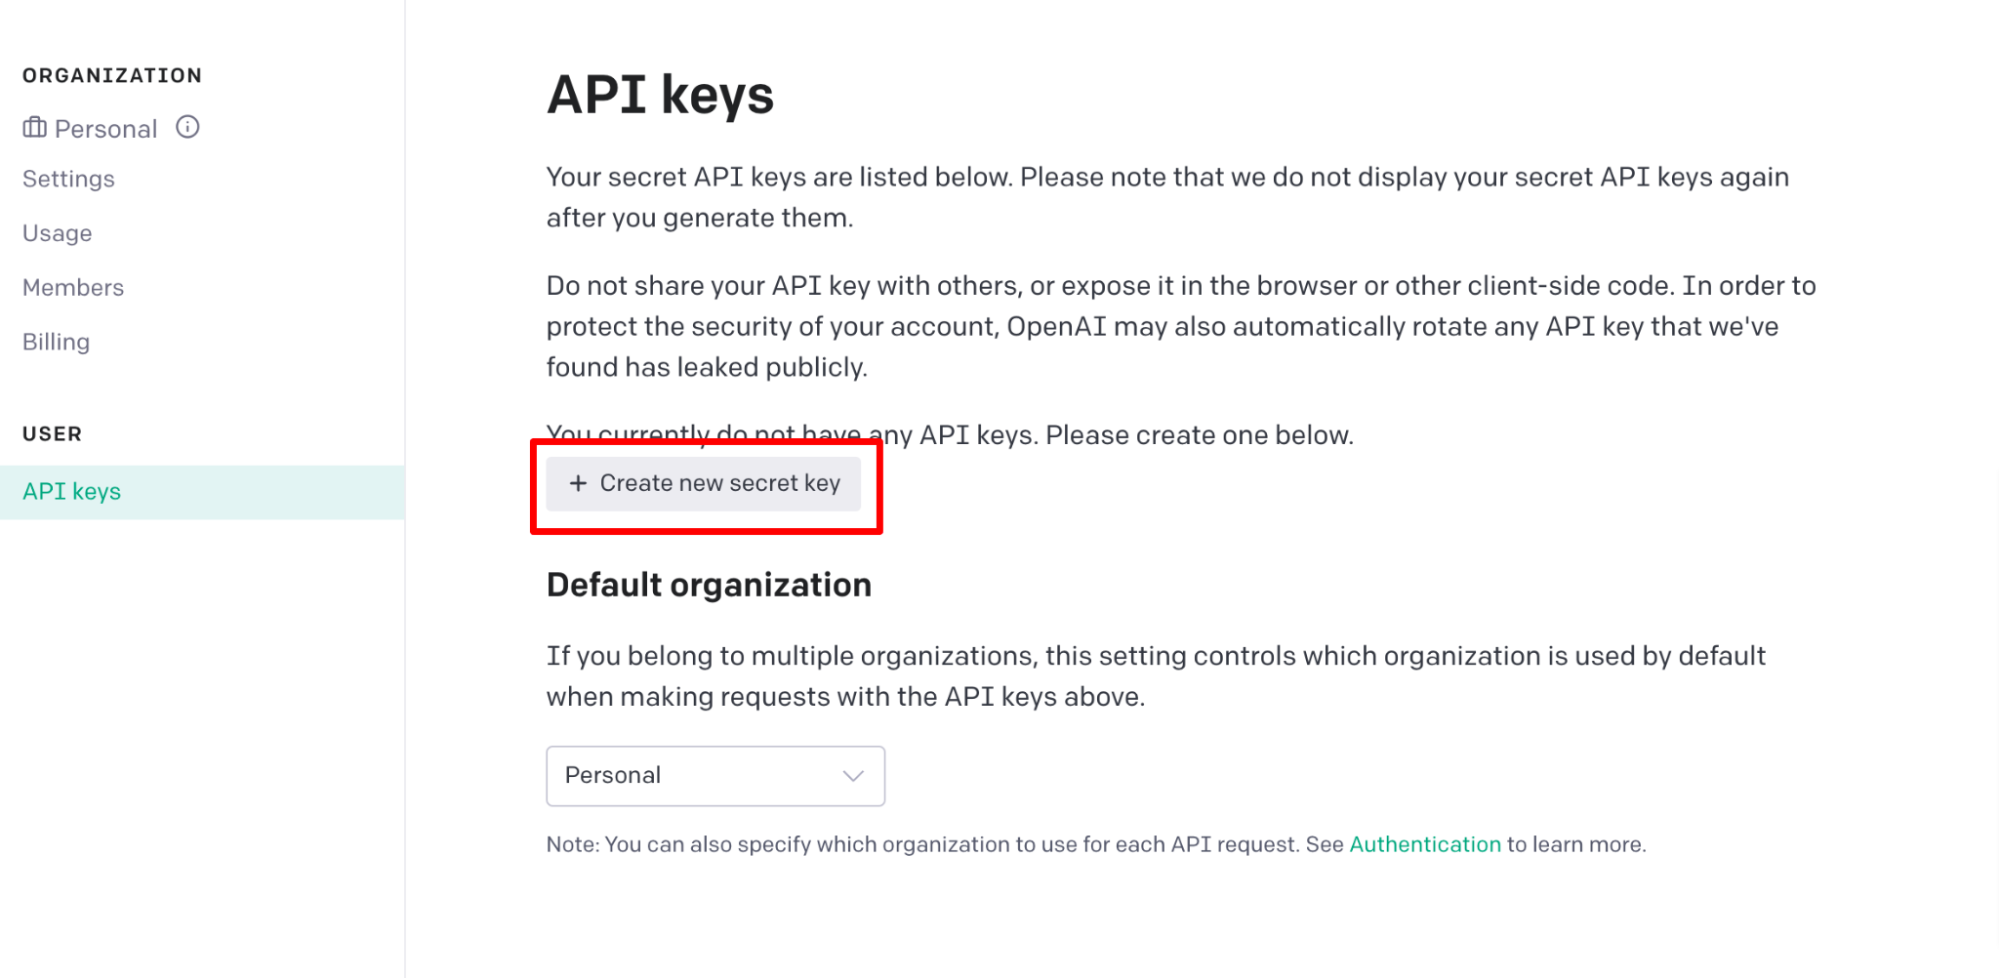
An OpenAI account to access your API key. After you create your account, generate your API key as shown below.
Step 1. Enter your OpenAI API Key
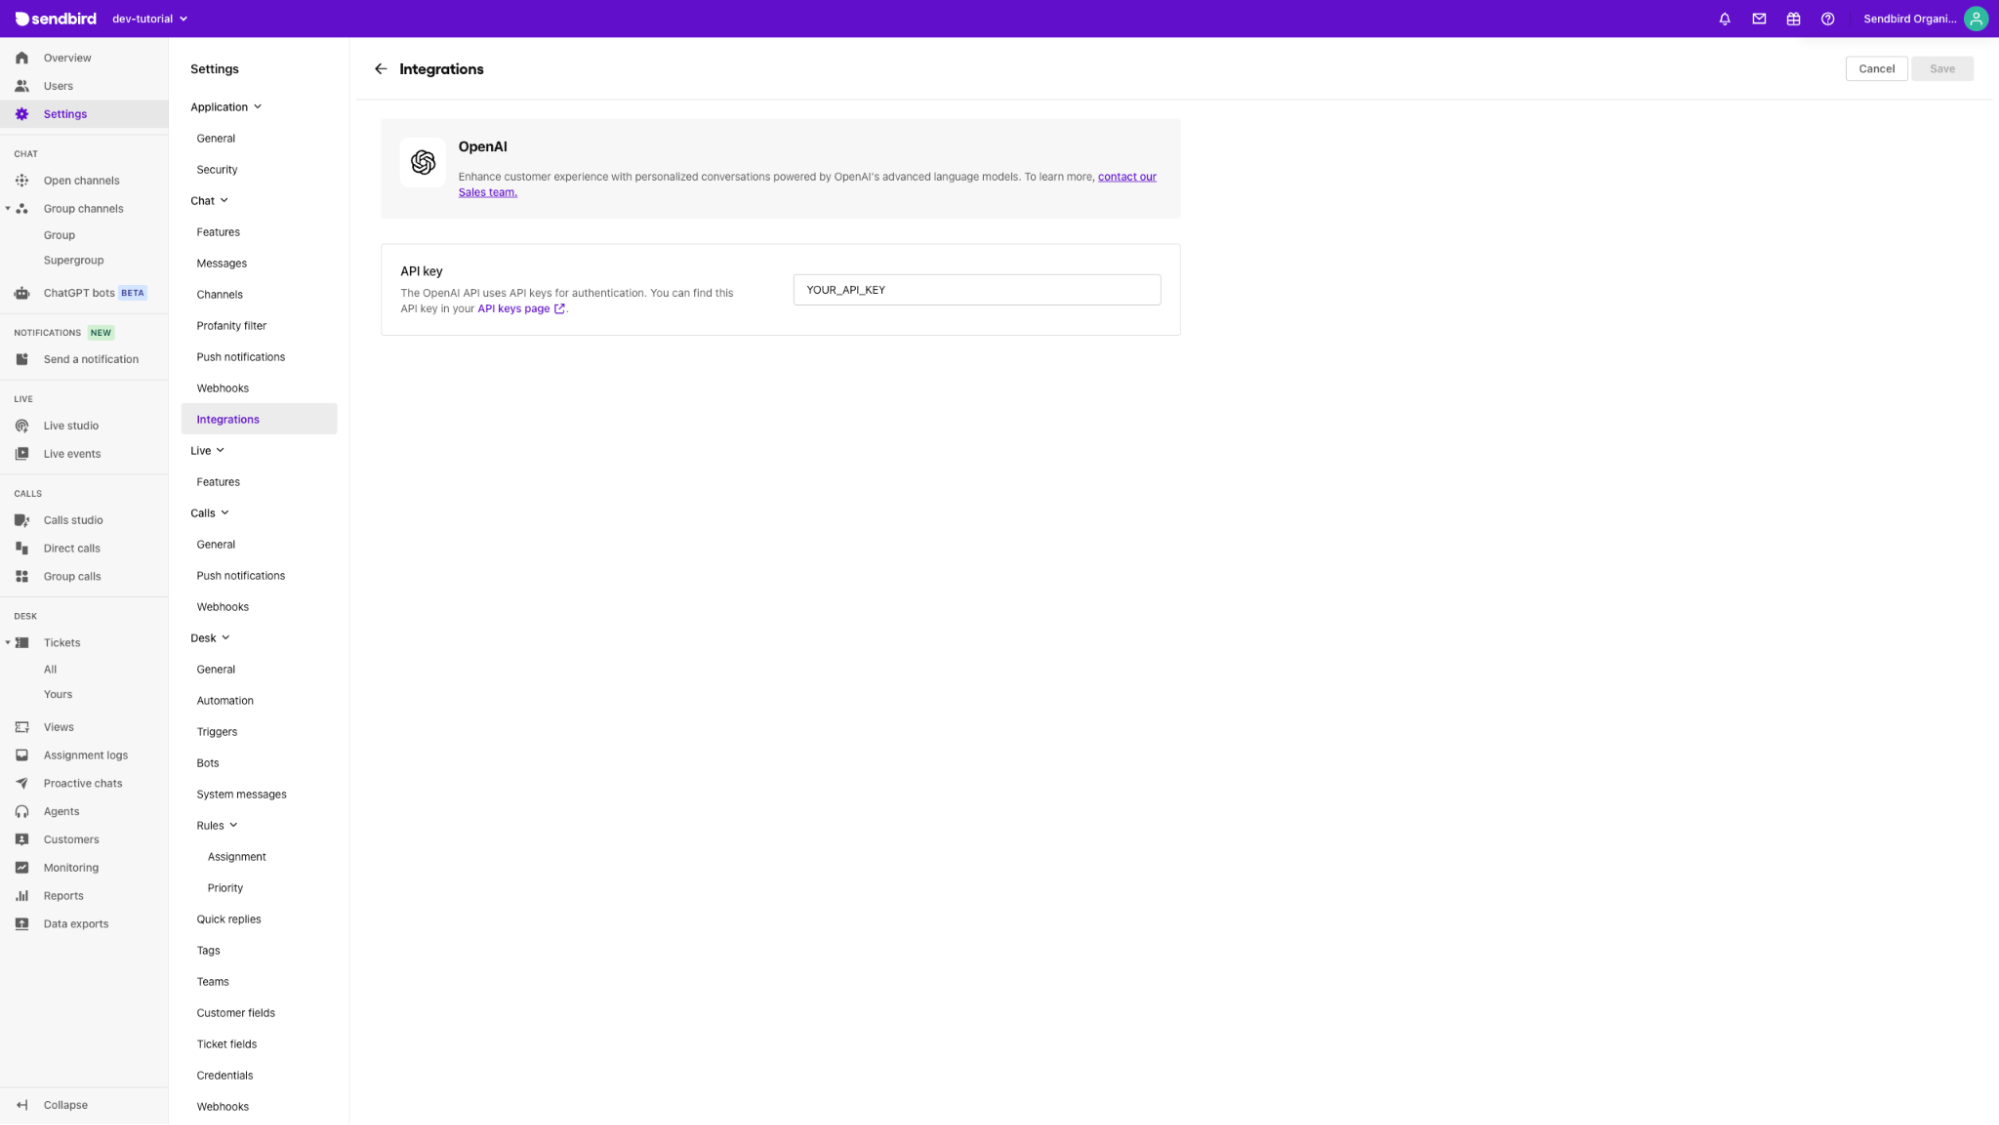
First, you will need to log in to the Sendbird Dashboard and add your OpenAI API key for usage. (If you are looking to understand how Sendbird hosts and manages the API Key, please reach out to your account manager or to our Sales team).
To enter your OpenAI API key, navigate to the left sidebar and go to Chat > Settings > Integration.
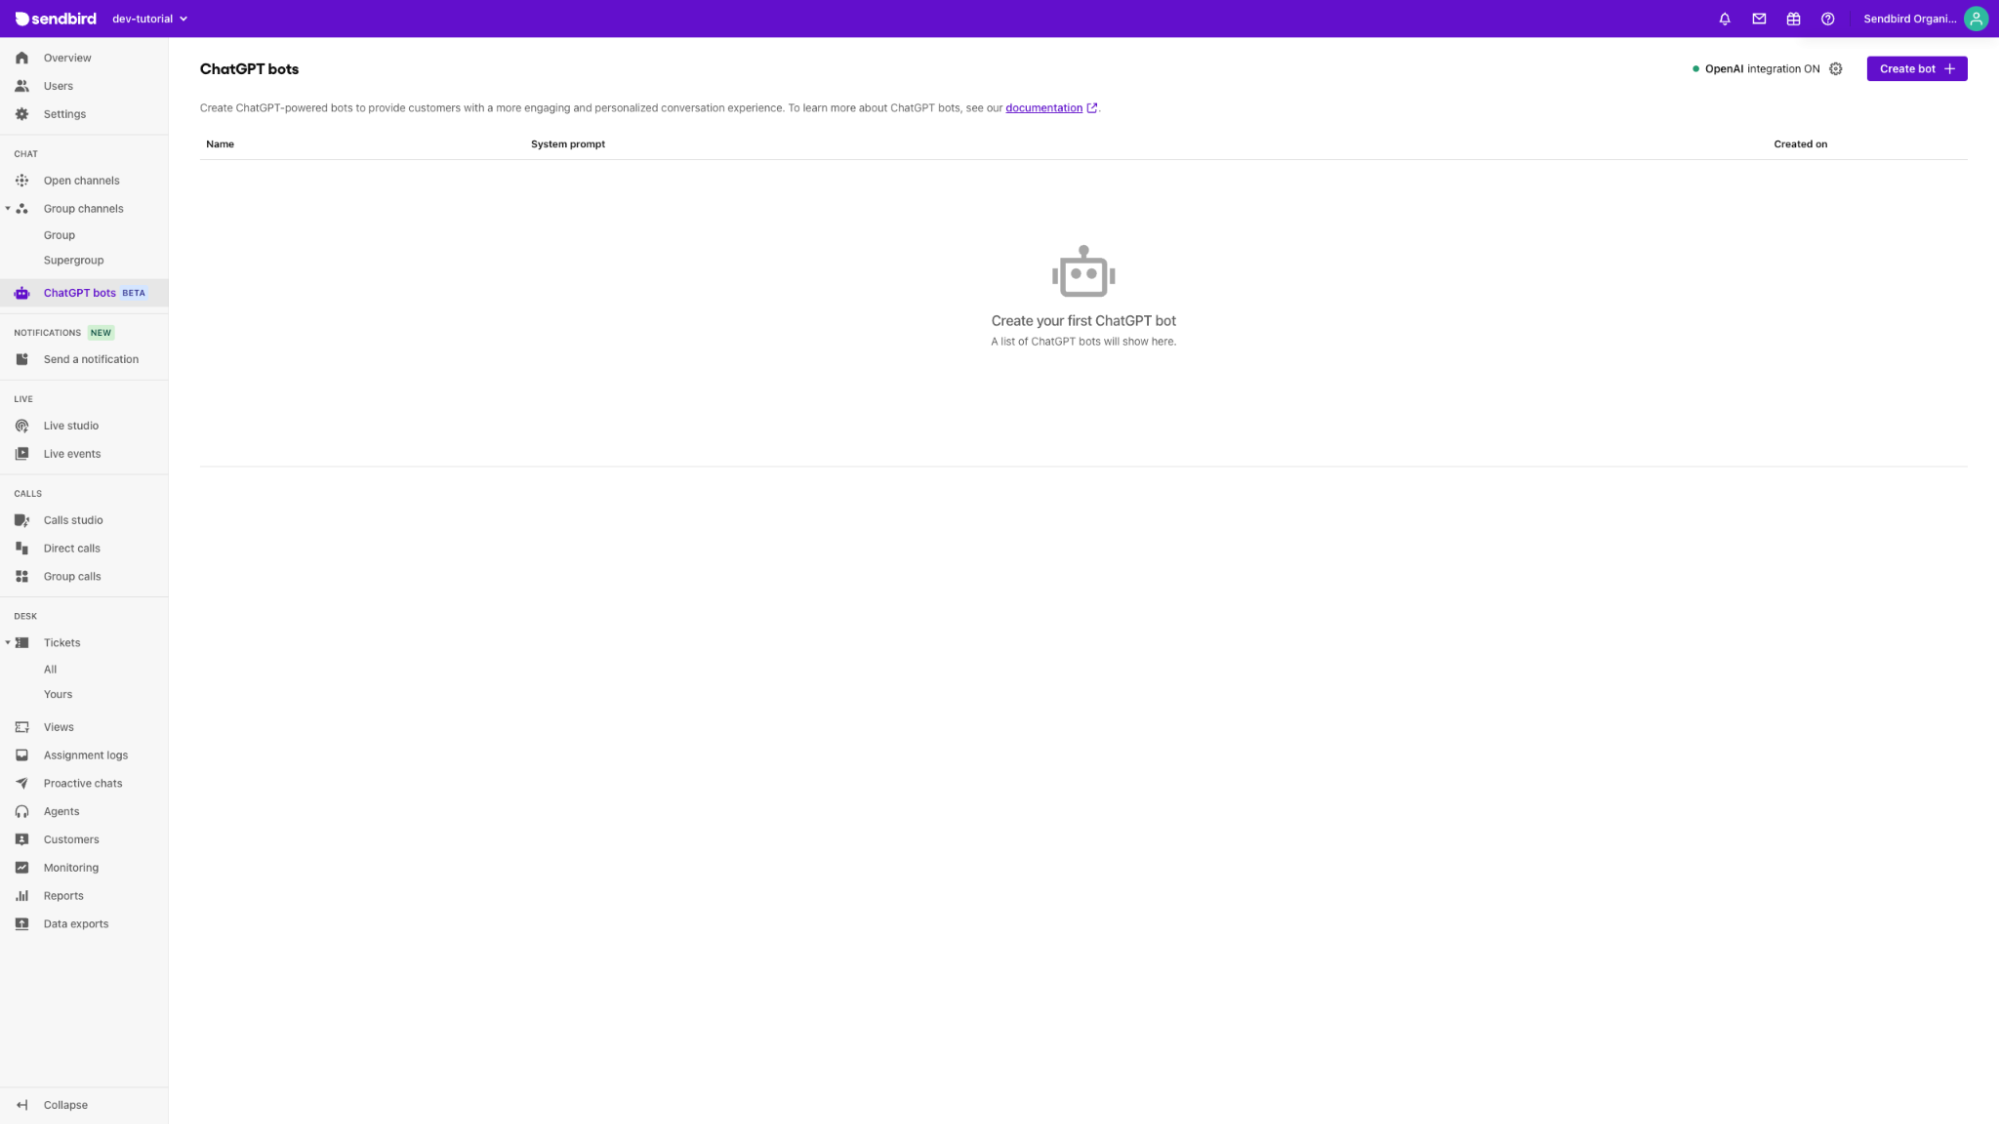
Step 2. Create your Sendbird bot and test it in real-time in the dashboard
Navigate to the “ChatGPT bots” tab and click on the “Create bot” button in the top right corner.
Input your parameters for the ChatGPT-powered Sendbird bot. We currently only support “v1/chat/completions/” from the “gpt-3.5-turbo” model and accept the following ChatGPT parameters:
System message
Temperature
Maximum tokens
Top P
Frequency penalty
Presence penalty
For more information about each parameter, please visit the OpenAI docs. Visit the Sendbird docs for a bot overview.
Now that you’ve entered all your parameters, feel free to experiment with your bot inside the dashboard.
Don’t like the results or want to improve them? Tweak your parameters as you go!
Note that just like ChatGPT, Sendbird bots will maintain each user’s session separately so that you don’t have to worry about switching between users.
Alternatively, you can call our create a bot API directly to create the bot.
Both the Sendbird Dashboard and API also support all of the standard CRUD operations similar to the above, so don’t worry if you want to change or remove some of your bots.
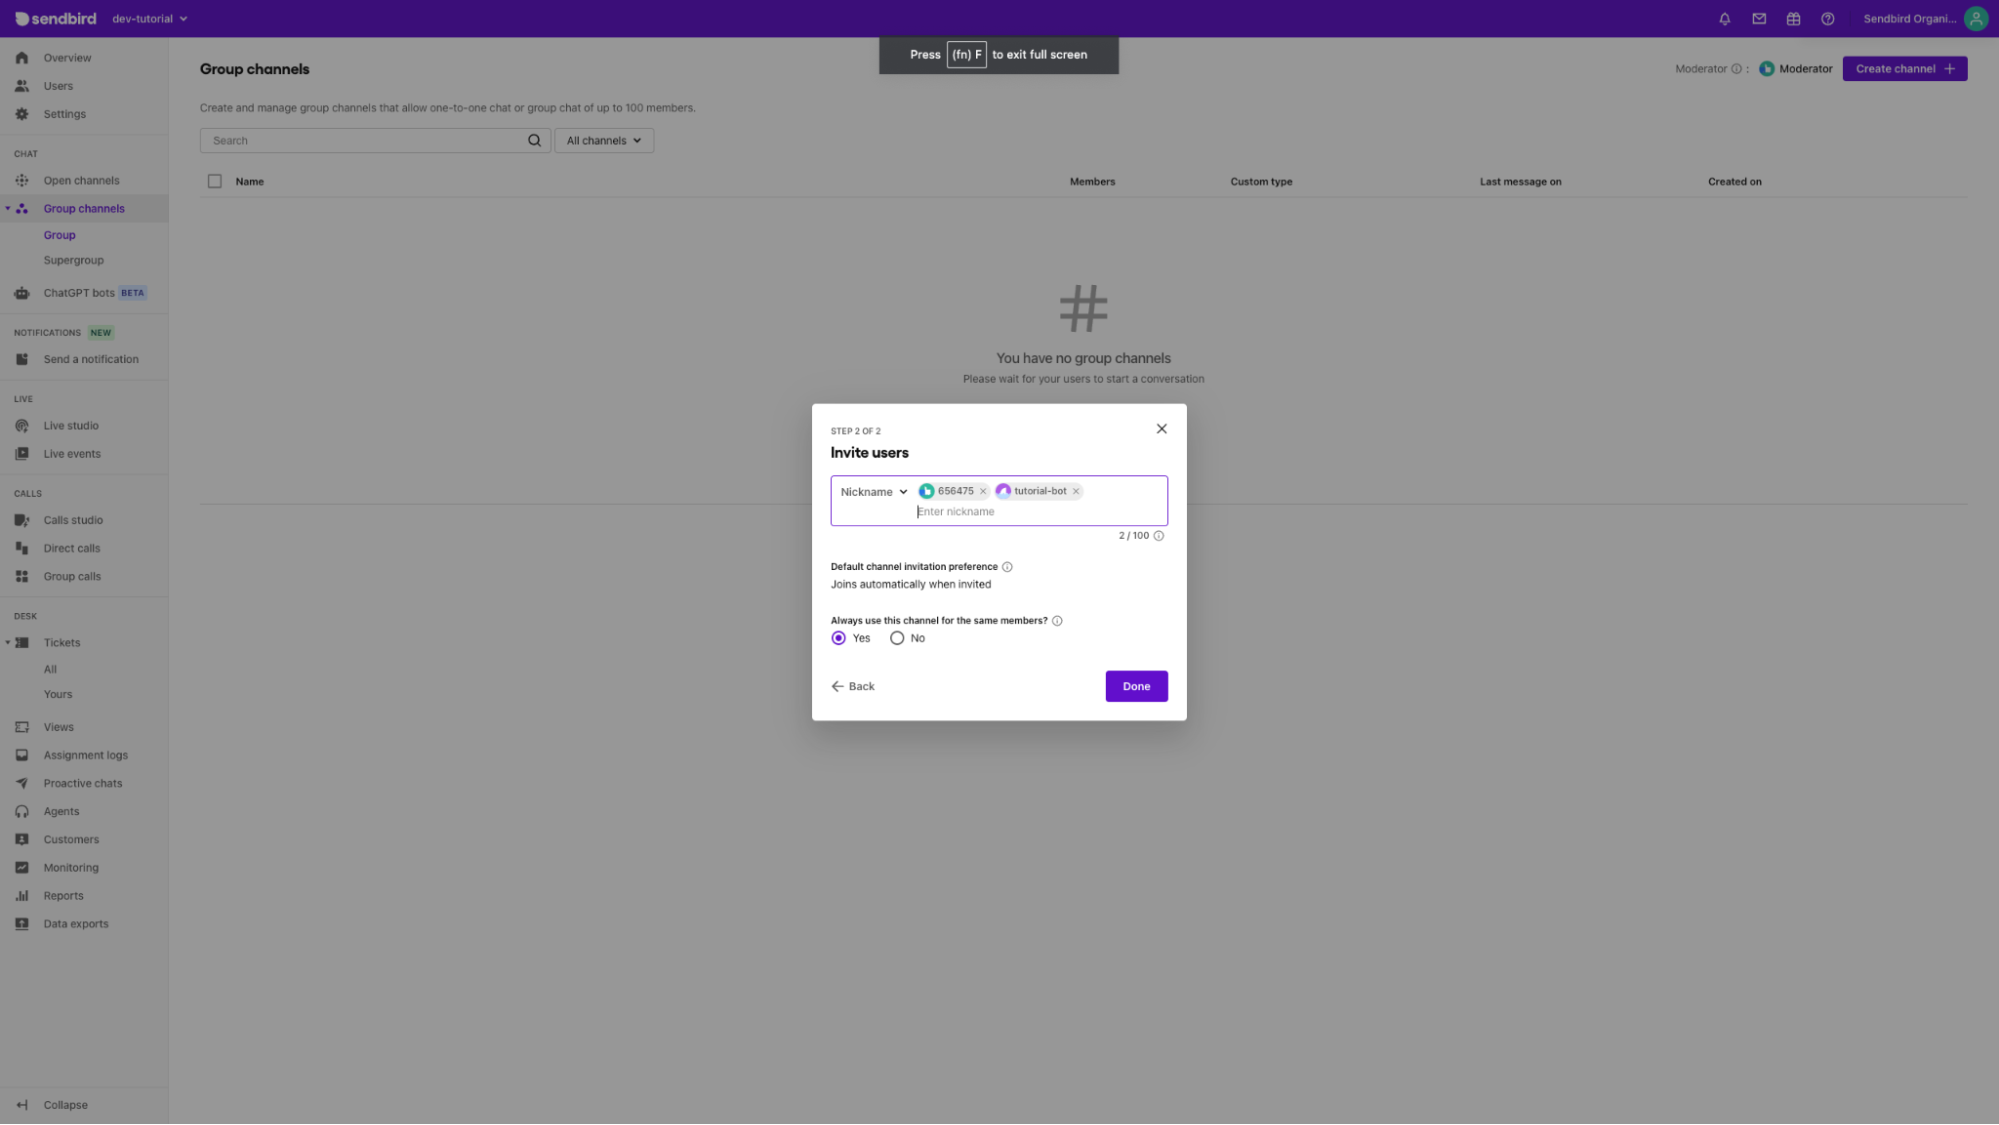
Step 3. Add your bot to Group Channels
Navigate to “Group Channels” under “Chat” in the left navigation bar. You can either add the bot when you create a channel or invite the bot later as a user.
Invite the bot at the time of channel creation when you click “Create Channel” in the top right corner.
You can invite the bot later by clicking “Members” in the right sidebar.
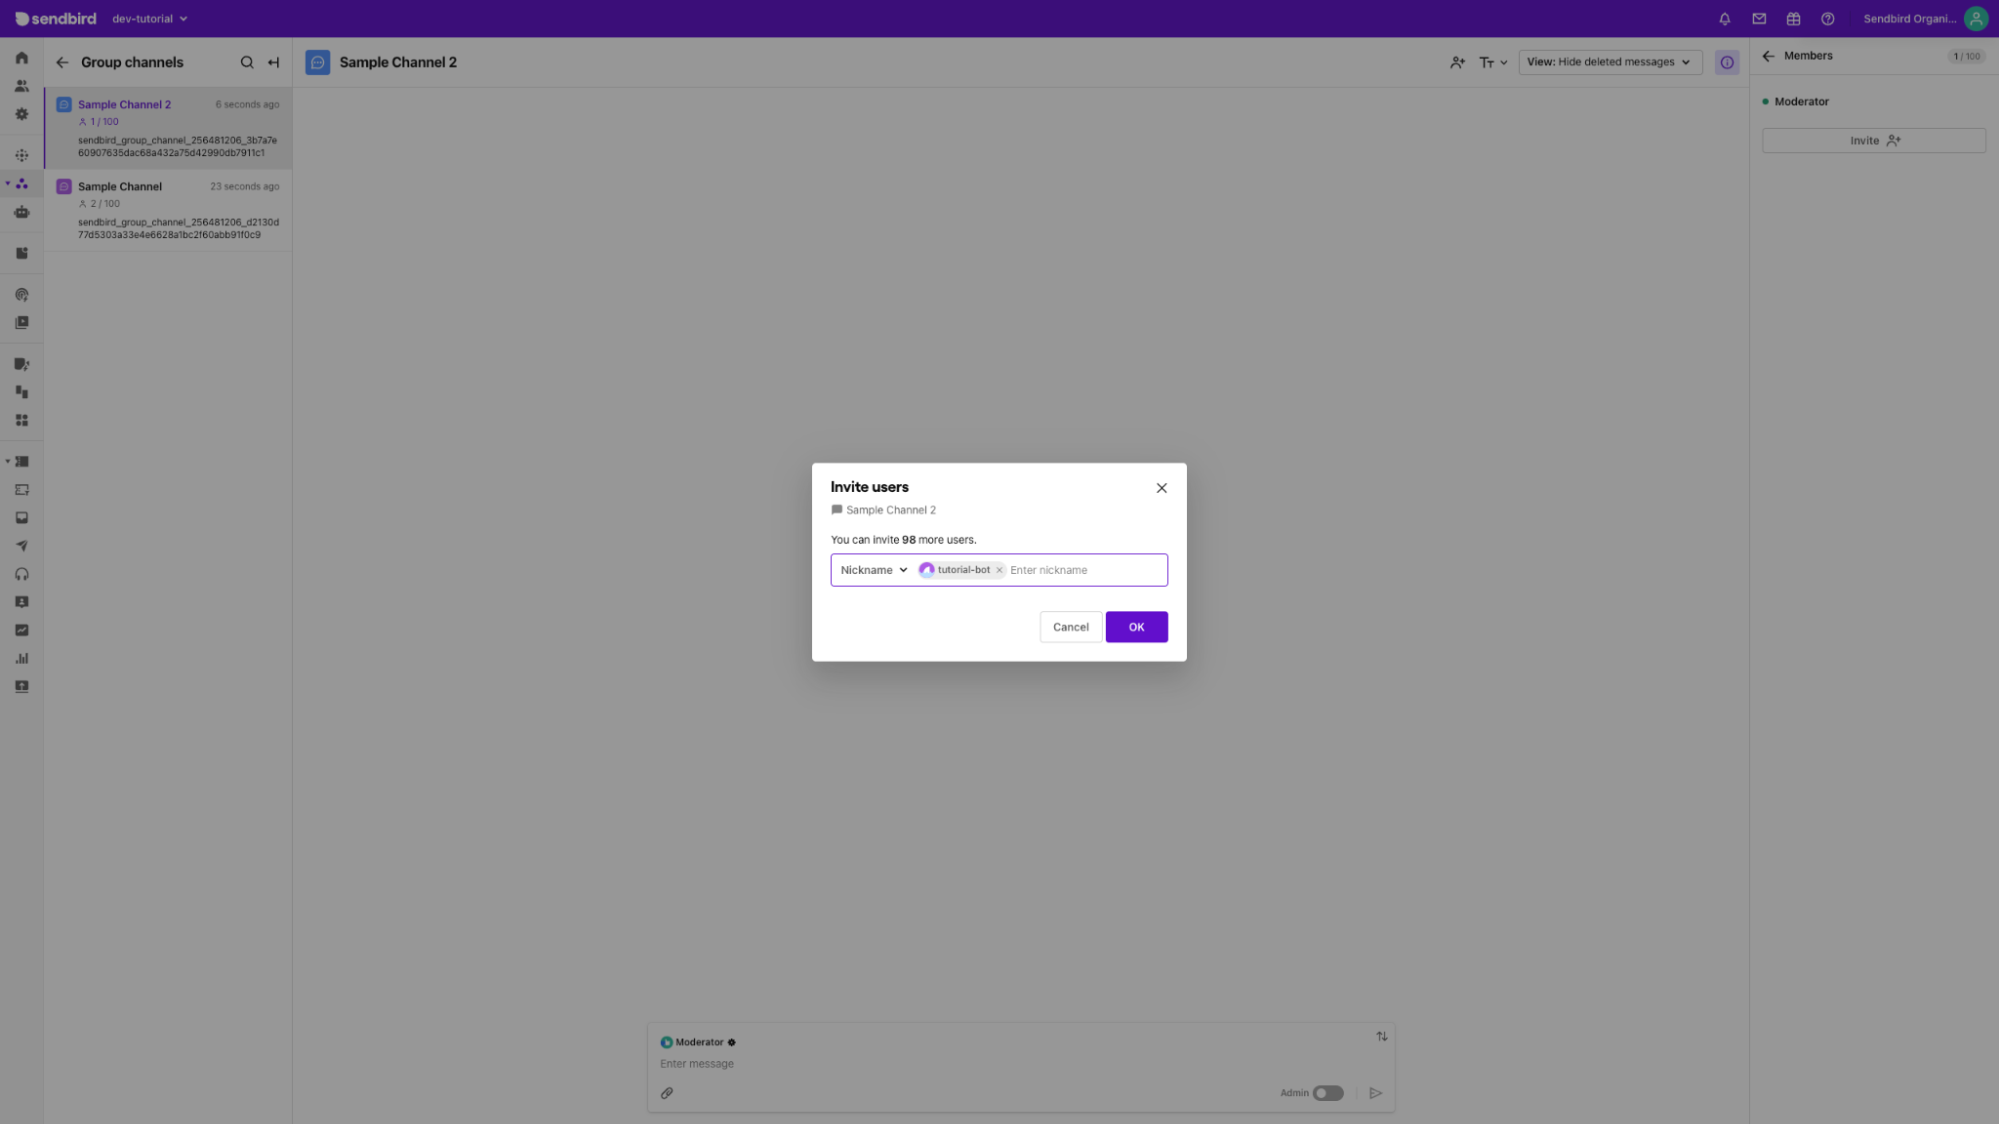
You can leverage our API as well. For scalability, we recommend that our clients leverage the join channels API that will allow you to bulk join channels.
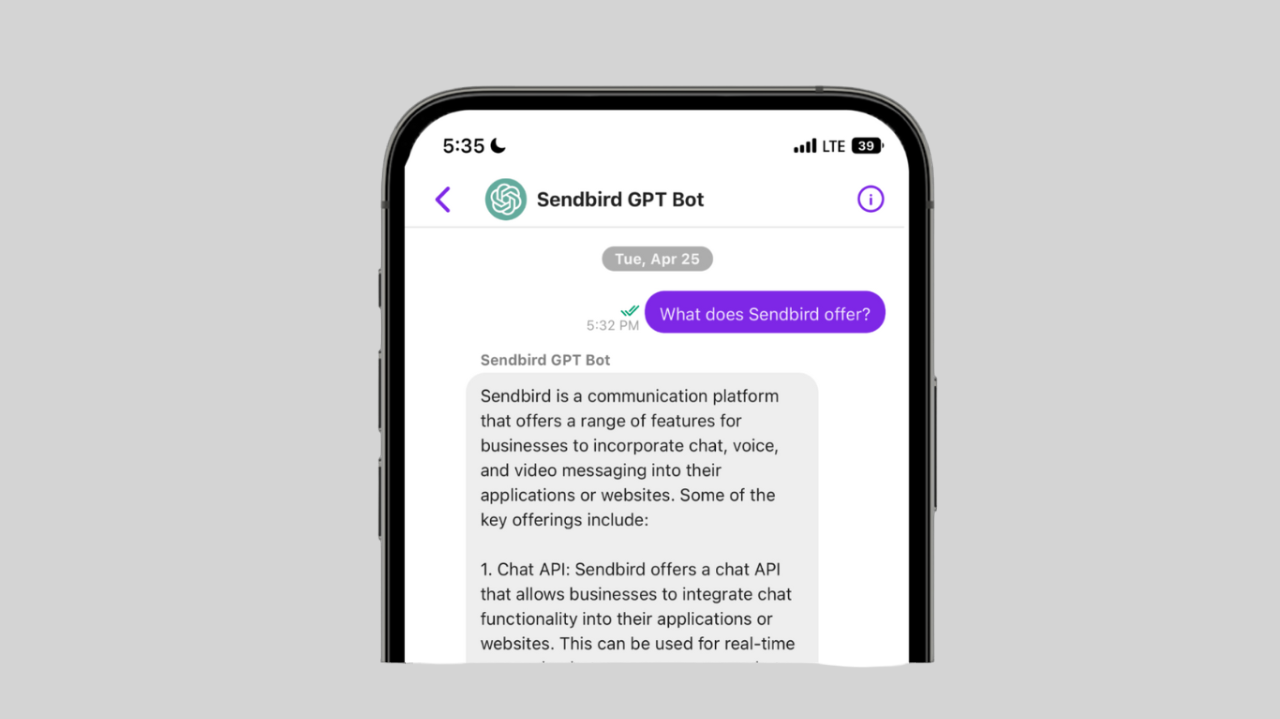
Step 4. All you have to do now is to chat!
Once the bot is added, users can start chatting with it. The bot will receive messages, process them through the ChatGPT API, and send the generated response back to the users in the channel.
Note that you can also have multiple bots inside one channel for different purposes! Bots will only automatically react to user-generated messages and not to other bots’ messages, so don’t worry about having multiple bots talking to each other at the same time.

Conclusion
That’s it for Part 1! Your ChatGPT integration with Sendbird is now complete. With a few clicks and settings in the dashboard and a simple API, you can now create ChatGPT-powered bots in your web and mobile apps. Stay tuned for Part 2 of this tutorial, in which we'll offer a step-by-step walkthrough of how to create the most streamlined, beautiful, mobile-friendly UI for ChatGPT-powered bots.
Sendbird is committed to becoming the one-stop shop for everything in-app conversations, and LLMs are no exception. We will keep exploring other LLM capabilities to offer richer features, such as an integration with the retrieval plugin. We just released a new ChatGPT-powered Summarize feature for our Salesforce Connector. So, stay tuned!
If you need help with the material in this tutorial, the OpenAI docs and the Sendbird docs are the best places to start. You can also ask questions on our Sendbird Community site. If you still need help, please contact us. Our experts will be delighted to help you with your ChatGPT integration.
We look forward to seeing how you will use the Generative Pre-Trained transformers to revolutionize bot-to-user interactions. We are also impatient to see the benefits of conversational AI to your business in terms of engagement, operational efficiency, and customer loyalty.
Good luck trailblazing, and happy ChatGPT bot building! 🤖


