
How to build a Flutter chat app with Firebase & Dashchat

Introduction
This tutorial demonstrates how to integrate Sendbird’s Flutter SDK with the Dashchat UI and Firebase Cloud Messaging to create a full-fledged, feature-rich chat experience for your users. By the end of this tutorial, you’ll have a solid understanding of how to combine these tools to build a robust app for iOS and Android.
In this tutorial, we’ll introduce you to Firebase, Flutter, and Dashchat before diving in to the implementation details. In addition to offering detailed guidance about how to build a Flutter chat app, we’ll also give you troubleshooting advice and, as a bonus, help you add push notifications to your Flutter chat app.
Let’s get started! 💻
We’ll first introduce Firebase, Flutter, and Dashchat so you can see how they fit with what you’re building in this tutorial.
What is Firebase?
Firebase is a comprehensive mobile and web app development platform that provides developers with a wide range of tools and services to help them quickly and easily build high-quality apps. Firebase is owned by Google and provides developers with access to the infrastructure and resources of Google Cloud Platform.
Firebase offers a wide range of features, including cloud storage, authentication, real-time databases, machine learning, and more. With Firebase, you can build and deploy applications for Android, iOS, and the web. Firebase also provides developers with a suite of powerful tools and services to help them improve the performance, stability, and security of their apps.
In this tutorial, we will be using Firebase Cloud Messaging (FCM) to send push notifications to users when they receive a message while not in the app. FCM is a cross-platform messaging solution that allows developers to send messages to their users’ devices from a backend server. By integrating FCM with our Flutter chat app, we can ensure that users are notified of new messages even when they are not actively using the app.
By leveraging the power of Firebase, we can build a robust and scalable Flutter chat app with ease.
What is Flutter?
Flutter is an open-source, cross-platform development framework written in Dart, a C-style language for developing high-performance web apps. With Flutter, you can develop applications for iOS, Android, macOS, Windows, and Linux. You can also develop web apps on Chrome, Firefox, Safari, Edge, and IoT or smart devices.
Flutter is an industry favorite thanks to its near-native performance and ease of development. The hot reload and hot restart features make it a snap to change source code and see it in action in a matter of seconds. Its wide range of rich widgets covers both Android and iOS. Using Flutter Devtools, you can inspect layouts, debug errors, and profile the performance of your Flutter app.
💡 What’s better for cross platform app development - Flutter or React Native? This head-to-head comparison has some great points to consider.
What is Sendbird’s Flutter chat SDK?
With Sendbird’s Flutter chat SDK, you can efficiently integrate feature-rich, real-time chat into your iOS or Android app.
The Flutter chat SDK supports the following chat channel types:
This tutorial focuses on Group channels.
While channels are an essential part of chat, the Flutter chat SDK offers much more than just a basic chat experience. It also supports:
That’s an abbreviated list of what Sendbird can do, of course. Later in this tutorial, we explore how to implement the real-time notifications feature.
What is Dashchat 2?
Building a chat UI from scratch is a tough job. To save time, effort, and ensure that you have a streamlined app design, it makes sense to use a prebuilt UI. If you use a prebuilt UI, you can focus on other features more important for your use case, for example authentication and notifications. This is where Dashchat 2 comes in.
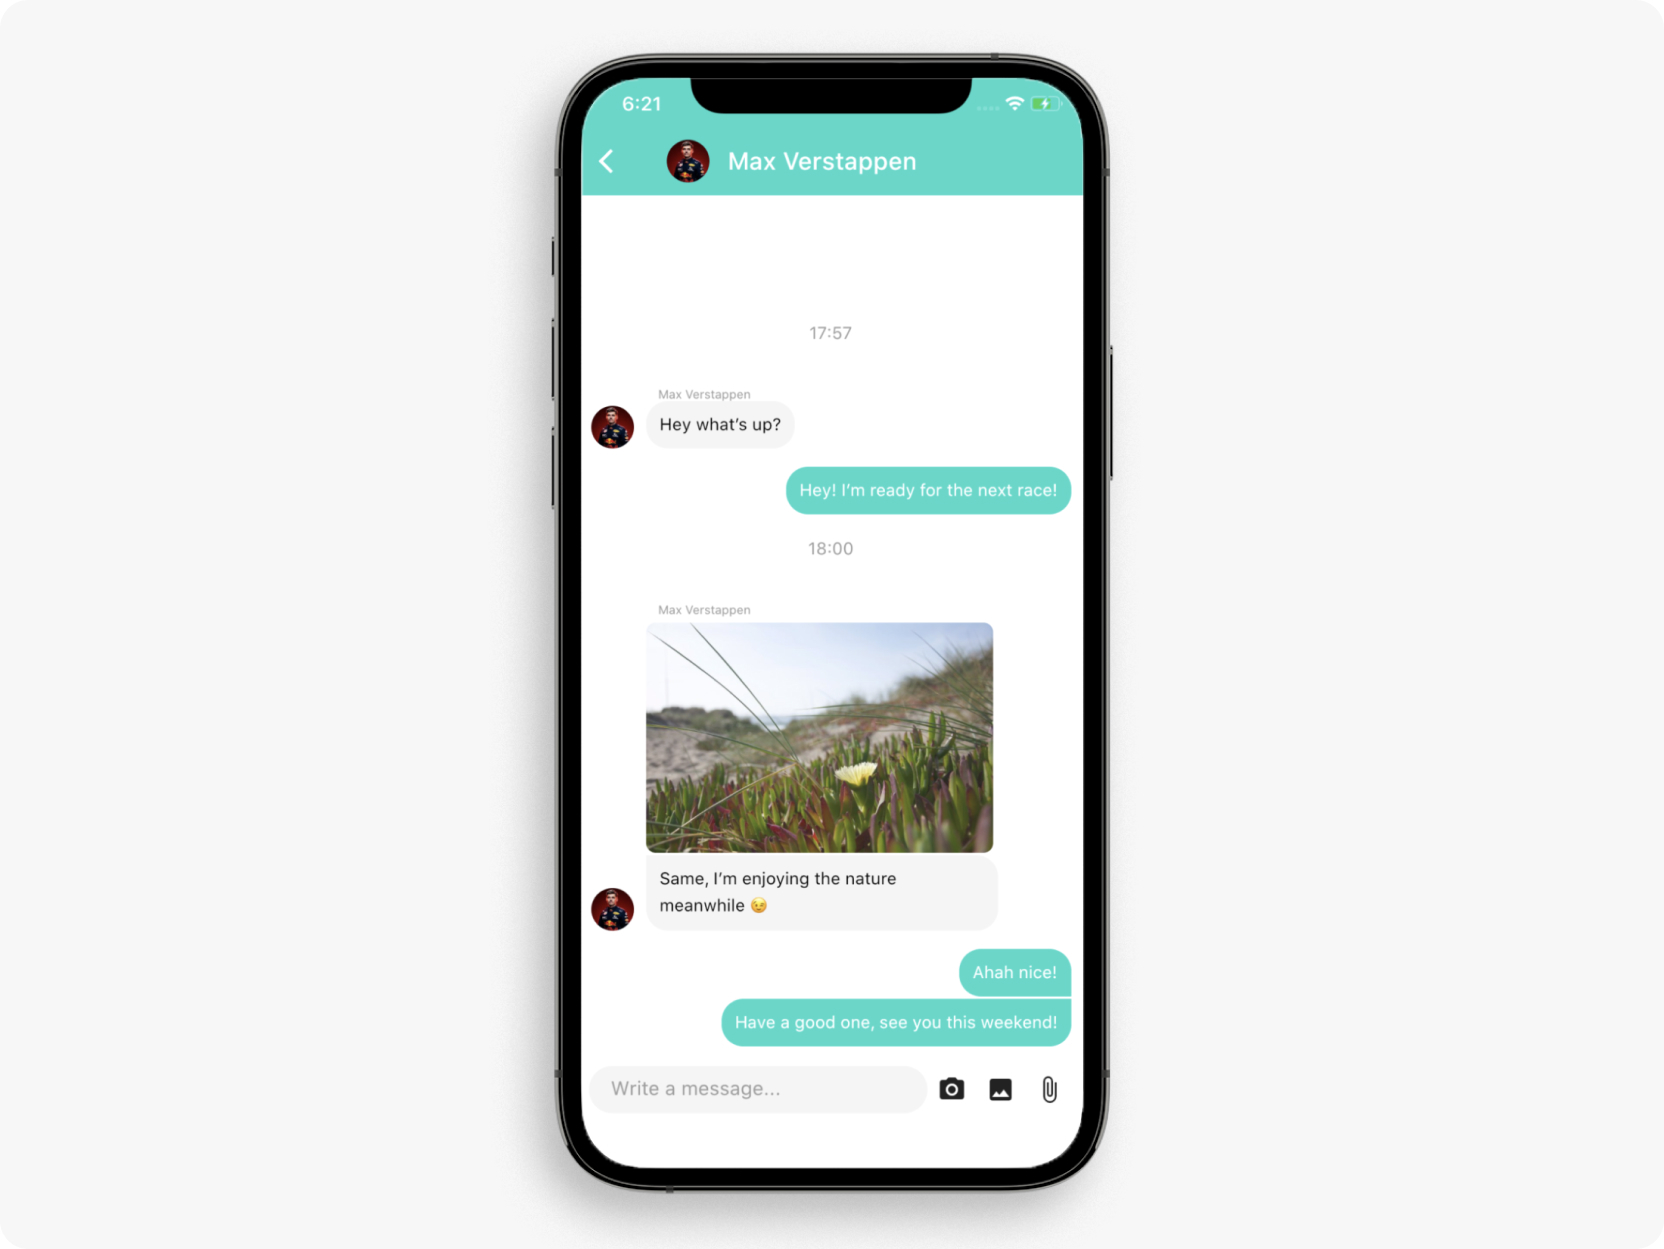
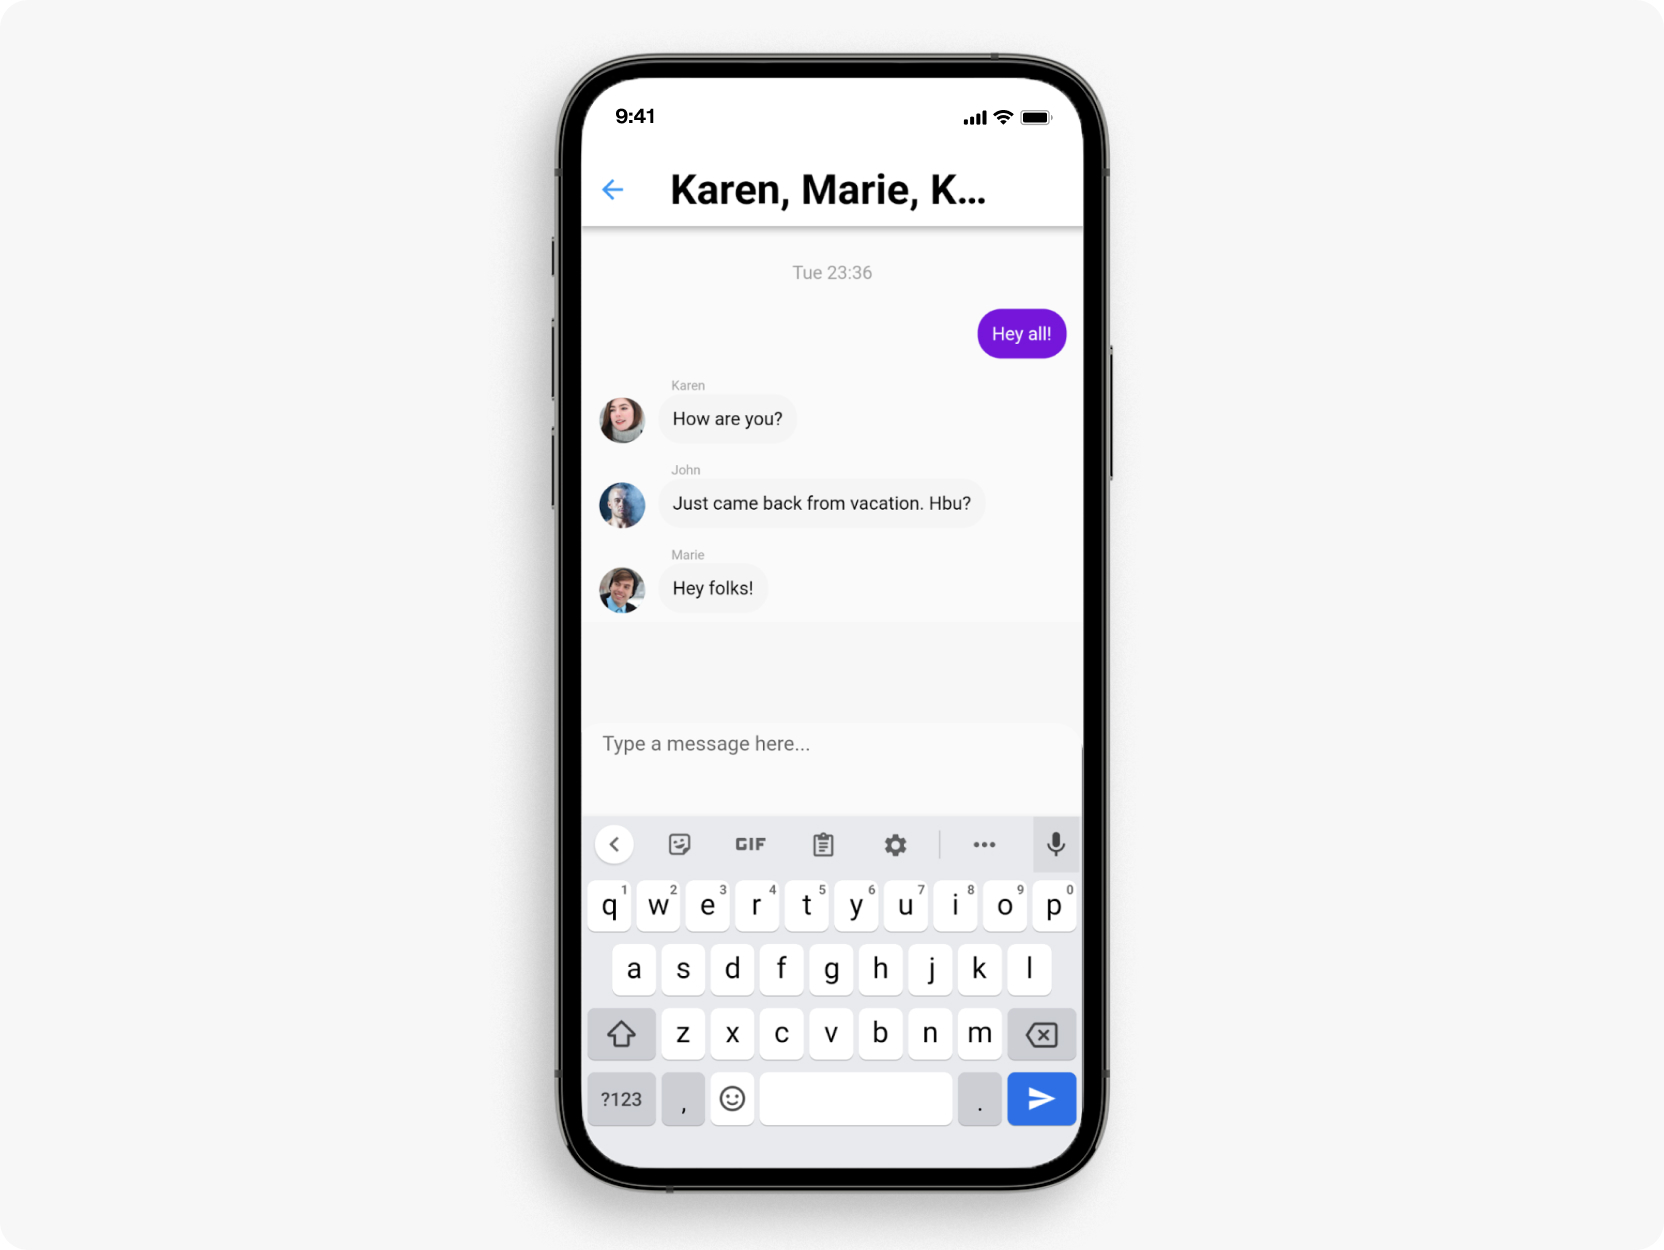
Dashchat is a popular chat UI library that provides a standard interface for conversations between two or more individuals. Dashchat’s plugin includes profile image avatars, numerous interface triggers, the ability to customize colors, and message rendering.
Here’s what a typical chat conversation’s UI looks like when using Dashchat:
Prerequisites to build a Flutter chat app
A free Sendbird account
Working knowledge of Flutter
Some familiarity with Firebase
(Recommended) Some familiarity with how push notifications work
Building your Flutter chat app with Firebase
Now that we’ve covered the basics, let’s build our Flutter chat app.
To keep things as simple as possible, this tutorial uses Flutter’s default inherited widgets for state management and combines the logic for each view in the same .dart file.
We’re also ignoring a few production best practices (such as not using print), but you should follow all best practices when publishing your app to production.
Now, let’s get straight to coding.
Step 1: Create a new Flutter app
Begin by creating a new Flutter project:
Once your project is ready, add the necessary dependencies. As you know, this tutorial uses the Sendbird Flutter SDK, Dashchat UI, and Firebase to facilitate the exchange of chat messages between people. You can add these dependencies to your Flutter project by adding the following code snippet to your project’s pubspec.yaml file:
If your IDE doesn’t do it for you automatically, sync the dependencies by running:
This installs the following dependencies in your project:
sendbird_sdk: The Sendbird SDK enables you to create chat rooms (or channels) to send and receive messages.dash_chat_2: This UI library is a successor of Dashchat and helps you easily create the UI of a chat room.flutter_local_notifications: This helps display notifications in your app.firebase_messaging: This sends and receives notifications for your chat functionality through Firebase.firebase_core: This package provides the core functionality for Firebase services and is a required dependency for using the firebase_messaging package.
Dependencies such as firebase_core have some special requirements when it comes to target Android SDK versions. Update the minSdkVersion and compileSdkVersion of your Flutter project to the following values in the android/app/build.gradle file:
Step 2: Setup
Create the following four views for the app:
Login: Authenticate and set up a user account
Channels list: Show the list of available channels for the user
New channel: Create a new channel
Group channel: View the channel’s chat and participants
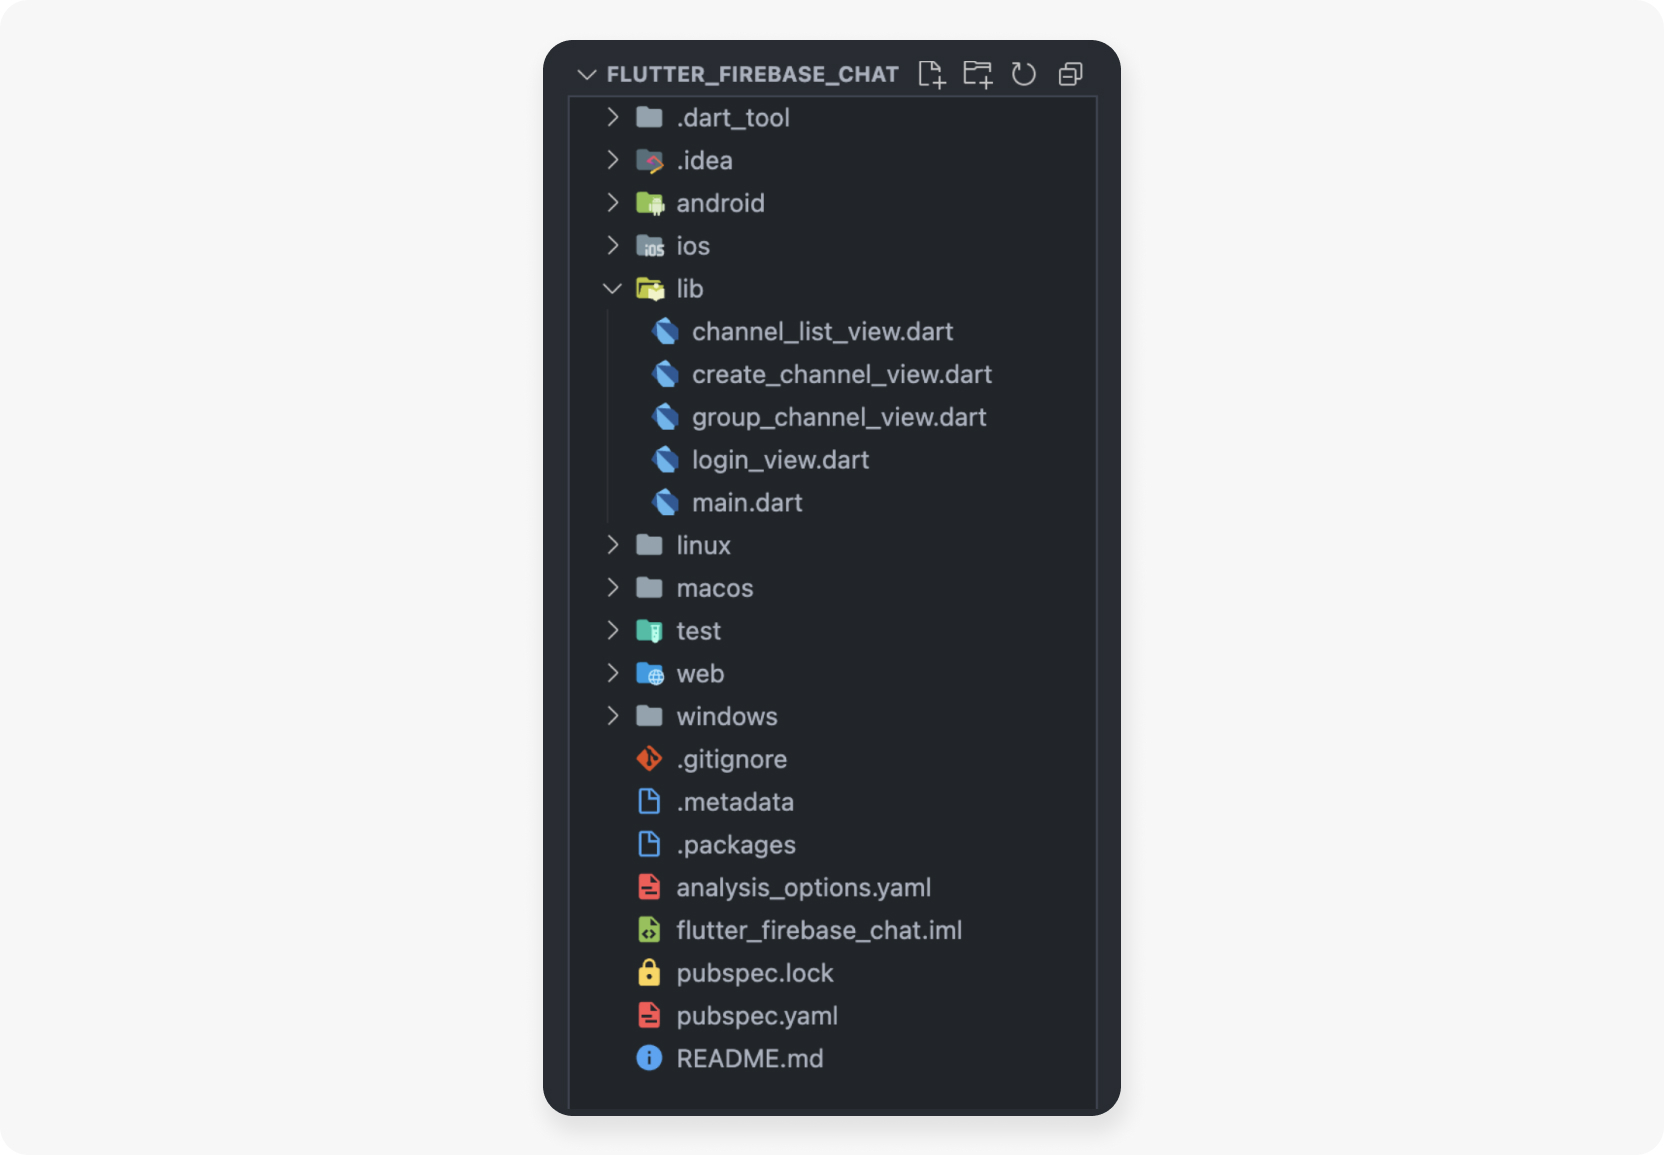
To create these views, you first need to create four new files in the lib directory with the following contents:
Next step is to set up routing between the views. To do that, replace the contents of the lib/main.dart file with the following:
The previous code snippet sets some boilerplate values for the MaterialApp widget and defines the routing structure for the four views you created earlier. Here’s what the folder structure should look at this point:
Step 3: Initialize Sendbird
Import the Sendbird Flutter package with the following line of code:
Once it’s imported, initialize it by passing your Sendbird application ID to the constructor:
Where to find your Sendbird app ID
You can find your Sendbird application ID in your dashboard. Login to your Sendbird account (or create a free account) and select one of your applications.
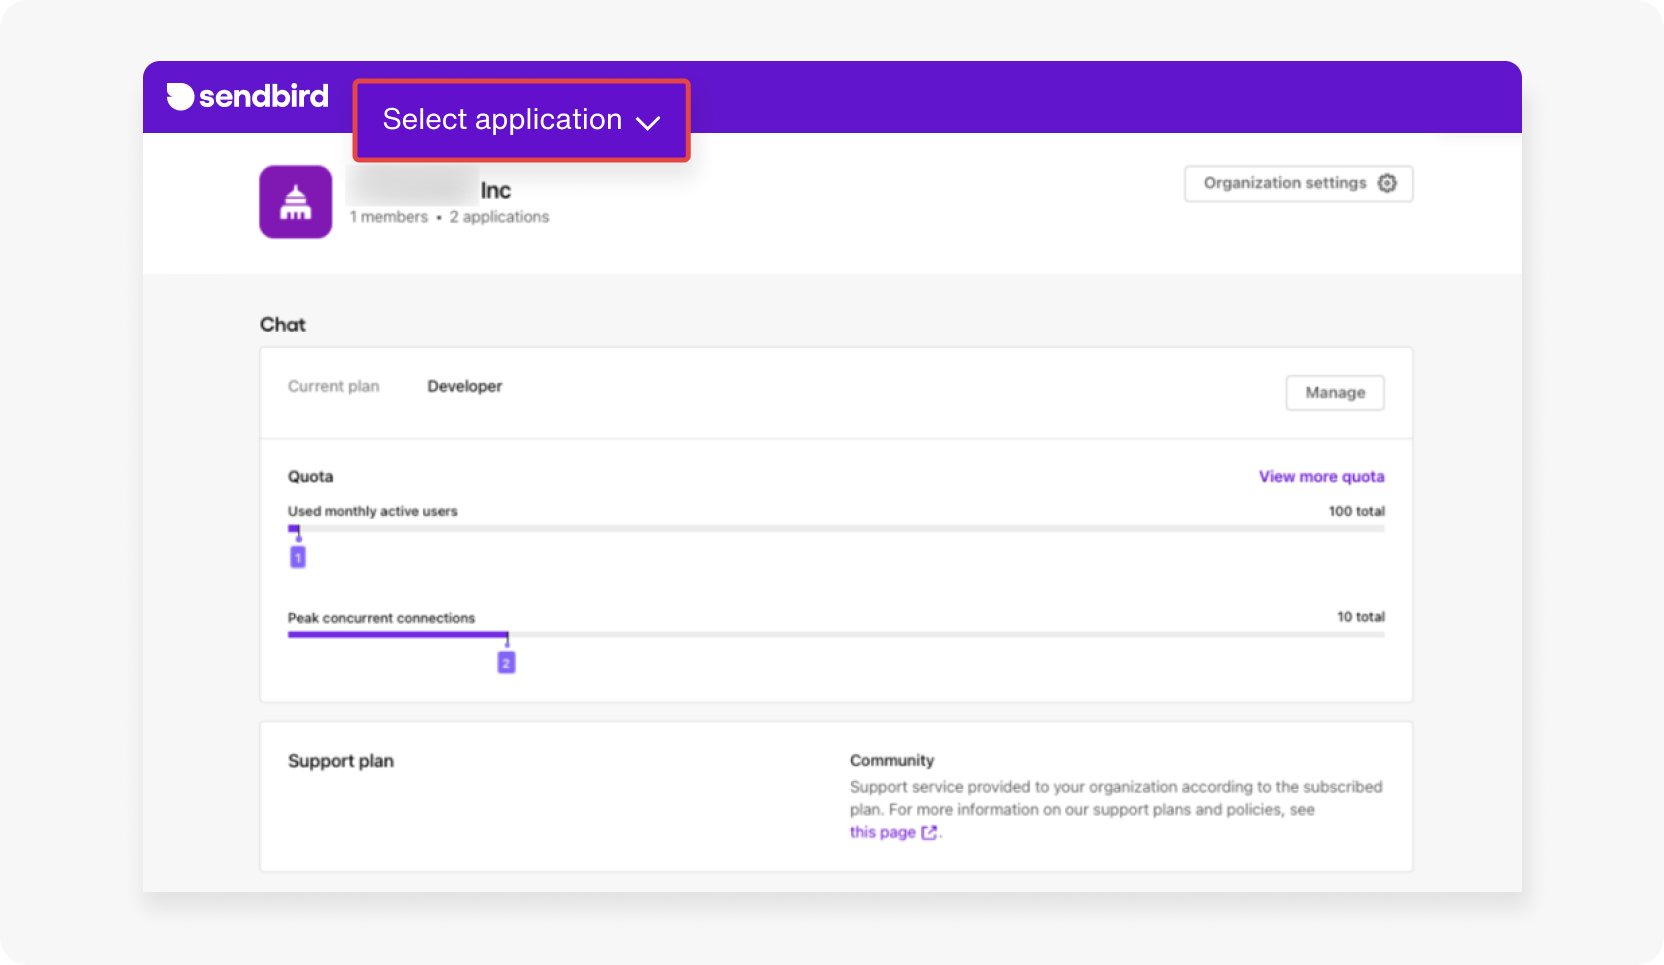
Note: In the process of creating an account, you’ll also create a new Sendbird application.
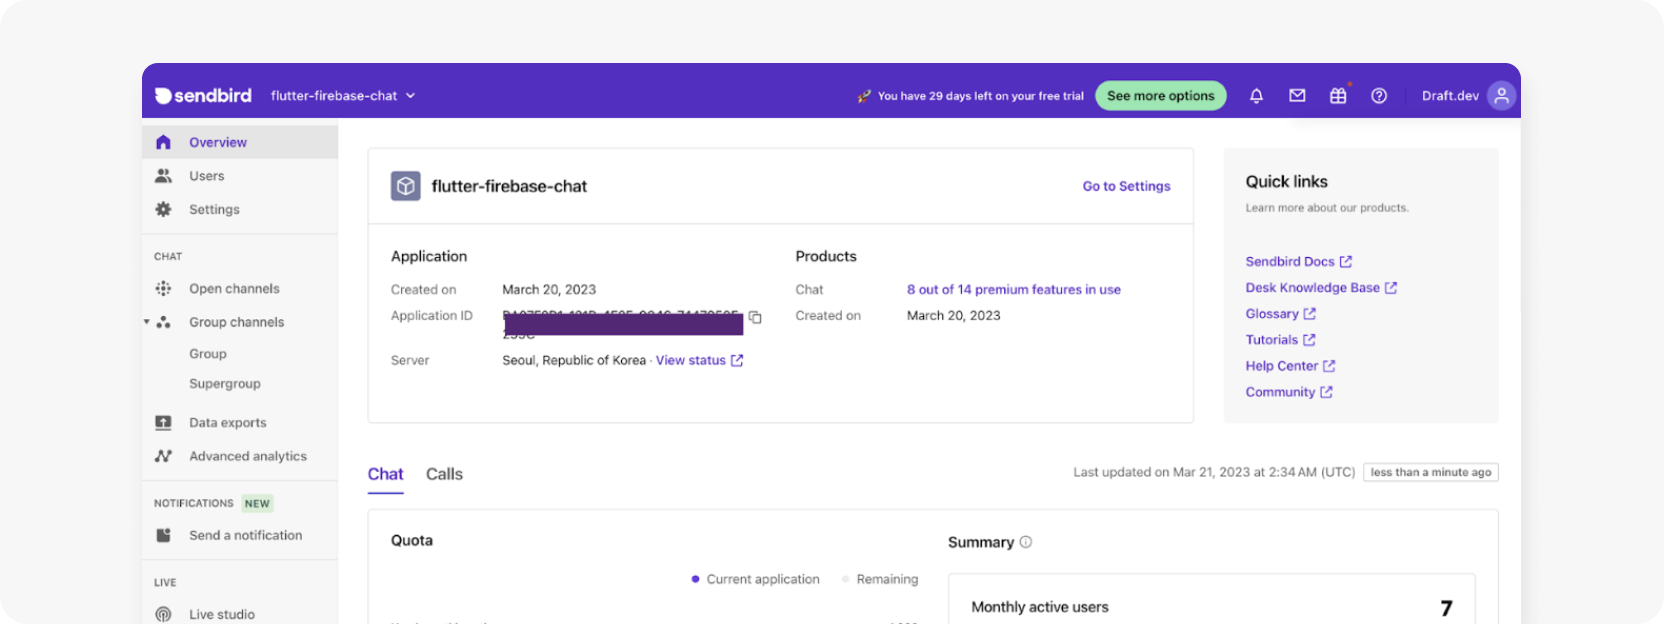
You can access the application ID in your dashboard:
Step 4: Connect to Sendbird
Now let’s set up a login page to connect your client app to Sendbird when authenticating users. Sendbird user IDs can be any unique strings that your app’s authentication system uses. Here’s how you can use them in a Flutter app:
Combine this line with the initialization of the SDK like so:
Add this in the login_view.dart file, and it pushes the channel_list_view.dart file when login is successful.
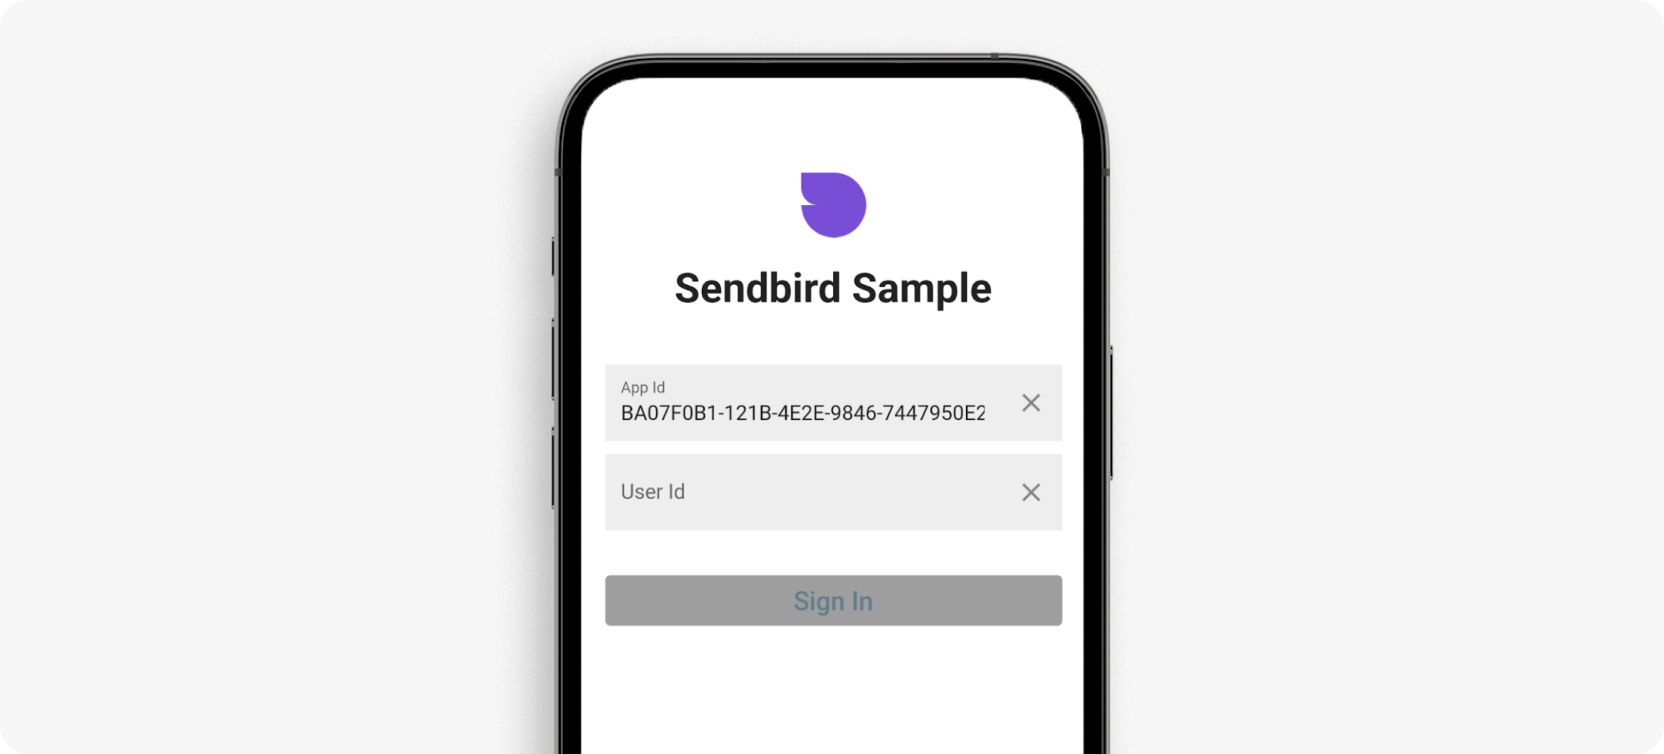
To help keep things simple, you can copy the complete contents of the login_view.dart file into your app and update the Sendbird application ID on line 12. Here’s what that looks like:
The code that you just pasted provides you with the following:
A
TextFieldfor entering a Sendbird application ID (you’ve already updated the value of the application ID in code).A
TextFieldfor manually entering a Sendbird user ID (you need to manually create users in the Sendbird dashboard for this tutorial. You can learn how to do that in this video.)A sign-in button to kick off the initialization and connection functions.
At this point, try running your app using the following command:
This is how the app should look now:
Troubleshooting
If your app doesn’t work the first time you start it up, there are a few tricks you can try.
Missing assets
Is there a red box with a cross inside it above the title of the page?
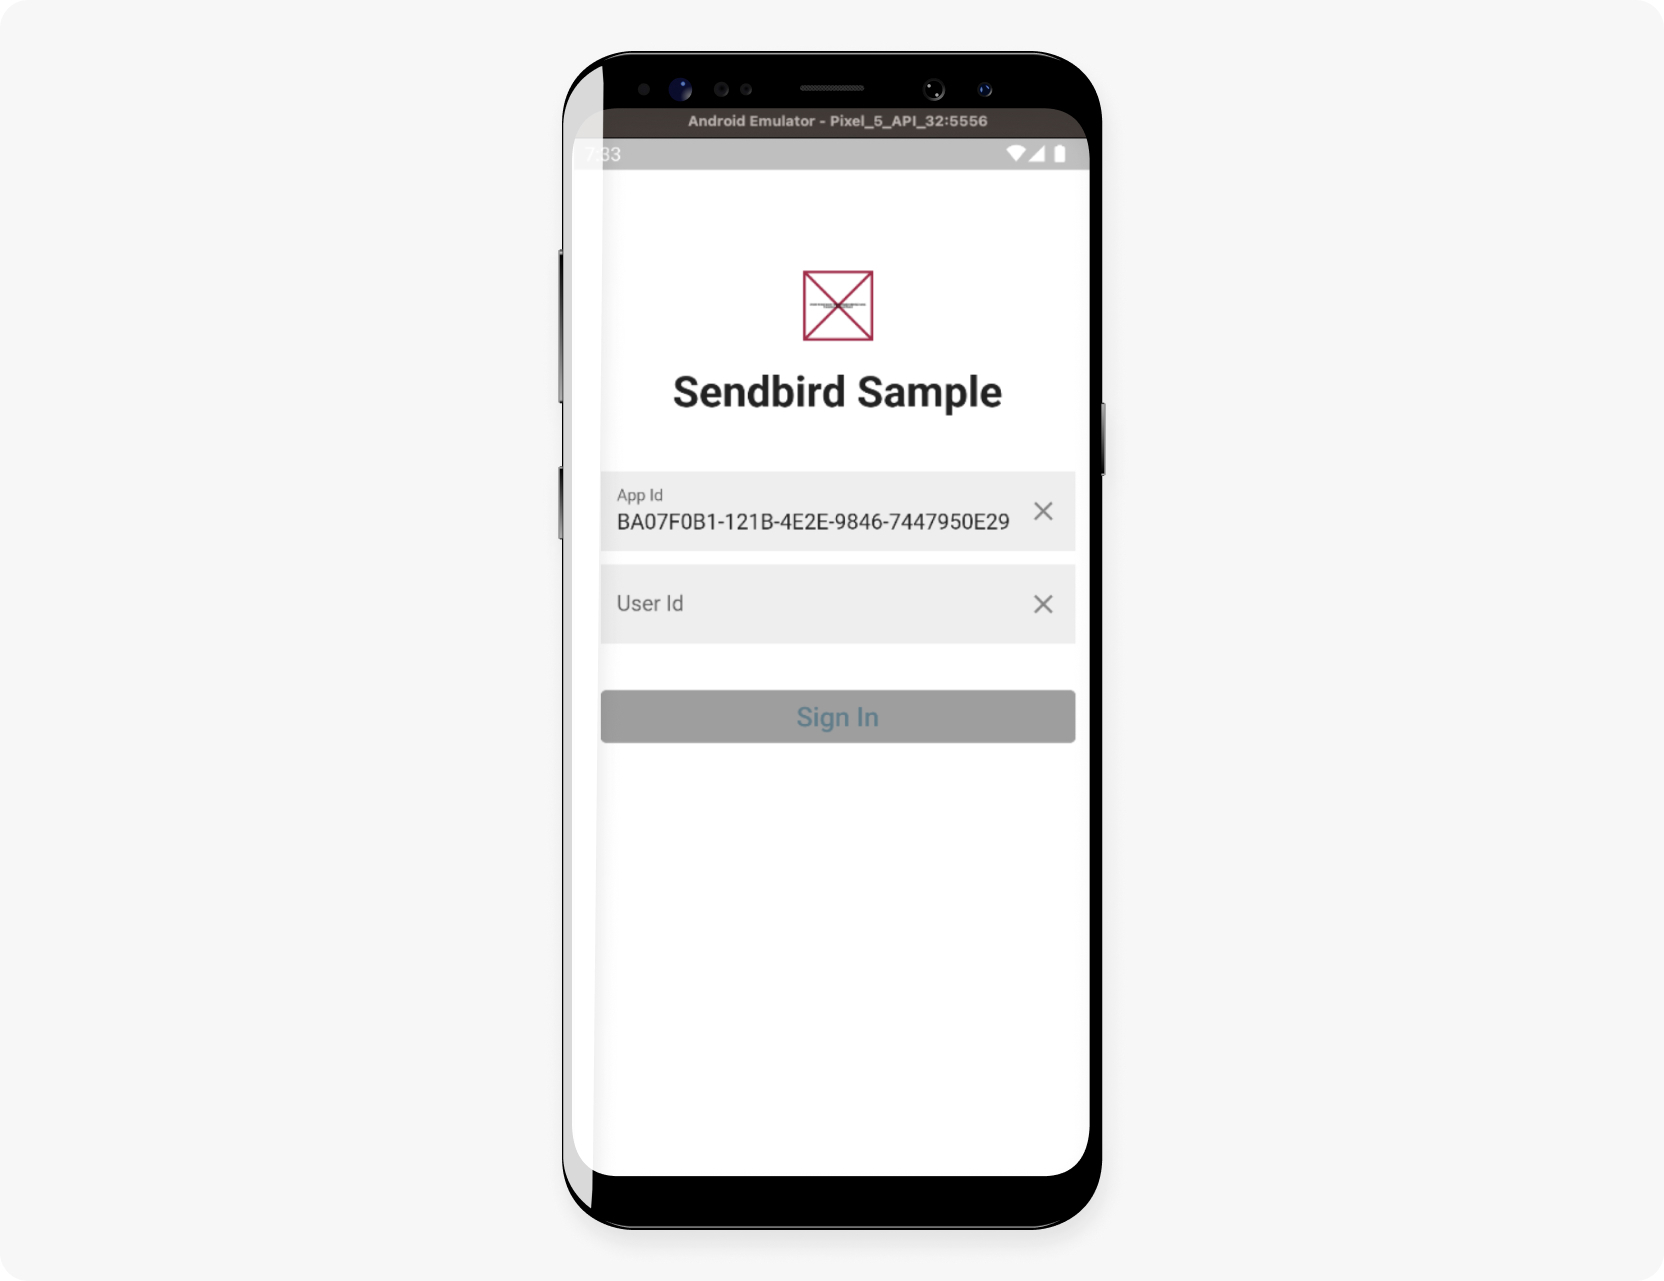
This means you don’t have the image assets to render the logo. Add the following assets folder to your project’s root directory and add the following code snippet to your pubpsec.yaml to load the assets correctly:
App not running on Android
If the app doesn’t run on an Android device or emulator, you can try the following:
Ensure that the
minSdkVersion,compileSdkVersion, and thetargetSdkVersionare set correctly. Many dependencies have certain requirements around setting the values of these attributes in Android, and they won’t run until you make this change. However, remember that changing these values also restricts your app from being installed on older devices. If you’re targeting a specific Android SDK with your app and a dependency requires these values to be set higher, you might want to consider swapping that dependency for an equivalent one that works for lower versions.Check that everything is correctly installed—Android Studio, Android SDKs, CLI tools, etc. Incomplete installation can often result in unexplained errors that are difficult to troubleshoot.
Check if the adb server can view and access your device. If not, restart the adb service. Without an active emulator (or physical device), Flutter can’t run your app.
If the build fails with the error The number of method references in a .dex file cannot exceed 64K, you can resolve it using the Flutter CLI. At the end of the failure message, a prompt asks, Do you want to continue with adding multidex support for Android? [y|n]:. Type y and Flutter adds multidex support and fixes the failure for you.
App not running on iOS
If you’re having problems running the app on iOS, try the following:
Check that CocoaPods is configured correctly. You might need to run
sudo gem install cocoapodsto set it up. CocoaPods is necessary for running and debugging iOS apps.Try doing a
pod updateand apod installfrom within theios/folder. Sometimes outdated pods can cause errors that are difficult to understand.Make sure that you haven’t changed any build phases, rules, or settings in Xcode, as it may cause issues. While this may seem odd since you’re not developing in the Xcode IDE, Xcode settings and configurations affect overall iOS development done on your local machine.
General troubleshooting tips
Here are a few things that can help when troubleshooting an app that’s not running on any platform:
Run
flutter doctorto run a health check on your Flutter setup. This should highlight almost all possible causes of error.Make sure your network is stable. Disable any VPNs you’re using. VPNs can sometimes restrict the network, causing Flutter to behave unpredictably.
Try closing the terminal window (and the Terminal application itself, if you’re on a Mac) and restarting it.
Once your Sendbird installation is working, you’re ready to move on.
Step 5: Displaying chat channels
With your app set up and a login screen created, it’s time to build the channel list.
Update the channel_list_view.dart file so that it can:
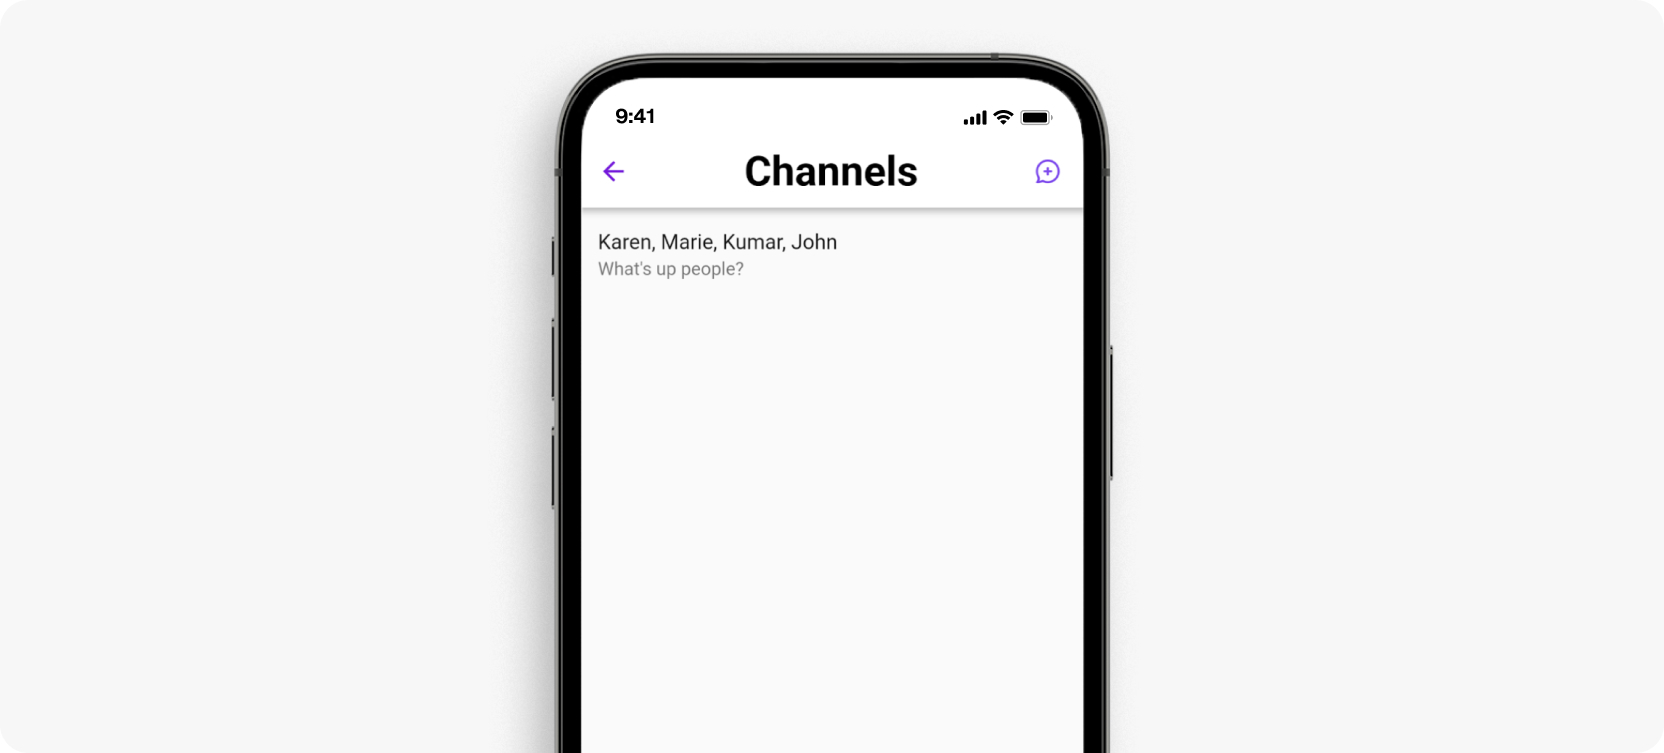
Display a list of all the group channels a user has joined.
Enable the user to navigate to the
create_channel_view.dartscreen.Allow the user to select one of these channels to navigate to the
channel_view.dartscreen.
This is how the screen should look once you’re done:
Set up the class file by following these steps:
Add
import "package:sendbird_sdk/sendbird_sdk.dart".Extend the
viewStatewith theChannelEventHandlermixin.Connect a Sendbird
addChannelEventHandlerin an override of theinitState()function.
The initial file looks like this:
The quickest way to get a list of all the channels the current user is a member of is to use the Sendbird GroupChannelListQuery.
You can wrap this query into an async function like this:
It can be called from a FutureBuilder to build a ListView:
Creating new channels requires selecting users from a list, so later in this tutorial you’ll see how to create another screen to display and handle that. For now, add an appBar with an action to push that view:
You can now update the scaffold stub with the FutureBuilder and appBar widgets you created earlier:
You can find the final code for this file on GitHub.
Step 6: Create a new channel
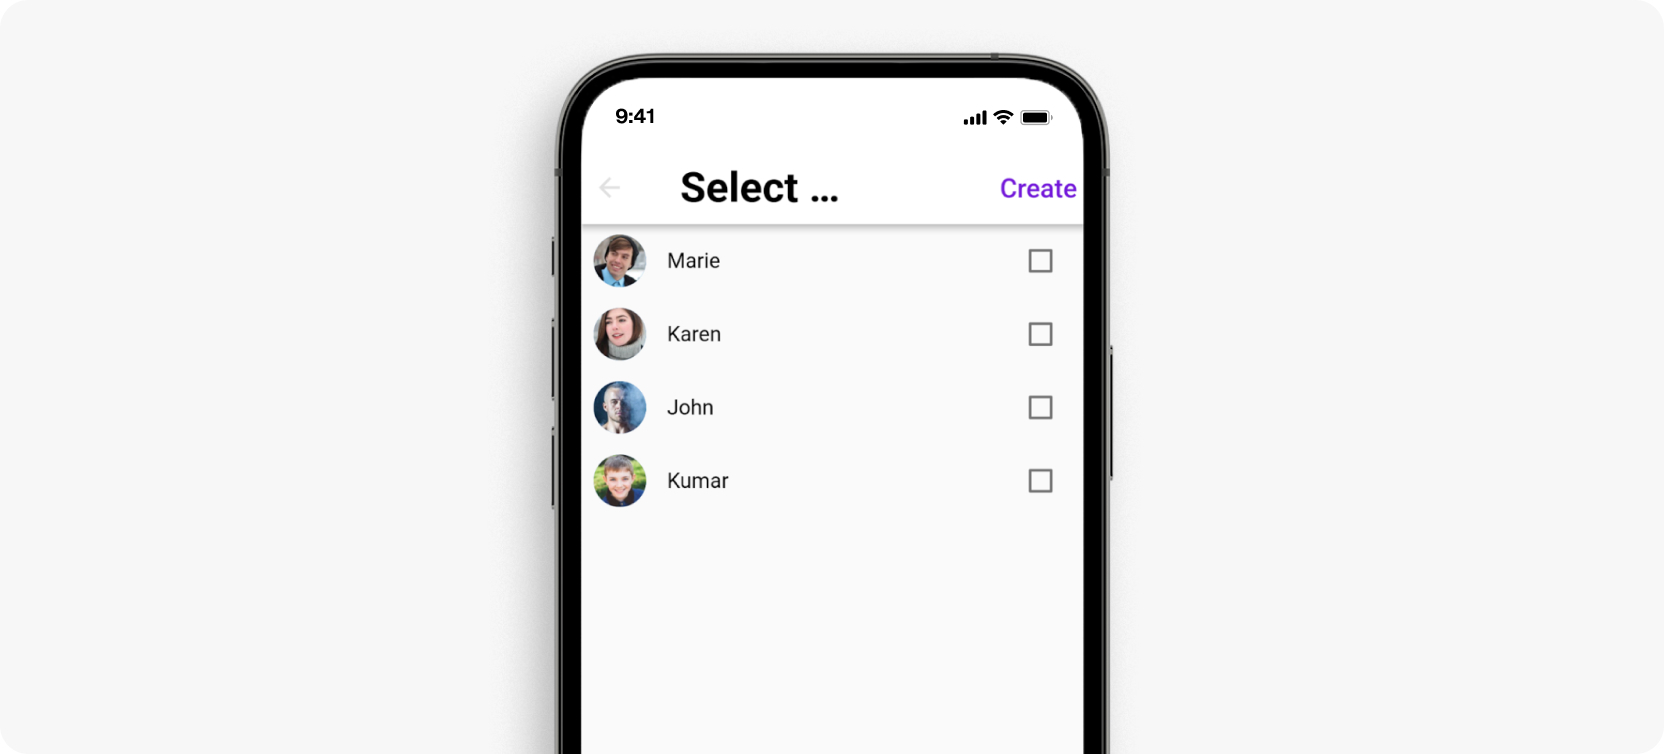
Next, update the create_channel_view.dart file. This allows a user to:
View a list of Sendbird users
Select and deselect users
Create a new group channel with selected users
Once it’s ready (and you’ve added some users to your Sendbird application), this is how it should look:
Start by adding the following properties to the class CreateChannelViewState extends State {} block:
These properties store the list of users that are available to select for a channel, and those users that have been selected for a channel.
To get the list of available users, use the ApplicationUserListQuery() function to return a list of Sendbird users. Call from initState() to pre-populate the list.
Here’s the code for the same:
The screen displays the list of users with a ListView. It uses CheckboxListTiles so users have a visual toggle for adding Sendbird users to the new channel.
To create a new chat channel, use the GroupChannel.createChannel() function by passing in a GroupChannelParams object populated with a list of user ID strings. Put that into its own function that you can later call through an appBar action:
The createChannel method also supports a nullable parameter OnUploadProgressCallback that can be used to check the upload progress of your payload and render a progress bar on the UI.
Add an appBar that triggers this createChannel() function:
Note that this converts the set of _selectedUsers into a list of user IDs with this line:
As before, you can now update the scaffold stub in the build() function:
You can find the complete code for this class on GitHub.
Step 7: Integrate with Dashchat
To integrate the Dashchat UI into your app, you need to update the group_channel_view.dart file. This should enable users to:
Chat between two or more users in real time
Display avatar images if an image has been assigned to a user
At that point, the screen will look like this:
Set up this file with the following steps:
Add
import "package:sendbird_sdk/sendbird_sdk.dart";Add
import "package:dash_chat/dash_chat.dart"Add a
GroupChannelproperty and an initializer to populate that property in a constructorExtend the
viewStatewith theChannelEventHandlermixinConnect a Sendbird
addChannelEventHandlerin an override of theinitState()functionAdd a
List _messages = []property to the_GroupChannelViewStateto store messagesAdd the
onMessageReceived()override function to update the_messagesproperty when a new message is detected
Unpack existing messages from the GroupChannel object passed in by calling the getMessagesByTimestamp() function. This takes two arguments:
Timestamp in an
intform of a unix epochMessageListParamsobject
The MessageListParam object allows you to customize the scope of the messages to return, but you can use the default for now. Once you have the messages, update the _messages property in a convenience function that can be called during the initialization.
The group_channel_view.dart file should now look like this:
To use the Dashchat widget, the current Sendbird user and Sendbird messages need to be converted to a Dashchat user and Dashchat messages. You can do that by including these convenience functions:
Now you can create a Dashchat widget:
Notice that in the onSend DashChat property, Sendbird’s GroupChannel sendUserMessageWithText() function is being called to actually deliver the message.
You can now replace the scaffold stub with a default appBar that displays the names of all the channel members:
Note that you can find the complete code for this file on GitHub.
By now, you should have a stable chat application that allows you to create channels and chat with people.
Step 8: Add push notifications using Firebase
Now let’s add push notifications to your Flutter chat app. A quick heads-up: this is a very detailed part of this tutorial. For even more guidance regarding Firebase push notifications, please check out Flutter’s documentation on local_notification. If you need ideas on what push notifications should look like, this blog has some great examples.
If you’re ready to dive in, here’s a quick overview of what you’re going to do:
Create a new Firebase project to use Firebase Cloud Messaging (FCM) in your Flutter application
Set up the FCM details in the Sendbird dashboard
Update your Flutter project to include the FCM dependencies and config files in the Android module
Create a new model and service to handle local notifications
Set up the notification channel and other boilerplate code to handle incoming notifications
Update the
connectmethod in the login page to upload the FCM token for signed-in users and enable Sendbird to send them push notifications via FCM
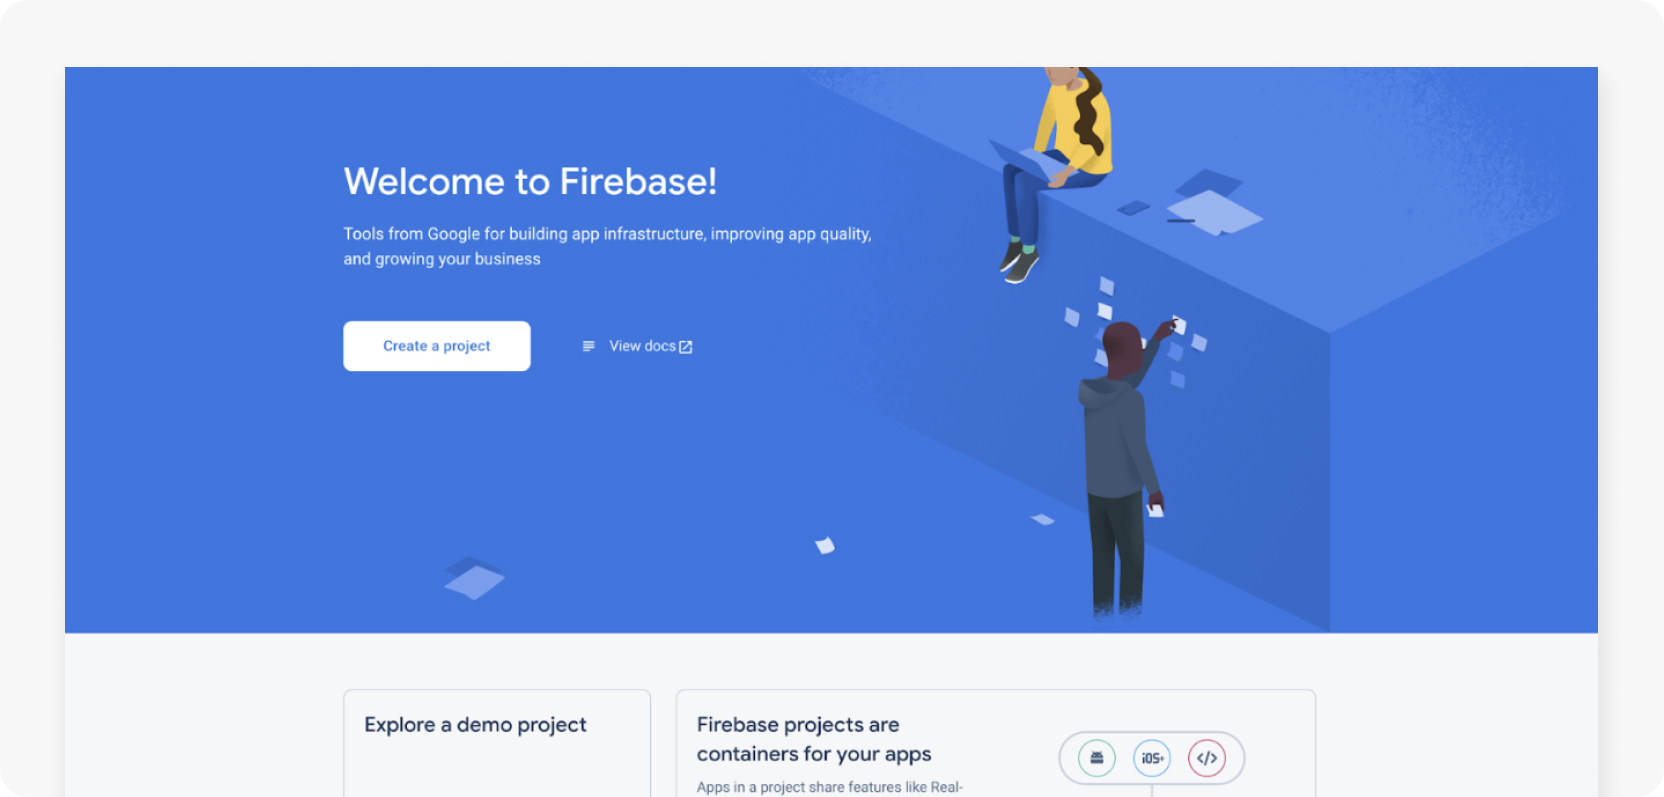
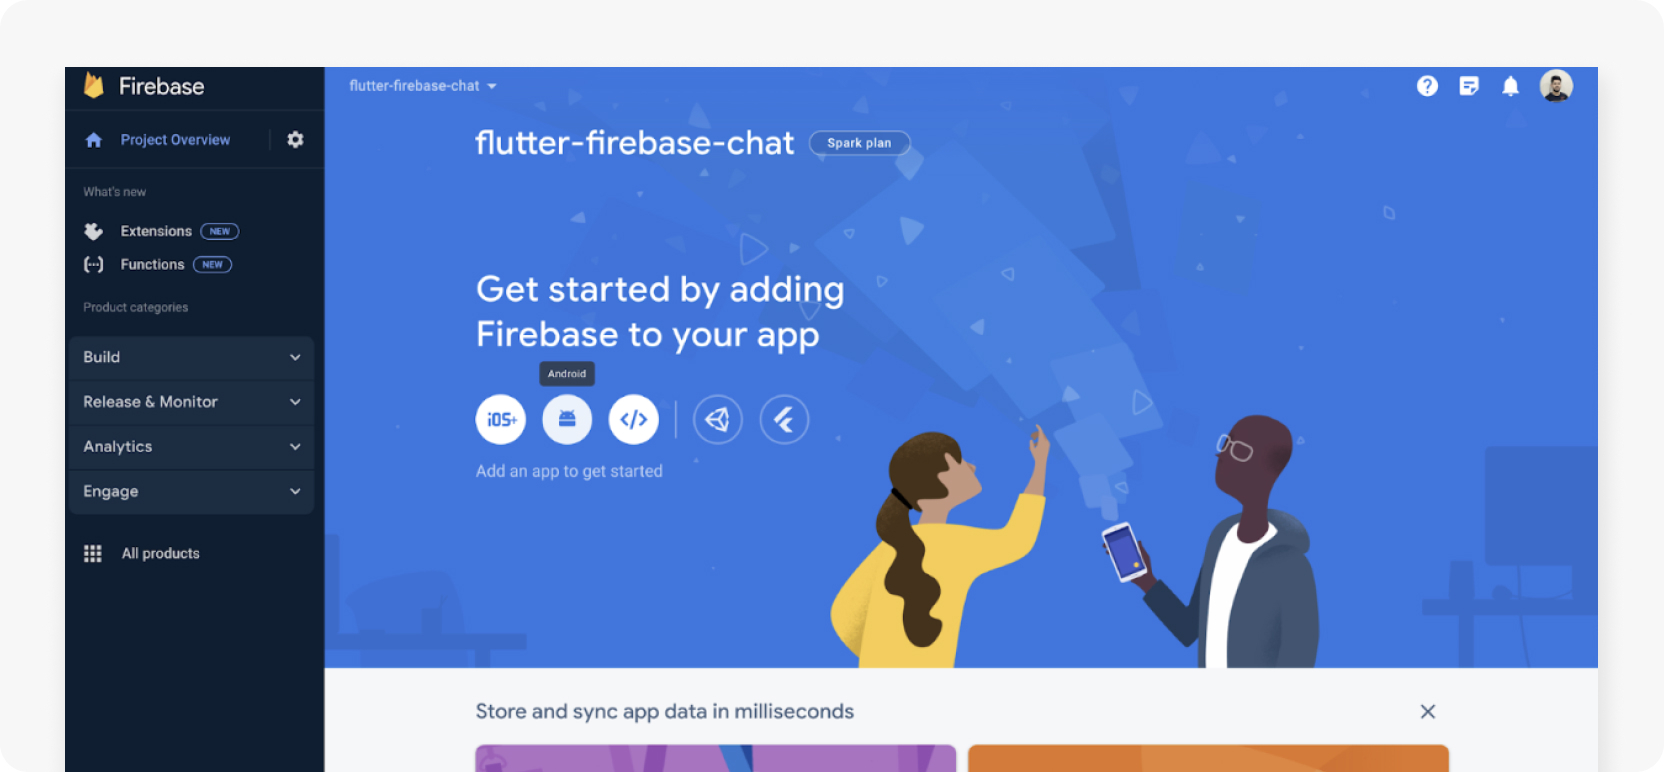
To set up the Firebase project for your app, go to the Firebase Console and click Create a project.
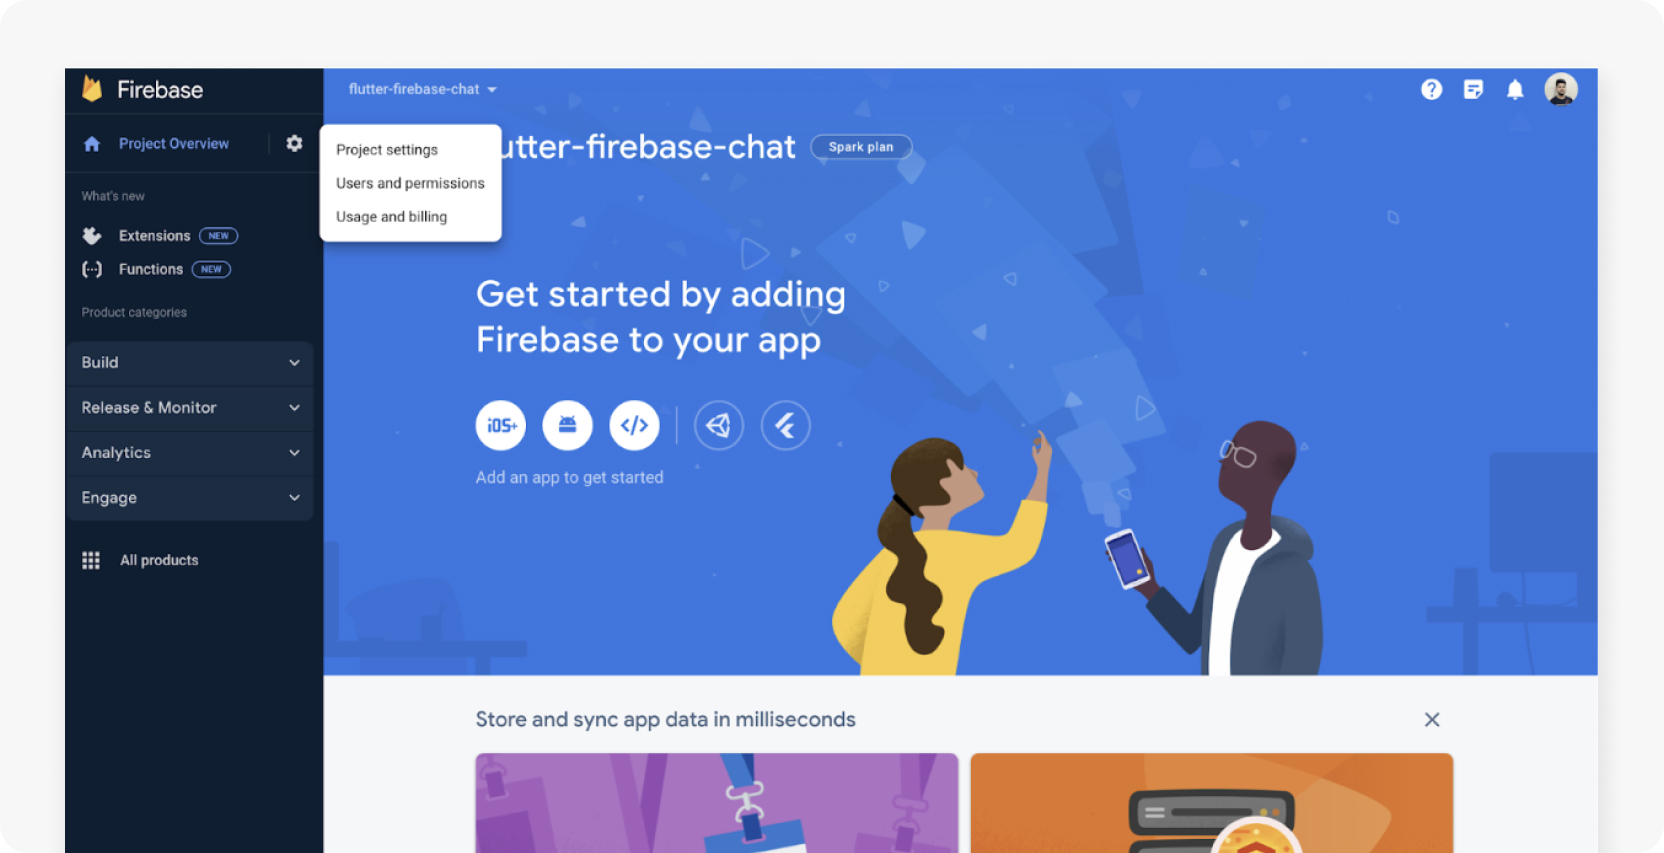
Once the project is created, click the cogwheel icon next to Project Overview and select Project Settings.
In the Project Settings page, select the Cloud Messaging tab and click the three dots next to Cloud Messaging API (Legacy). Click the Manage API in Google Cloud Console link to enable the legacy FCM API from the Google Cloud Console.
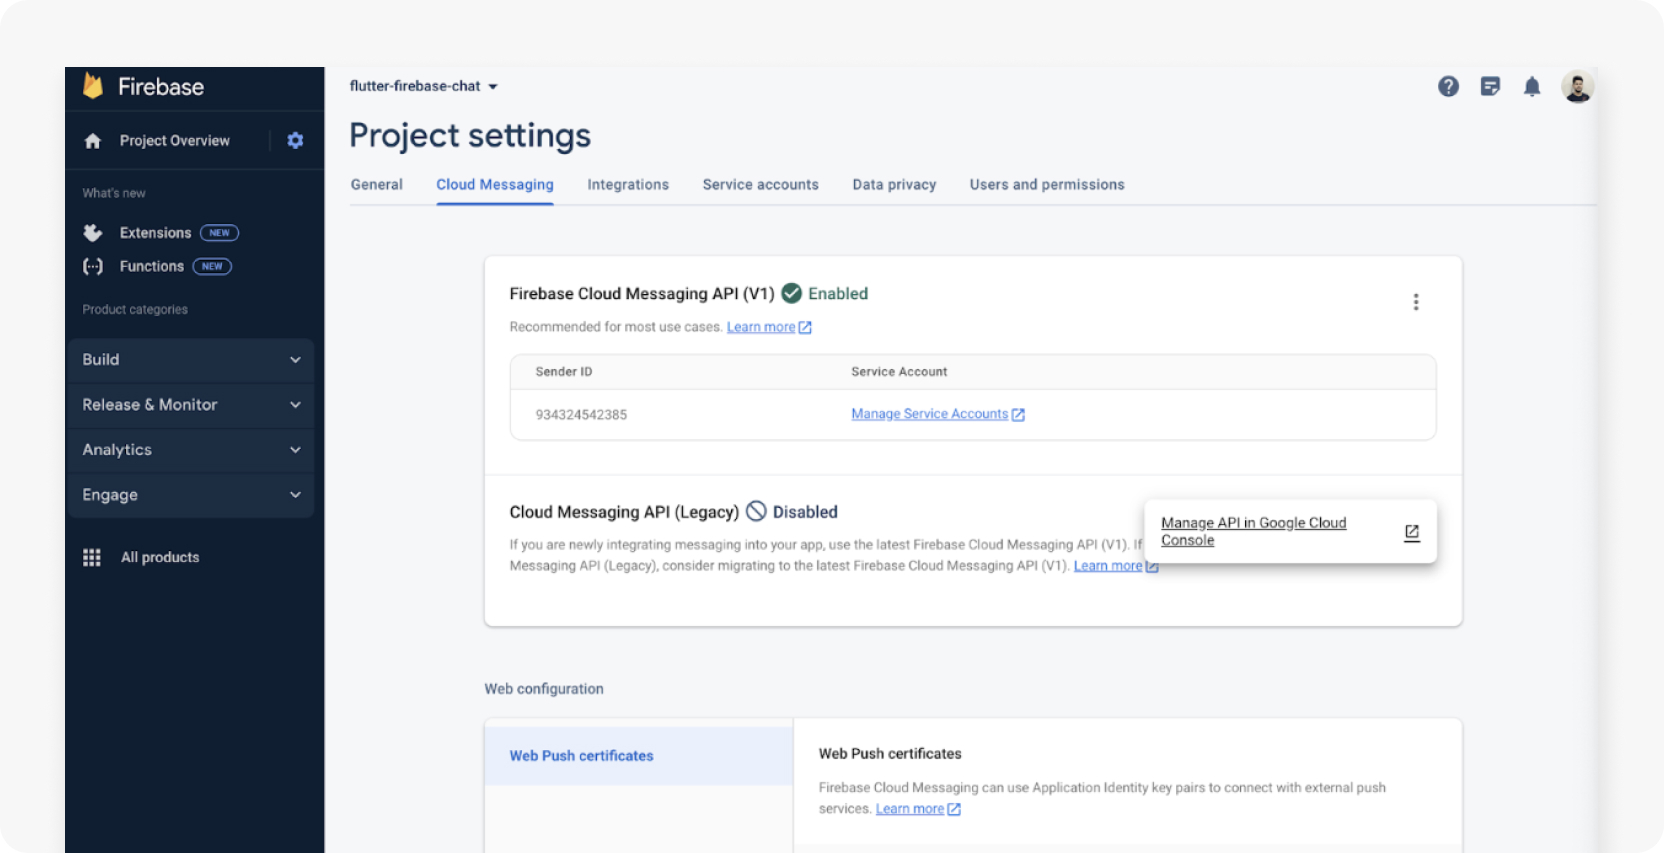
In the Google Cloud Console, click Enable to enable the legacy API.
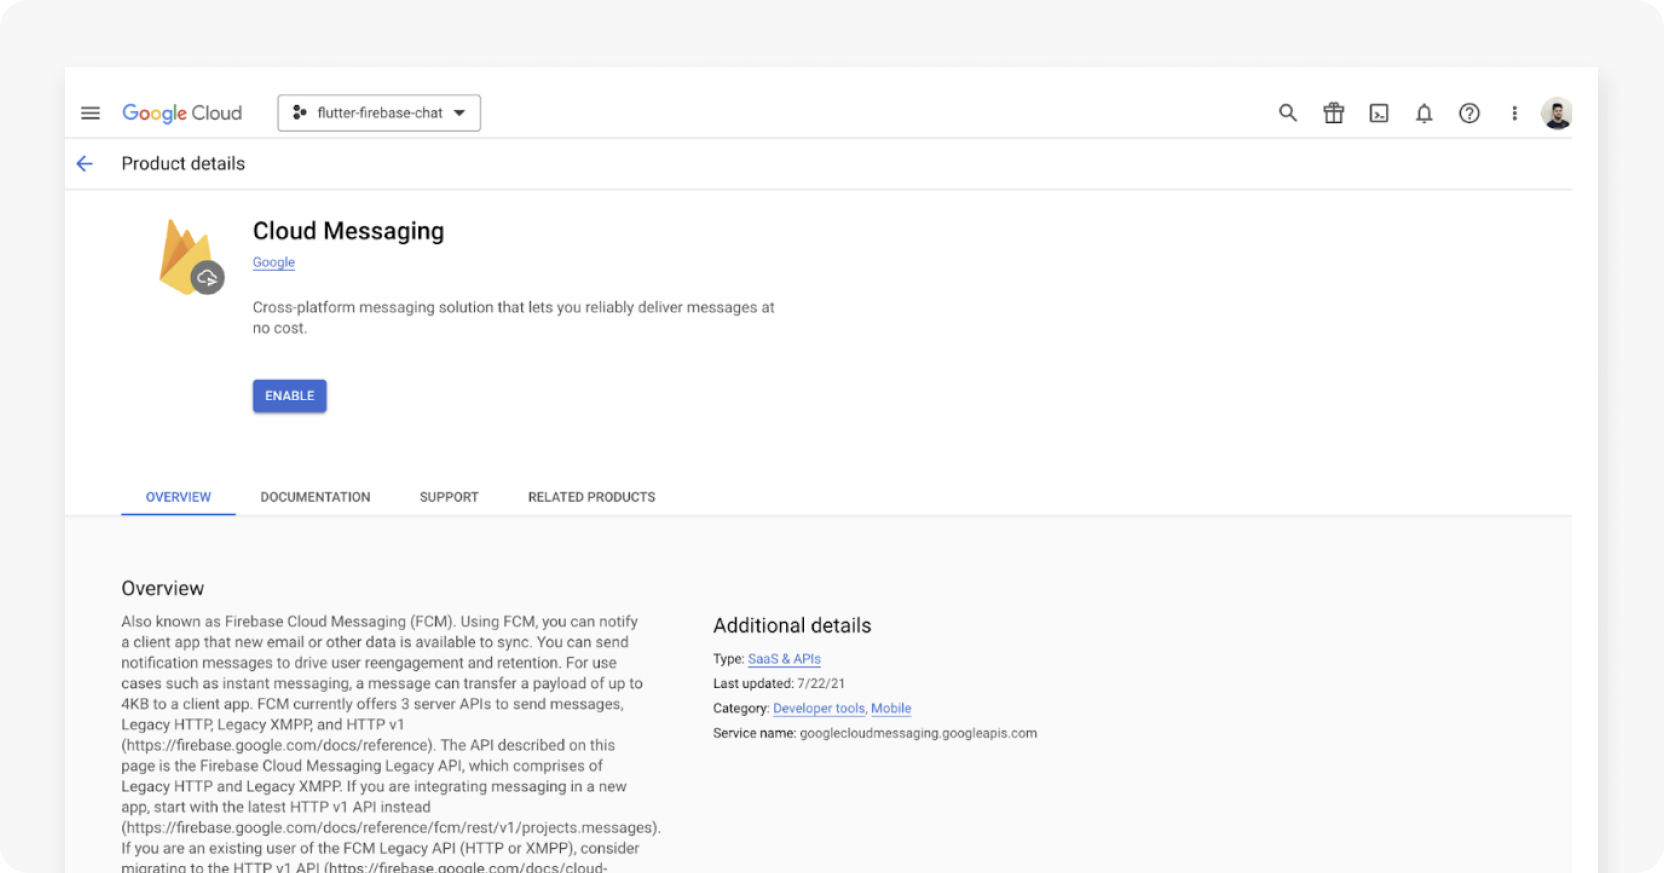
Refresh the FCM API page in the Firebase Console settings, and you’ll see that a server key has been created for you in the Cloud Messaging API (Legacy) section.
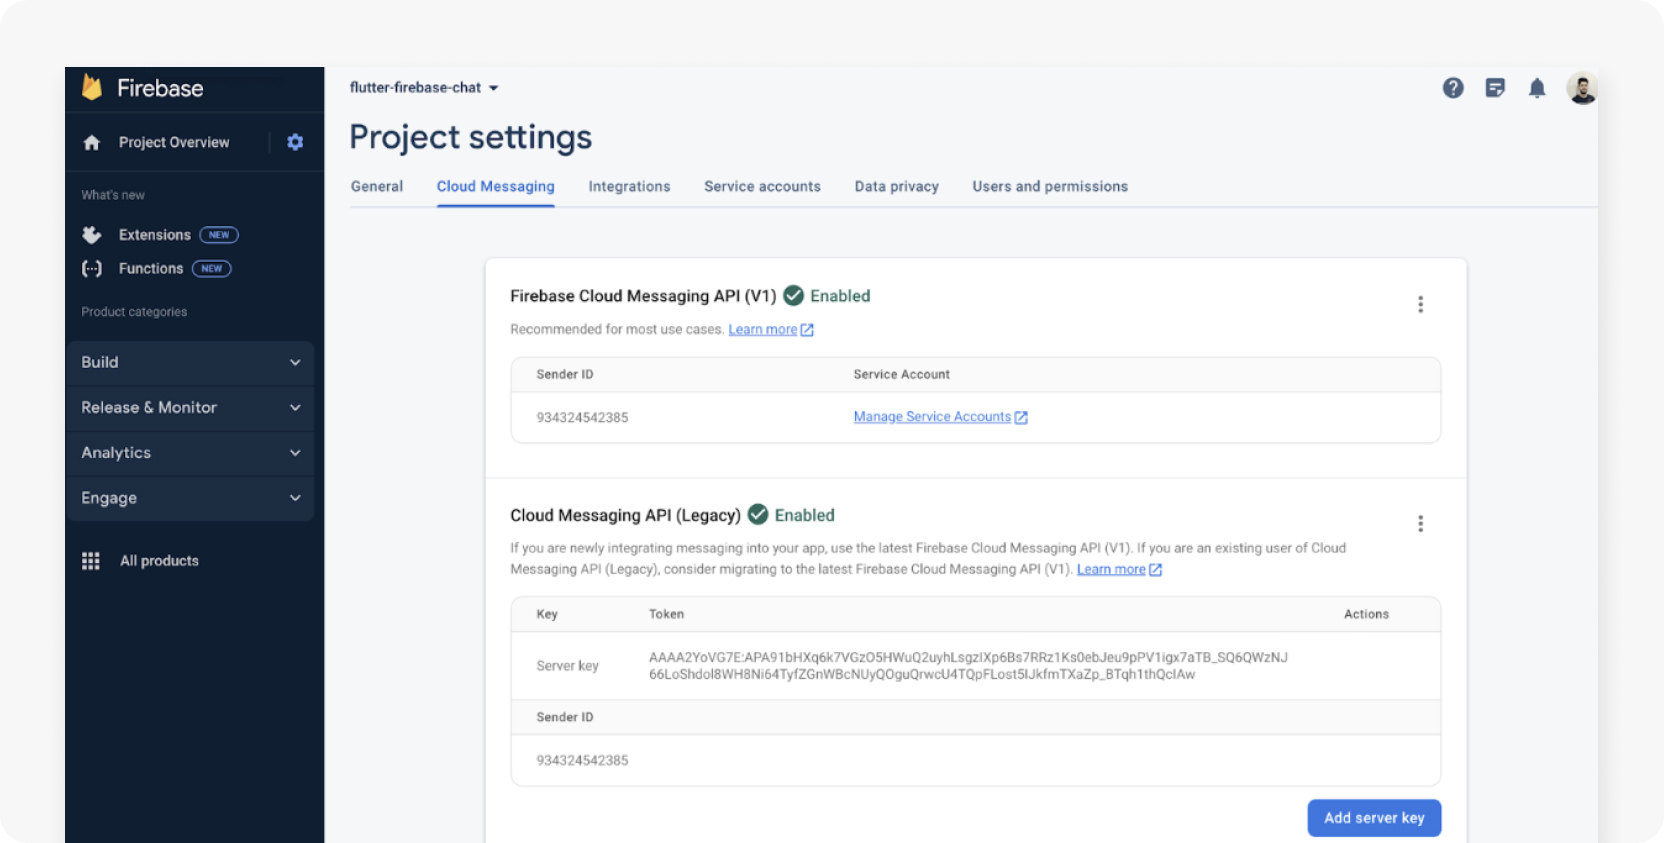
Copy this key—you’ll need to add it to your Sendbird project to allow Sendbird to use FCM to manage push notifications.
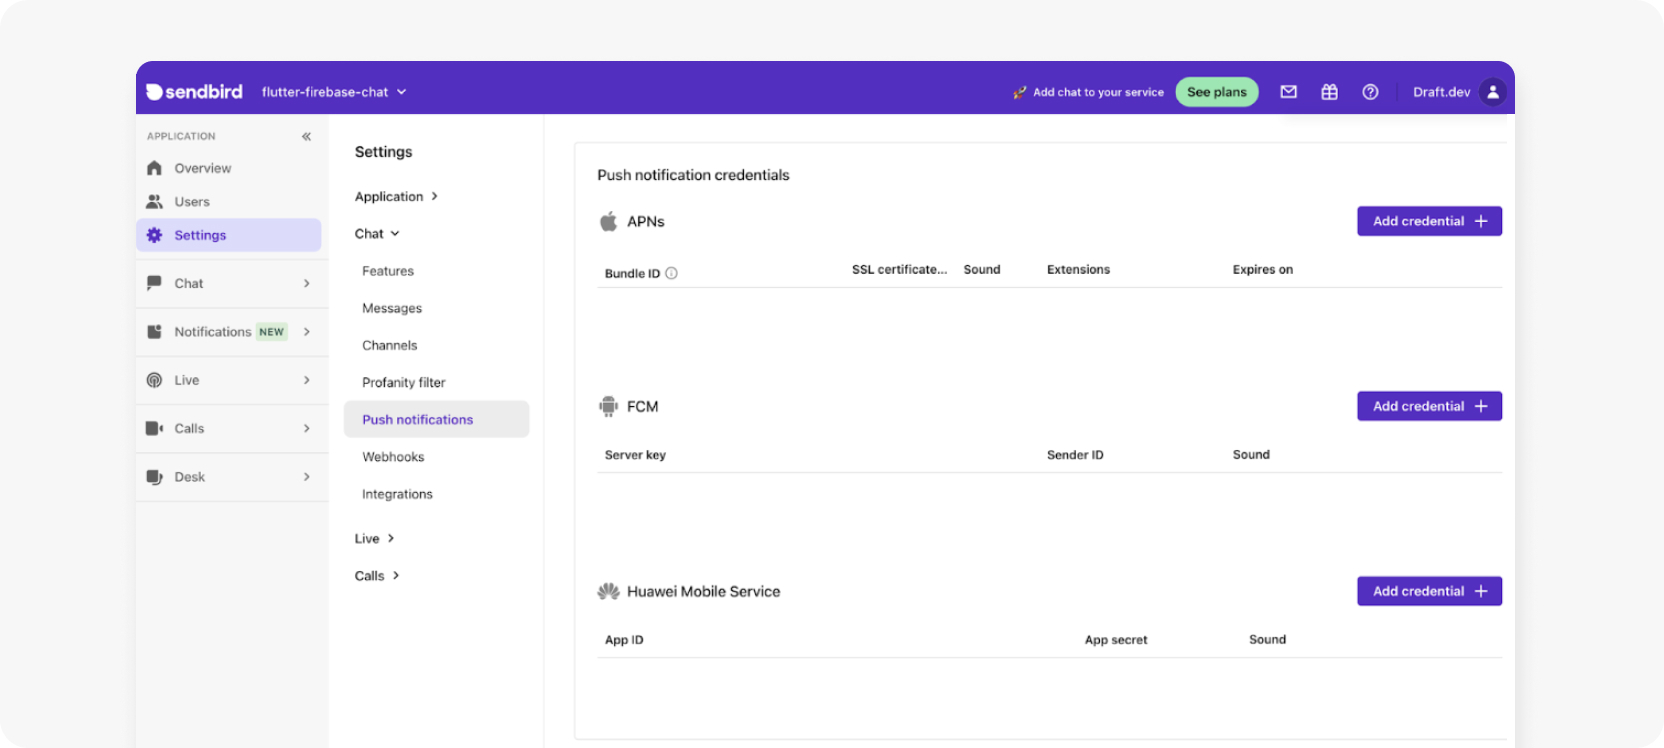
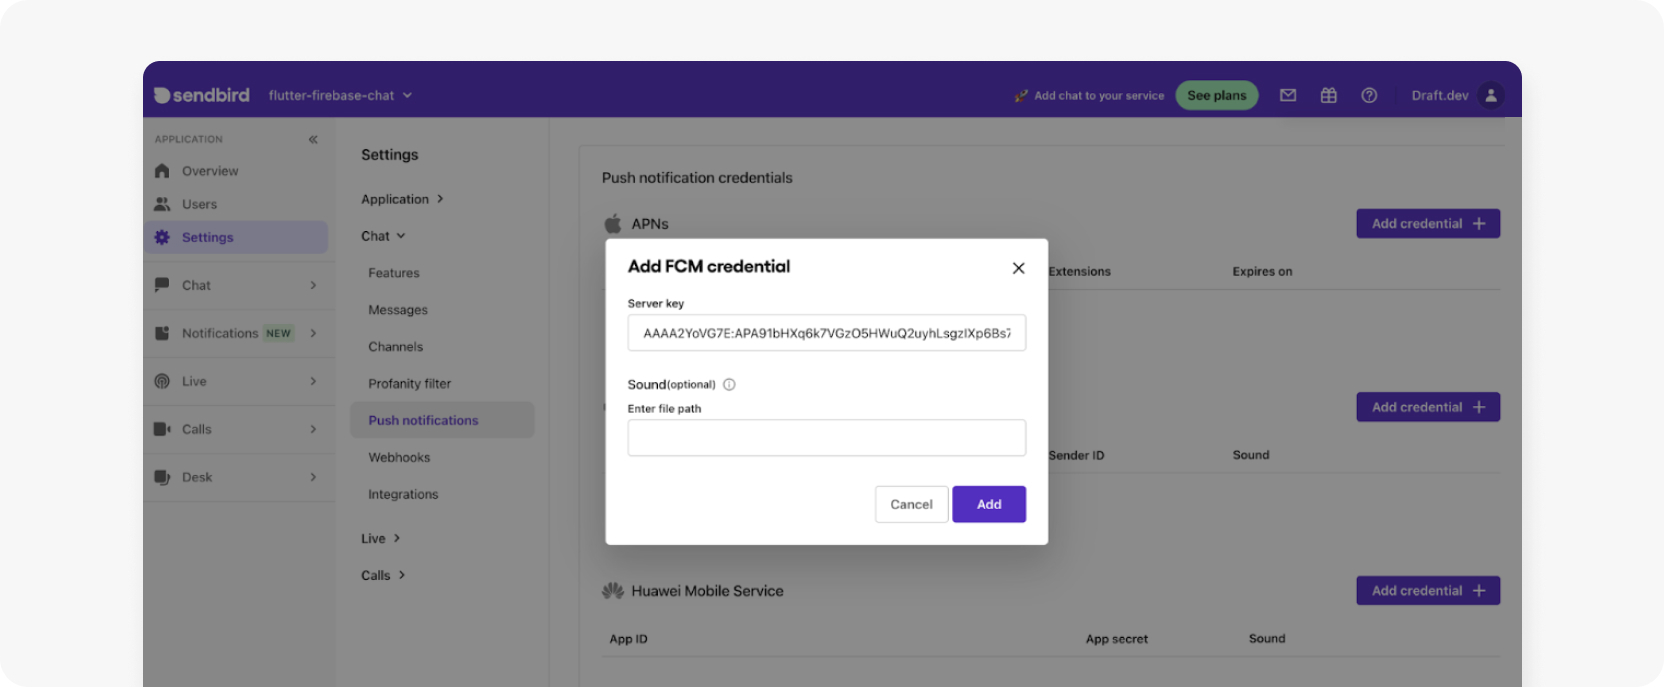
Head over to your Sendbird dashboard, choose your app, then navigate to Settings > Chat > Push notifications. Click Add Credential + in the FCM section on this page to add the FCM server key.
In the dialog that opens, paste the server key and click Add.
This completes the setup of the new Firebase project in the cloud and integration with your Sendbird project.
Next, you need to add the FCM dependencies and config files in your Flutter project to enable your app to interact with FCM. So go back to your Firebase Console and click the Android icon under Get started by adding Firebase to your app.
On the next screen, set the package name as com.example.flutter_firebase_chat (or any other name that you have chosen while setting up the project) and click Register app.
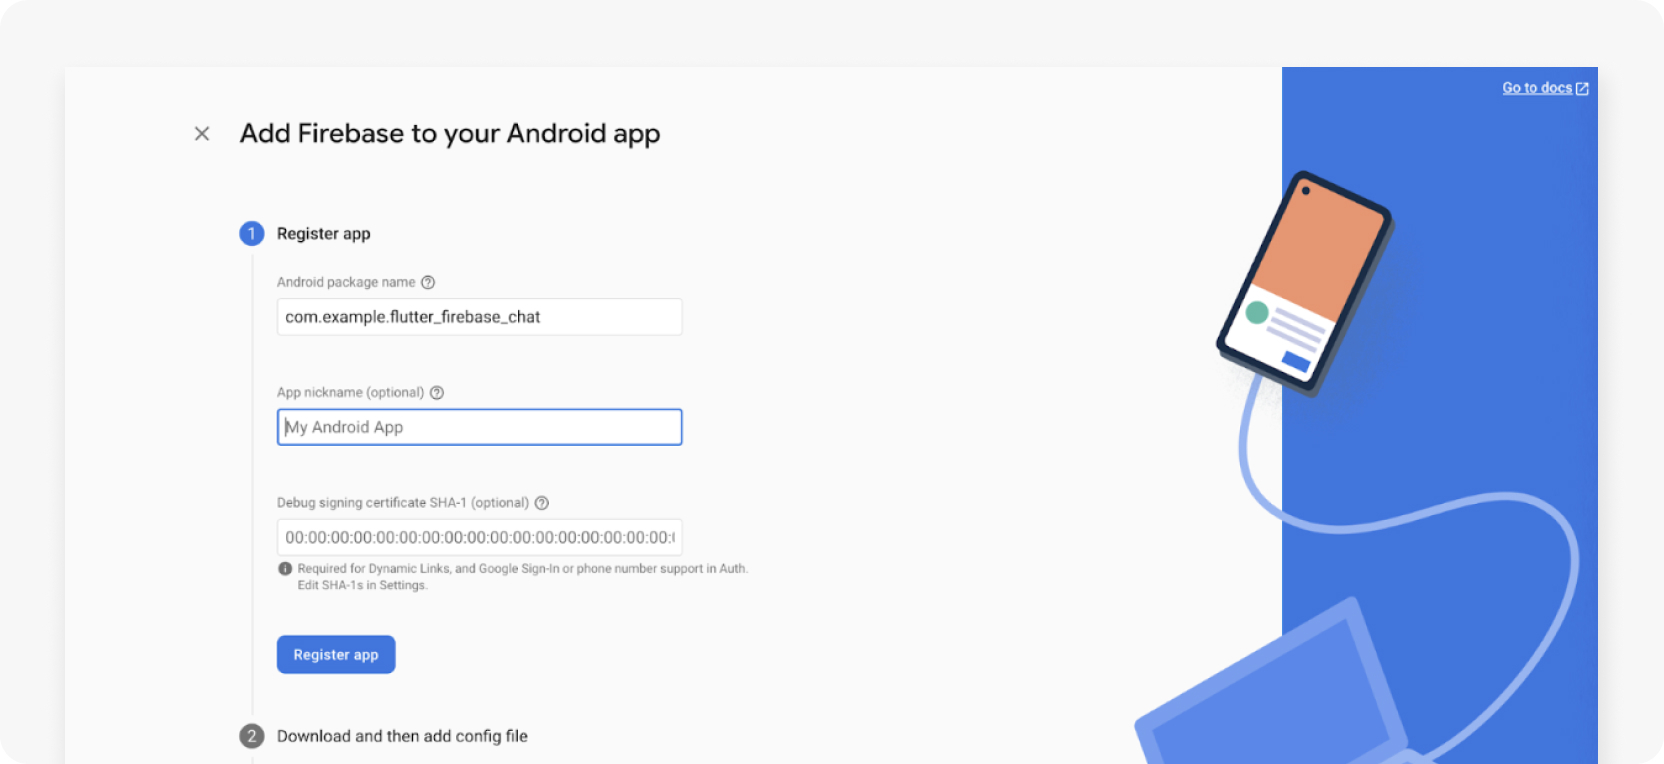
Now, you can download a google-services.json file. You need to store this file in the flutter_firebase_chat/android/app directory—it contains the credentials that your Flutter app will use to connect to your Firebase backend (on the cloud).
Once you’ve stored the file, you need to make two more changes in the Android code.
The first change is to add the line classpath 'com.google.gms:google-services:4.3.13' in the file android/build.gradle under buildscript > dependencies. Refer to the following code snippet to understand where to paste it:
The second change is to add the line apply plugin: 'com.google.gms.google-services' at the bottom of your android/app/build.gradle file. This completes the configuration for Firebase Cloud Messaging in your Flutter project.
Now let’s write the code for handling notifications.
First, create a new model class to generate and publish local push notifications. Save the following code snippet at lib/push_notification.dart:
Create a helper class to easily publish notifications on the device. Save the following code at lib/notification_service.dart:
The class above defines just one method, showNotification, that takes care of creating an instance of the local notifications plugin, gathering assets and preferences, identifying the app’s notification channel (for Android), and publishing the notification.
You’ve got two more steps: handling incoming notifications in the app, and registering the device token for the logged-in user with Sendbird.
To handle incoming notifications, update the main.dart file. Initialize the Firebase SDKs by adding the following code in the initState method of your MyAppState class:
Define the handler for the incoming notifications in the same file:
You can also handle notification taps from the user (such as navigating to the chat that the notification came from). You can do that by defining the notificationTapBackground method:
The @pragma(‘vm:entry-point`) annotation marks this function to indicate that it will be invoked from the native environment of the device. This is useful as the native notifications handler of the underlying OS (Android/iOS) needs this method to pass notifications to your app. If you remove the annotation, the Dart precompiler will get rid of this method as part of its code optimization routines, as it is not called by the rest of your Dart code.
Add the following code to the main() method to complete the initialization of the local notifications plugin:
With some other changes around state management and widget styling, the main.dart file should look something like this by now.
To receive push notifications from Sendbird for your chats, collect and register the device token from FCM to Sendbird. Replace the connect function in lib/login_view.dart with the following code:
Check in with the demo on GitHub to see how the updated login_view.dart file should look like now.
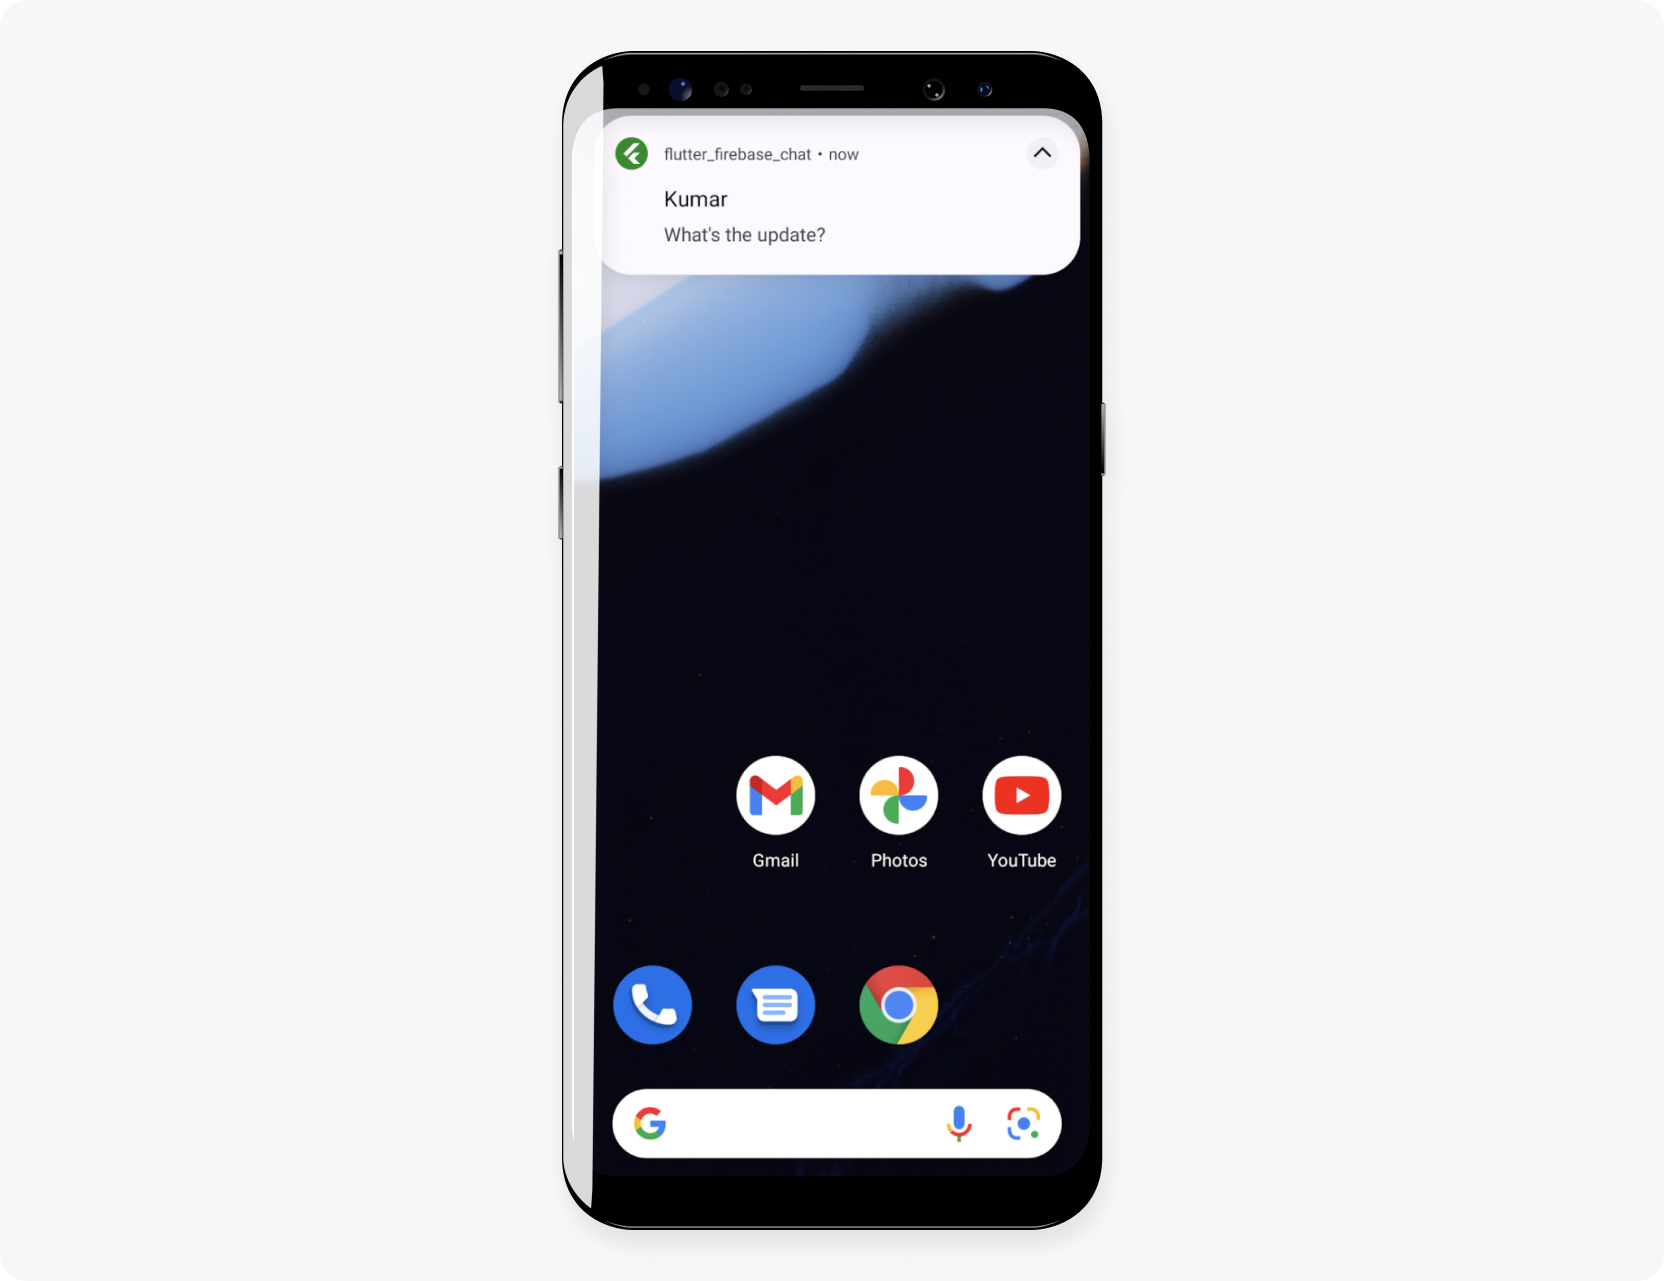
And you’ve set up push notifications in the chat app! Try sending messages to a group channel to see the push notifications in action.
Remember, you can find the complete code of this tutorial in this GitHub repo.
Other advanced Sendbird features to include in your Flutter chat app
Sendbird offers many advanced features for your chat application. For example, you can enable a typing indicator in your app to let channel participants know when a user is typing.
Here’s an example code snippet for the message box to help you do that:
The startTyping() and endTyping() methods send the typing status of the current user to all the users in the chat. You can have it appear however you like (perhaps just the text John is typing…, or show the avatars of the people who are typing). You can handle incoming typing statuses using the onTypingStatusUpdated function in the channel handler.
Furthermore, you can use the UserConnectionStatus property of a User to check if they’re currently online and show their online presence indicator in the chat UI (a bright green dot next to their name, for example).
In addition, Sendbird supports message and user moderation. The Sendbird dashboard can grant channel members privileges to freeze channels, block, or mute users.
Start building your Flutter chat app today
Congratulations! You are now equipped to integrate Sendbird’s Flutter chat SDK with Dashchat and build chat into your mobile app. You also know how to integrate push notifications to notify users of incoming messages when they’re not in the app.
Of course, we couldn’t cover everything here, so remember that there are several more Sendbird and Dashchat features that you can add to your app:
Long-press events
Avatar touch events
Avatar long-press events
Custom inputs
Reactions
Images and file handling
Typing indicators
And more!
For a full rundown of features supported by Sendbird’s Flutter chat SDK, as well as additional resources to help you on your mobile app journey, check out our official docs. We highly recommend that you check out the Flutter sample app.
If you’re building chat with Flutter, you should definitely try Sendbird for in-app chat—we offer a 30-day free trial, and our Developer plan is free forever. We recommend that you become a part of the Sendbird developer community to tap into more resources and learn from the expertise of others. You can also browse our demos to see Sendbird Chat in action. If you have any other questions, please contact us. Our experts are always happy to help!
Happy chat building! 💬


