
How to build a notification center into your Android app

Uplifting omnichannel communication with in-app notifications
In a world where people use their mobile phones as the command center of their daily lives, businesses must send custom mobile notifications through various mobile channels, including SMS, WhatsApp, push notifications, and email. Unfortunately, many of these channels have limitations. For instance, SMS (texts) aren’t authenticated, which raises security concerns and leads many users to ignore these messages. Emails buried in cluttered inboxes are often missed. While WhatsApp notifications provide a modern and engaging experience, they’re branded by Meta and adherent to governance rules, which makes them less appealing for their inflexibility.
Given the limitations of external mobile channels, many businesses like Paytm, Porter, Maya, PicPay, Shipt, and more are shifting most of their SMS and email notifications to in-app messages. Branded, secure, and media-rich, in-app messages boast an exceptional 99.99% delivery rate and double the engagement rates of external channels, leading to more conversions and growth.
In this tutorial, you’ll learn how to quickly create a notification channel in your app and send in-app messages using our business messaging software.
For SMS and push notifications, you can refer to these guide:
This guide for in-app notifications shows you how to:
Send native and custom notifications easily to your Android app using the Sendbird Business Messaging software and notification app UI Kit. Specifically, you’ll learn how to:
Add Sendbird notifications to a sample application
Create an in-app notification channel through which you'll send your messages
Create a notification outreach template with a bespoke message
Configure push notifications
Send your first in-app notification message with the Sendbird Business Messaging software
If you want to build the UI yourself, Sendbird also offers an in-app notification SDK. This step-by-step tutorial on sending in-app notifications is also accompanied by an in-app notification video walkthrough.
Prerequisites for enabling your Android app to receive notifications
Android 5.0 (API level 21) or higher
Support AndroidX only
Android Gradle plugin 4.0.1 or higher
Sendbird Chat SDK for Android 4.16.0 and later
Sendbird Chat UIKit for Android 3.15.0 and later
Creating an Android sample application to receive in-app notifications
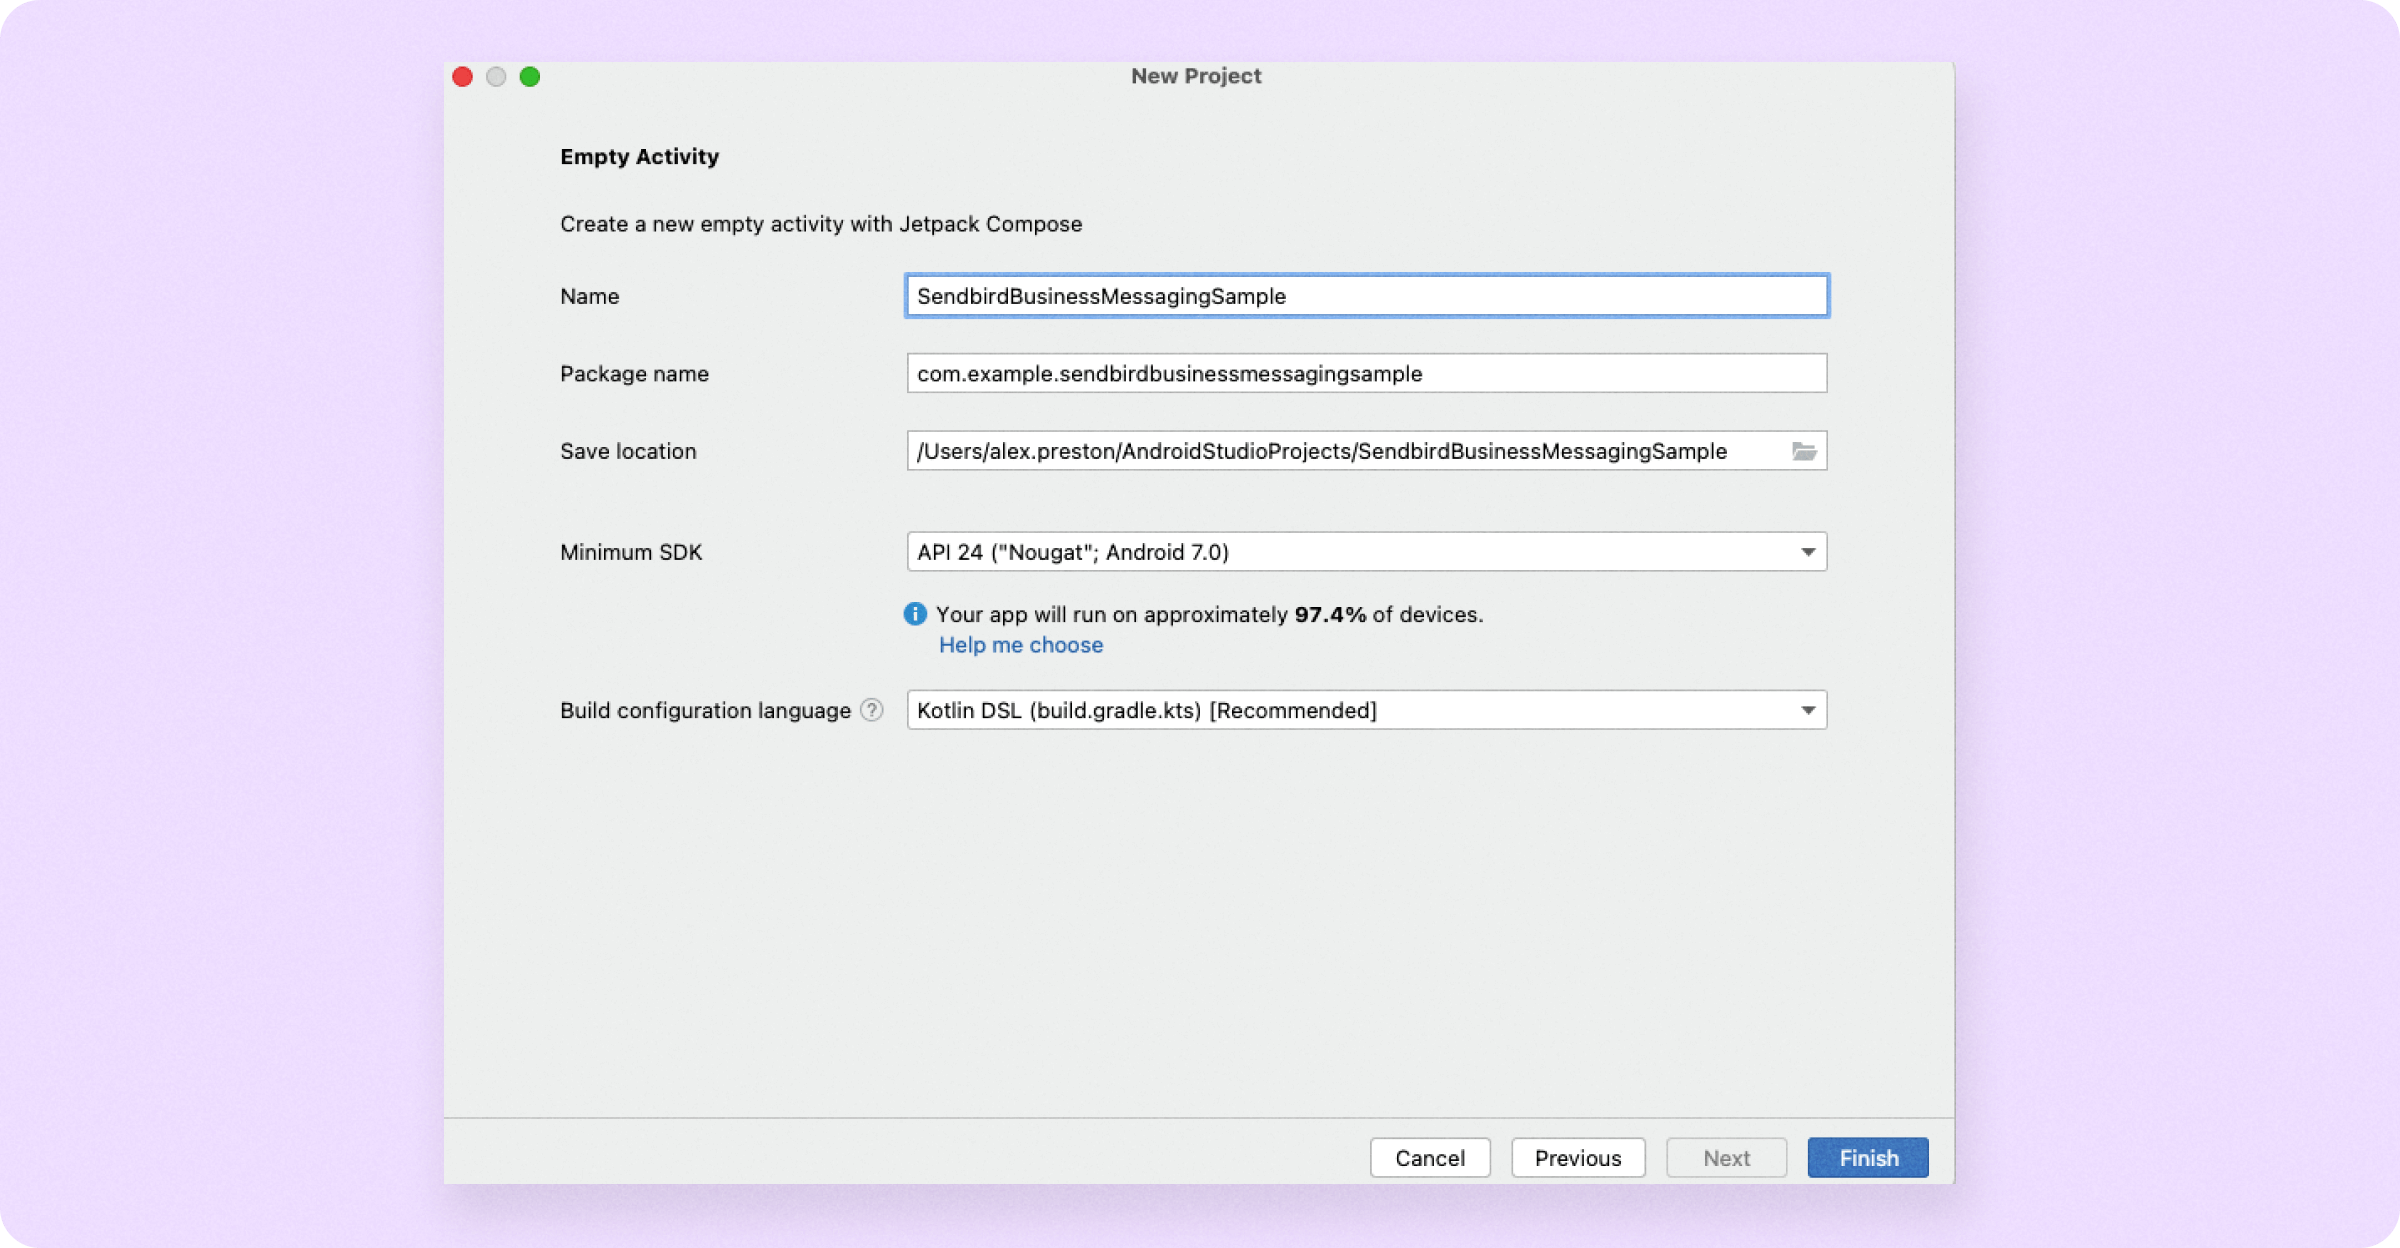
Open up Android Studio and create a new project.
For simplicity, choose the [Empty Activity] option, name the application whatever you want, and click [Finish].

Import dependencies to your Android App
Before we write any code, let's make sure to add the proper dependencies into our application. Assuming you are using Gradle 6.8 or higher, use the following and add it into your settings.gradle file at the root level:
Next, open up the build.gradle file in the application level:
Click [Sync Now] at the top of the screen.
Initializing the Sendbird Business Messaging/in-app notifications UIKit
Next, refactor the MainActivity to “BaseApplication” and make BaseApplication extend Application. Add BaseApplication to the AndroidManifest.xml in the <application> tag:
The only thing we will do in the BaseApplication is initialize the UIKit. To save time, we won’t create a loginUI so that we will hardcode the values for userID/AccessToken. To complete this, you must grab your app_id from the Sendbird dashboard.
You will also need to create a user or grab one from the Sendbird Dashboard. Ensure you issue an access token for this user, as Sendbird Business Messaging will not work without a properly authenticated user.
Connecting with a user in your Android app
While you can authenticate a user with the .authenticateFeed method—which will allow your user to get push notifications and see the in-app notification channel without incurring an MAU—we will be using the .connect method. The advantage of using .connect is that it establishes a WebSocket connection with Sendbird, allowing real-time events.
Next, create a Kotlin class named ConnectActivity. In this activity, we will have a function that connects the user to Sendbird and launches the Notification Channel.
Before we forget, let’s add this class to the AndroidManifest.xml. At this point your manifest should look something like this:
Registering push notifications for Sendbird Business Messaging
Push notifications are mobile messages that appear on a device’s lock screen, allowing a business to engage with users, even while they’re not active in the app. Push notifications are used to complement in-app notifications and help drive engagement with in-app messages and effectively relay critical information in real-time.
To receive push notifications, you first need to register notification credentials.
You can set up push notifications for Firebase Cloud Messaging (FCM) or Huawei Mobile Services (HMS). Both FCM and HMS are mobile platforms that offer messaging and notification services. The key differences are that FCM can be used for Android, iOS, and web apps, while HMS is mainly for Huawei devices. Similarly, FCM can be across multiple devices and ecosystems, while HMS is specific to Huawei’s ecosystem.
Register your server key and a registration token if you’re using FCM for push notifications. Register your app ID and app secret if you’re using HMS for push notifications.
You can also implement push notifications with multi-device support if you want to send a push notification even when the client app is in the foreground. Refer to the multi-device support guide for HMS or FCM for push notifications.
Since the purpose of this guide is to showcase the Notifications Channel and how easy it is to customize Templates to send messages to these Channels, the push section will not be covered here. However, you can refer to our complete guide on how to implement and send push notifications using the Sendbird UIKit.
Displaying the notification channel in your Android app
The last bit of code we will need to write is the easiest. All we need to do is start the Activity for the NotificationChannel. In the connect method, after the TAG denoting a successful connection, add the following:
That’s it! However, if you launch your application you should be presented with a blank white screen.
We’re going to fix that. The rest of this guide is all code-free and uses the Sendbird Business Messaging software to create a channel and customize message templates.
By the end, you’ll be able to send your own business messages as an in-app notification with little effort.
Creating a notification channel in your Android app using the Sendbird Business Messaging software
In the first part of this no-code section, we will create a Channel, which is a place where all notifications sent to target users are centralized.
To optimize communication management, we offer message sequencing functionality. This allows you to send a message to multiple channels (in-app notifications, push notifications, SMS, WhatsApp, Kakao Alim Talk) in a specific order at a specific time from within a Template. If you wish to try out SMS, Sendbird offers a sandbox to test this.
To create a messaging Channel, go to the Sendbird Dashboard, click [Business Messaging] in the left-side menu, and then click [Channels].
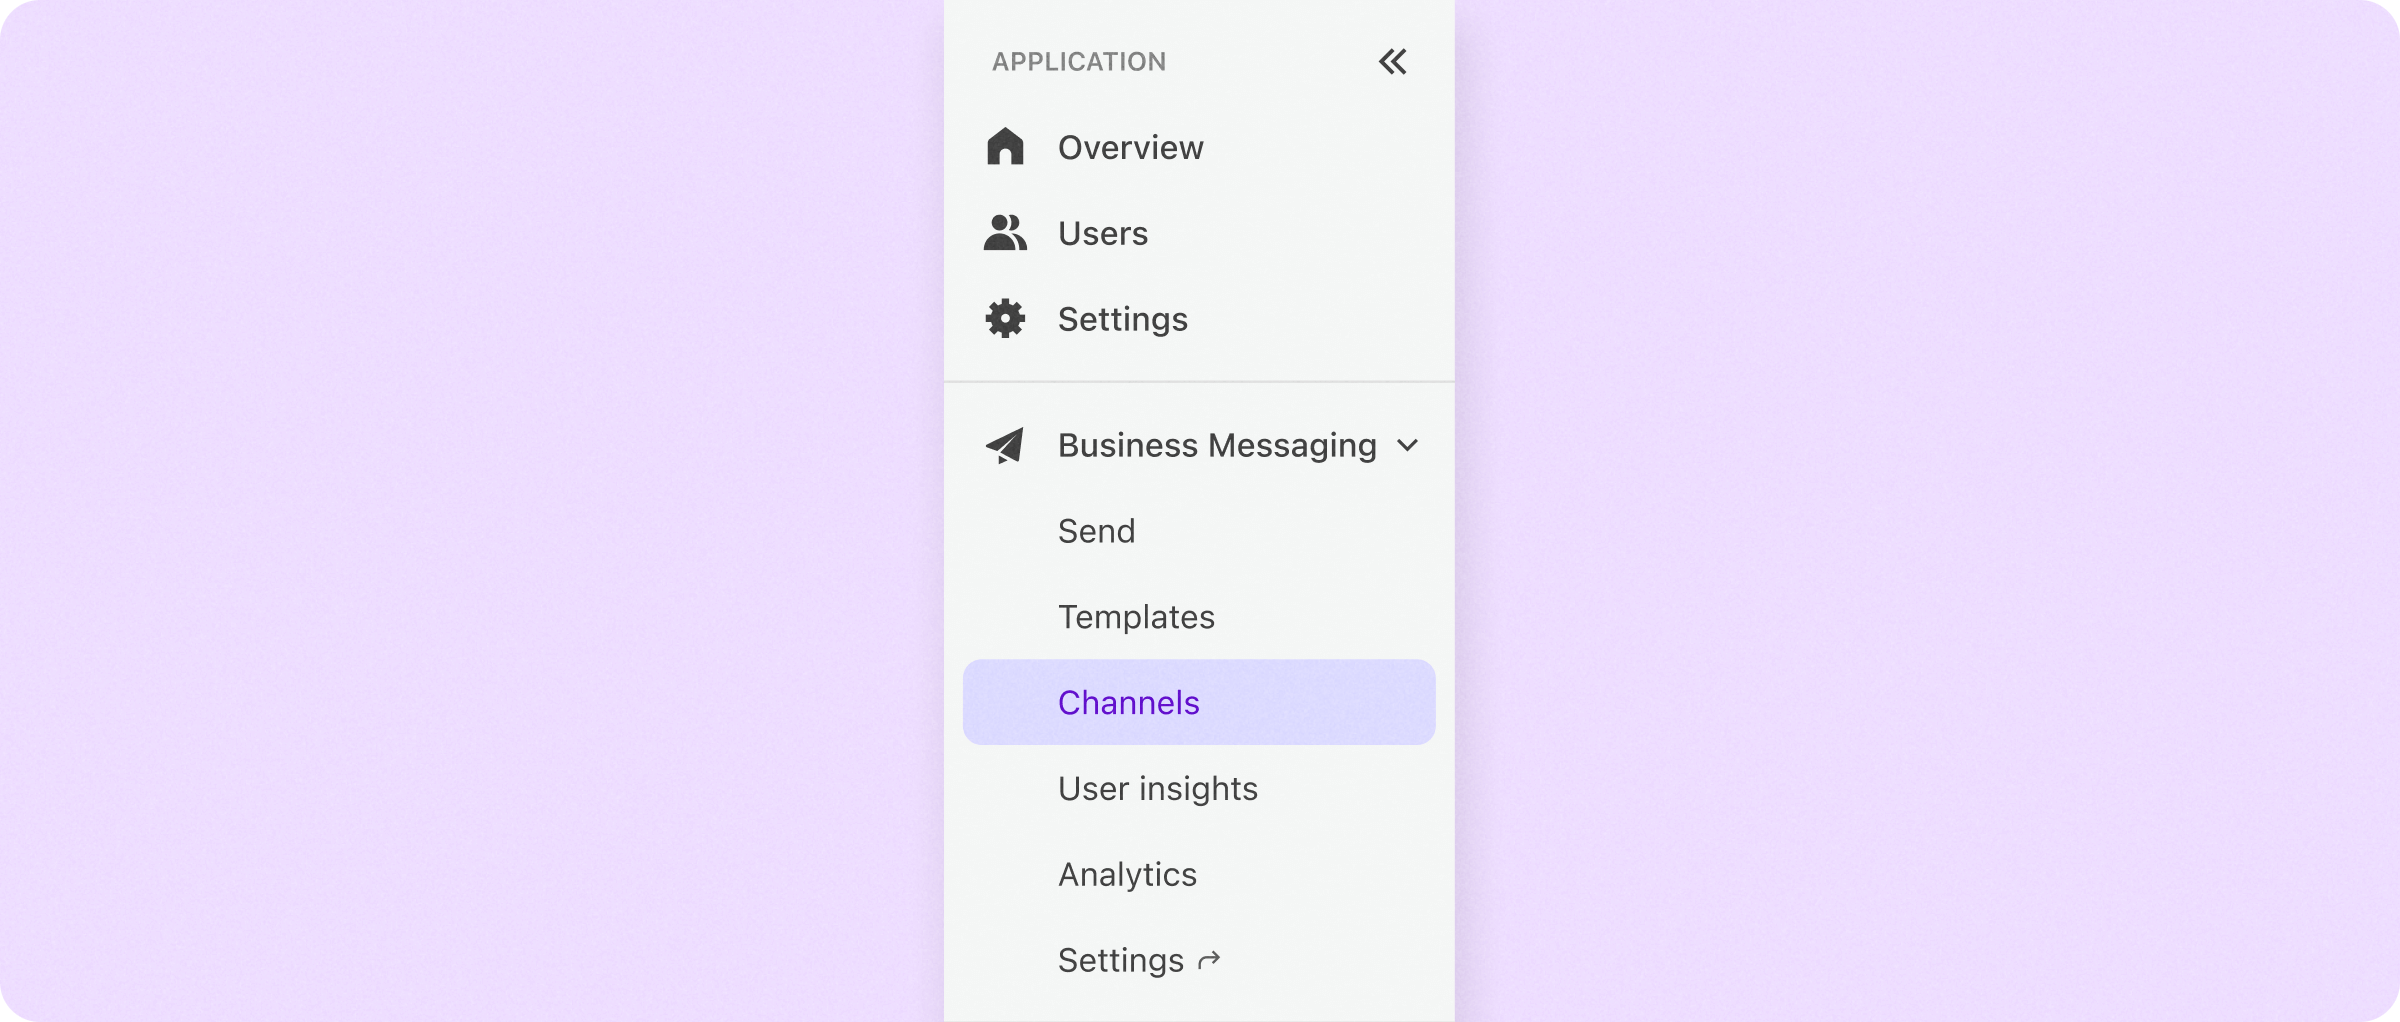
At the top right, click [Create channel].
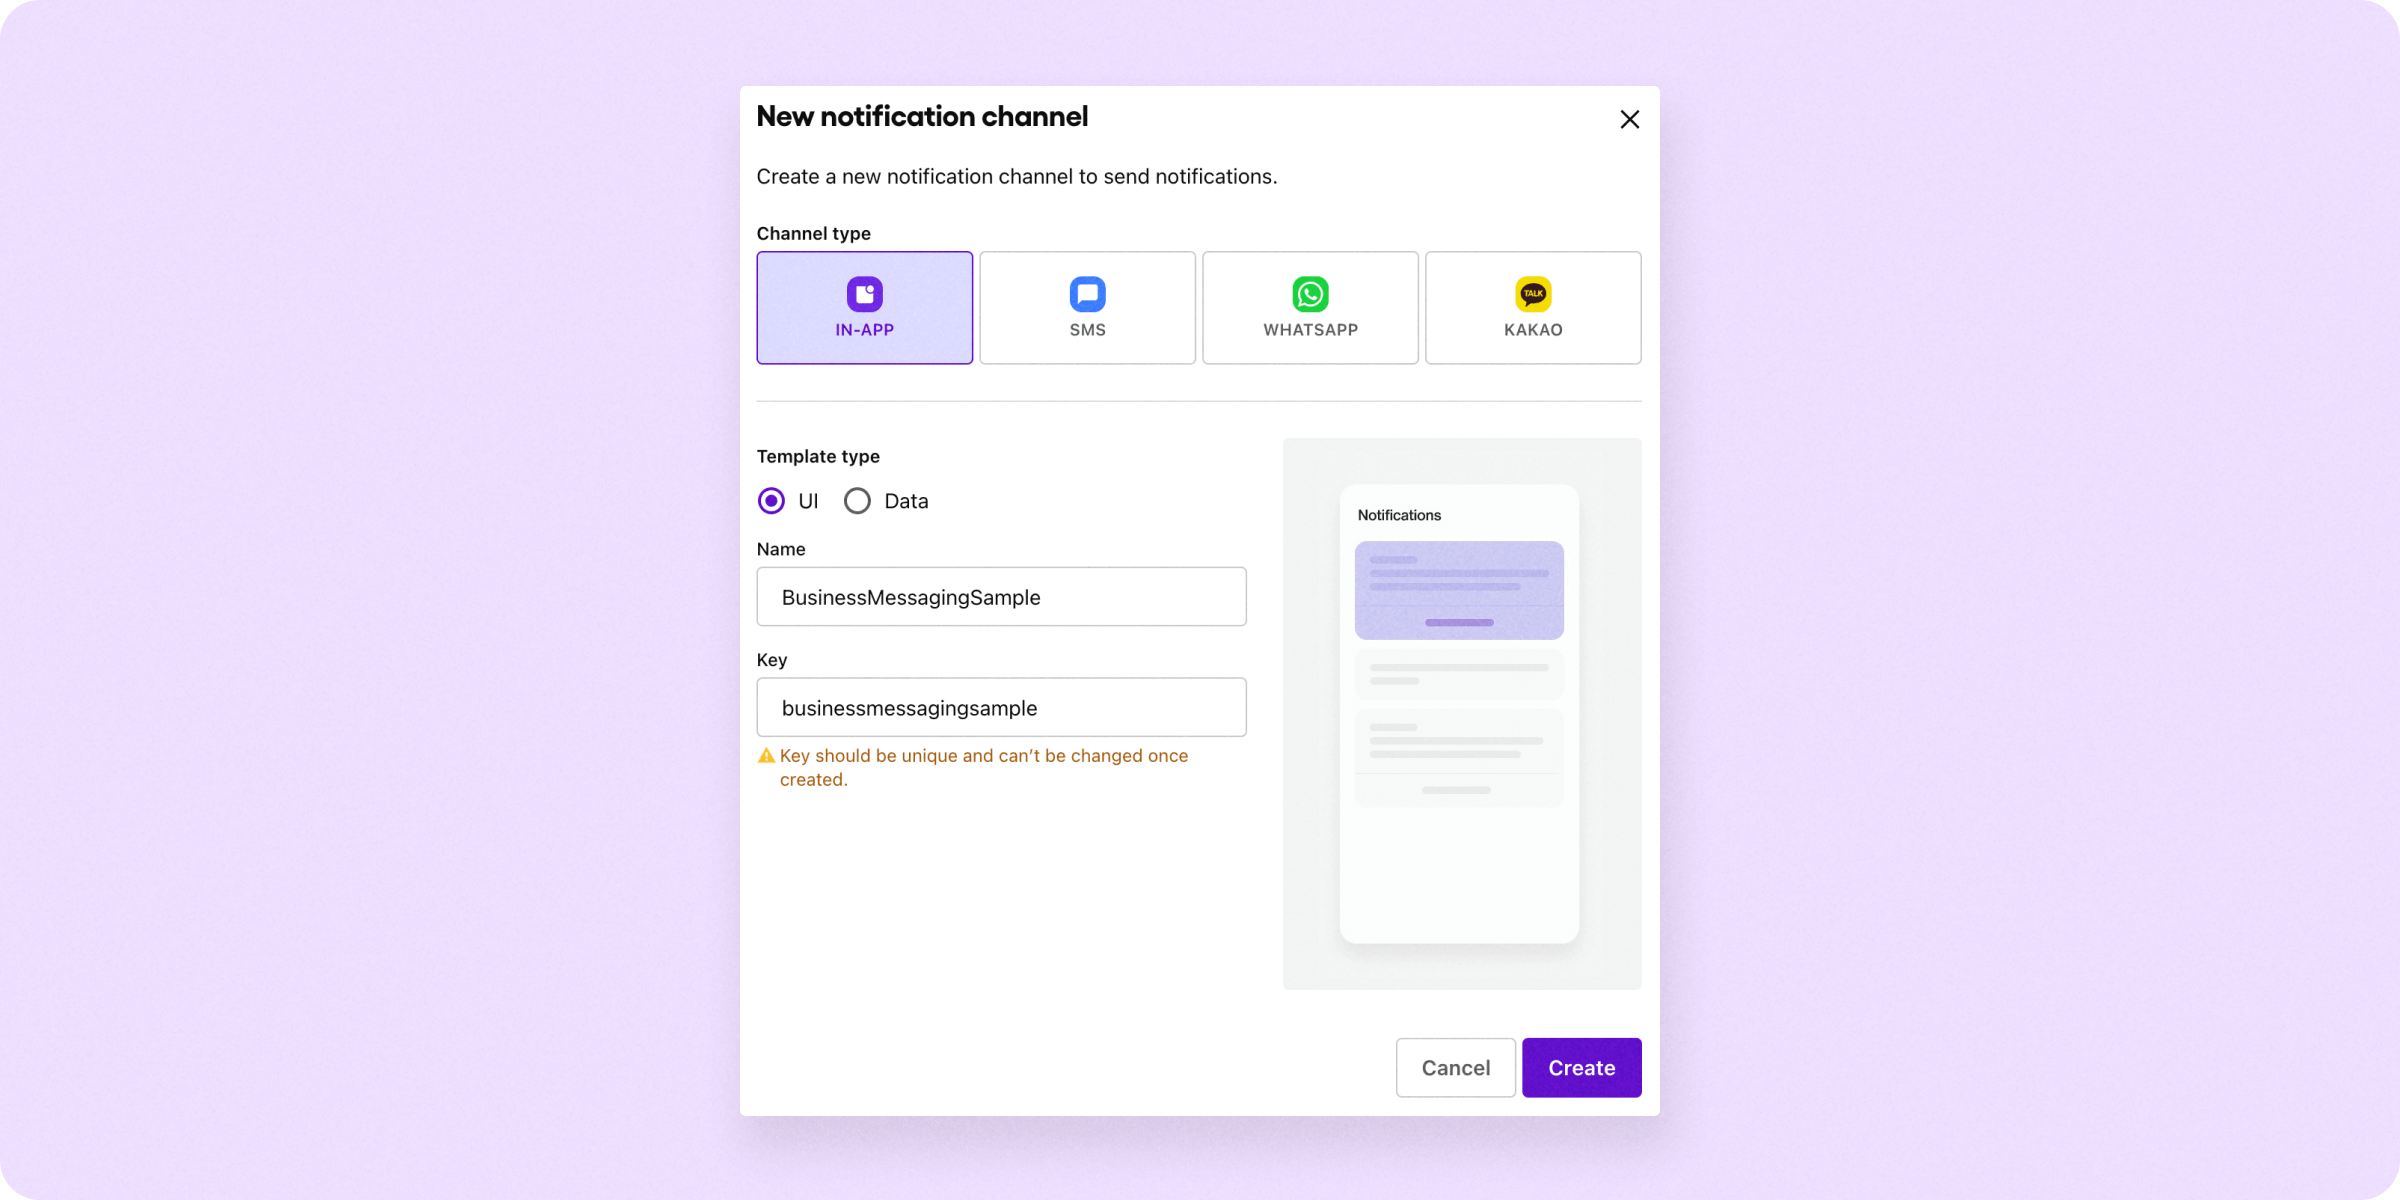
For this example, we will showcase the in-app channel. However, Sendbird offers a variety of key channel types. Click [Create].
Creating an in-app notification template with the Sendbird Business Messaging software
Templates are the core of how Sendbird Business Messaging works. These are pre-formatted, customizable message designs that allow you to send a coordinated flow of personalized notifications through multiple channels by building and then triggering the corresponding templates for each channel.
Templates can be created and customized in the Sendbird dashboard without writing code. This allows non-engineers, such as product managers and marketers, to easily compose up to 100 different templates and send notifications that fit the needs of their exact use case.
By this point, we’ve created our sample application and a Channel.
Next, we’ll configure a template and test it out.
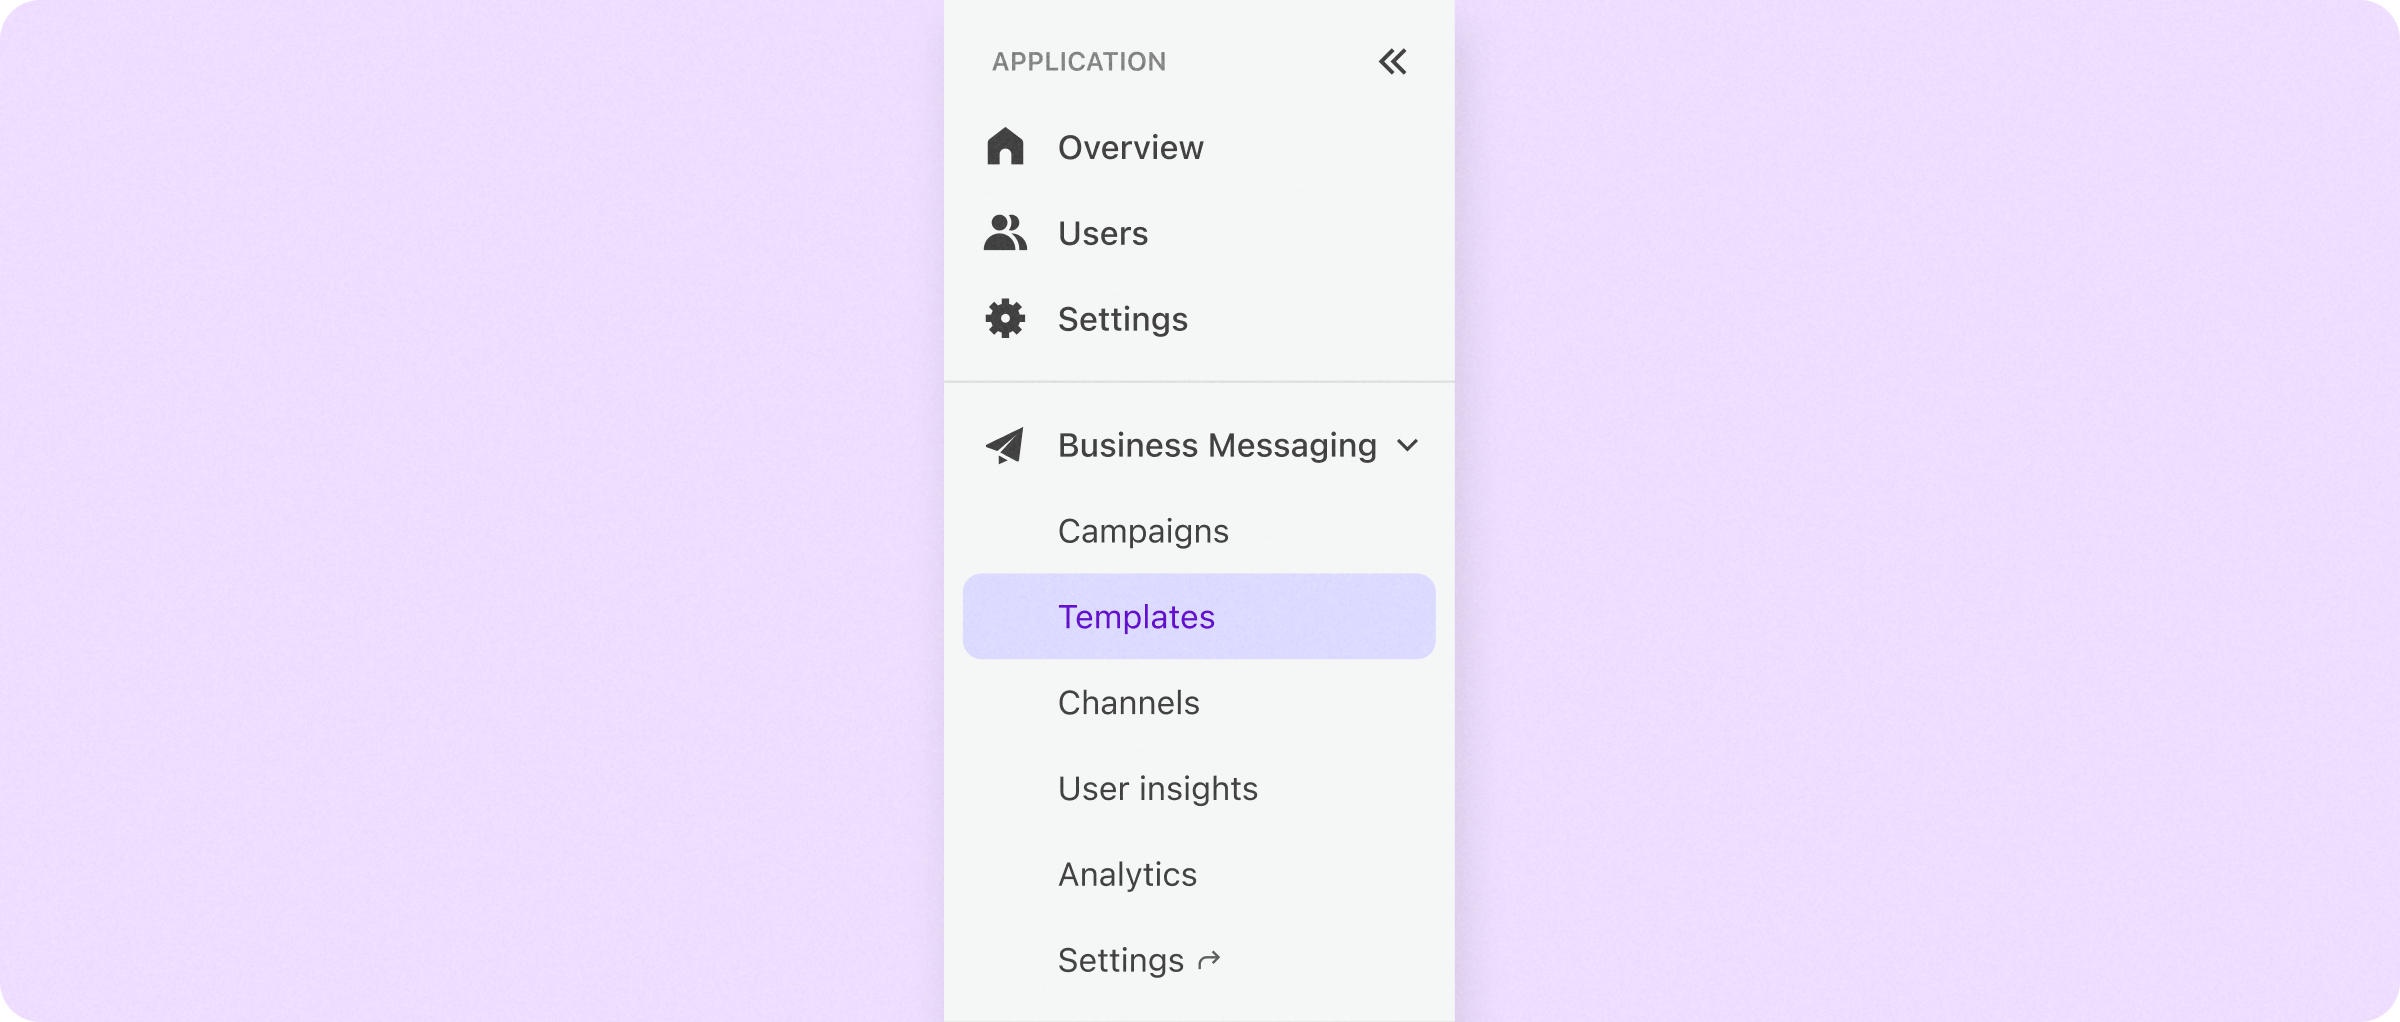
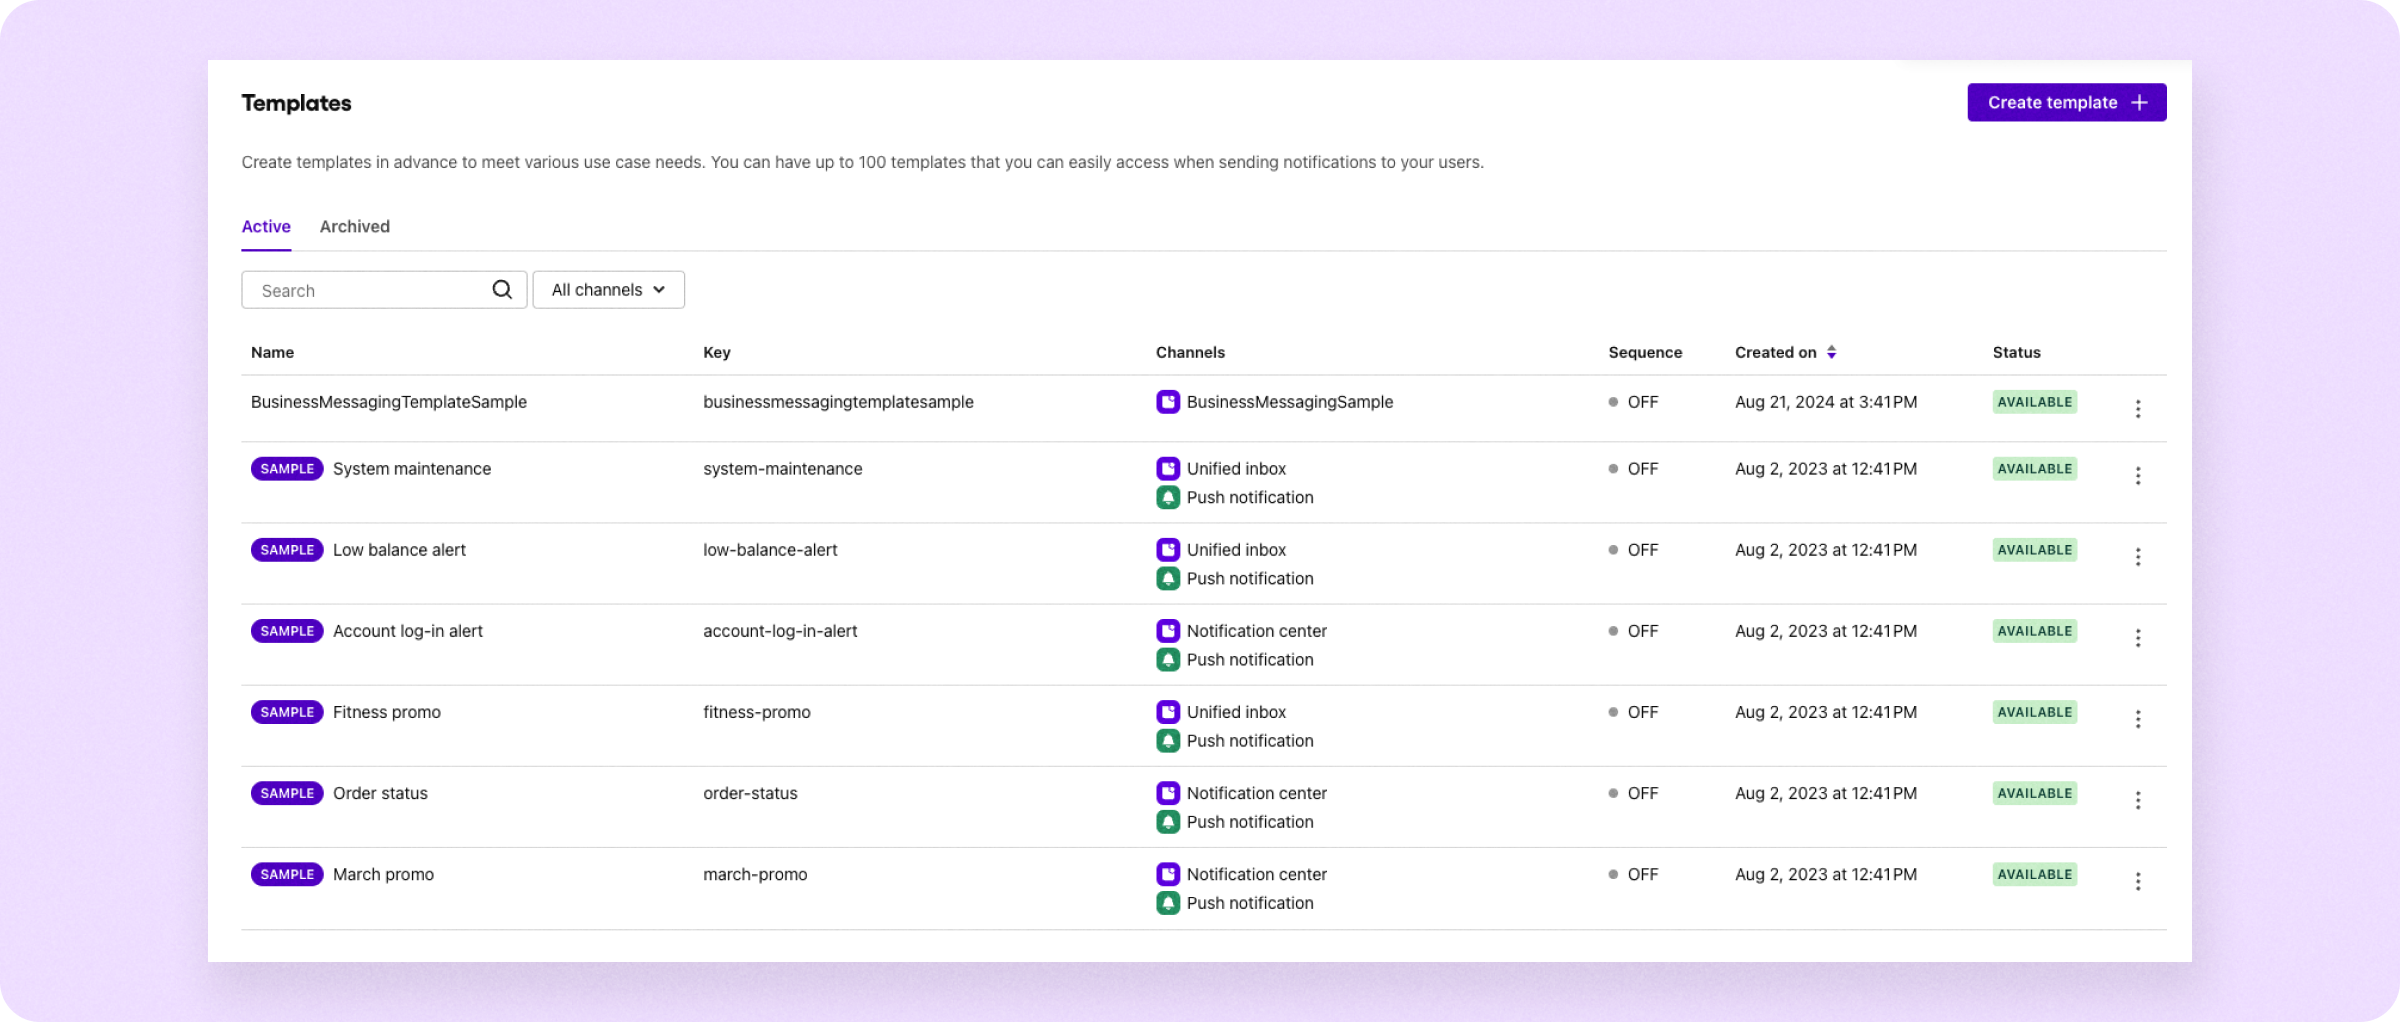
To start, navigate to the Sendbird Dashboard. In the left-side menu, you’ll see a section titled [Business Messaging]. Click on the subsection below titled [Templates].
In the Templates menu, you’ll see several entries with a denoted “Sample” tag. If you wanted to start testing immediately, you could use those prebuilt ones. However, for this tutorial, we will make our own.
To start, click [Create template] at the top right.
You will be presented with a new notification template that contains no names or designs. Go ahead and name the template, and then add a key. Next, you’ll want to assign the template to the channel you created in the previous step.
To do this, you’ll scroll down to the [In-app channel settings] and add a [Label] and an [Alternative text]. This will help with classifying the type of message within the UI and provide a fallback text.
![Adding a [Label] and [Alternative text] to a message template](https://sendbird.imgix.net/cms/sending-push-and-native-notifications-to-android-app_fig-7.png)
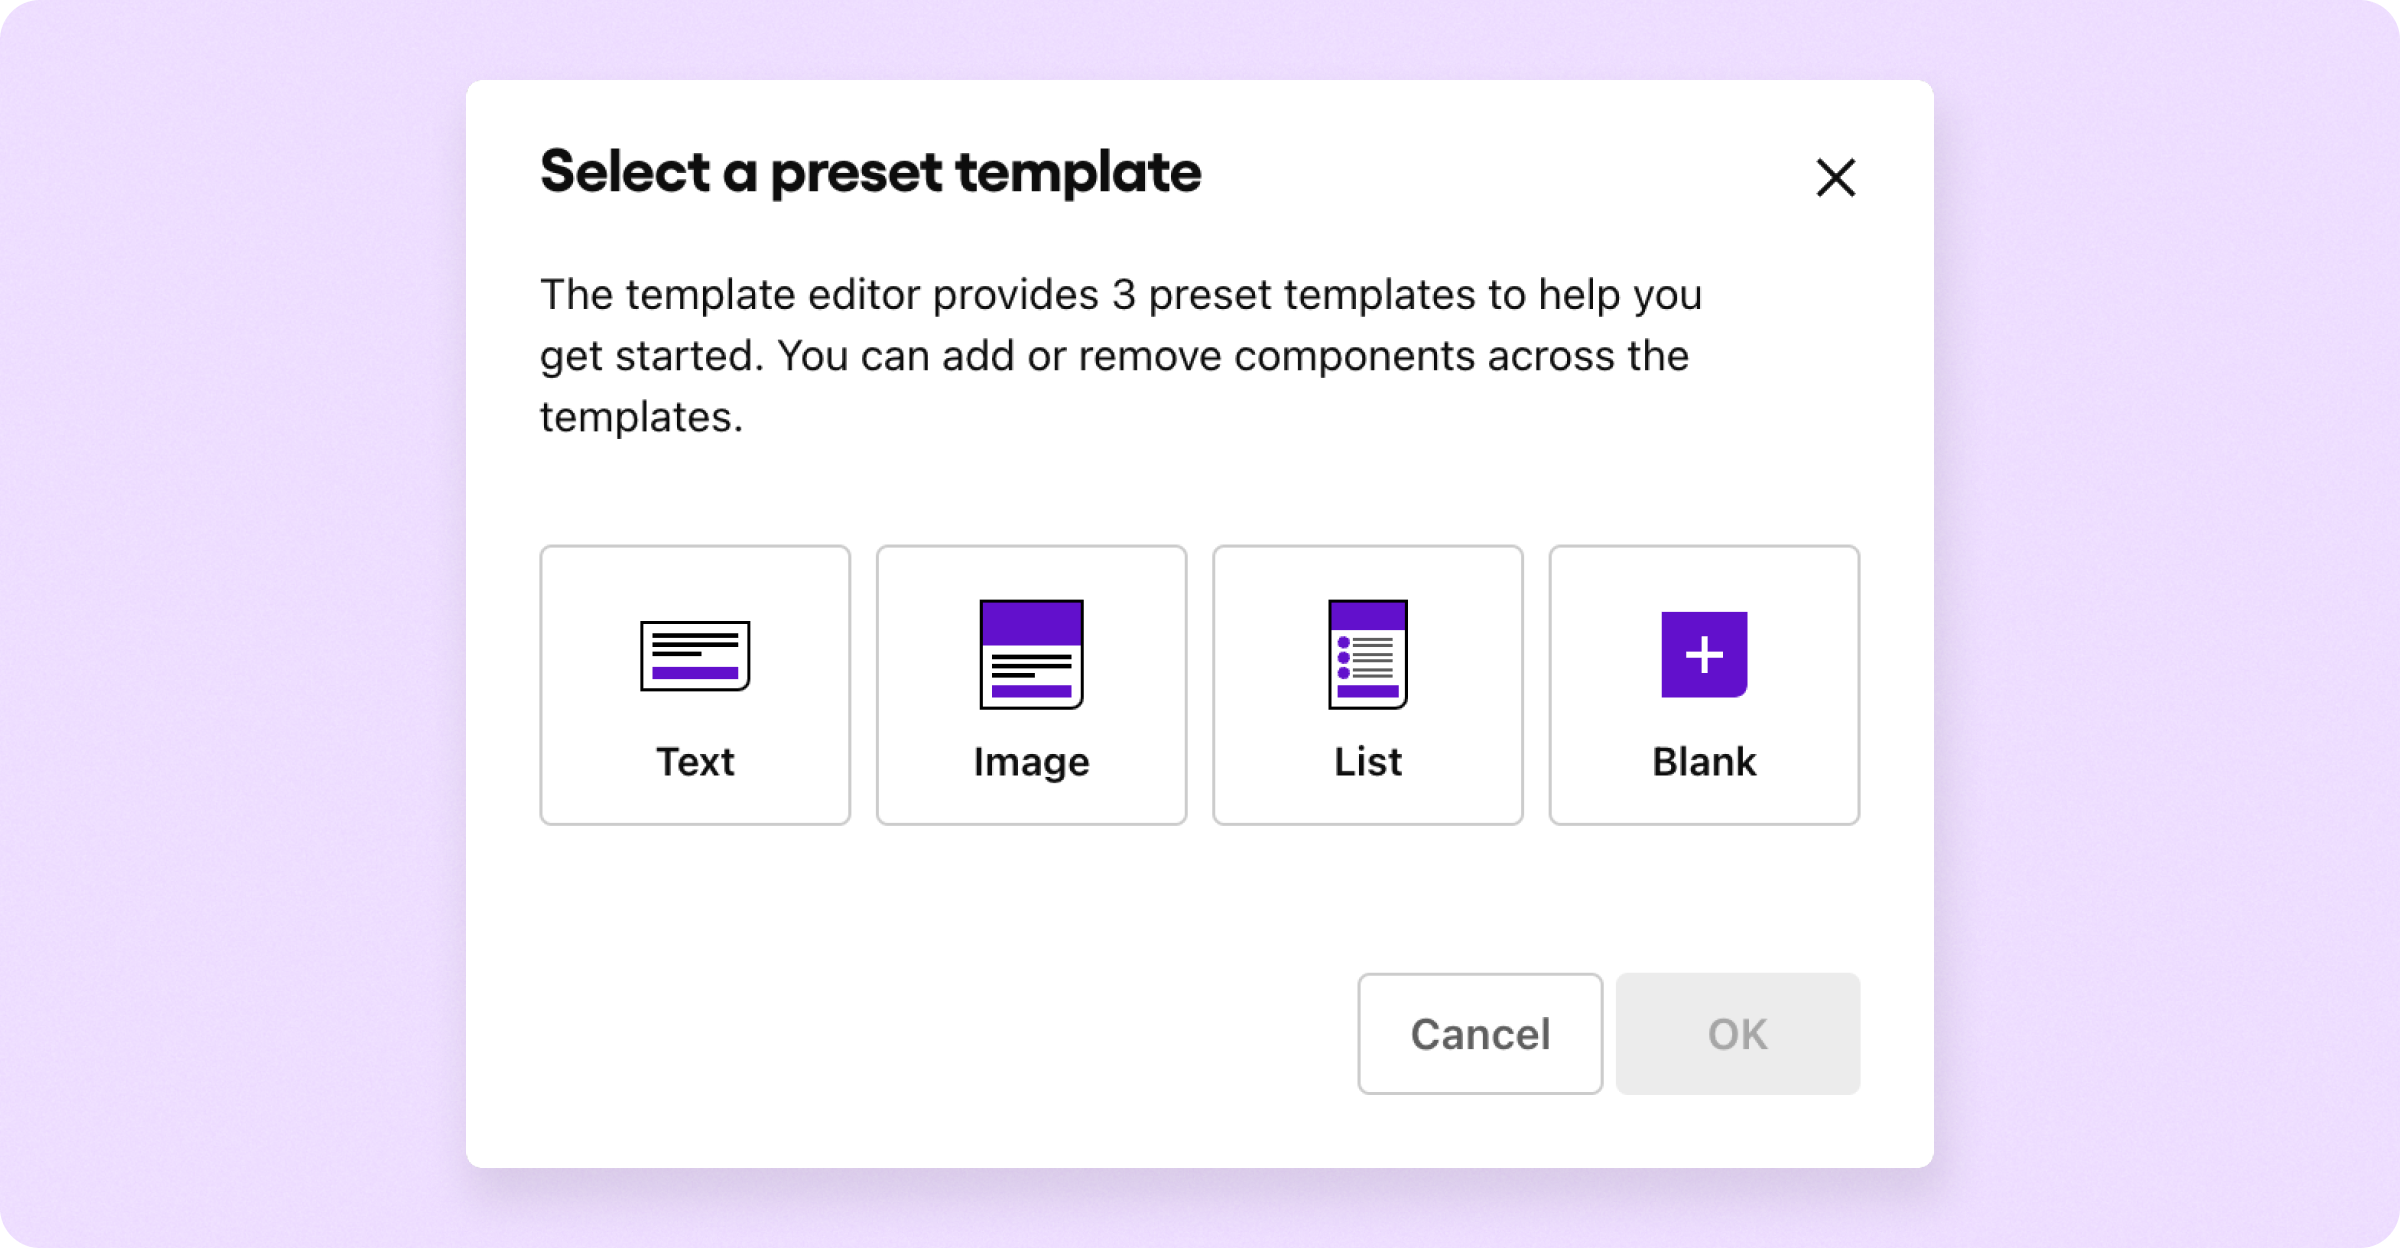
The next step is to design the UI. The GUI in the Sendbird Dashboard allows you to easily customize the message templates in your application with no code. This is a drag-and-drop interface similar to what’s in Sketch, Figma or the design tab in Android Studio.
To start customizing, click the [Design] button that sits atop the empty screen. I’m going to choose the “Image” template, but you can choose whatever you want.
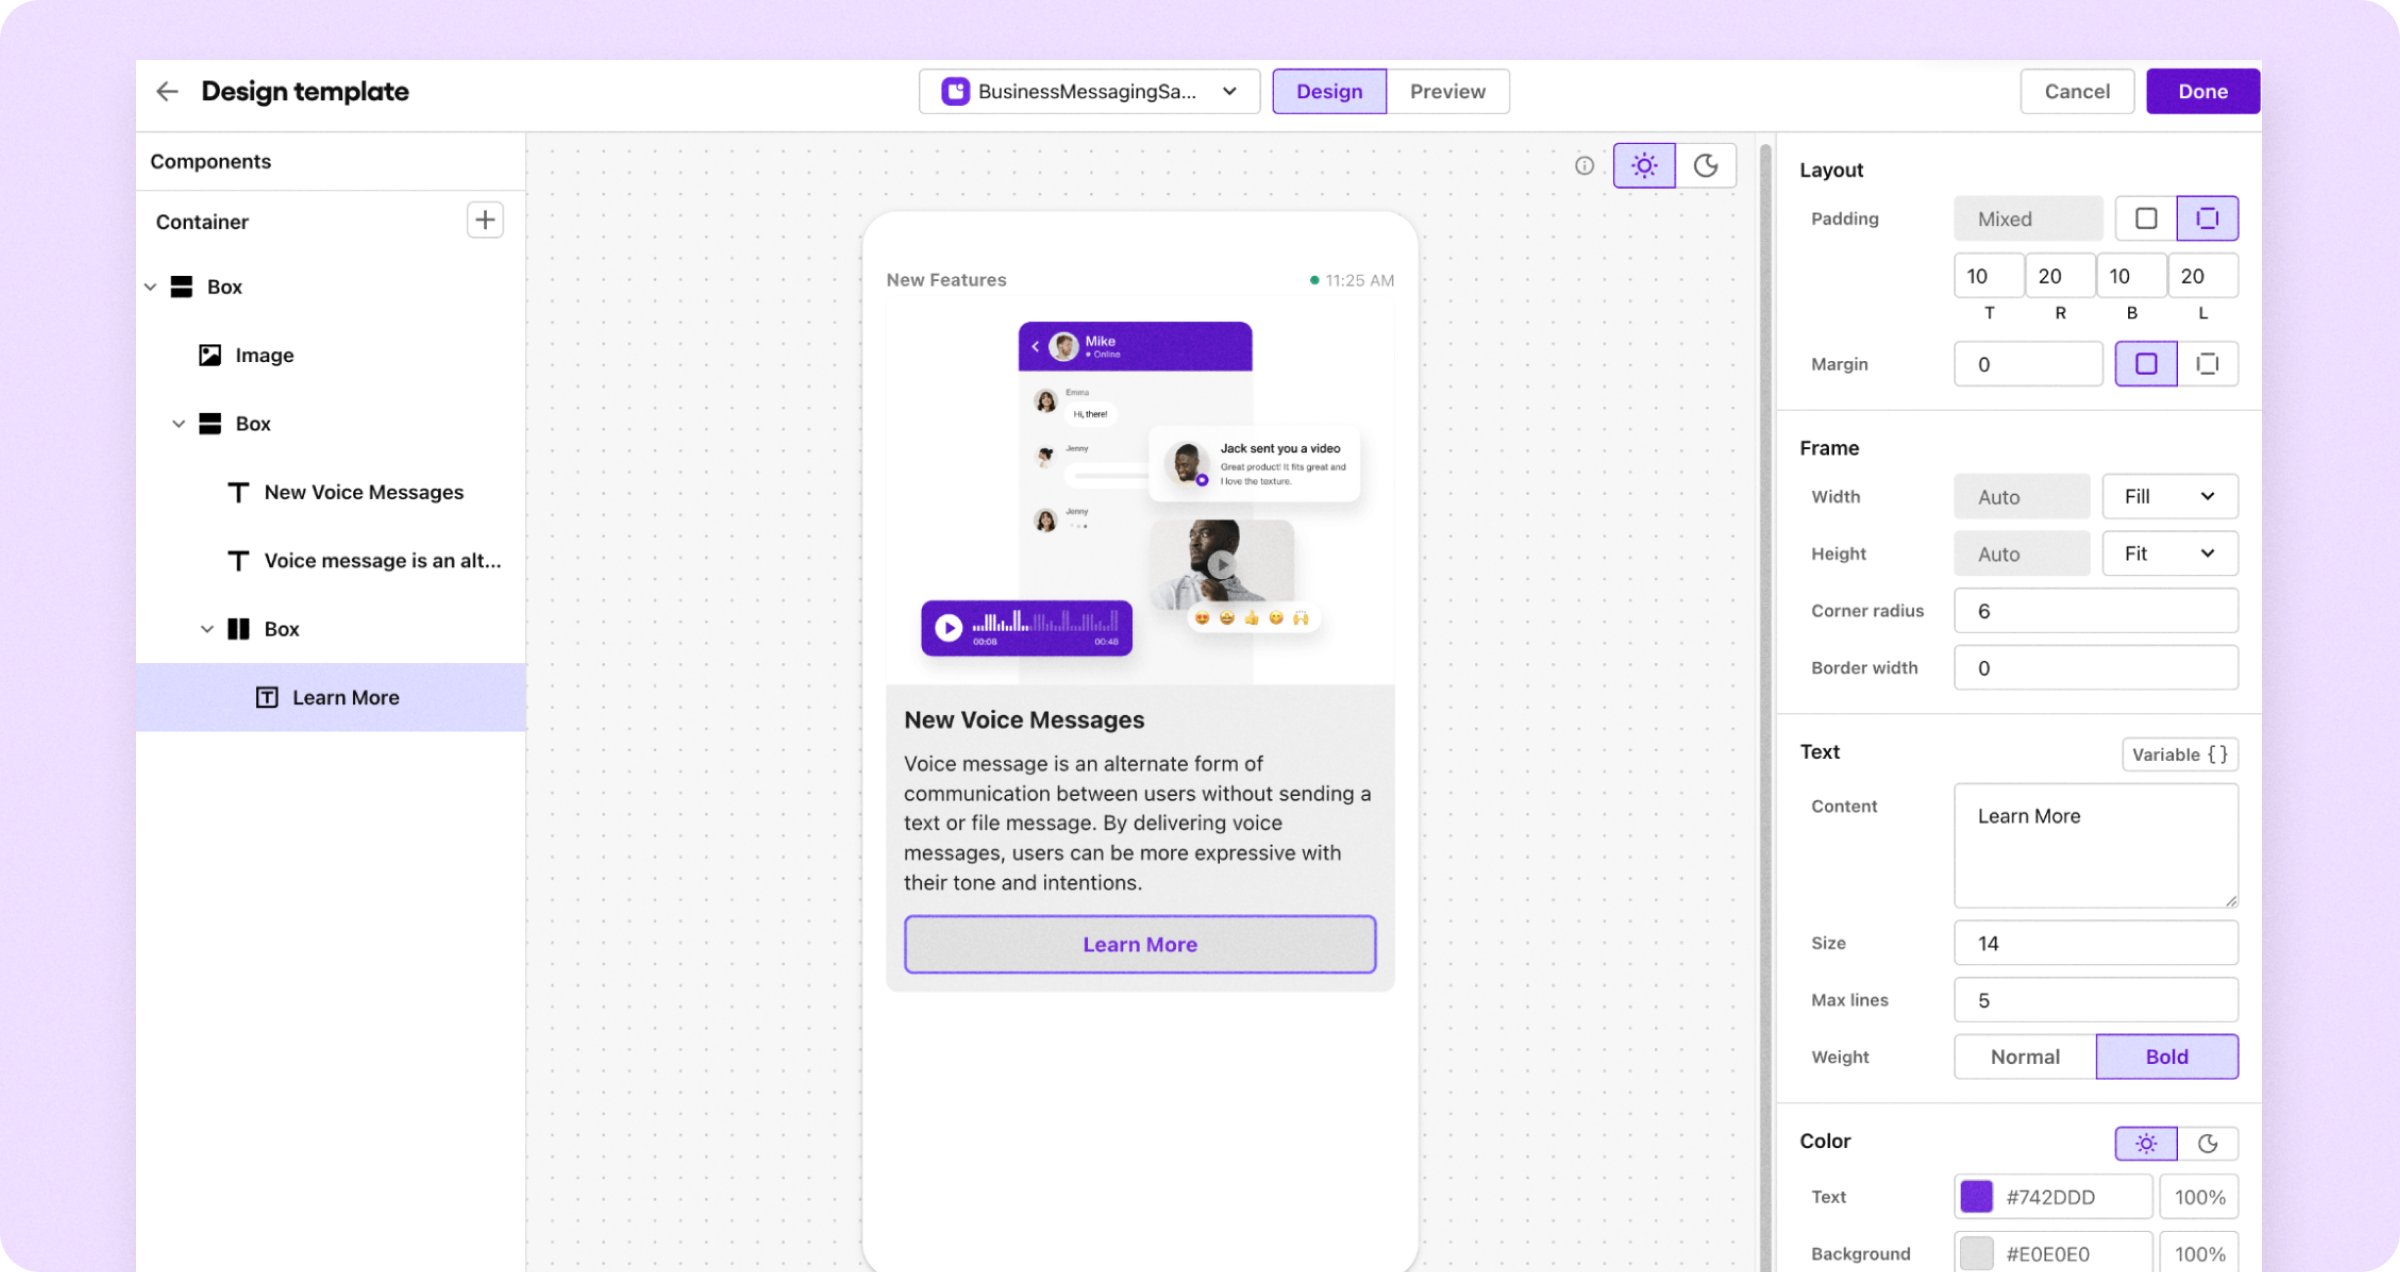
This will take you to the template design area in Sendbird Business Messaging. From here you can edit the message buttons, text, and images to whatever you want. For a more personal experience, you can also add in variables that can be populated based on provided information about individuals.
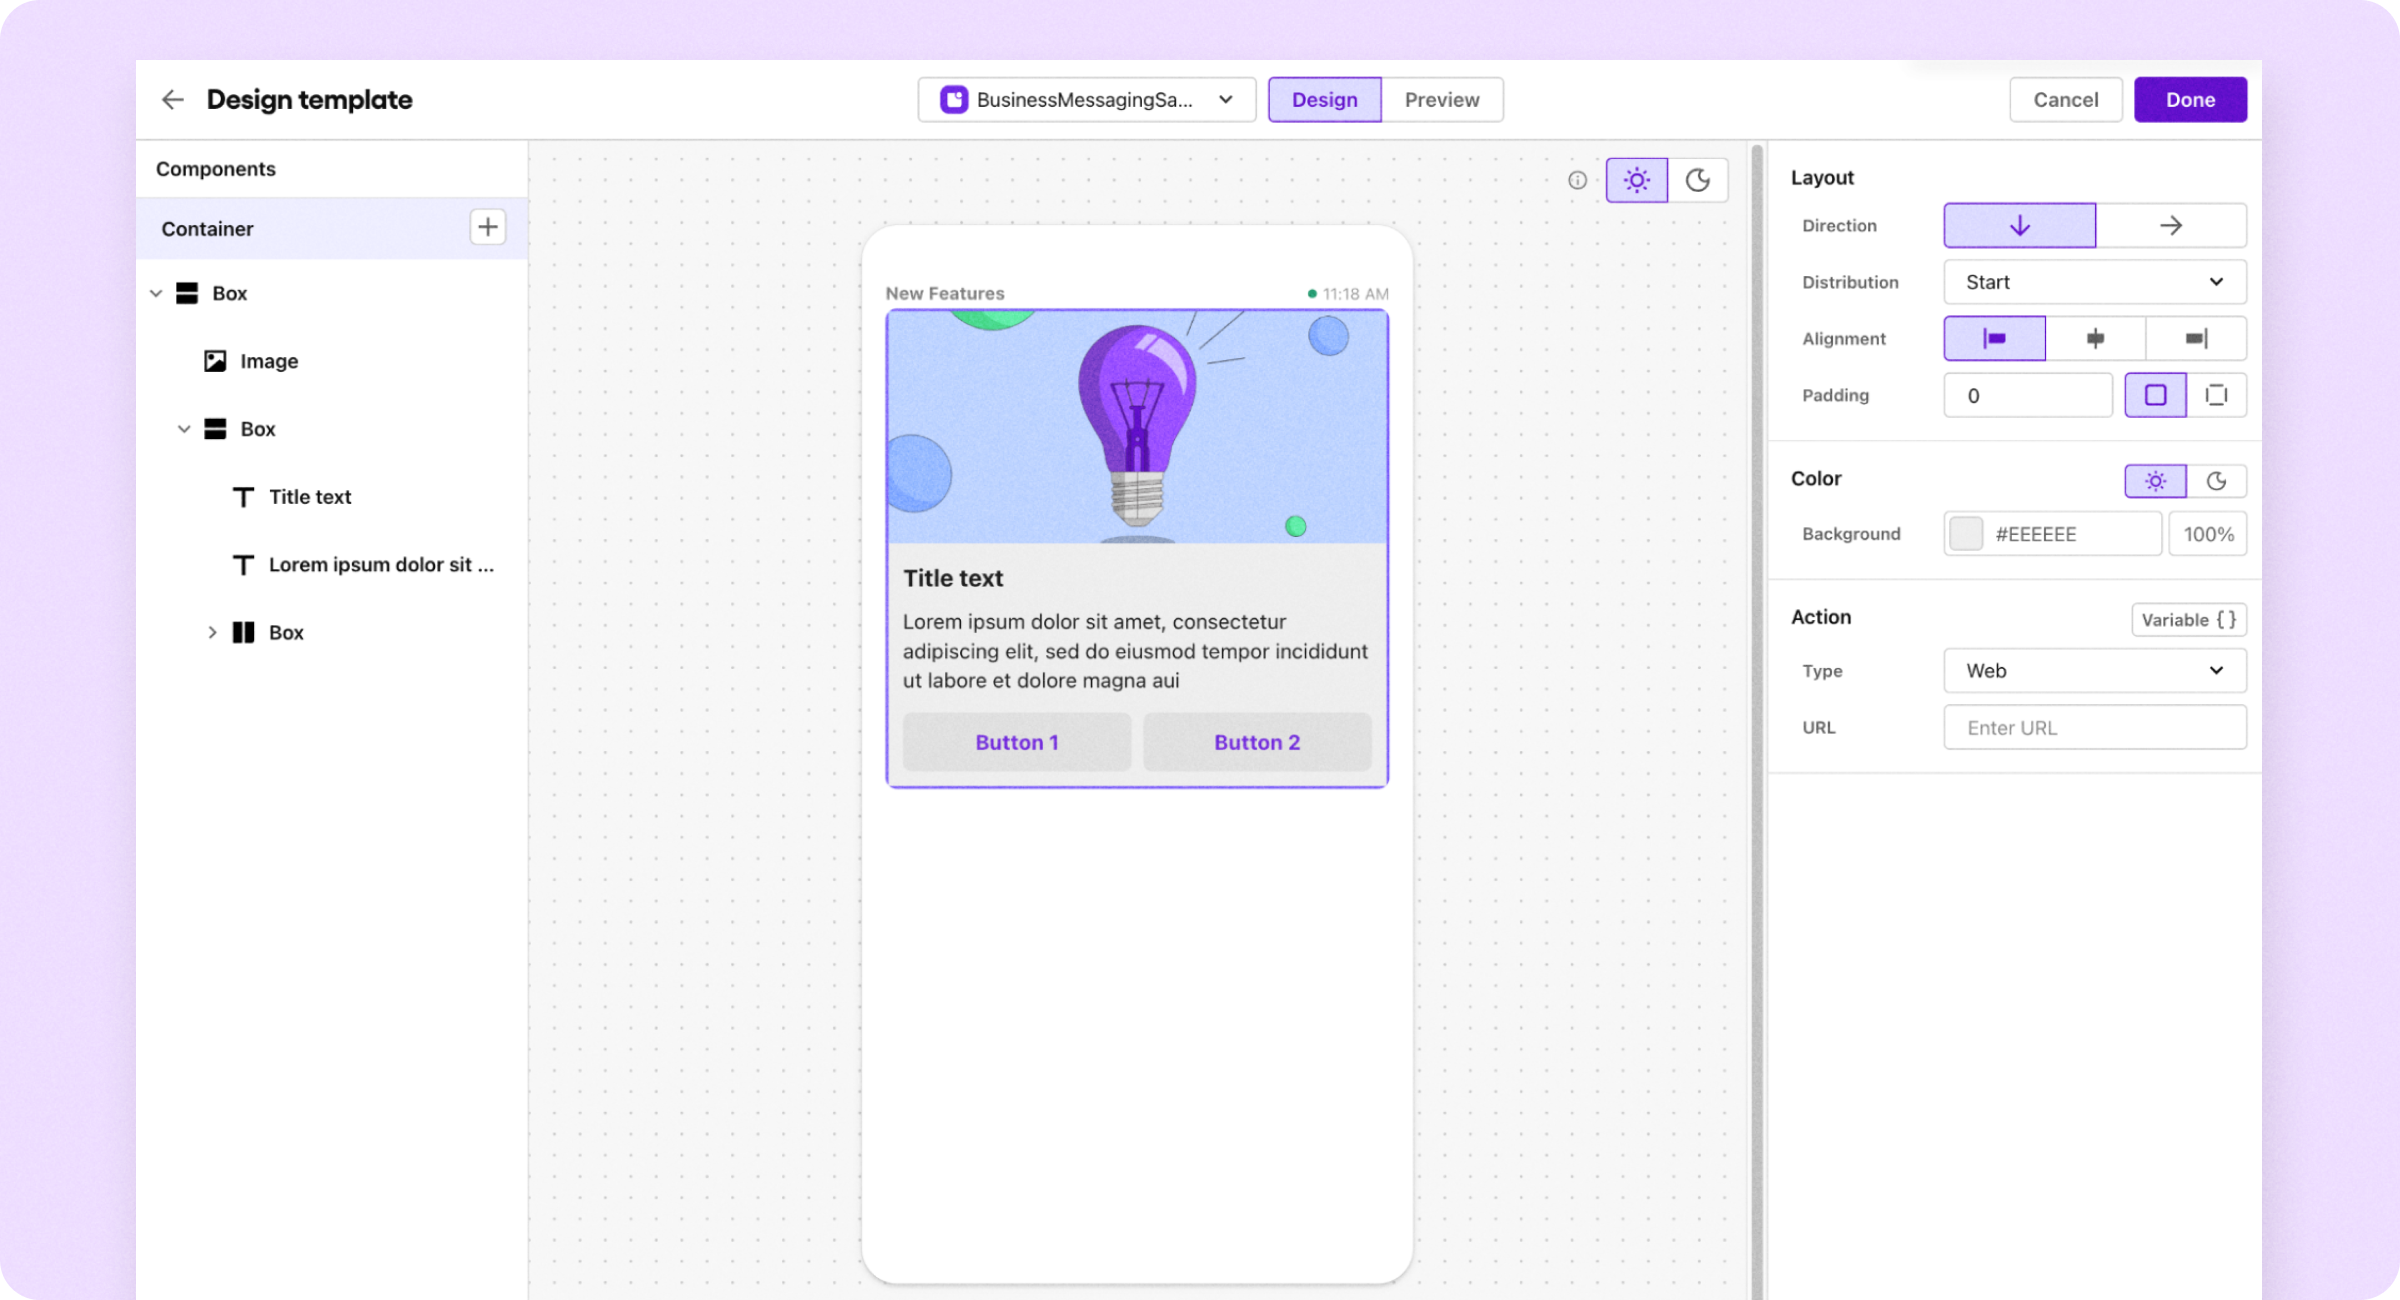
Feel free to play around with the design and come up with whatever you want. When finished, click [Done] and then [Create].
If you’d prefer a video or just want a quick recap of progress so far, you can watch a step-by-step video guide here on how to create templates and send your first in-app notification with Sendbird.
Sending your first in-app notification with the Sendbird Business Messaging software
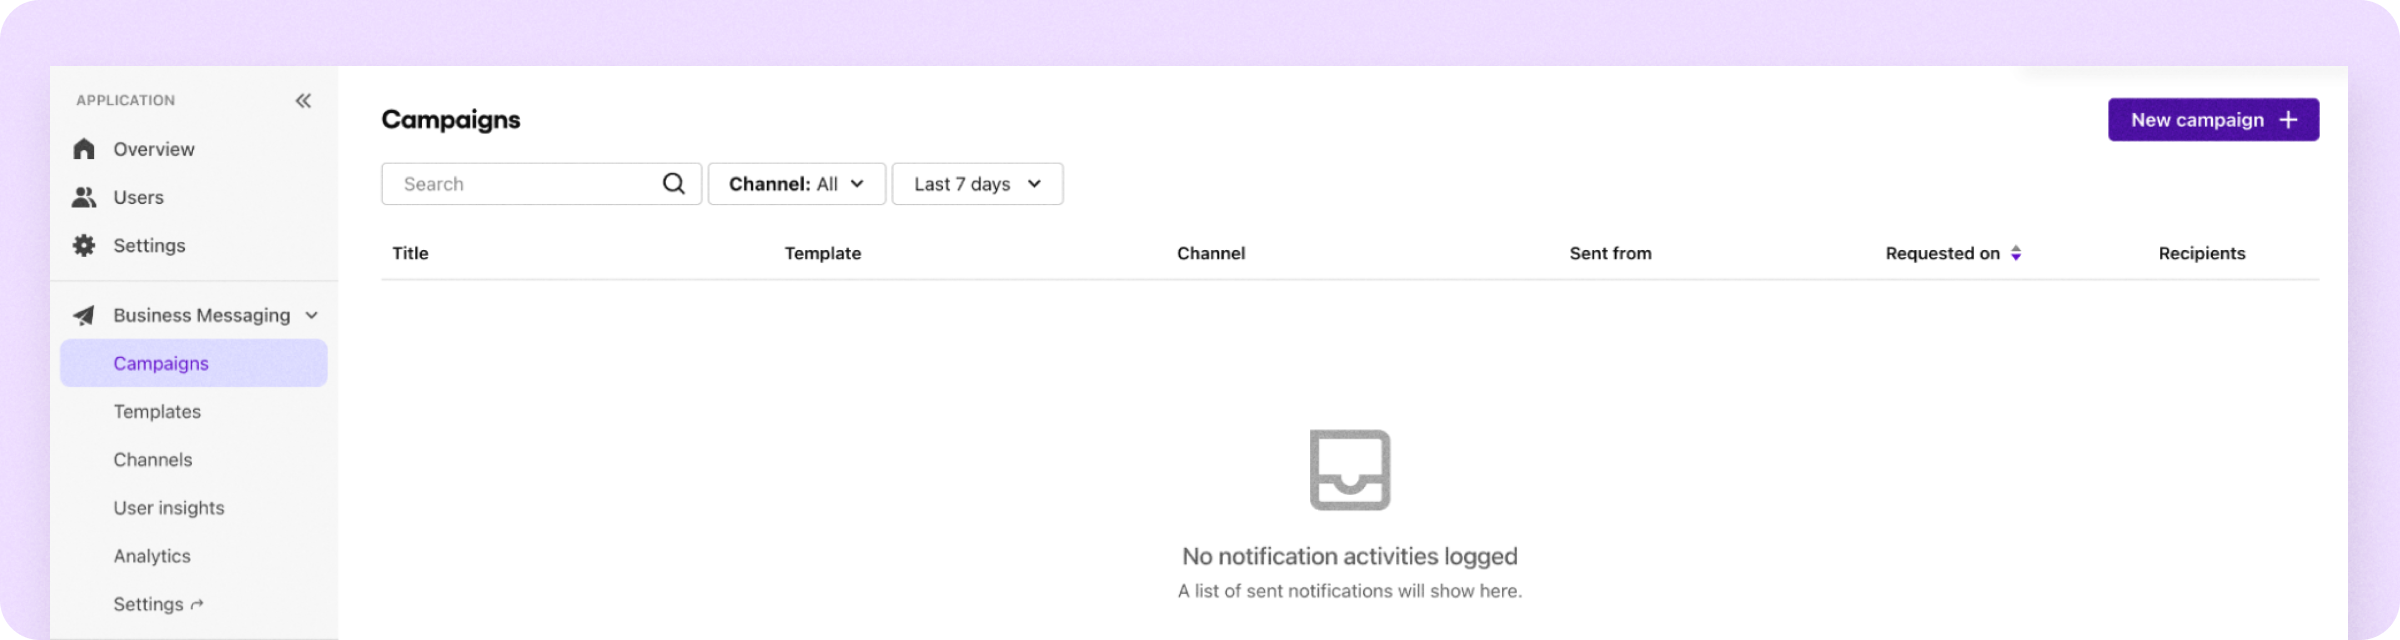
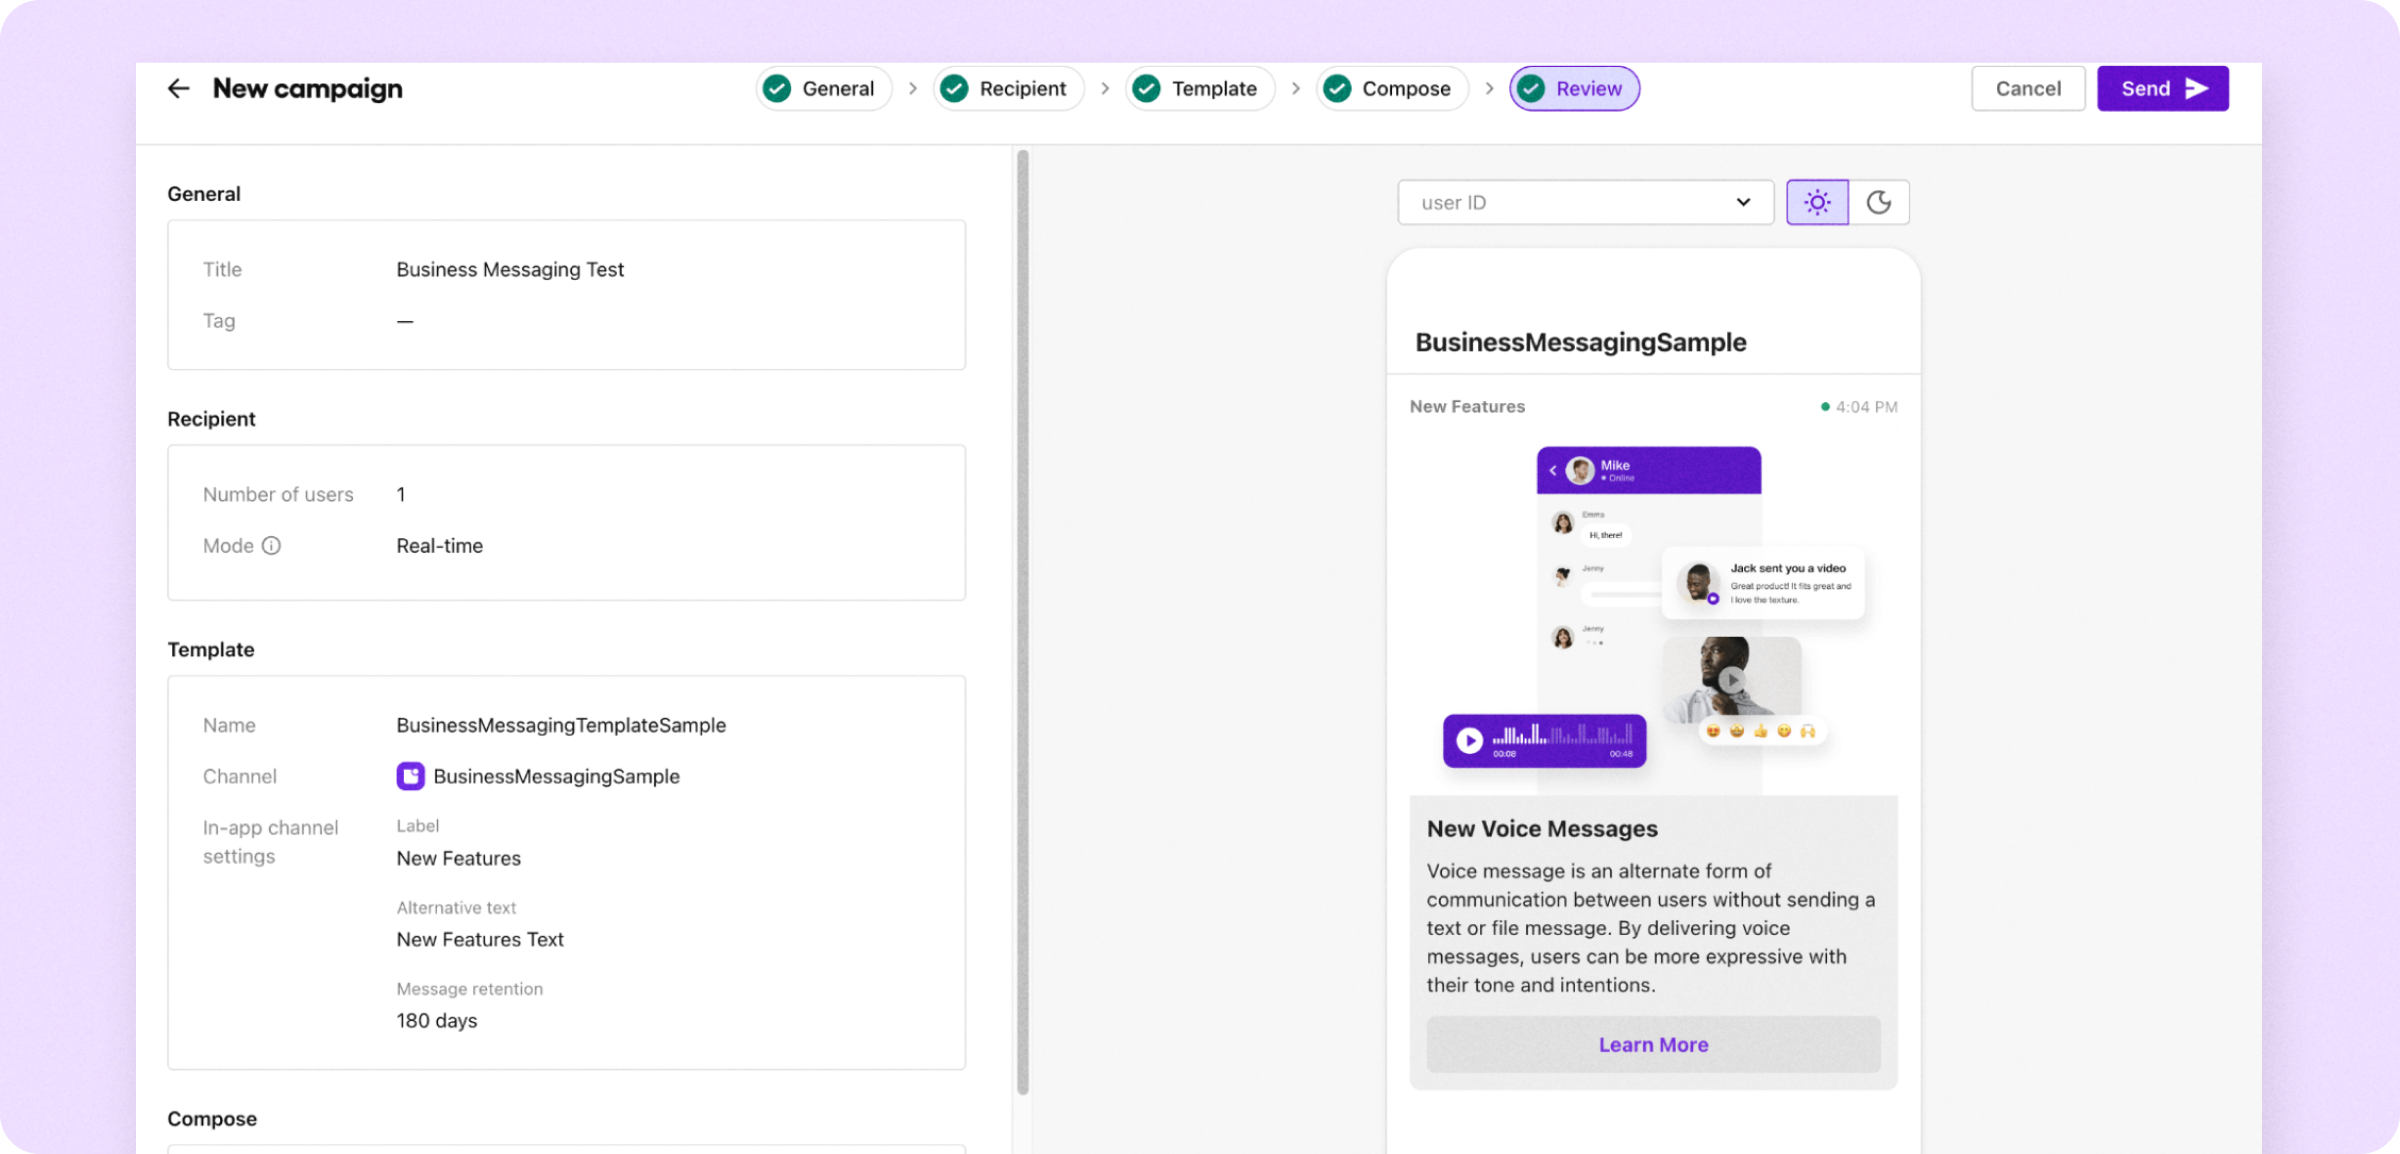
Now let's put it all together and view the message in the app we created. To begin, launch your application on your emulator or physical device. Next, in the Sendbird Dashboard, click [Business Messaging] --> [Campaigns]. Then click [New Campaign] at the top right hand side of the page.
On the next page, enter a title for your outreach. Then click [Next].

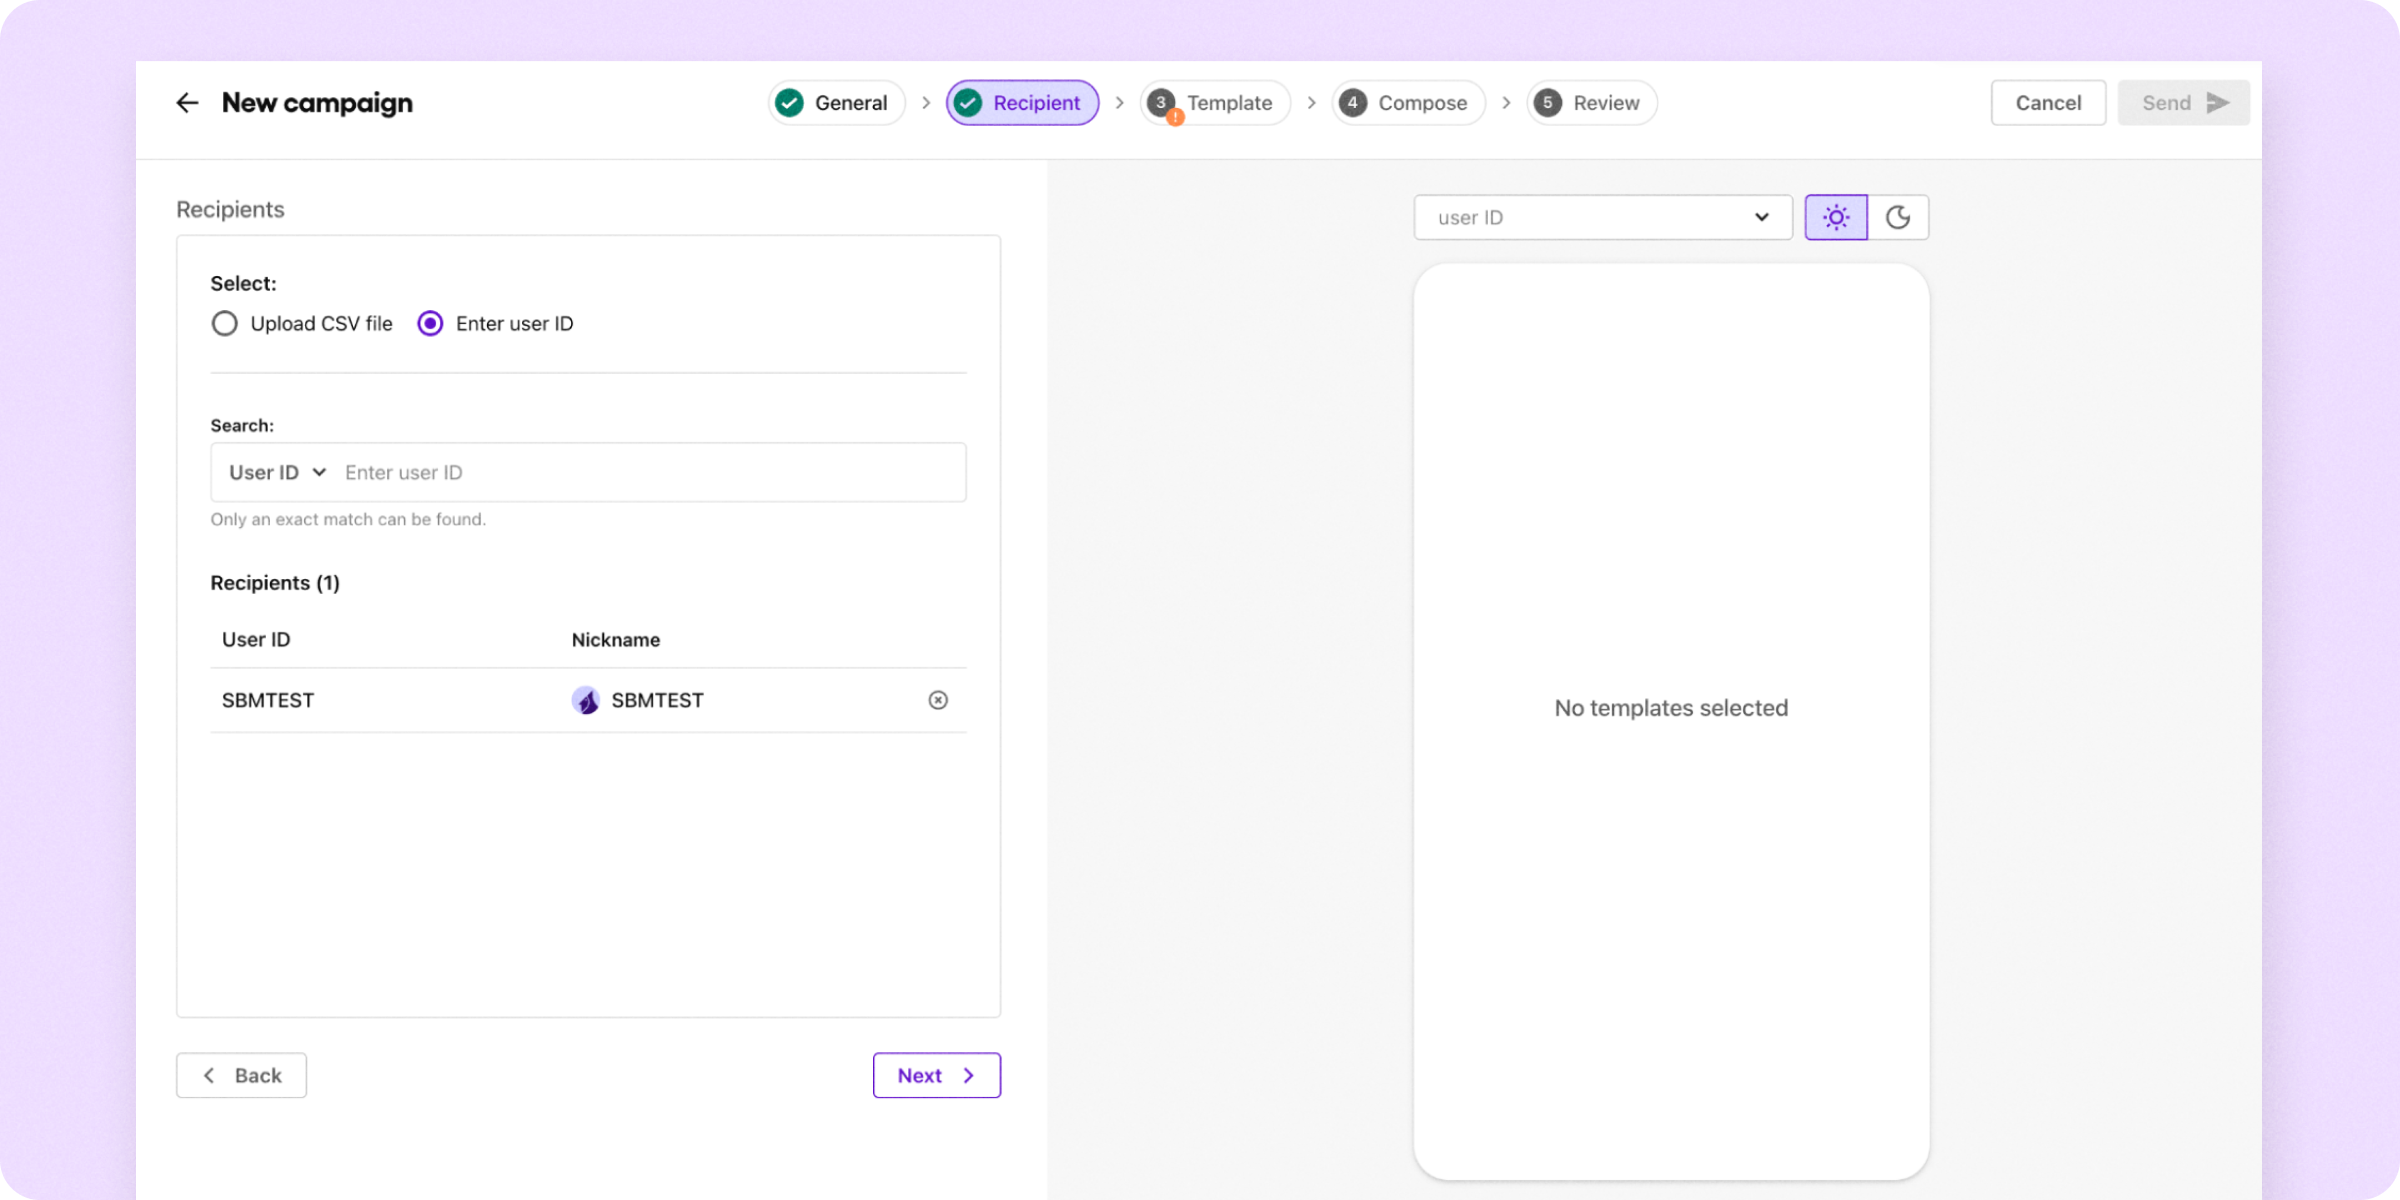
On the next page, choose [Enter user ID], and search for the user that is logged in on your sample app. Click [Next] again.
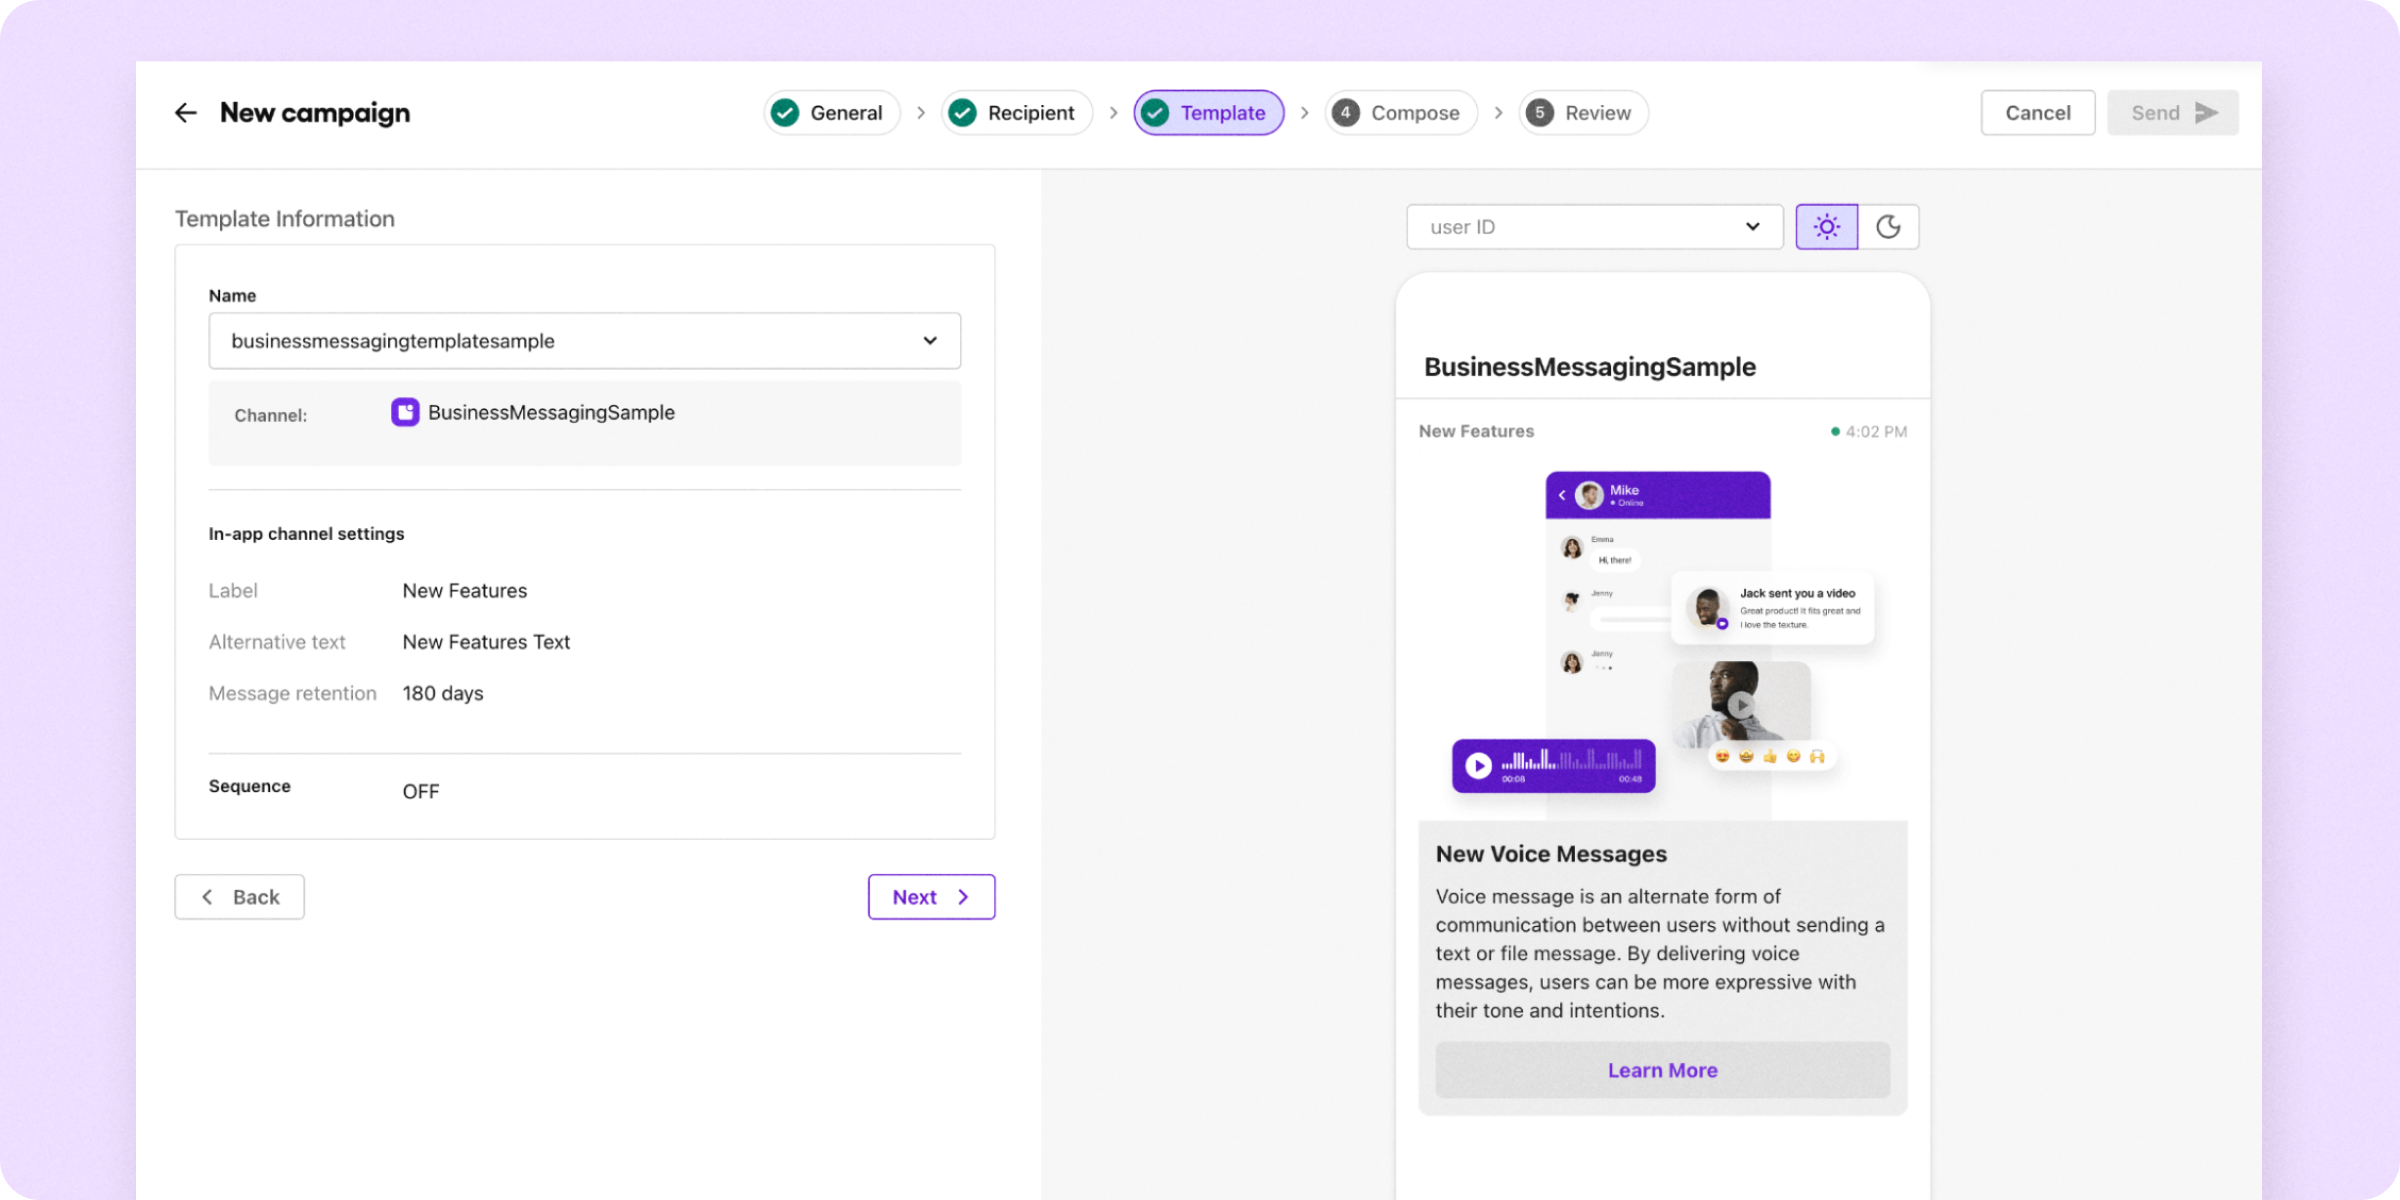
On the next page, choose the notification template you just created.
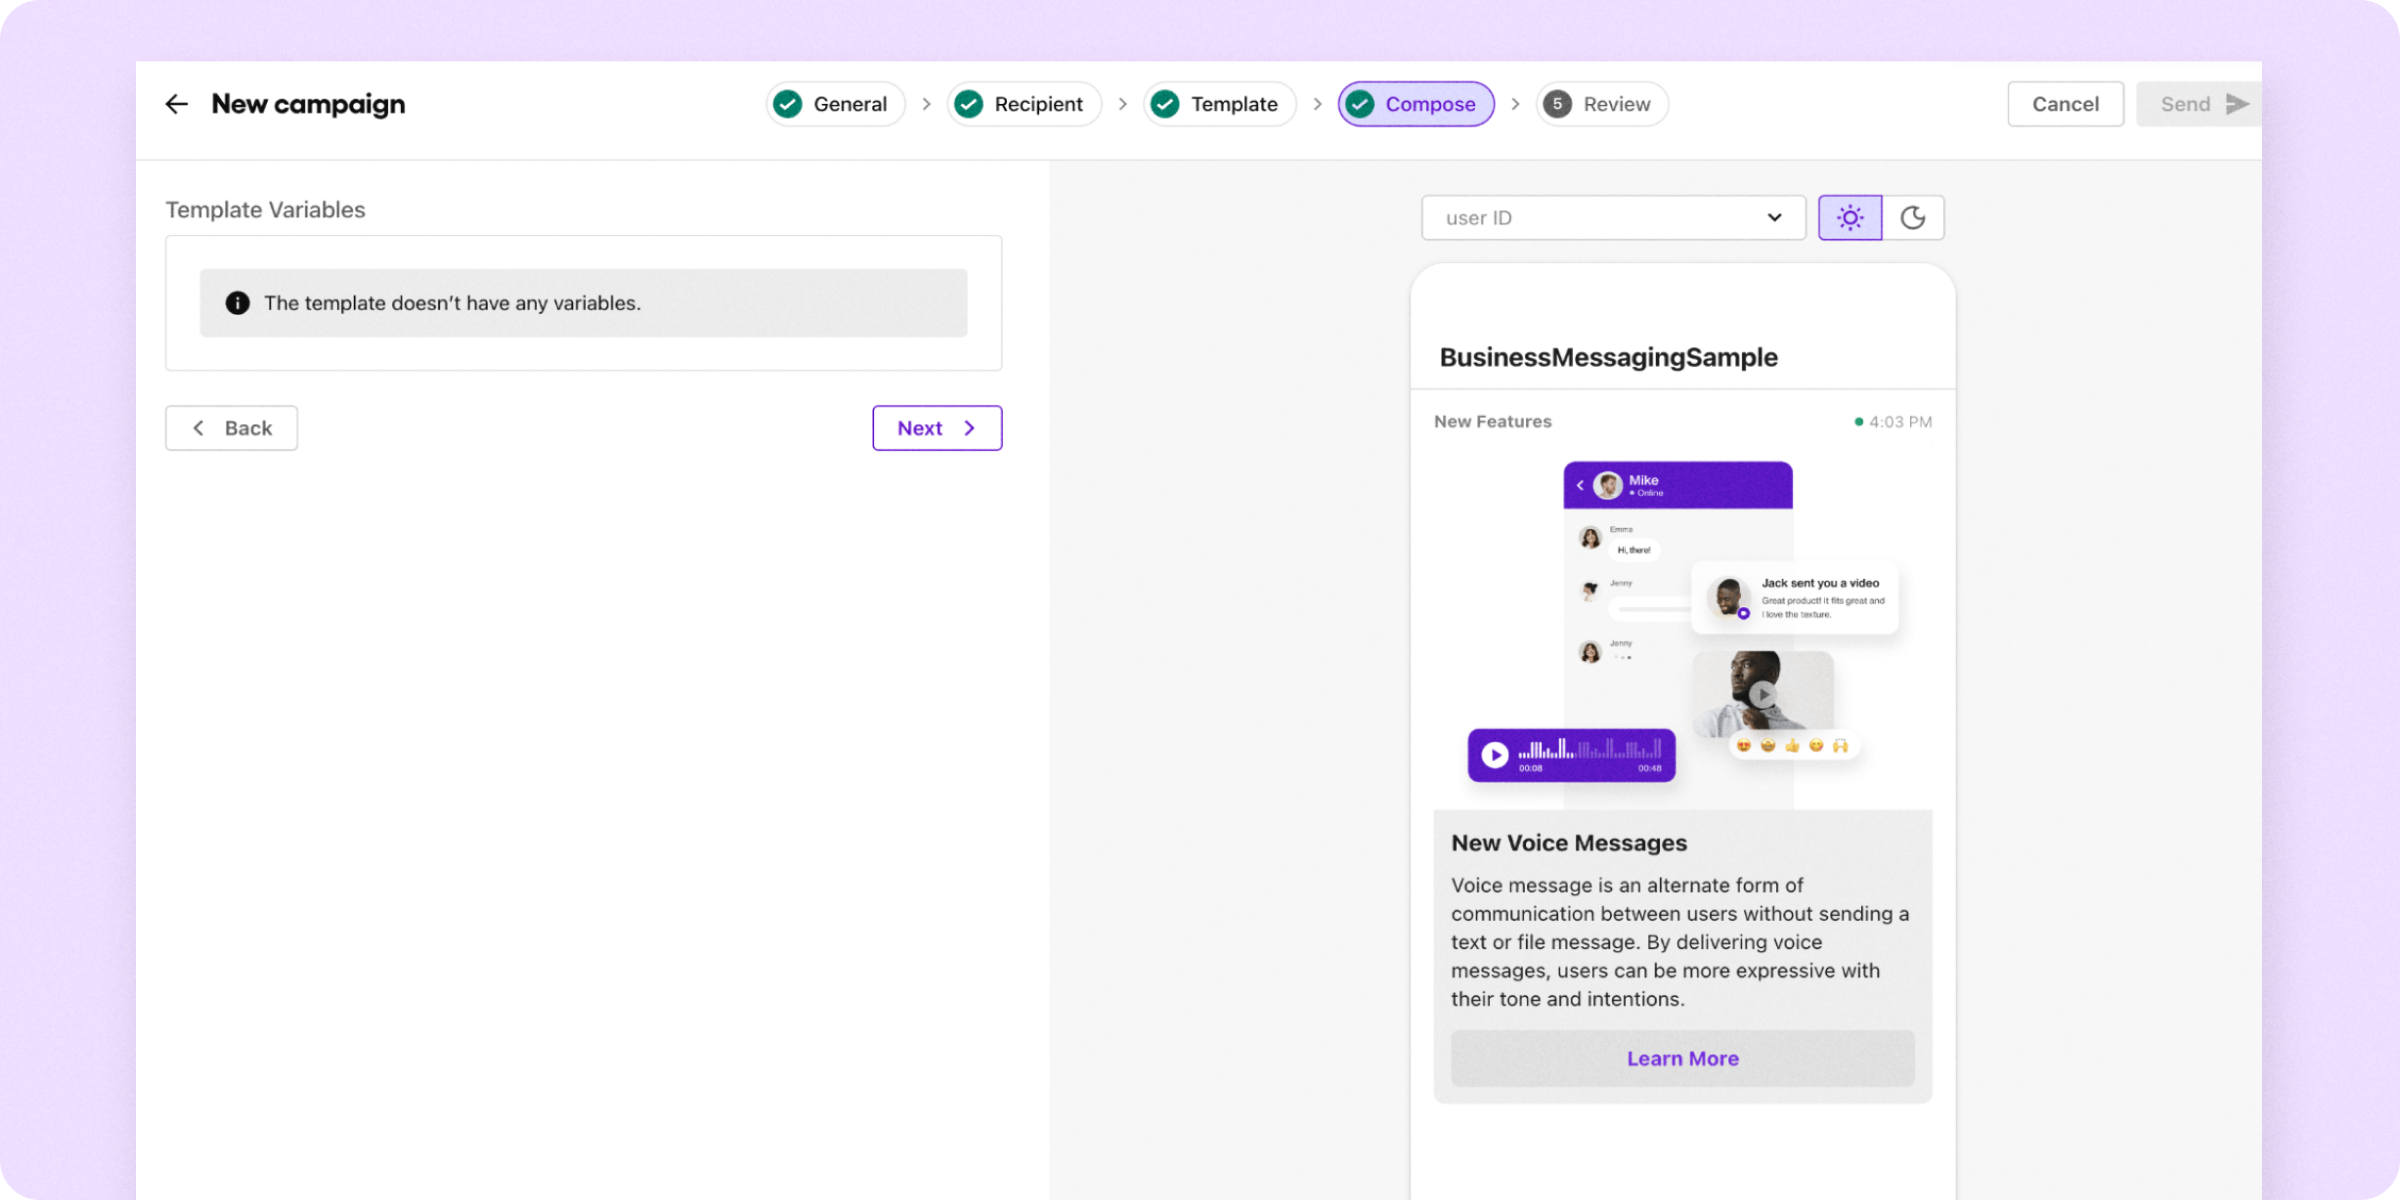
If you put in custom variables for the in-app channel settings, define those here. If not, click [Next] and review the message sample you’ve created.
If everything about your message looks good, click [Send] in the top right corner.
Now check your emulator, and you'll see your newest notification is what you created with Sendbird.
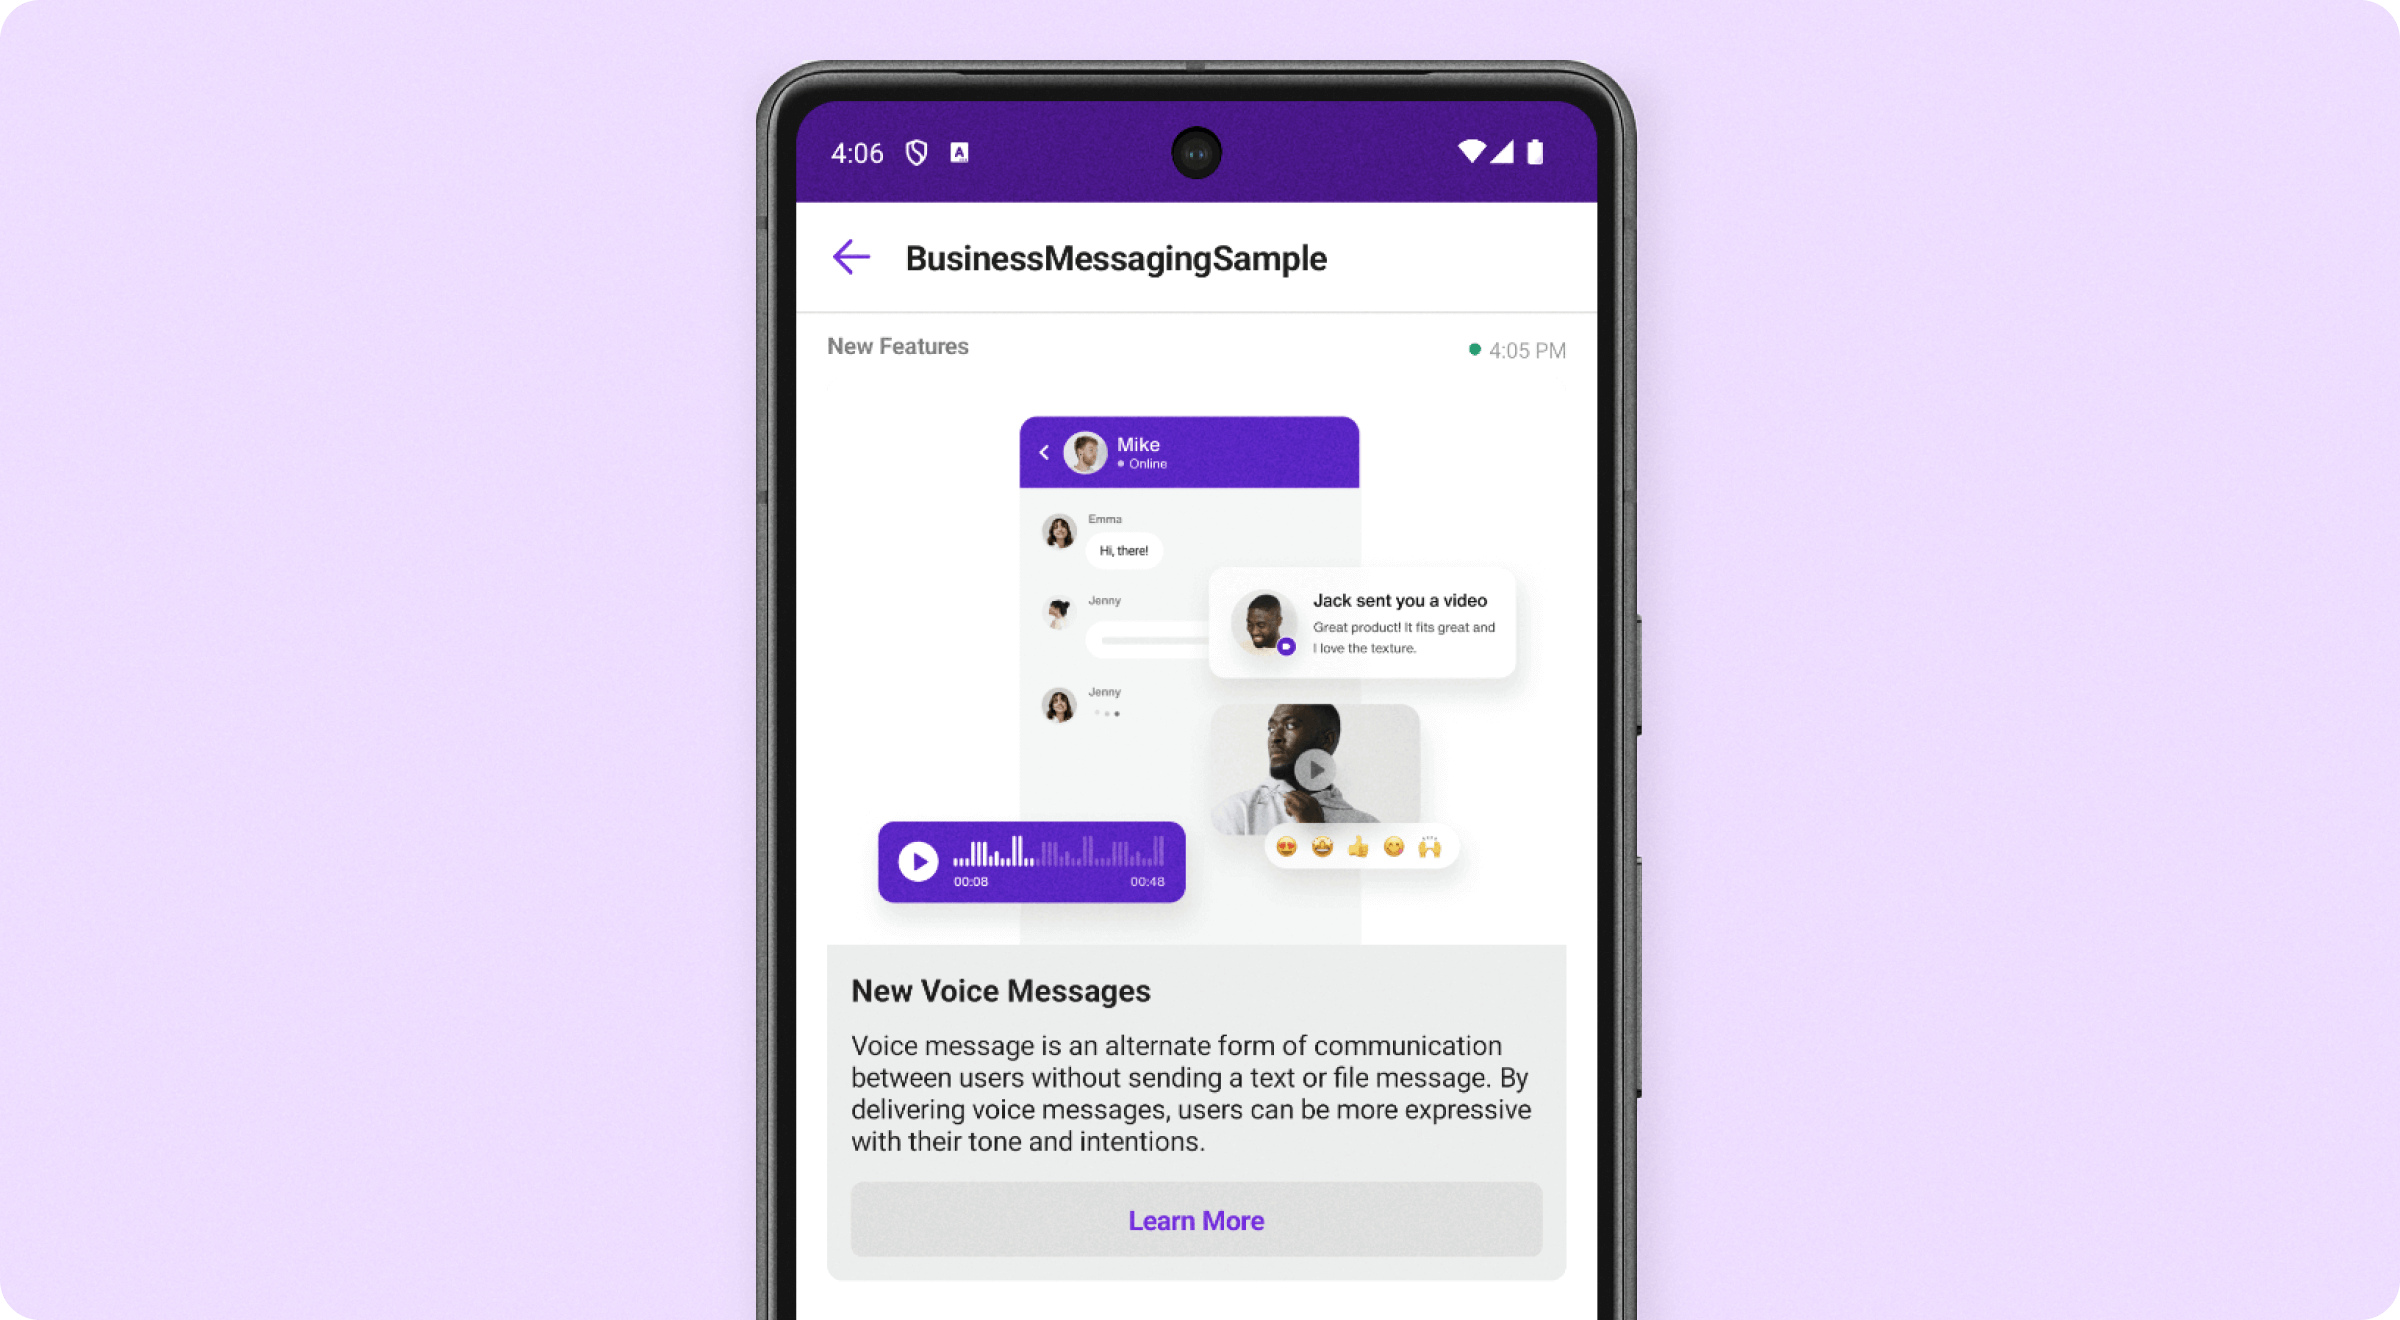
Feel free to play around with sending different types of notifications (in-app notifications, push notifications, WhatsApp, SMS, KakaoTalk), as Sendbird Business Messaging makes it easy to send various mobile notifications to customers.
You can also try out message sequencing to orchestrate multiple notification channels. Or view notification analytics to understand how your end users are interacting with your messages across all channels. You can even integrate notification capabilities with marketing tools like CleverTap or Braze.
Configuring push notifications for Sendbird Business Messaging
Push notifications are a mobile message that appear on a device’s lock screen, allowing a business to engage with users, even while they’re not active in the app. Used to complement in-app notifications, push notifications help to drive engagement with in-app messages and effectively relay critical information in real-time.
In order to receive push notifications, you first need to register notification credentials.
You can set up push notifications for either Firebase Cloud Messaging (FCM) or Huawei Mobile Services (HMS). Both FCM and HMS are mobile platforms that offer messaging and notification services. The key differences are that FCM can be used for Android, iOS, and web apps, while HMS is mainly for Huawei devices. Similarly, FCM can be across multiple devices and ecosystems, while HMS is specific to Huawei’s ecosystem.
If you’re using FCM for push notifications, register your server key and a registration token. If you’re using HMS for push notifications, register your app ID and app secret.
You can also implement push notifications with multi-device support if you want to send a push notification even when the client app is in the foreground. Refer to the multi-device support guide for HMS or FCM for push notifications.
Since the purpose of this guide is to showcase the Notifications Channel and how easy it is to customize Templates to send messages to these Channels, the push section will not be covered here. However, you can refer to our full guide onhow to implement and send push notifications using the Sendbird UIKit.
Building an in-app notification center: A recap
In this tutorial, we showed how easy it is to create a notification channel and send in-app notifications in your Android app with the Sendbird Business Messaging software and Android UIKIt.
Both GDPR and HIPAA-compliant, Sendbird Business Messaging is ideal for any team seeking to implement an effective communications messaging strategy. Our software is straightforward and easy to use within minutes, empowering any department with the autonomy to message customers directly or en masse—without the delay of waiting for help from marketing, support, or engineering teams.
Meanwhile, since SMS offers lower open and delivery rates at a higher cost, switching to in-app notifications and push notifications helps a business to increase engagement with marketing campaigns and critical outreach, all while reducing its costs.
Onward to more effectively reaching your customers! If you have any questions or need support, please don’t hesitate to contact us.


