
Build in app calling: Use a voice & video calling API & highly abstracted SDKs to build a real-time communication web app (Next.js)

Building calls with a voice & video calling API
In a post-pandemic world, app-based communication has seen accelerated adoption for use cases from marketing and operations to telemedicine and fintech. Voice and video calls, in particular, are more important than ever for business and personal use cases.
The WebRTC protocol underlies the implementation of these calls. What is WebRTC? Web Real-time Communication, or WebRTC, is an open-source communications protocol that allows real-time video, voice, or data communication between browsers, applications, or devices. If you’re building a web app that needs peer to peer communication, it’s important to familiarize yourself with how WebRTC works and why WebRTC is important.
It’s a good idea to use an abstraction layer on top of the WebRTC protocol to build and deploy your real-time applications. Let's look at how (and why) to use Sendbird’s video calling API and highly abstracted SDKs to handle the operational complexity of real-time communication requirements for in-app calls and live streaming so you can focus on building your core application.
In this article, you’ll learn how to build a voice and video call application in React using the Sendbird JavaScript SDK.
But first, let’s familiarize ourselves with the WebRTC protocol.
How does the WebRTC protocol work?
The WebRTC protocol is the foundation of Sendbird’s live streaming and Calls protocols. Let’s take a look under the hood of the WebRTC protocol so you understand what it can do and why Sendbird works well with it.
WebRTC provides protocols (like STUN, ICE, and SDP) and APIs that let you request real-time information from browsers or devices. This enabled users to share voice, videos, files, chat, and screens in real time. According to the Mozilla Developer Network documentation, “The set of standards that comprise WebRTC makes it possible to share data and perform teleconferencing peer-to-peer, without requiring that the user install plugins or any other third-party software.”
Because WebRTC connections are peer to peer, they in theory operate independently of servers, thereby reducing latency and bandwidth consumption for a faster user experience. A signaling server is needed to create the peer to peer connection, allowing peers to swap metadata like codec info and network data, but that doesn’t directly affect the voice or video call. If you’d like to understand the basics of peer to peer communication, here’s a great introduction to peer to peer calls.
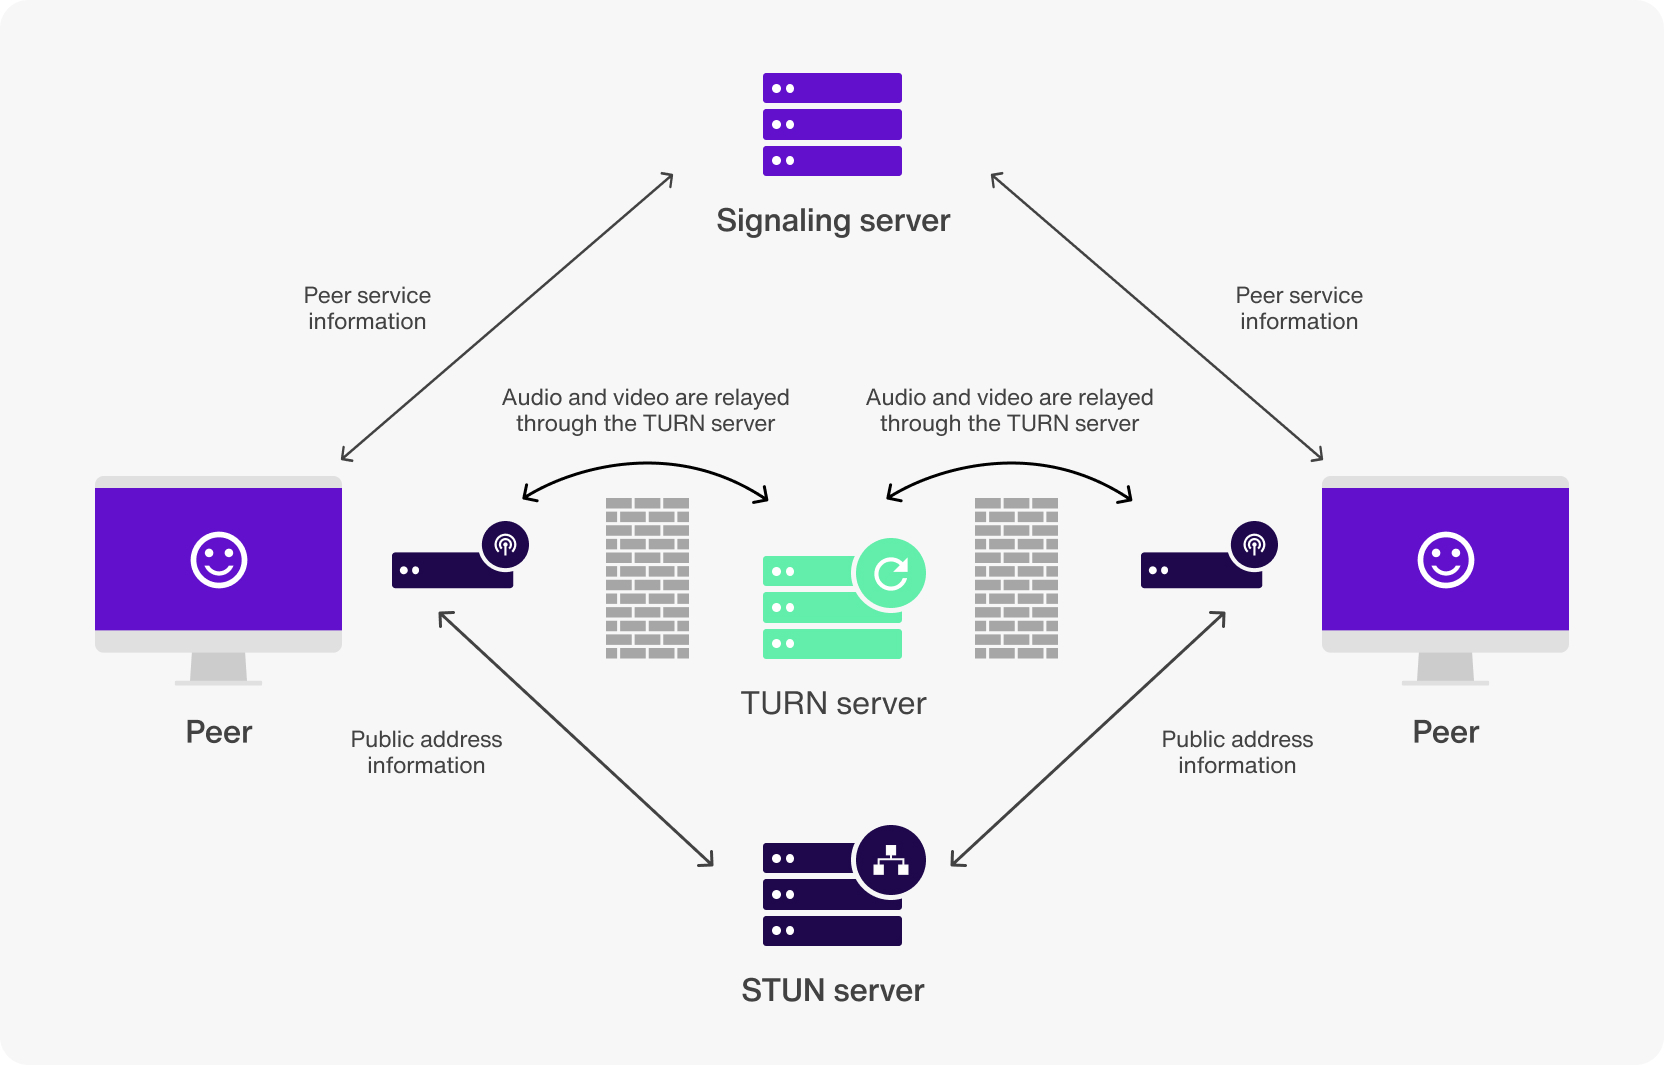
After successfully implementing a signaling server, you can create the peer connection with the RTCPeerConnection API. This process might ask you to pass an ICE configuration object, containing the STUN or TURN server details, as a parameter to the API. Both peers must be configured to listen for ICE candidates produced by their RTCPeerConnection. The signaling server transmits these candidates to the other peer.
Now you need a peer to create and exchange offers with other peers. Following the creation of the offer via the createOffer API, a local description is set using the setLocalDescription API, and the offer is subsequently sent to the other peer. The other peer generates an answer using the createAnswer API and sets a remote description with the setRemoteDescription API.
In this exchange, the peer who creates the offer is referred to as the caller, while the peer who receives the offer is the callee. The answer generated is then returned to the caller, and a connection is established.
Now, both peers can add their media streams to RTCPeerConnection. You can display remote media streams using various methods. Here’s where Sendbird comes in.
Getting started with Sendbird: Using voice & video calling APIs and abstracted SDKs built on WebRTC
Sendbird provides SDKs for iOS, Android, React Native, and JavaScript to integrate voice and video call features into your application. With the Sendbird SDKs, you can quickly add a real-time call feature without having to set up your signaling server or listen to the ICE candidates.
The Sendbird Calls SDKs give you an abstraction layer above the native WebRTC APIs to simplify working with them. Don’t worry about manually creating any handshake methods for communicating with your peers—Sendbird handles it under the hood.
Prerequisites for building a web application: Groundwork to build with a voice and video calling API
To build a Next.js and Tailwind CSS web application for voice and video calling with Sendbird’s Calls SDK, it’s important that you are familiar with the following:
The basics of JavaScript
Some Tailwind CSS knowledge for styling the application
Foundations: Building in-app calls with Sendbird’s voice and video calling API & abstracted SDKs
Before you build the necessary components and tie them together, you’ll need to obtain the necessary keys from Sendbird and create a Next.js project.
Obtaining keys from Sendbird
First, create a free Sendbird account. Fill out the registration page, and you’ll be directed to your dashboard.
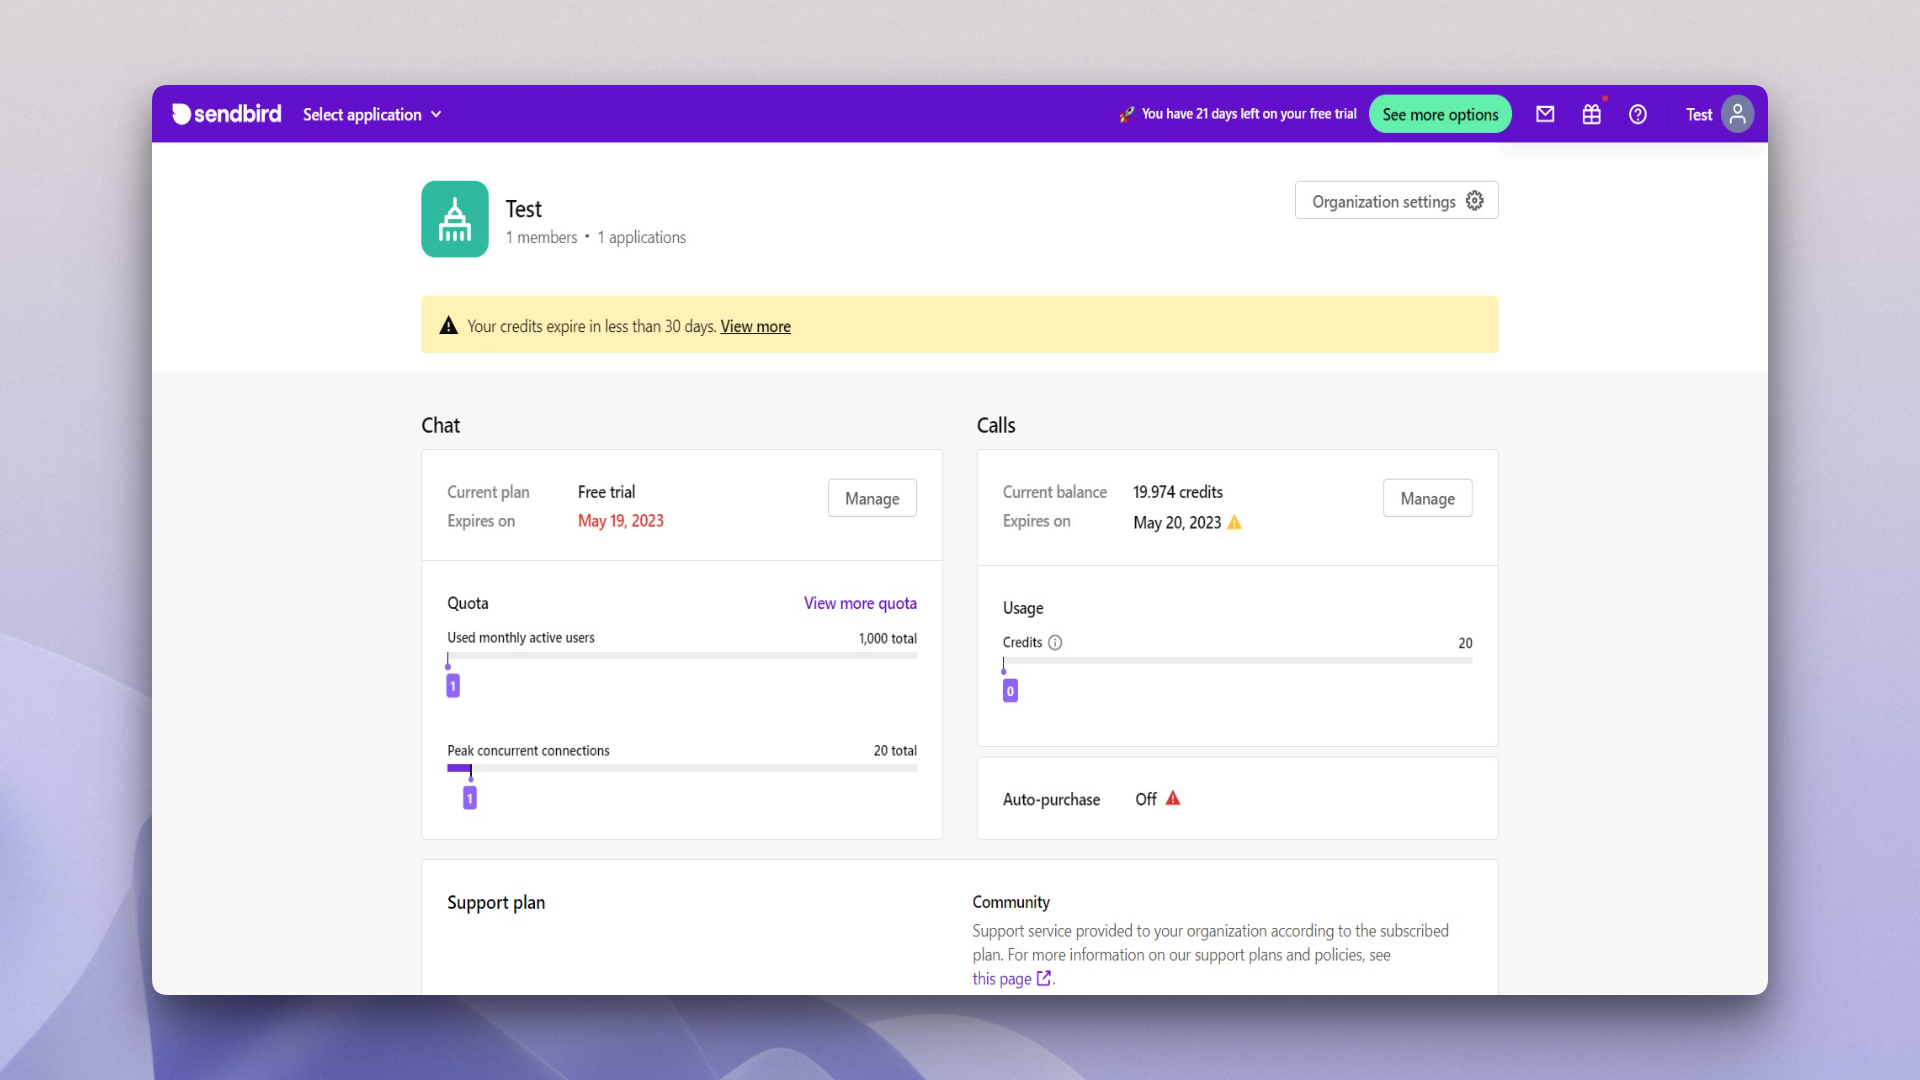
To obtain the necessary keys, you’ll have to create a new Sendbird application in the dashboard.
Click Select Application from your dashboard’s sidebar, then click Create Application. Fill out the pop-up modal with an application name and your preferred region. Select either All Products if you plan to use more than just the Calls feature in Sendbird, or simply Calls. Click Confirm.
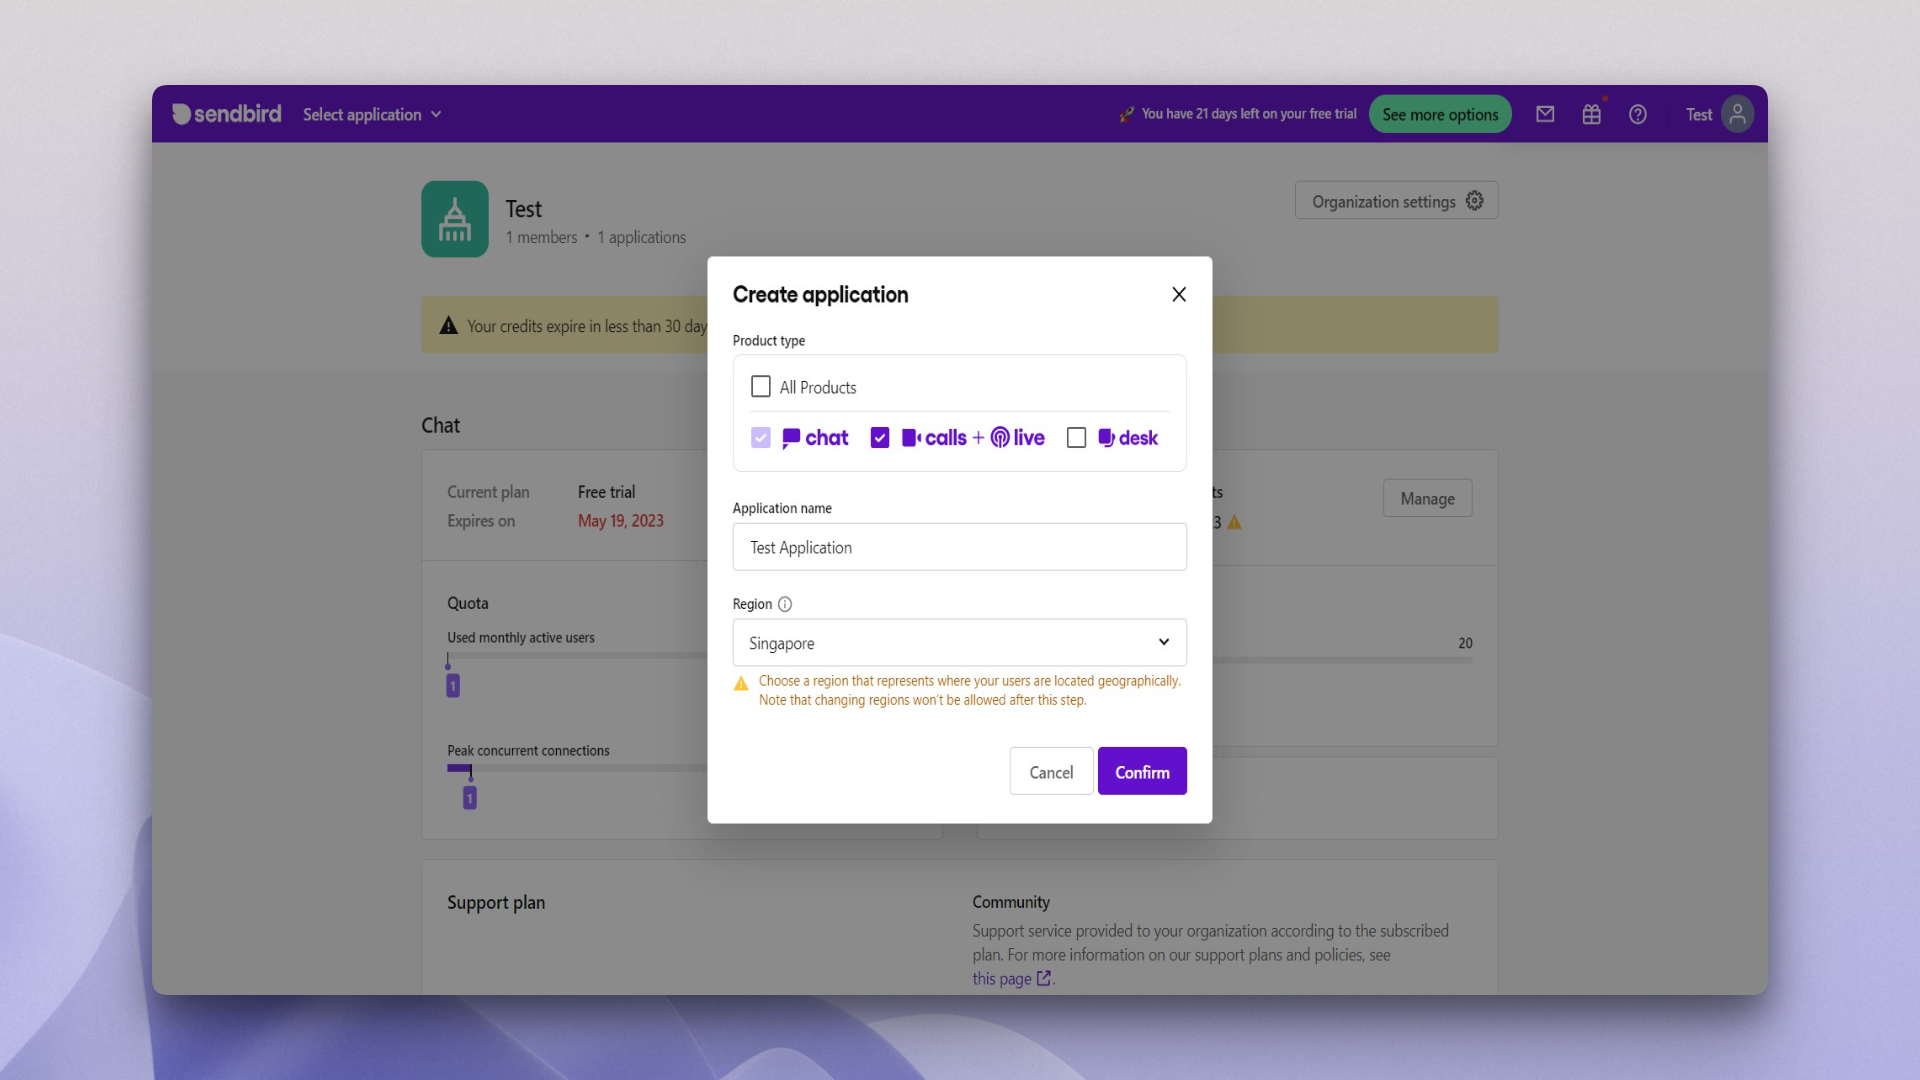
You should now be able to see the necessary details required for connecting Sendbird to your application, including the application ID. Copy this ID and save it somewhere—you’ll need it later.
Create a Next.js project and install necessary packages
To integrate the call functionality, you need the Sendbird Calls npm package. It provides methods like connectWebSocket, dial, and onEstablished to connect, dial, and manage sessions.
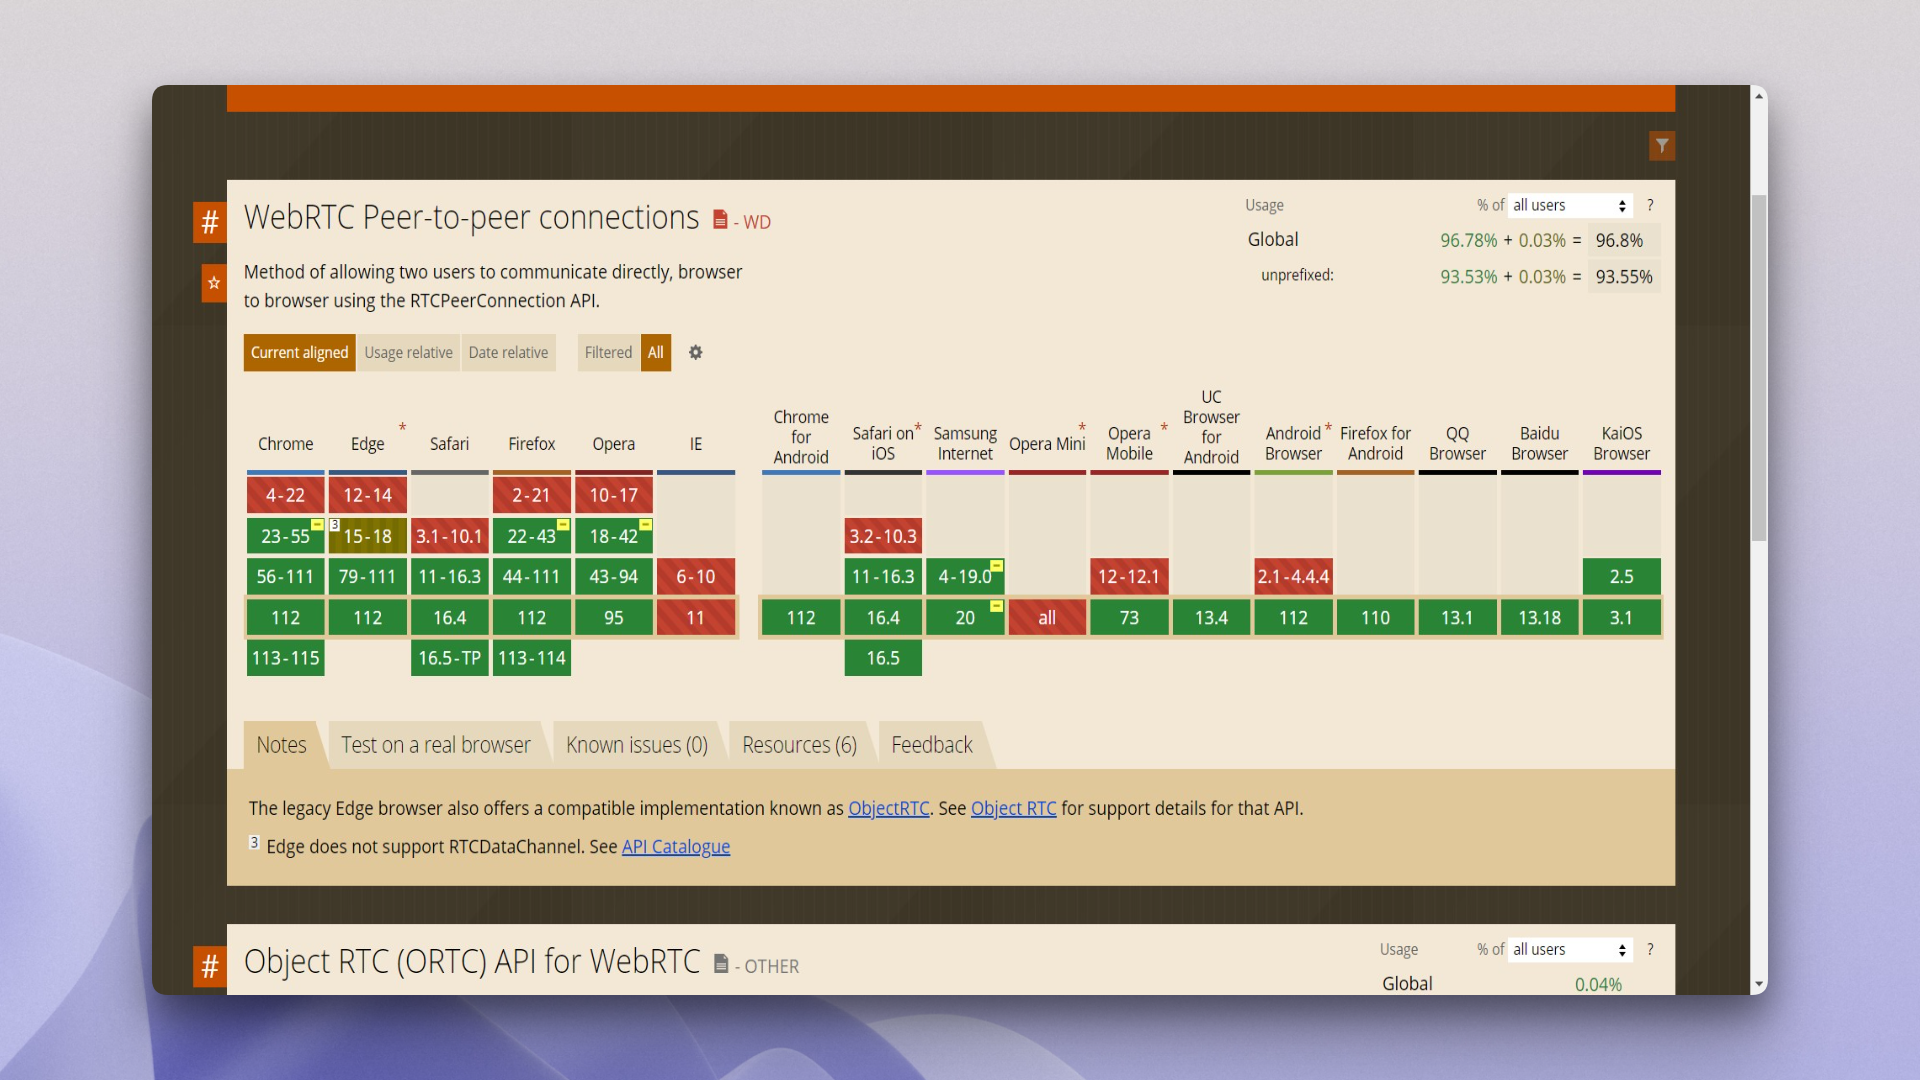
Remember that Sendbird only works on browsers that support the WebRTC APIs. Browsers like IE or Opera Mini don’t support WebRTC.
Now, let’s create a Next.js project.
Open a folder from your code editor where you want to create the project and run the following command in the terminal:
Name your application and click Enter. A new Next.js project is scaffolded for you.
Now, cd into the project directory and install the Tailwind packages.
Once the Tailwind setup is complete, run the following command to install the sendbird-calls package:
Create a new file called .env.local inside the root directory of your application, and define a new variable called NEXT_PUBLIC_APP_ID to it. The value of the variable is the application ID you copied from the Sendbird dashboard earlier.
The content of the .env.local file should look like this:
Implementing in-app voice and video calls with a video calling API
With the package installed and the environment variable defined, let’s discuss the application flow before we move on.
A user will authenticate in the application by providing the user ID, which needs to be unique. An authenticated user (in this case, the caller) can input the user ID of another user (the callee) and choose to voice or video call them. Since we’re building for the web with a JavaScript SDK, the callee will receive an event of an incoming call. An event is an occurrence or situation, recognized by software, that can be triggered by an action performed by a person or a condition/state that becomes true. The callee receives a notification of incoming calls and can choose to accept or reject the call. If they accept the call, a connection is established, and both users can see and hear each other.
Let’s build a few components first. This tutorial uses Tailwind CSS to design the UI, but you’re not bound to use a specific UI library. Sendbird lets you use whatever you’re comfortable with.
Login component
Create a new folder called components in your project’s root directory and create a file called Login.js inside it. Paste the following code to the file:
The form takes a prop called setUserId to set the user ID using the connect function. The form has an onSubmit method called connect, which sets the value of the user ID input field via the setUserId state setter.
Dialer component
Let’s create a dialer for calling other users. Create a new file called Dialer.js inside the components directory. The content for this file should look like this:
This dialer is a form similar to the login form. It has an input field for the callee’s user ID, and below that are two buttons, one for initiating a voice call and the other for a video call.
This form takes a prop called makeCall, used for calling another user. There are also two React states: one for displaying any input user ID error, and another state called userId and setUserId for setting and passing the user ID to the makeCall function.
The initiateCall function takes a single parameter to verify if the call is a video call. If the user ID for the input field is empty, it sets an error via the setUserIdError method and displays it in the frontend. The makeCall function takes the userId and a Boolean value of isVideoCall and instantiates the call. The dialer is ready!
With the Login and Dialer components ready, let’s implement the business logic using Sendbird.
Call component and business logic
The complete application logic will be inside a Call component, so create a new component called Call.js inside your components folder.
You need to import the Sendbird Calls SDK and the other components you built earlier in this article. Start the Call.js component by pasting the following:
This component requires a few states. Create a React functional component called Call and paste the following states into it:
Let’s briefly discuss how each state is used:
userIdandsetUserId: This state holds theuserIdof the logged-in user.setUserId: A setter method to set the state.callandsetCall: This state holds information relevant to the call, like details for the callee and caller, application context, and more. This state holds necessary details only when a call is made using the Sendbird SDK’sdialmethod.authenticatedandsetAuthenticated: This state checks if the user is authenticated for using the application. Necessary details, like accepting or rejecting a call or changing audio settings, will only be visible to an authenticated user.ringingandsetRinging: Theringingstate checks if the user is receiving any calls. The buttons to accept or reject the call are shown to the user only when theringingstate istrue.connectedandsetConnected: This state is set to true when a call is connected between the peers. This state shows or hides the buttons for ending the call or changing the voice and video settings along with theauthenticatedstate.connectingandsetConnecting: Along with theauthenticatedstate, this state also shows the accept or reject buttons to the user whentrue.loadingandsetLoading: This state checks if the application is in loading state.mutedandsetMuted: This state checks if the user is muted.startVideo()andstopVideo(): These check whether the user's video is on or off.defaultCallParamsandsetDefaultCallParams: This state sets the default call parameters for calling a user.
Now, let’s create a function to authenticate the user. Define a function called authenticate and paste the following code:
This function uses the authenticate method from the Sendbird SDK; it passes the user ID and a callback function. If there is an error, the promise is rejected; otherwise, it is resolved. Later in this tutorial, you’ll see this function used to authenticate the user. The Sendbird Calls SDK will be initiated depending on whether the user is authenticated.
Now, create a new function called addEventHandler for handling Sendbird listener events. Paste the following code below the authenticate function:
The addListener method registers device-specific event handlers. This listener listens for events such as onRinging, onAudioInputDeviceChanged, and so on.
For the sake of simplicity, this tutorial only defines the onRinging listener. This listener takes the call as an argument. The call argument sets the default call handler parameters. The setter method sets the ringing and call states, which display the notification to the user when they receive a call.
Your next step is to create a function for initiating Sendbird Calls using the init method. Paste the following code below your addEventHandler function:
The SendBirdCall.init method takes the application ID as a parameter, and the authenticate function is called inside a try-catch block. After authentication, the Sendbird SDK’s connectWebSocket method establishes a connection to the WebSocket server.
For the default call handler options, set the values using the setDefaultCallHandlers setter:
This code sets different default parameters for different events: or the call.onEnded event, the ringing is set to false so that the notification doesn’t show; the connected state is set to false so that the video elements get hidden; the connecting state is set to false; and the call state is set to null.
You’ll also need to define a useEffect hook. Paste the following code below your existing code:
The useEffect hook checks if the userId exists, calls the initiateSendbirdCalls function, and then sets the default call parameters. Inside this object, define another object called callOption. The localMediaView key sets the caller’s video output. The remoteMediaView sets the callee’s video output. The audio and video inputs are set to true.
Finally, let’s create the makeCall function for calling another user:
The makeCall function takes an object containing userId, and isVideoCall values. The dialParams object holds the defaultCallParams and the userId and isVideoCall values.
Finally, the call is initiated using the dial method available from the Sendbird Calls SDK. This method takes the dialParams object as an input and a callback function that takes the call and error as an argument. If there’s an error, the call state is set to null. Otherwise, the connecting state is set to true, and the call state is also set to the call value.
Paste the following code below your makeCall function:
This part of the code is straightforward, but let’s quickly take a look at it.
The JSX shows the different components depending on the state of the application. If the user receives a call, they get a Video Call is Ringing or Voice call is Ringing message depending on the type of the call. Two buttons are displayed for accepting or rejecting the call. The method call.end() rejects a call and the method call.accept() accepts a call.
If you wanted to implement the same functionality using WebRTC, it would have taken a lot more code than simply checking the call object.
When users are connected, they can see three buttons: one for toggling the audio, one for toggling the video, and one for terminating the call. Methods like muteMicrophone, unmuteMicrophone, stopVideo, and startVideo are available on the call object to achieve these features. The methods are bound to their corresponding buttons.
The user receives a connecting message when the call is in a connecting state. If the application is not in a connecting, connected, or ringing state, the Dialer component is shown to the user. The makeCall function is passed to it for dialing. If the user is not authenticated, then the Login component is displayed. The component takes the userId and the setUserId prop.
The video toggle button is only shown if the call is a video call. In that case, two video components are displayed. Take a look at the ids of the components—they’re referenced in the setDefaultCallParams setter in the useEffect function above. The local_video_element_id references the local video of the caller, and the remote_video_element_id references the callee’s video.
When no userId is available, the Login component is displayed.
The application is now ready!
As your final step, you need to import the Call function inside the index.js file. Replace the content of the index.js file with the following code:
You can start your application by running npm run dev; it should start a server locally on your machine. The application should work as shown in the following GIF:
You can find the complete source code for this application on GitHub.
Simplifying communication with Sendbird’s voice and video calling APIs and abstracted SDKs
We talked earlier about the basic workflow of building a communication app using WebRTC—it requires a signaling server to create a connection, which can be a complicated task. If you’re just starting out with WebRTC, it could take a long time to implement perfectly. And if you want to extend your app’s functionality with both voice and video calls, WebRTC takes even more work.
With reliable voice and video calling APIs, as well as highly abstracted voice and video SDKs, it becomes much easier to use underlying technology and communication protocols like WebRTC. As you’ve seen in this tutorial, methods like connectWebSocket, authenticate, and listener events simplify operational tasks. Depending on whether your app enables video, you can easily create a voice call or video call app without having to understand the nitty-gritty of WebRTC. Keep that attention on your core application!
Extend your app’s functionality with a live streaming SDK
If you want to livestream your video event, the Sendbird Live SDKs can help you extend your app’s communication functionality to give your users a customized experience without relying on a third-party streaming service. Sendbird Live can handle up to 100,000 participants per event, with a sub-second WebRTC latency of 100ms. You can also add useful (and fun!) features such as screen sharing, camera filters, cloud video recording, and more. Sendbird Live also offers RTMP ingest plus RTMP to WebRTC transcoding for global content delivery to web and mobile devices. This enables greater device compatibility, higher video quality, and a smoother viewing experience for live online events. Check out the docs to see how to start your live stream.
A top-quality app built with Sendbird’s voice and video calling API and JavaScript SDK
This tutorial used Next.js, Tailwind CSS, and the Sendbird JavaScript SDK to implement in-app voice and video calls. Using the Sendbird JavaScript SDK, you now know how to build a voice and video call app in React without managing or building a Websocket server or media server. You also saw how to customize the user experience with Sendbird’s flexible voice and video API and SDKs.
Make your first call today and get in-depth guidance in the docs. If you need help, please start a conversation in the Sendbird Community or contact us to get personalized help. Our experts are always there for you and happy to answer any questions.
Happy calls building!📱


