
How to implement Android push notifications with Sendbird Chat & Firebase

What are Android push notifications?
Android push notifications are messages sent by applications to users' devices through Google's Firebase Cloud Messaging (FCM) service. These push notifications can display text, alerts, sounds, and icon badges, even when the app is not actively in use or the device is idle. Android push notifications provide timely information, updates, and increase user engagement with your app.
Why are Android push notifications important?
Push notifications are a powerful marketing channel by which you can target the right users, deliver meaningful content, increase conversion rates, and enhance your customer care strategy, regardless of whether you implement Android push notifications or iOS push notifications. In fact, according to RubyGarage, organizations that implement push notifications have 3x higher customer retention and 88% higher engagement than businesses that do not!
Here are the highlights of why Android push notifications are important for developers:
- User retention and engagement: For developers, Android push notifications are crucial in maintaining user engagement and retention, as they remind users to return to the app and interact with new content or features.
- Real-time updates and communication: Android push notifications enable developers to provide real-time updates, which is vital for apps that rely on timely information delivery, such as news or weather apps.
- Personalization and user experience: Developers can offer a personalized user experience by sending targeted messages through Android push notifications. The personalization is based on user preferences and behaviors.
- Cost-effective marketing: Android push notifications offer a cost-effective way to promote new features, products, or services directly within the app, reducing the reliance on external marketing channels and increasing conversion rates.
Our guide to mobile push notifications has everything you need to know about push notifications, their benefits, and how they can be used.
This tutorial provides step-by-step instructions for implementing Android push notifications.
Prerequisites
- Create a Sendbird account
- Ensure that Sendbird Chat works well in your Android app. You may want to check out the Kotlin implementation guide or this tutorial about building an Android chat app with UIKit. The docs contain additional guidance for implementing real-time chat in your Android app.
It is important to understand that push notifications on Android client apps are sent using Firebase Cloud Messaging (FCM) or Huawei Mobile Service (HMS), and these contain custom data that your app needs to respond to the notifications. When a message is sent to the Sendbird server from an app (through the Chat SDK for Android), the server communicates with either FCM or HMS, and then FCM or HMS delivers a push notification to the Android device. This article focuses on setting up push notifications with FCM.
Sendbird provides two options for push notifications: general push notifications and push notifications with multi-device support.
General push notifications support both single and multi-device users and are delivered only when a user is fully offline (disconnected from the server) from all devices. In other words, if a user is online on one or more devices, notifications aren’t delivered and thus not displayed on any device. On the other hand, push notifications with multi-device support are delivered to all offline devices, even when a user is online on one or more devices.
Push notifications for Android: FCM
There are two types of FCM messages: notification messages and data messages. According to the Firebase documentation, “Notification messages have a predefined set of user-visible keys and an optional data payload of custom key-value pairs.” In contrast, data messages contain only user-defined key-value pairs. Sendbird uses data messages, allowing client apps to create the custom message payload consisting of these custom key-value pairs.
Follow the below steps to set up the push notifications for FCM. Before you start, ensure that you have access to the Firebase console.
Let’s dive in! 💻
Step 1: Get the server key for FCM
The Sendbird server requires an FCM server key to send notification requests to FCM on your behalf. You can view your FCM server key as follows:
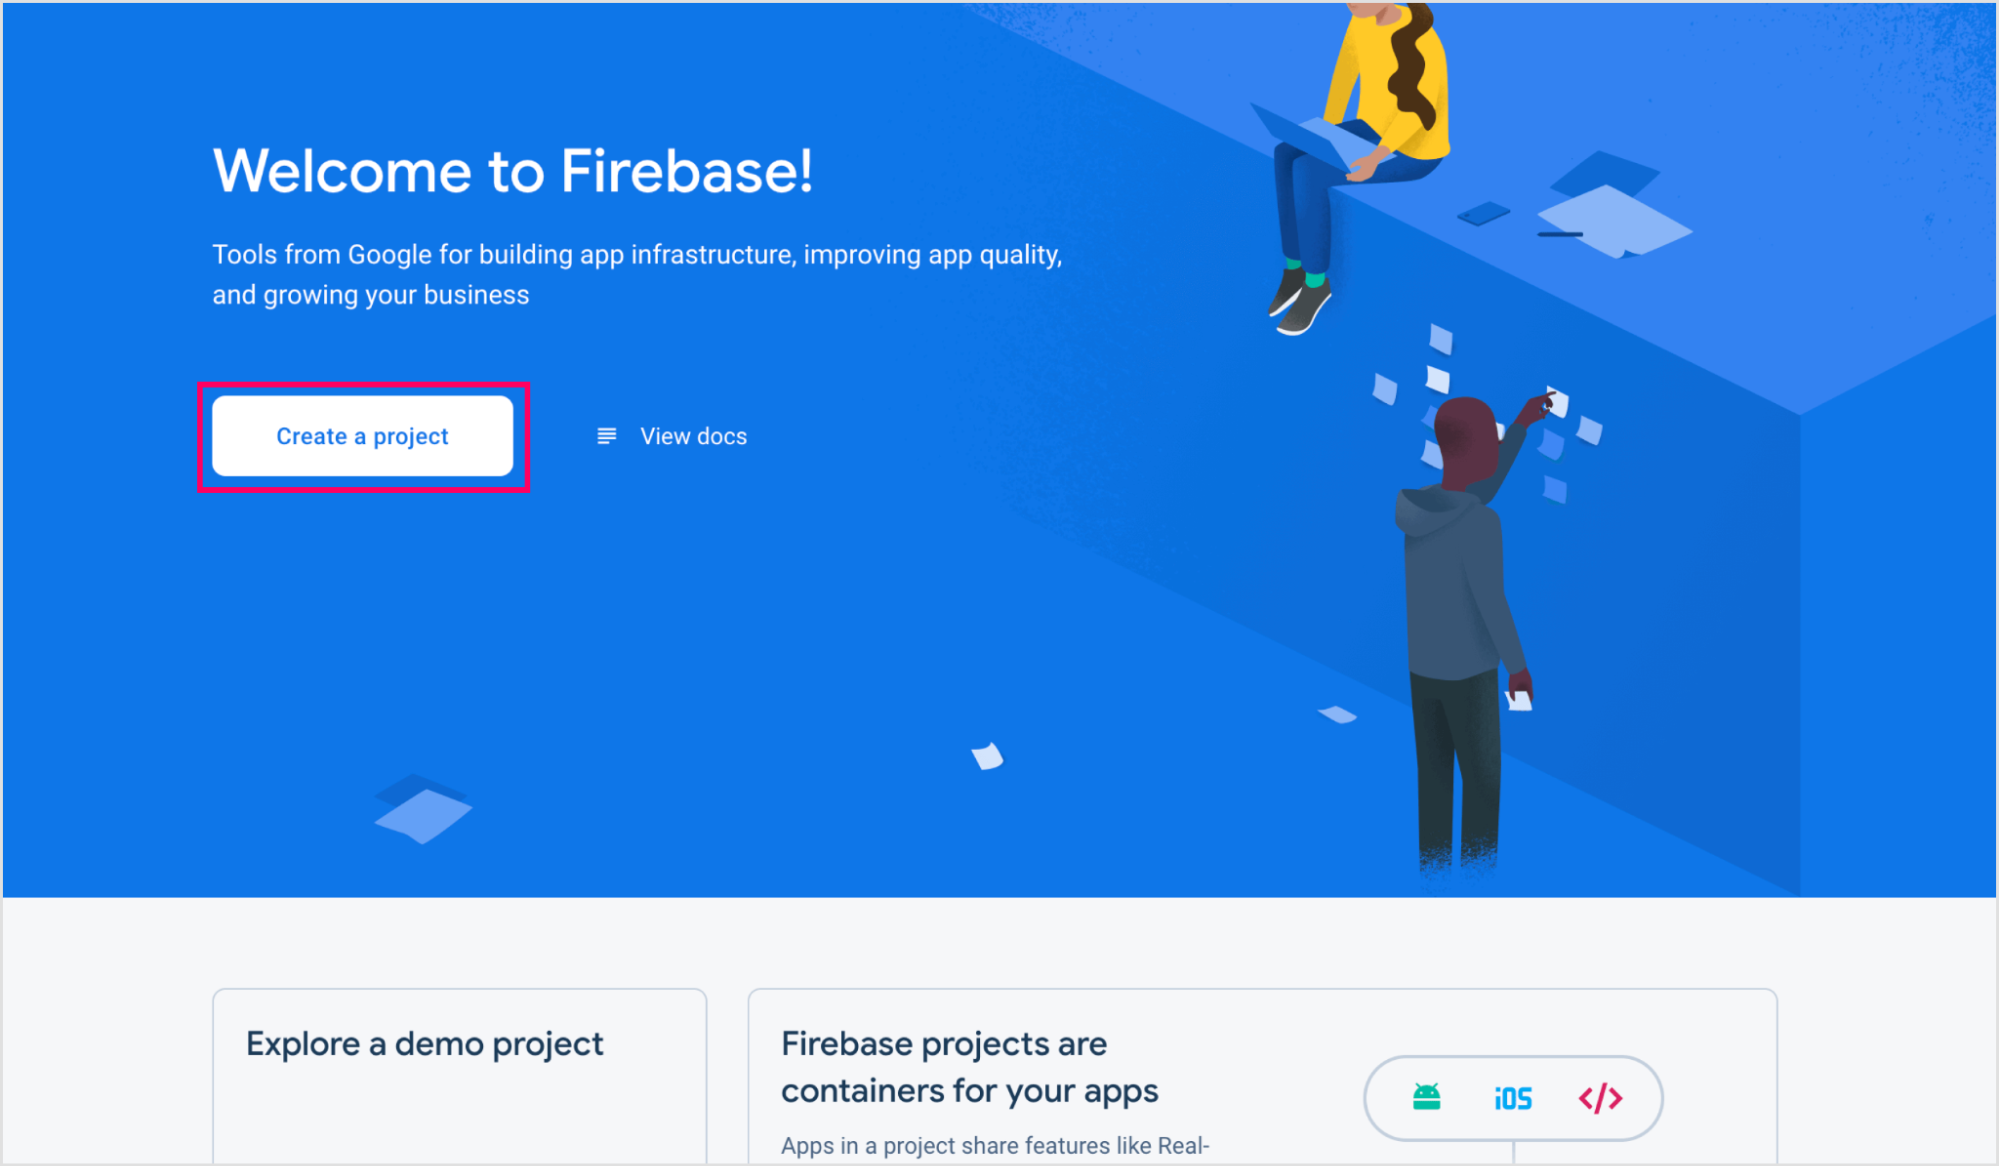
1. Login to the Firebase console. Create a new Firebase project or use the existing one if you already have it.
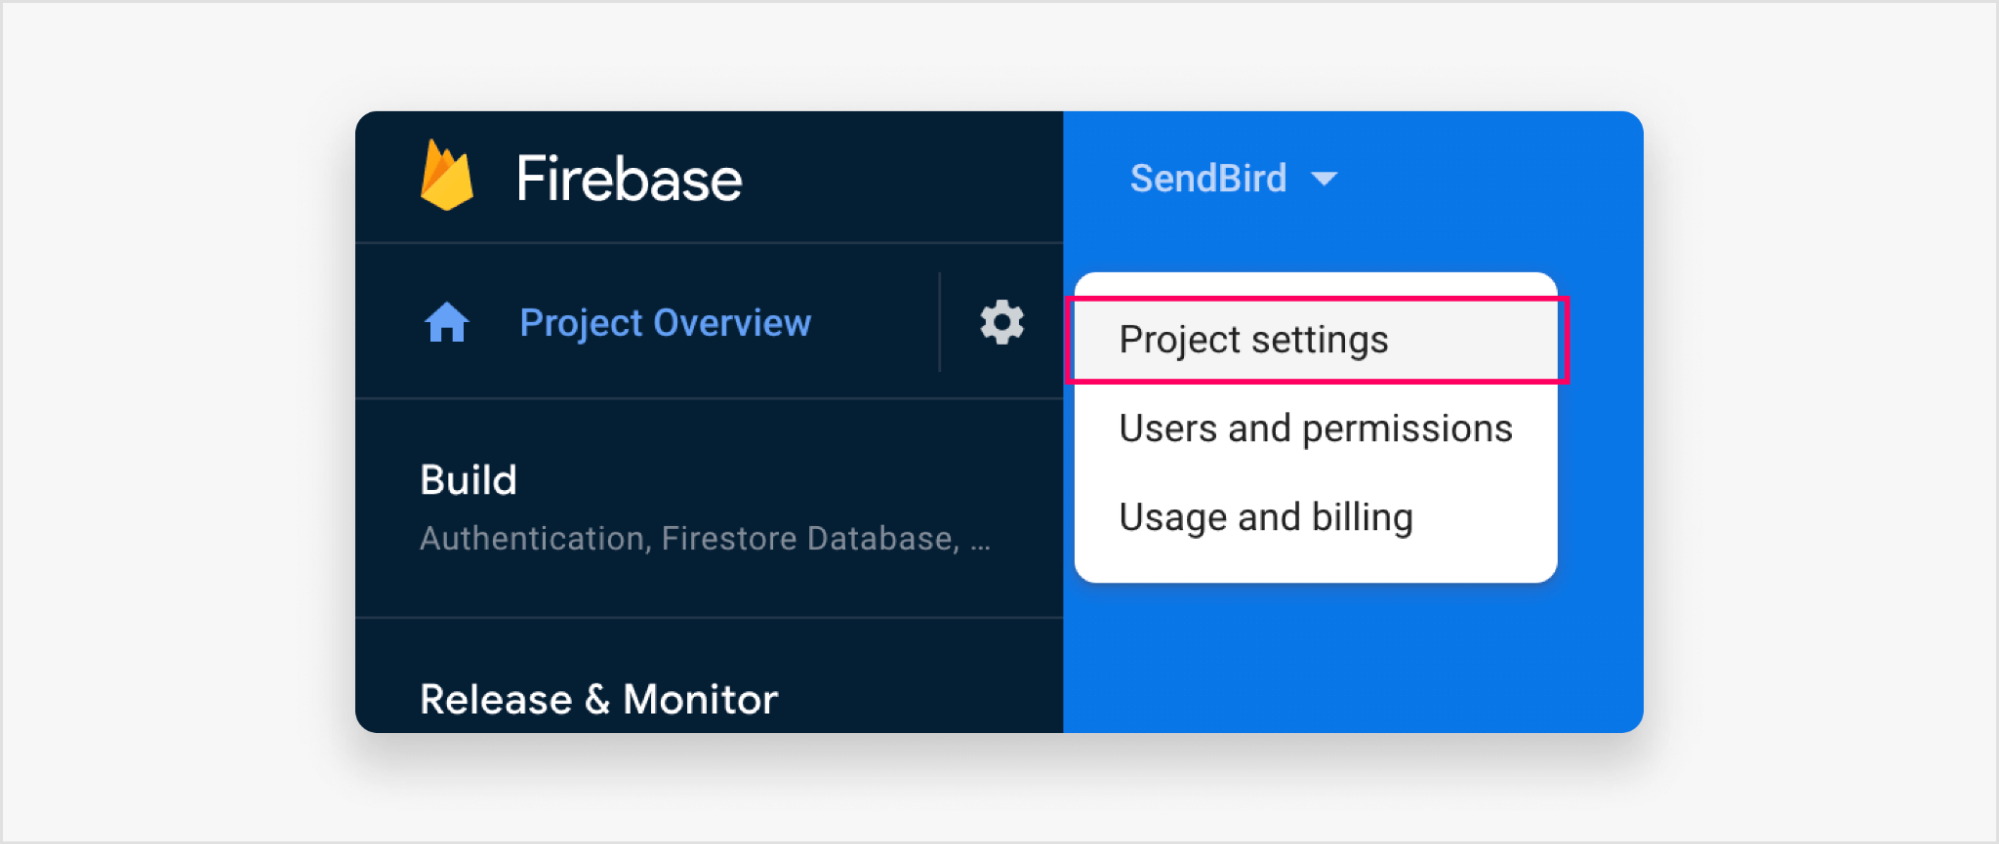
2. Open your project and navigate to the ‘Project settings’ as shown in the screenshot.
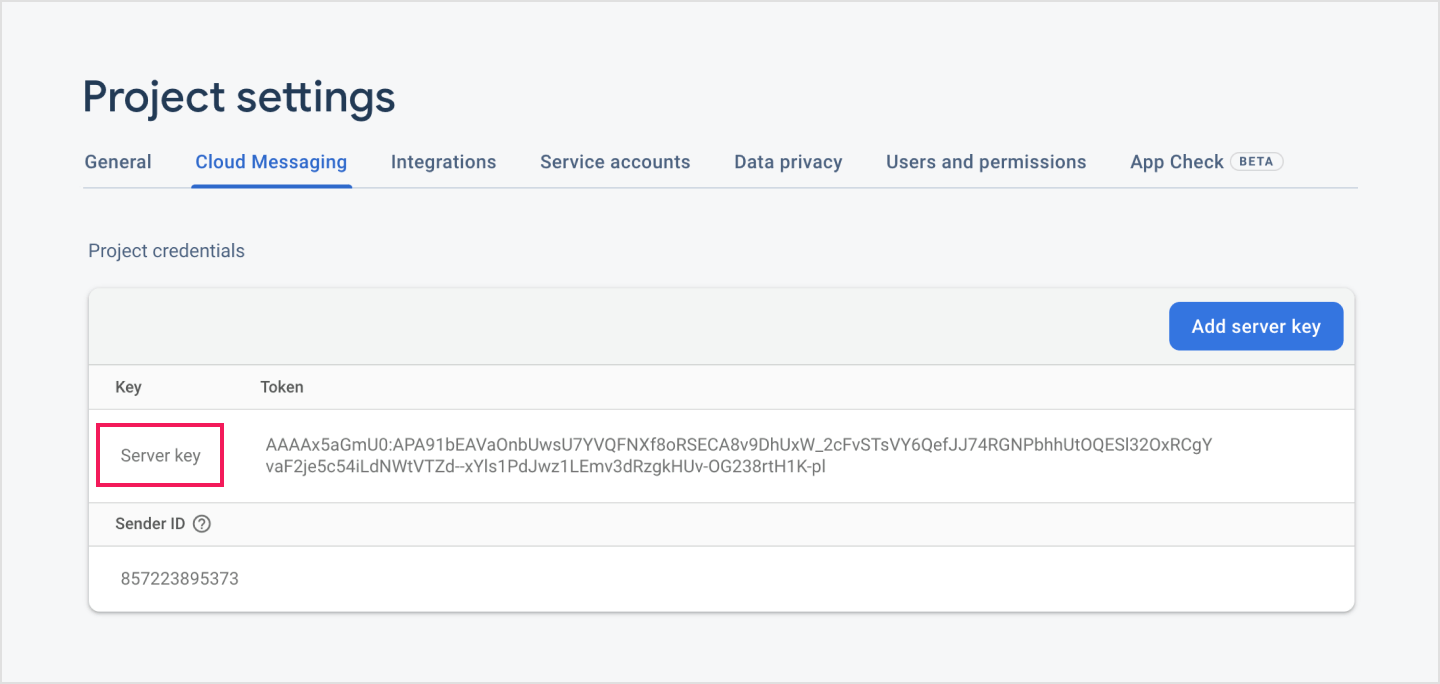
3. Go to ‘Cloud Messaging > Project credentials’ and copy your server key to be used later.
Step 2: Register FCM server key to Sendbird dashboard
Register your server key to the Sendbird server through the dashboard as follows. Note that the server key can also be registered using the Chat Platform API’s add an FCM push configuration action.
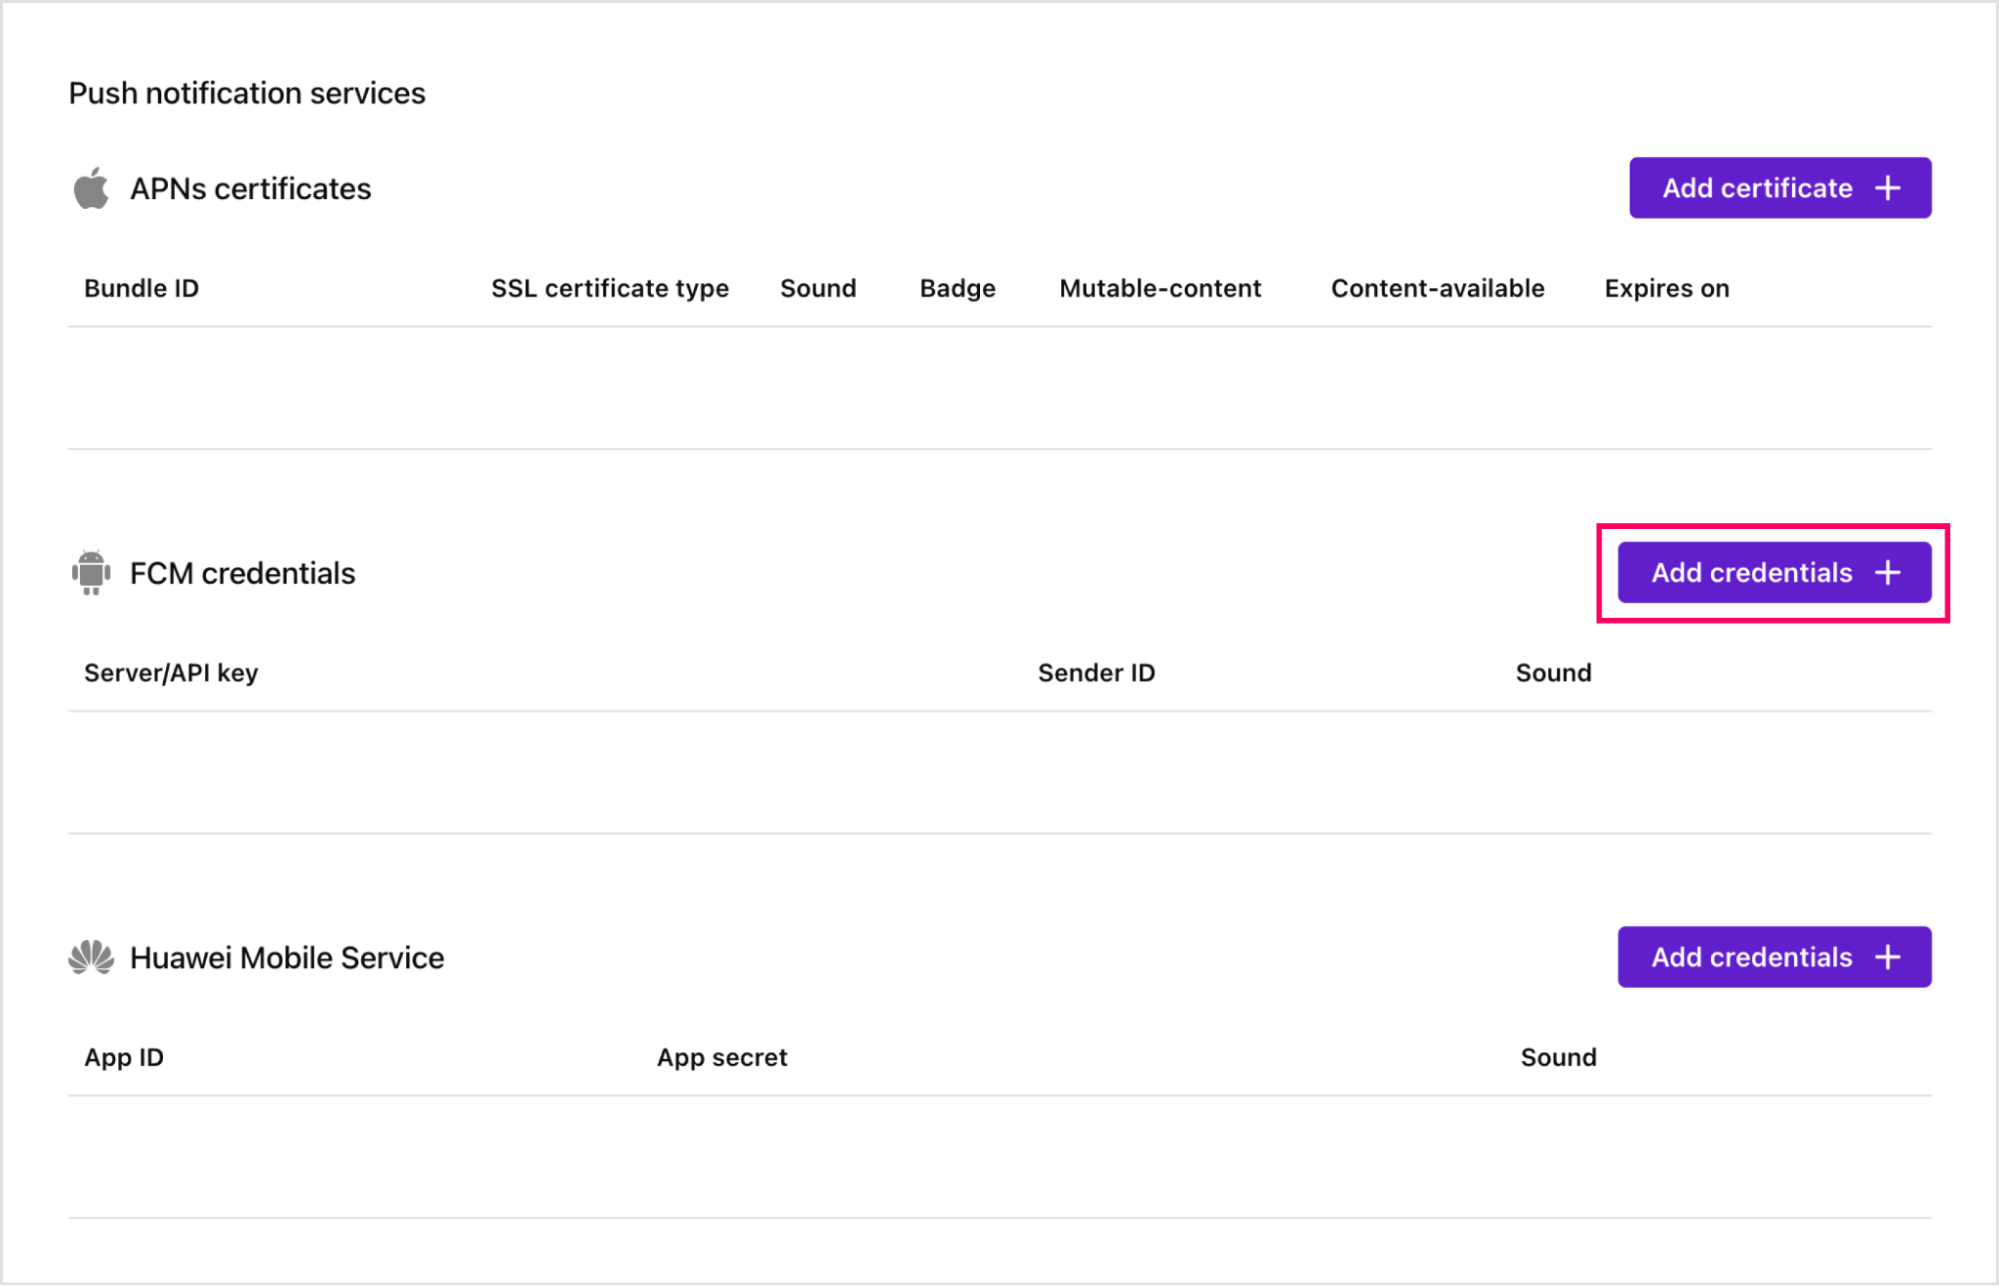
1. Sign in to the Sendbird dashboard and navigate to ‘Settings > Chat > Notifications’.

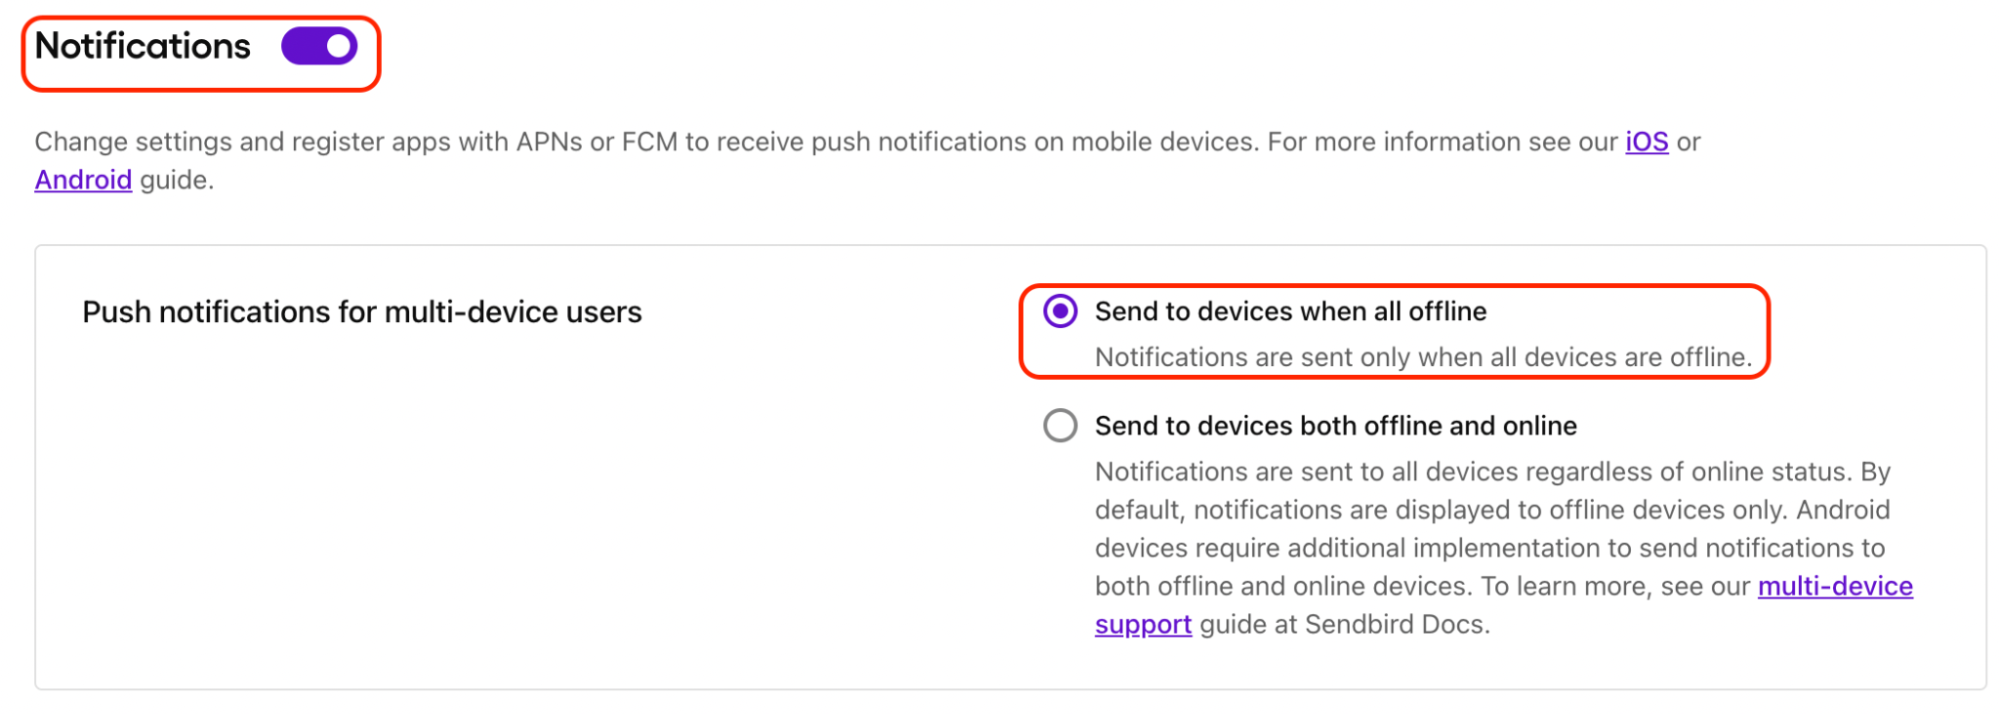
2. Turn on ‘Notifications’ and select the ‘Send to devices when all offline’ option.
3. Click the ‘Add credentials’ button next to FCM credentials. Enter the FCM server key copied in Step 1.
Step 3: Set up an FCM client app in your Android project
Now we will add the FCM configurations and dependencies to your Android project.
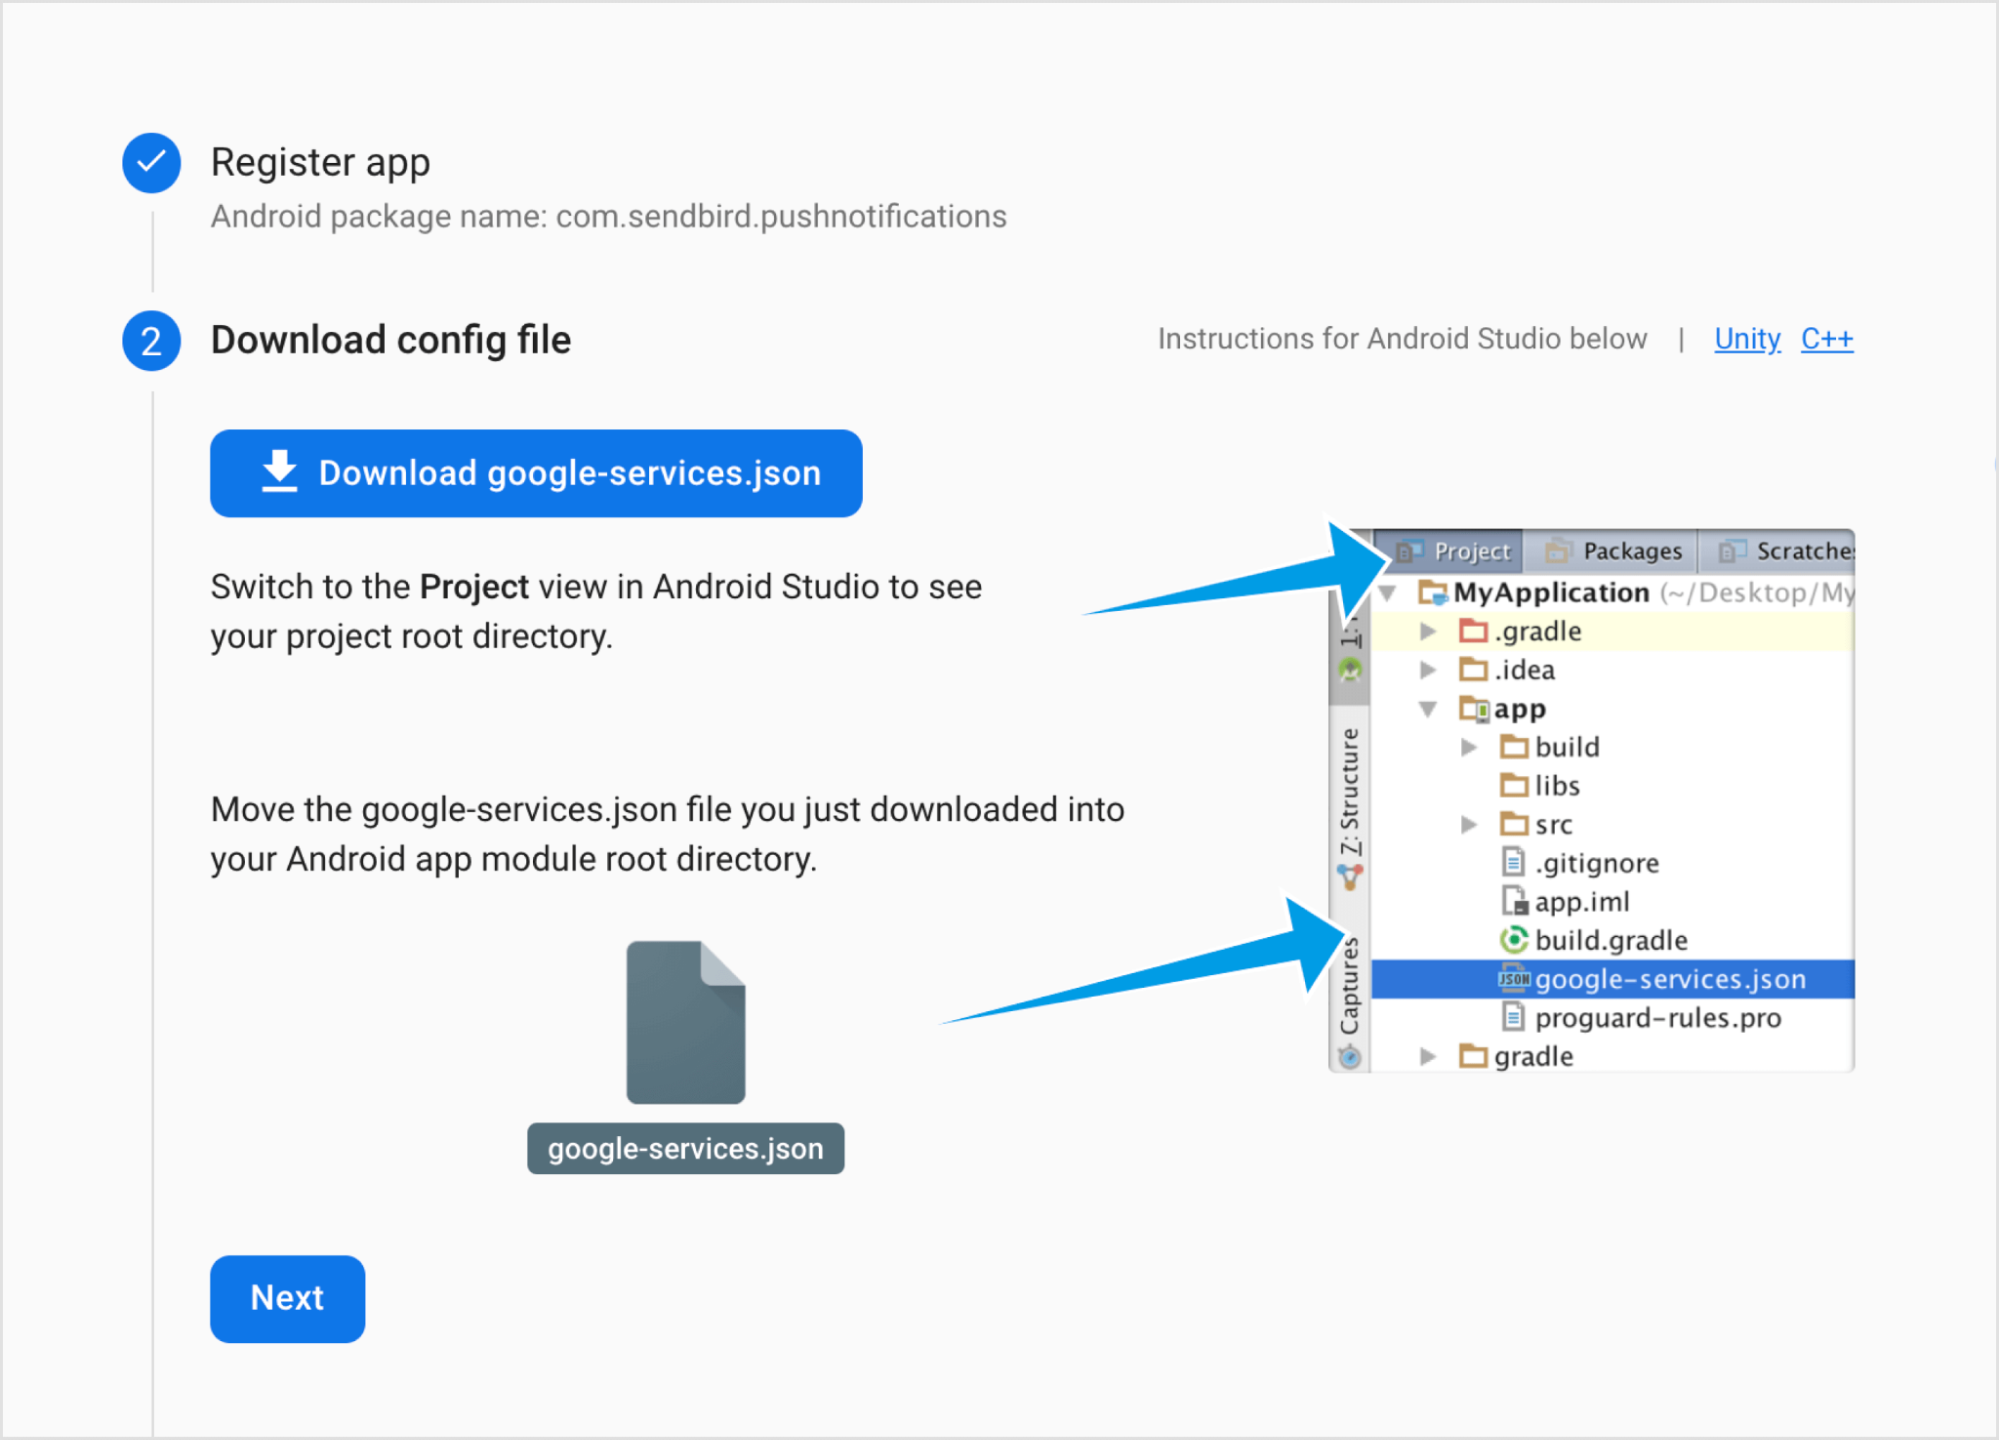
1. Go back to your project in the FCM console. Click on ‘Add app’ and select the Android platform

2. In the Add app wizard, enter your package name. Hint: Your package name is generally the ‘applicationId’ in your app-level ‘build.gradle’ file.
3. Download the ‘google-services.json’ file, and place it in your Android app module root directory.
4. Add the dependency for the Cloud Messaging Android library to your build.gradle file as below:
Note: The firebase-messaging version should be 19.0.1 or higher.
dependencies {    ...

    implementation 'com.google.firebase:firebase-messaging:20.1.0'

}
Step 4: Register a push token to the Sendbird server
To send notification messages to a specific client app on an Android device, FCM requires an app instance’s registration token, which the client app has issued. Therefore, the Sendbird server also needs the registration token of every client app instance to send notification requests to FCM on your behalf.
Upon your app’s initialization, the FCM SDK generates a unique, app-specific registration token for the client app instance on your user’s device. FCM uses this registration token to determine the device to which notification messages need to be sent. You can access this token by extending ‘com.sendbird.android.SendBirdPushHandler’ and overriding ‘onNewToken’. The ‘SendBirdPushHandler’ internally registers this token to the Sendbird server.
Here is the sample implementation:
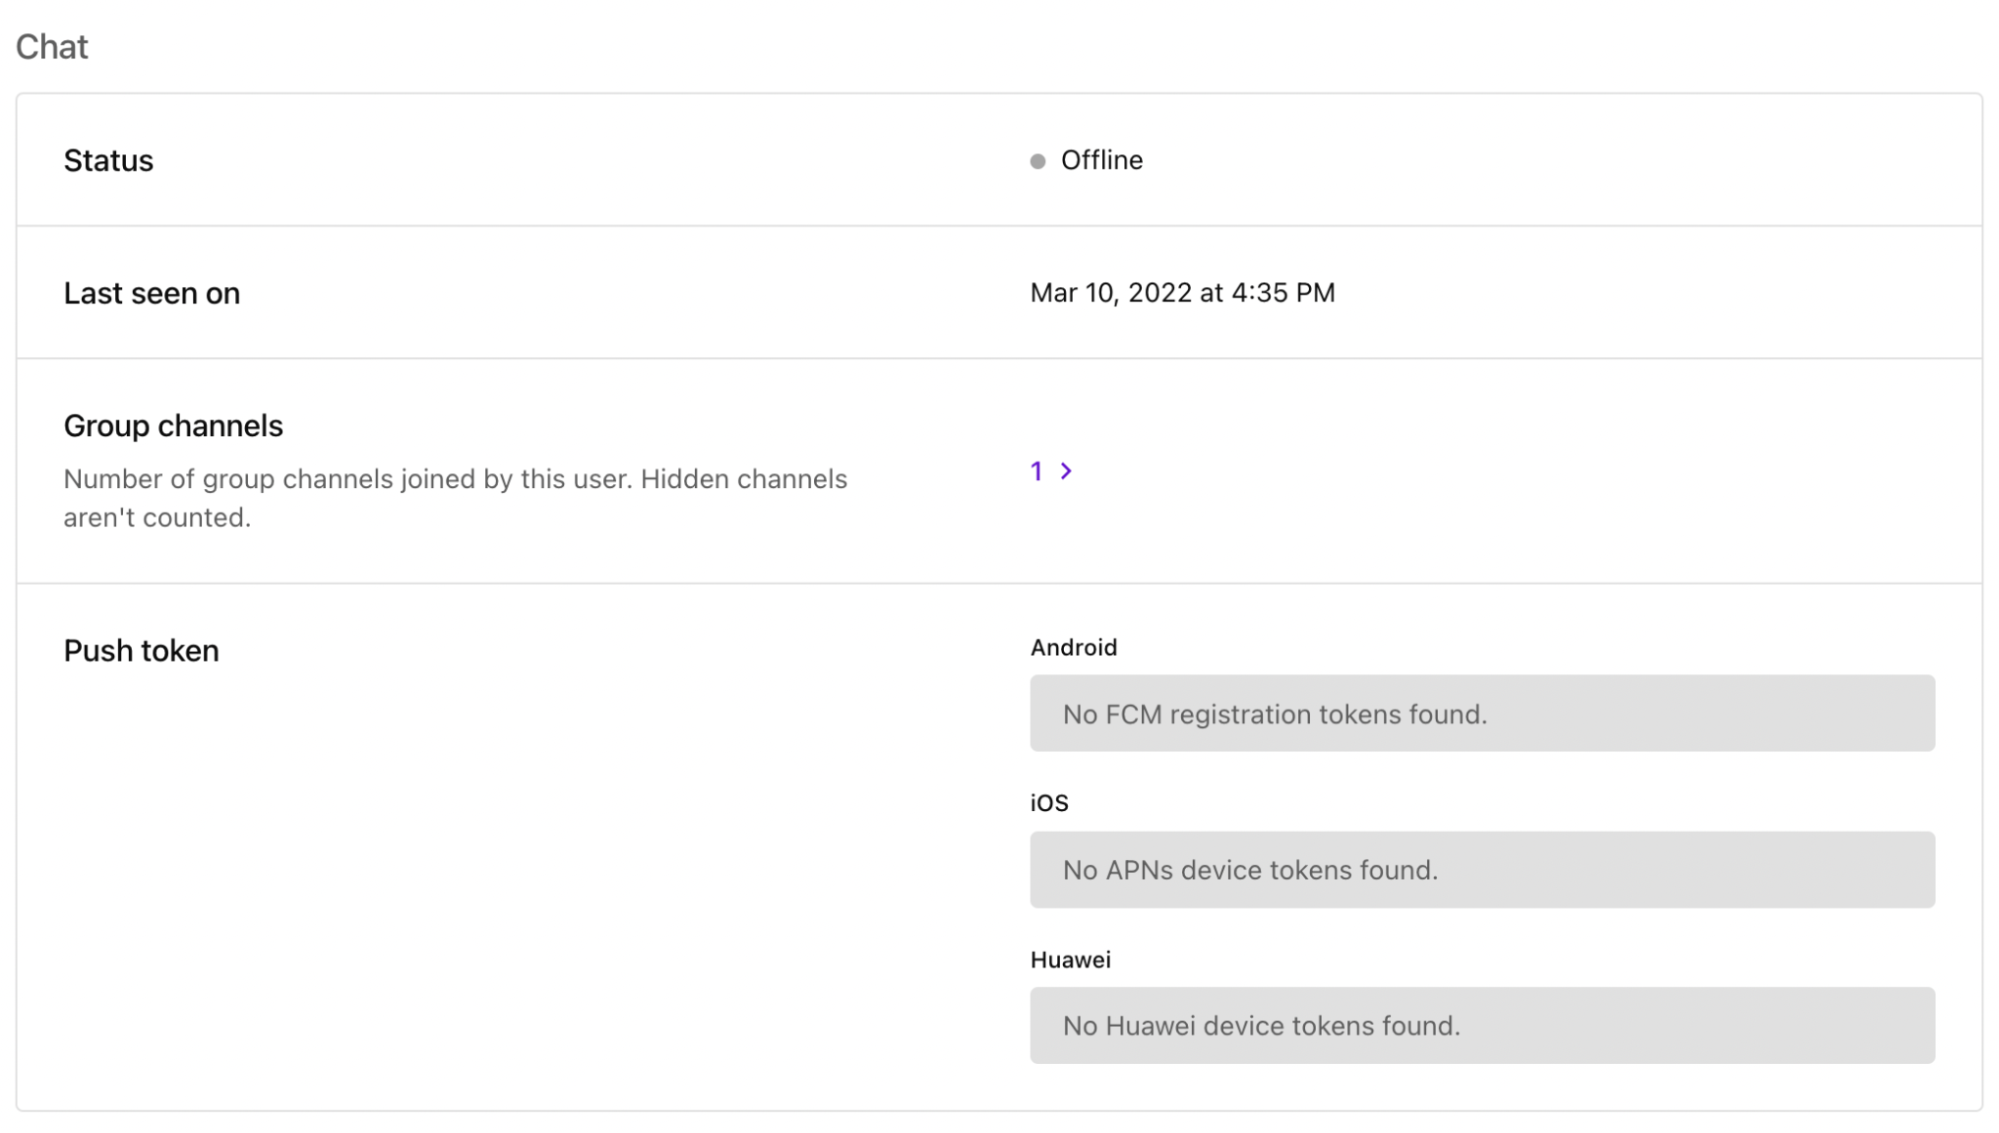
The registered push token appears in the dashboard under ‘Users > user_id > Chat’:
Step 5: Add the push event handlers
To receive information from the Sendbird server about push notification events for the current user, register a ‘MyFireBaseMessagingService’ instance to the ‘SendBirdPushHelper’ as an event handler. Do this in the ‘onCreate()’ method of the ‘Application’ instance as follows:
Also, register a ‘MyFireBaseMessagingService’ instance when a user connects to the Sendbird server as follows:
Also, before disconnecting the user from the Sendbird server, unregister all the push tokens so that they do not receive any notifications.
Step 6: Handle an FCM message payload
As described earlier, the Sendbird server sends push notification payloads as FCM data messages. The payload consists of two properties: message and sendbird. The message property is a string generated according to a notification template you defined on the Sendbird Dashboard. The sendbird property is a JSON object which contains all the information about the message a user has sent.
As shown in the sample implementation, in step 4, you can show the parsed messages to users as a notification by using your custom ‘sendNotification()’ method.
Tips for troubleshooting Android push notifications
Troubleshooting Android push notifications can be complex; here are some tips on doing this.
- To make it easier for developers to debug and troubleshoot push notifications, we have built a tester tool that you may find useful. Please see this tutorial to understand how to use the tool, which you can access via the Sendbird dashboard.
- Check out this comprehensive guide to troubleshooting Android chat push notifications.
- If you want to debug failure conditions, please refer to the FCM error codes.
Start building Android push notifications today
And that’s a wrap! You now know how to send push notifications for Android apps with Sendbird Chat. With the guidance in this tutorial and the docs, you’ll be on your way to sending timely, relevant, and engaging Android push notifications in no time!
We’e always here to help; contact us if you have any questions, comments, or concerns. You can also start or continue a discussion on the Sendbird Community!
Happy push notifications building! 💻 We can’t wait to see what you build!


